Sending Kombai Generated Email via ESPs
Kombai-generated code is compatible with the most popular Email Service Providers(ESPs). For images, we support the use of external assets and Base64 embedded images.
In external assets, we store all images used in the design inside an assets folder and use the relative path of those images inside the code. When you download the code, images are also downloaded along with it.
Under Base64 embedded images, we use Base64 strings to encode the images used in the design. Base64 (opens in a new tab) is an encoding process to convert binary data into ASCII characters for easy transmission and storage of data.
Note: We recommend selecting Linked PNGs and exporting the code for optimal experience across ESPs.
In this guide, we will cover how you can send Kombai-generated HTML emails through various ESPs in both methods. Here's the list of ESPs we are covering:
- Klaviyo
- Mailchimp
- HubSpot
- Constant Contact
- ActiveCampaign
- Campaign Monitor
- Moosend
- Brevo
- Zoho Campaigns
- Mailjet
- GetResponse
Klaviyo
Kombai also provides direct integration with Klaviyo for pro users. It allows you to send the code for your designs to Klaviyo's templates and campaigns in a single click. For more information, visit Klaviyo Integration doc.
Sending Kombai-generated HTML containing assets and linked images
To send the Kombai-generated email along with external images through Klaviyo, you have to create a template followed by creating a campaign. But before that, sign up for Kombai and download the code.
Creating a template in Klaviyo
-
Go to Content > Templates.
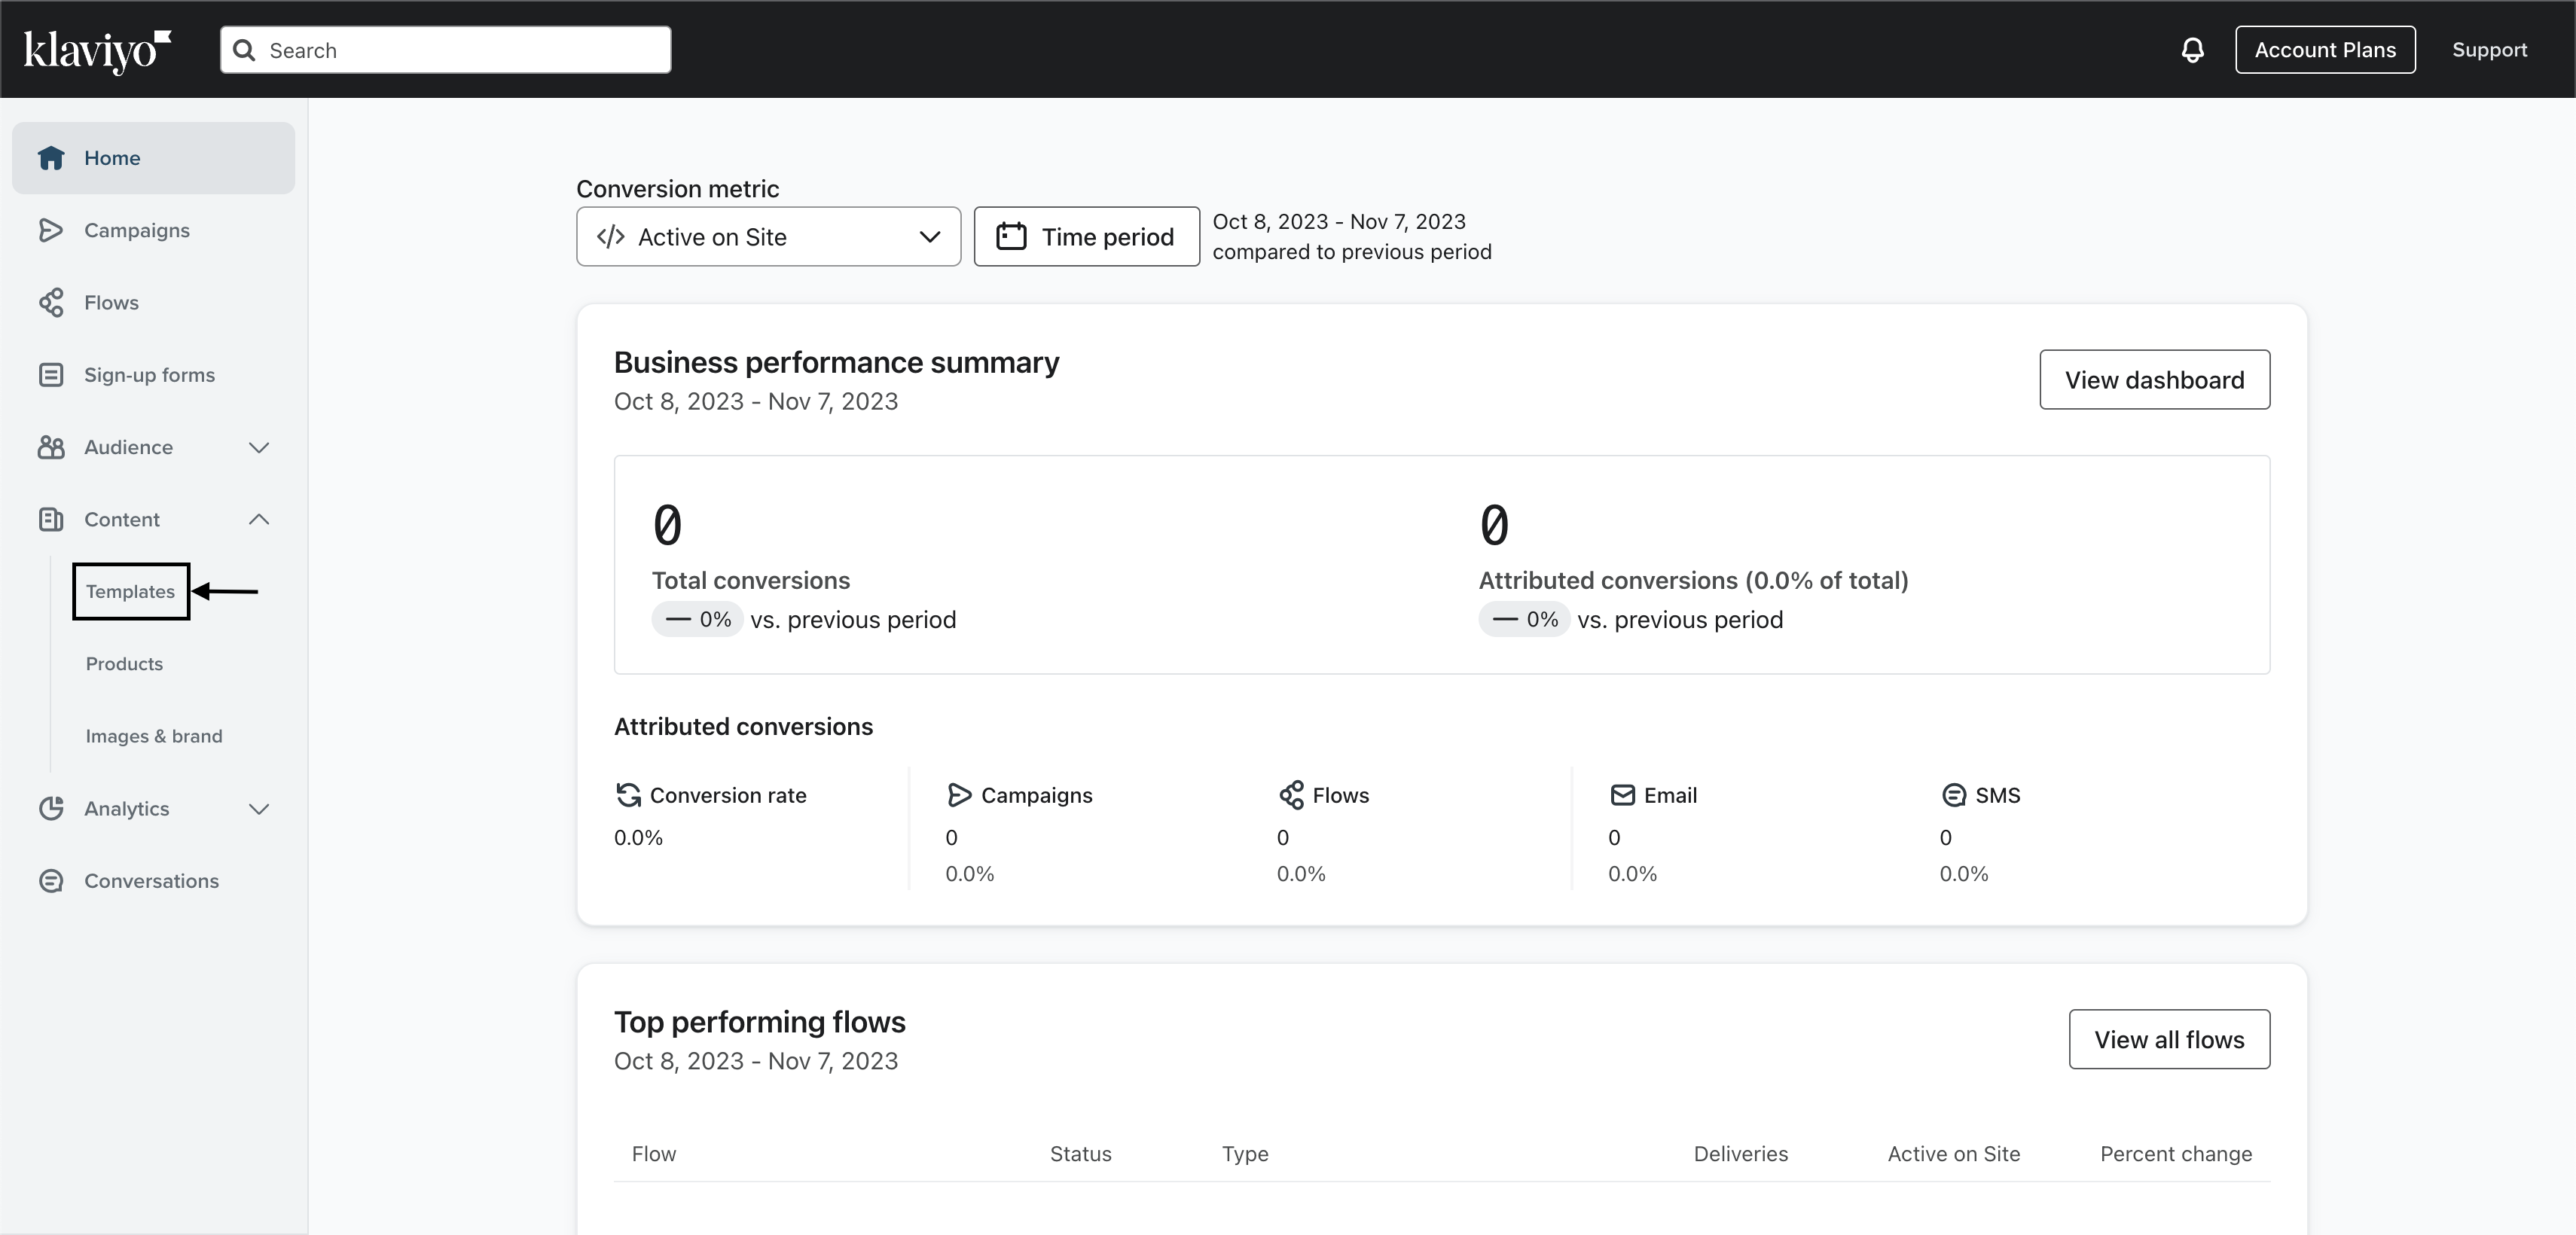
-
Click on Import Template.
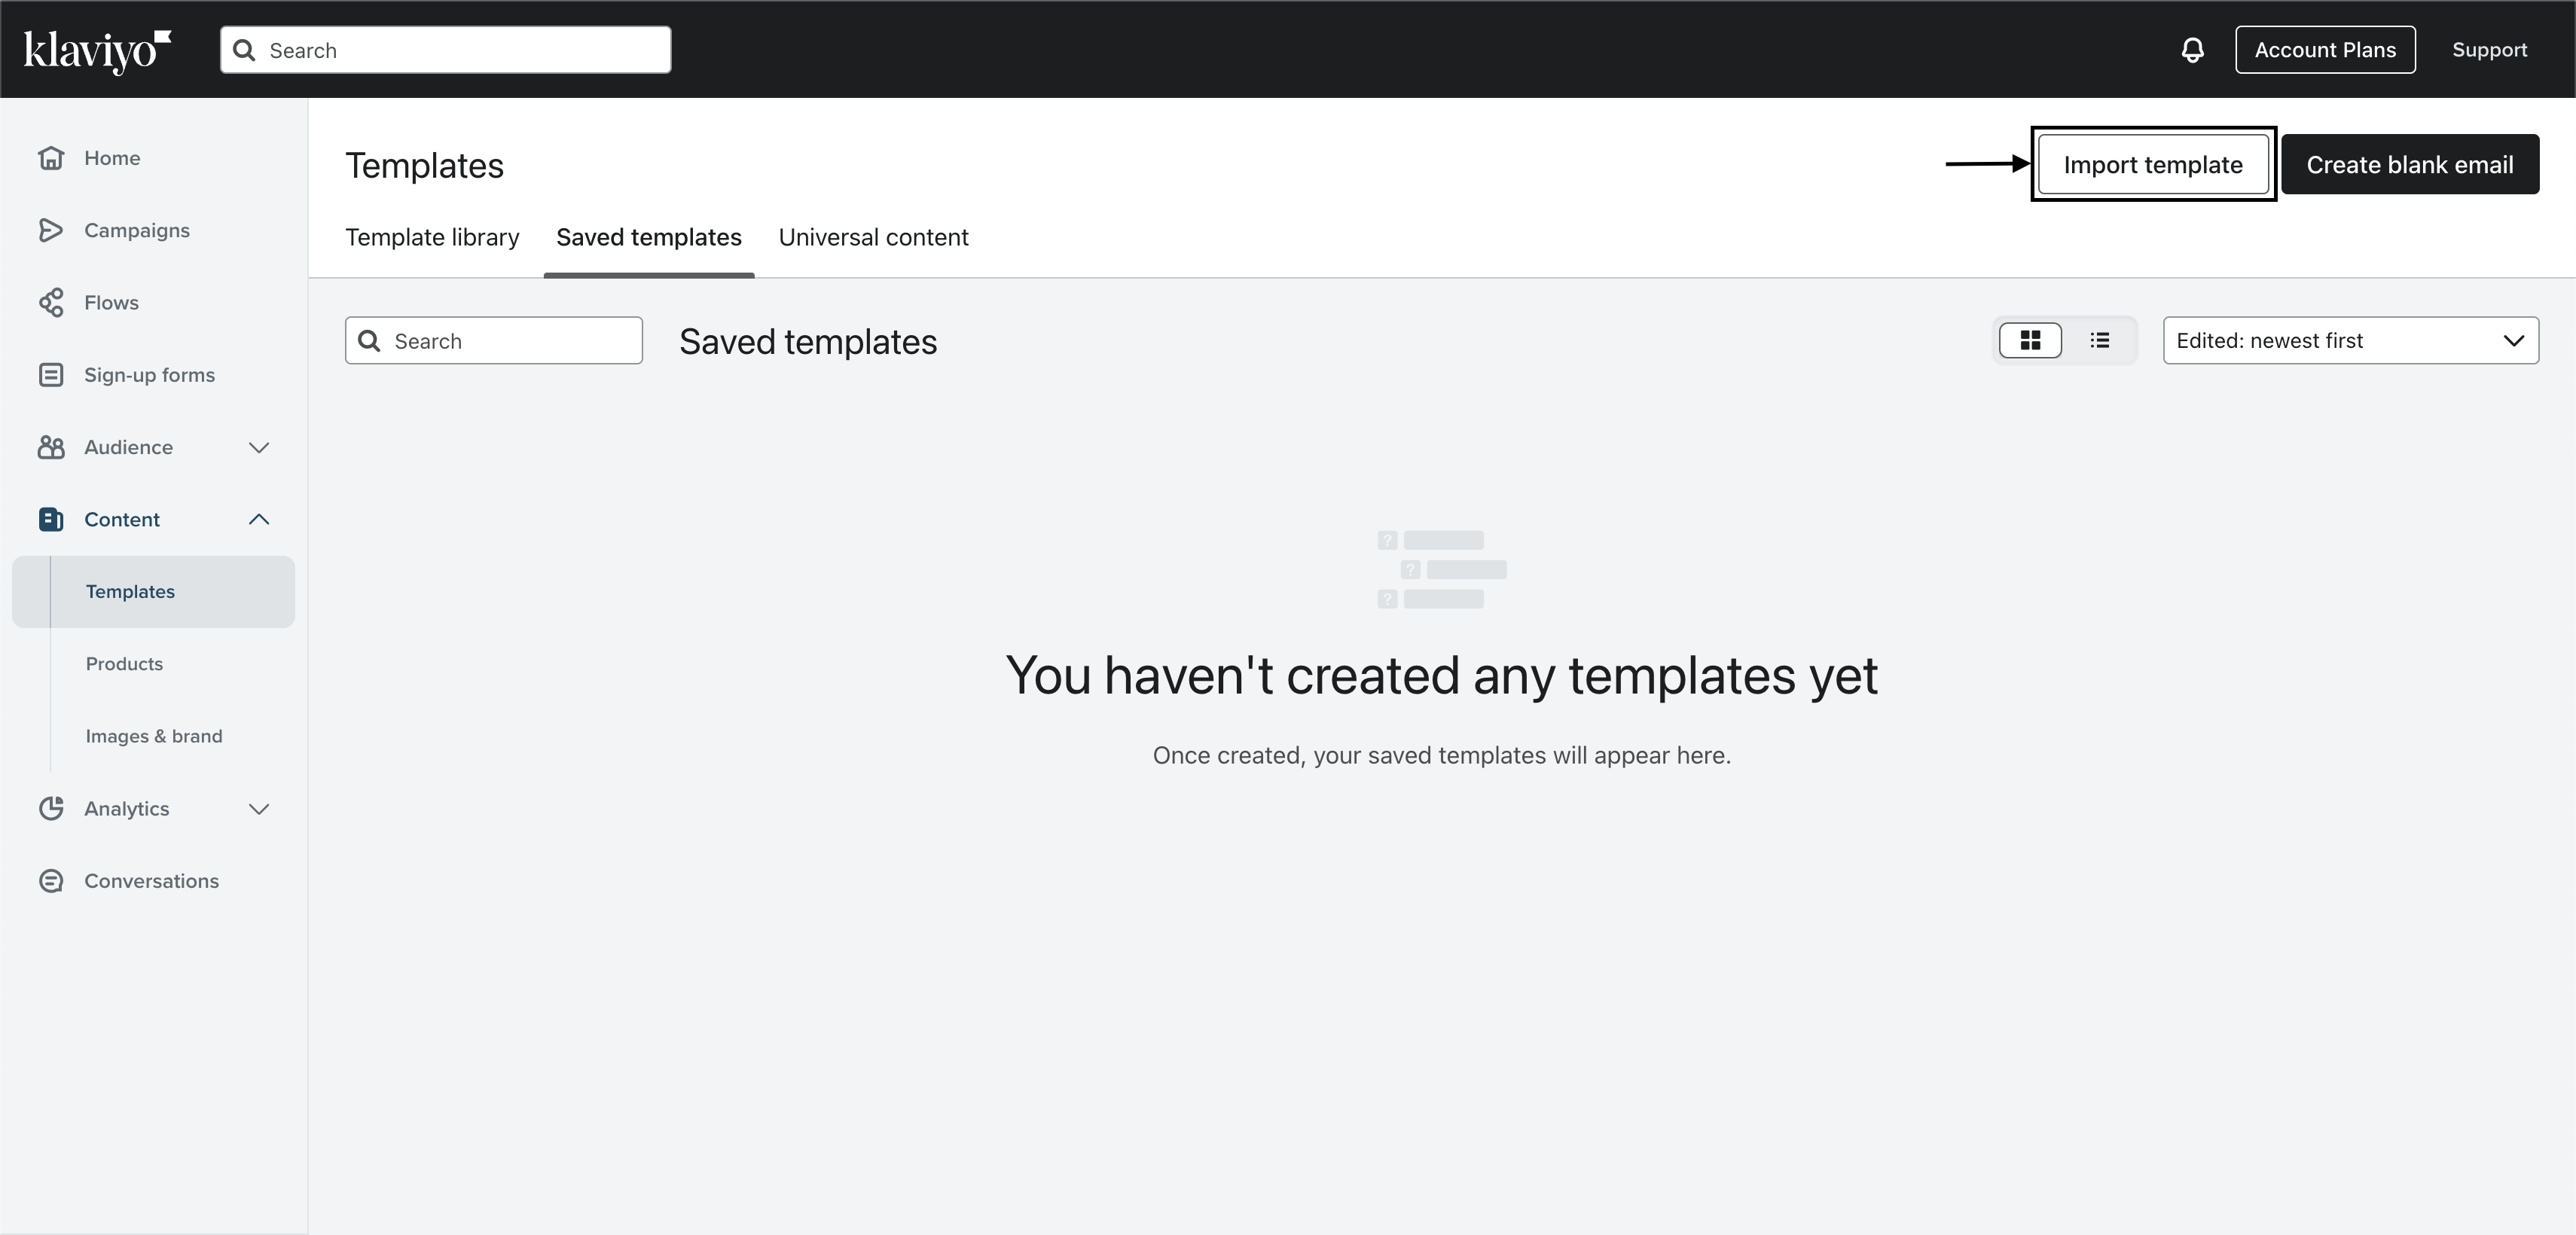
-
Give a name to your template, upload the HTML and zip file of the assets folder, and click Import Template.
Note: Unsubscribe tag is mandatory for marketing templates in Klaviyo. Add {% unsubscribe %} tag at the bottom of the body.
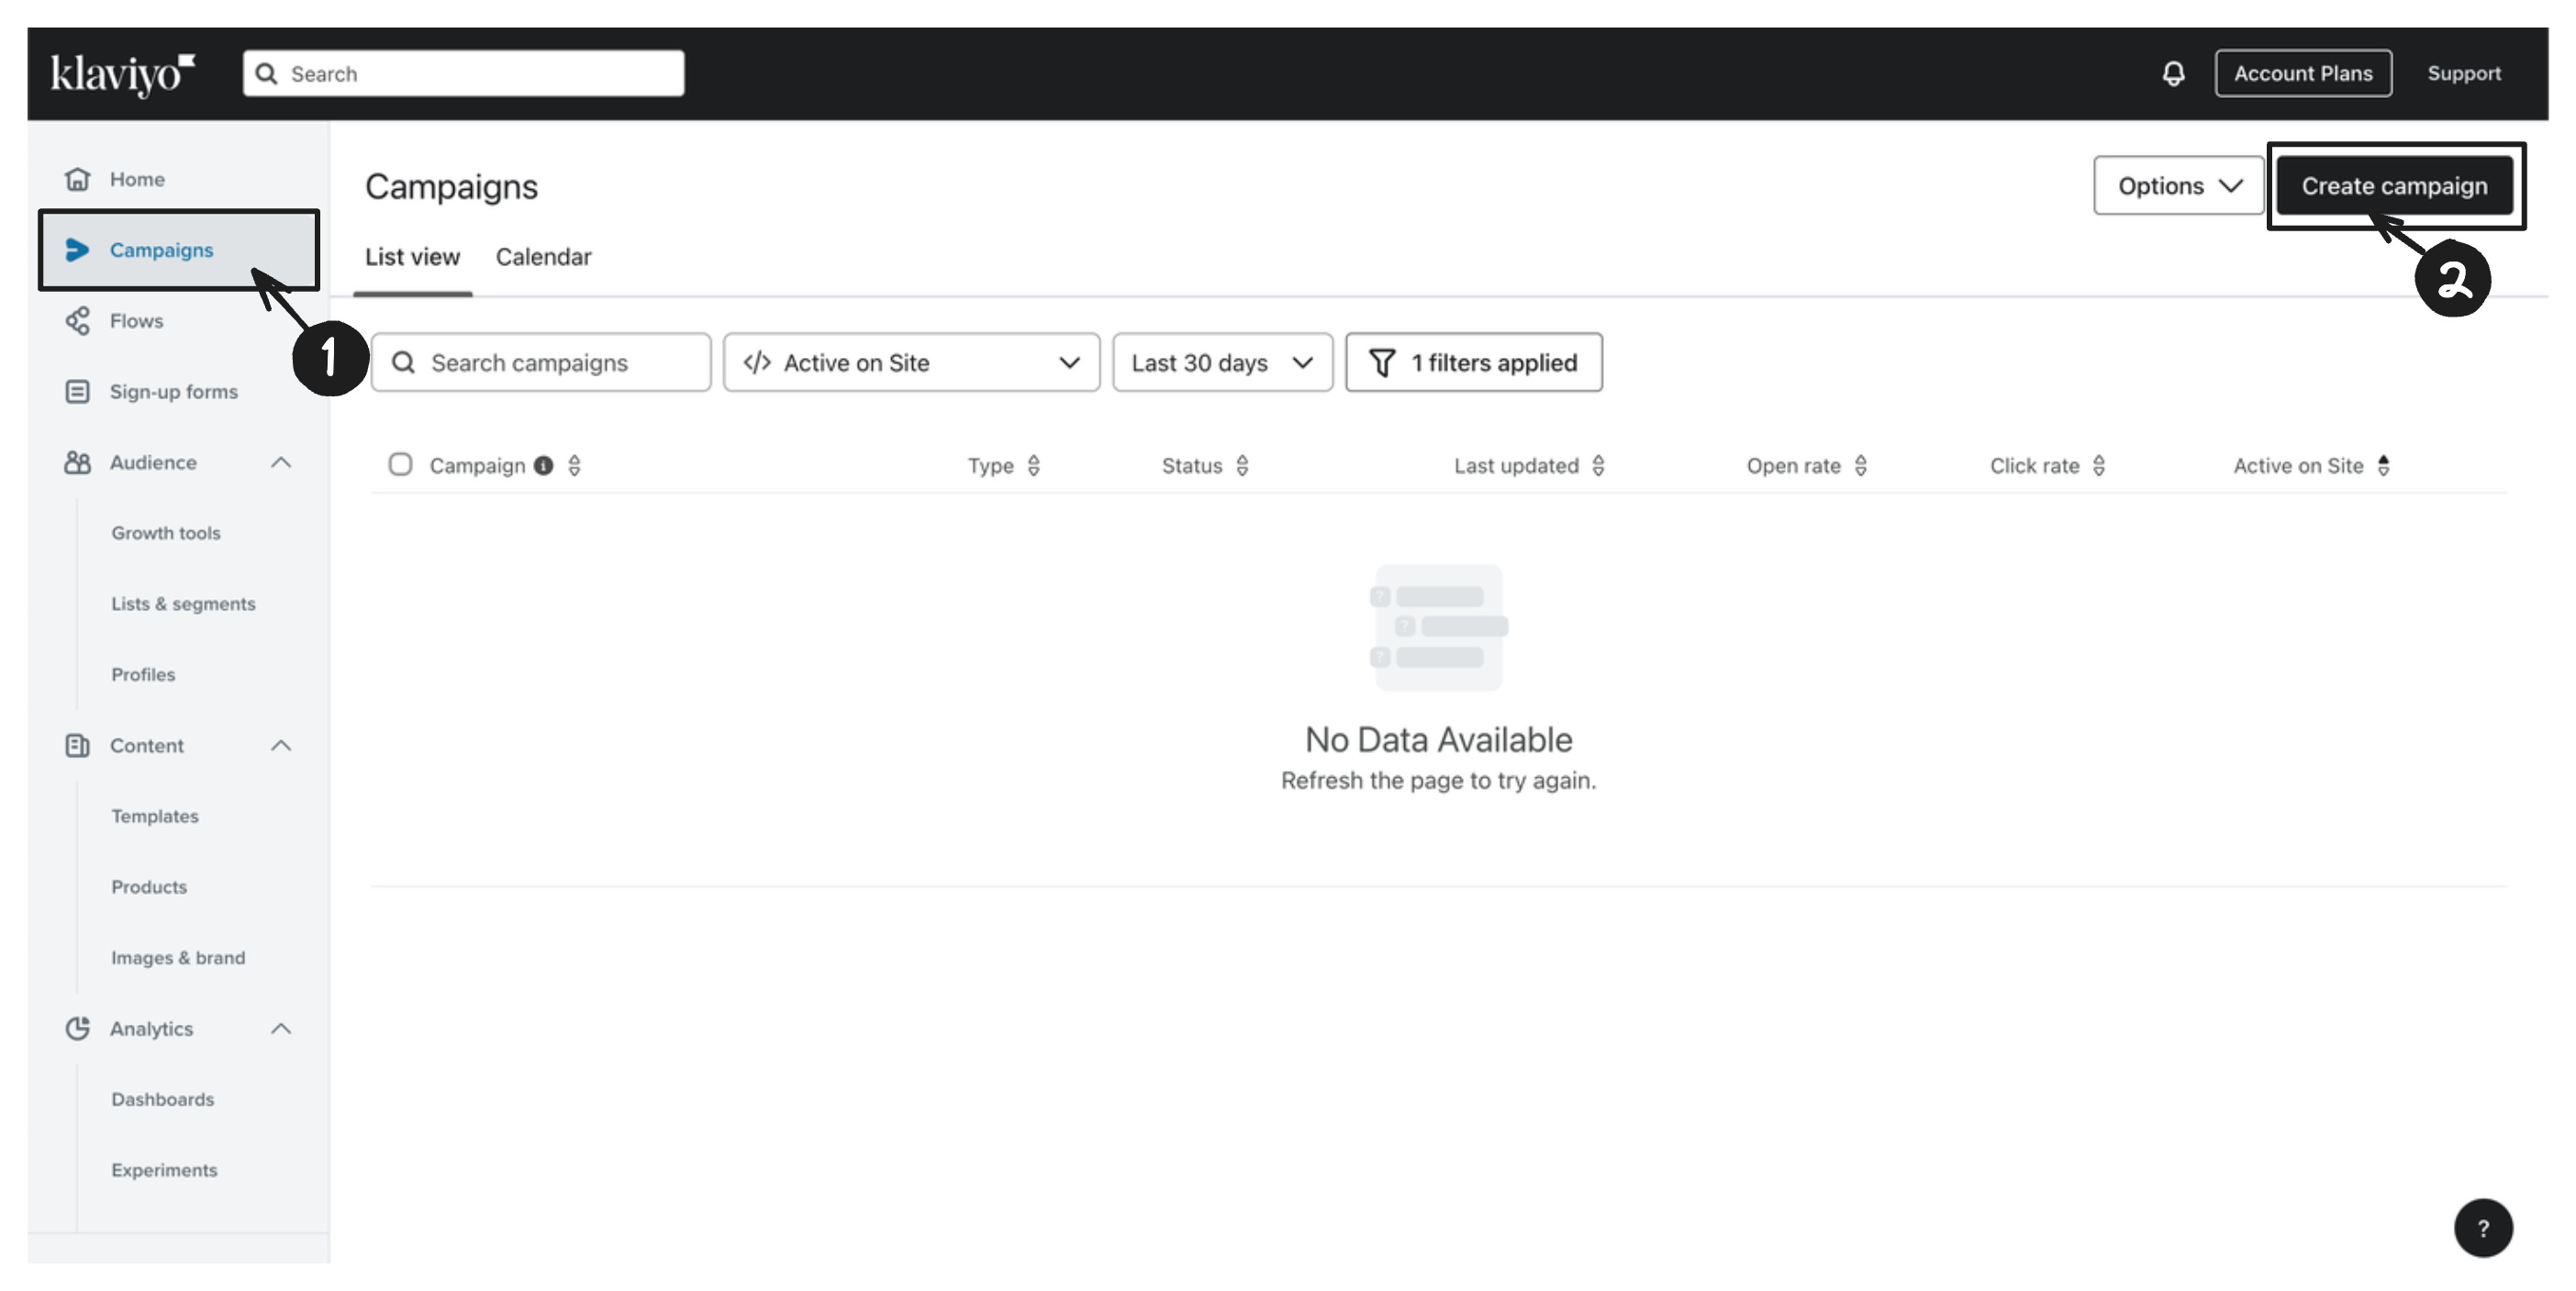
Creating a Campaign in Klaviyo
-
Go to Campaigns > Create campaign.
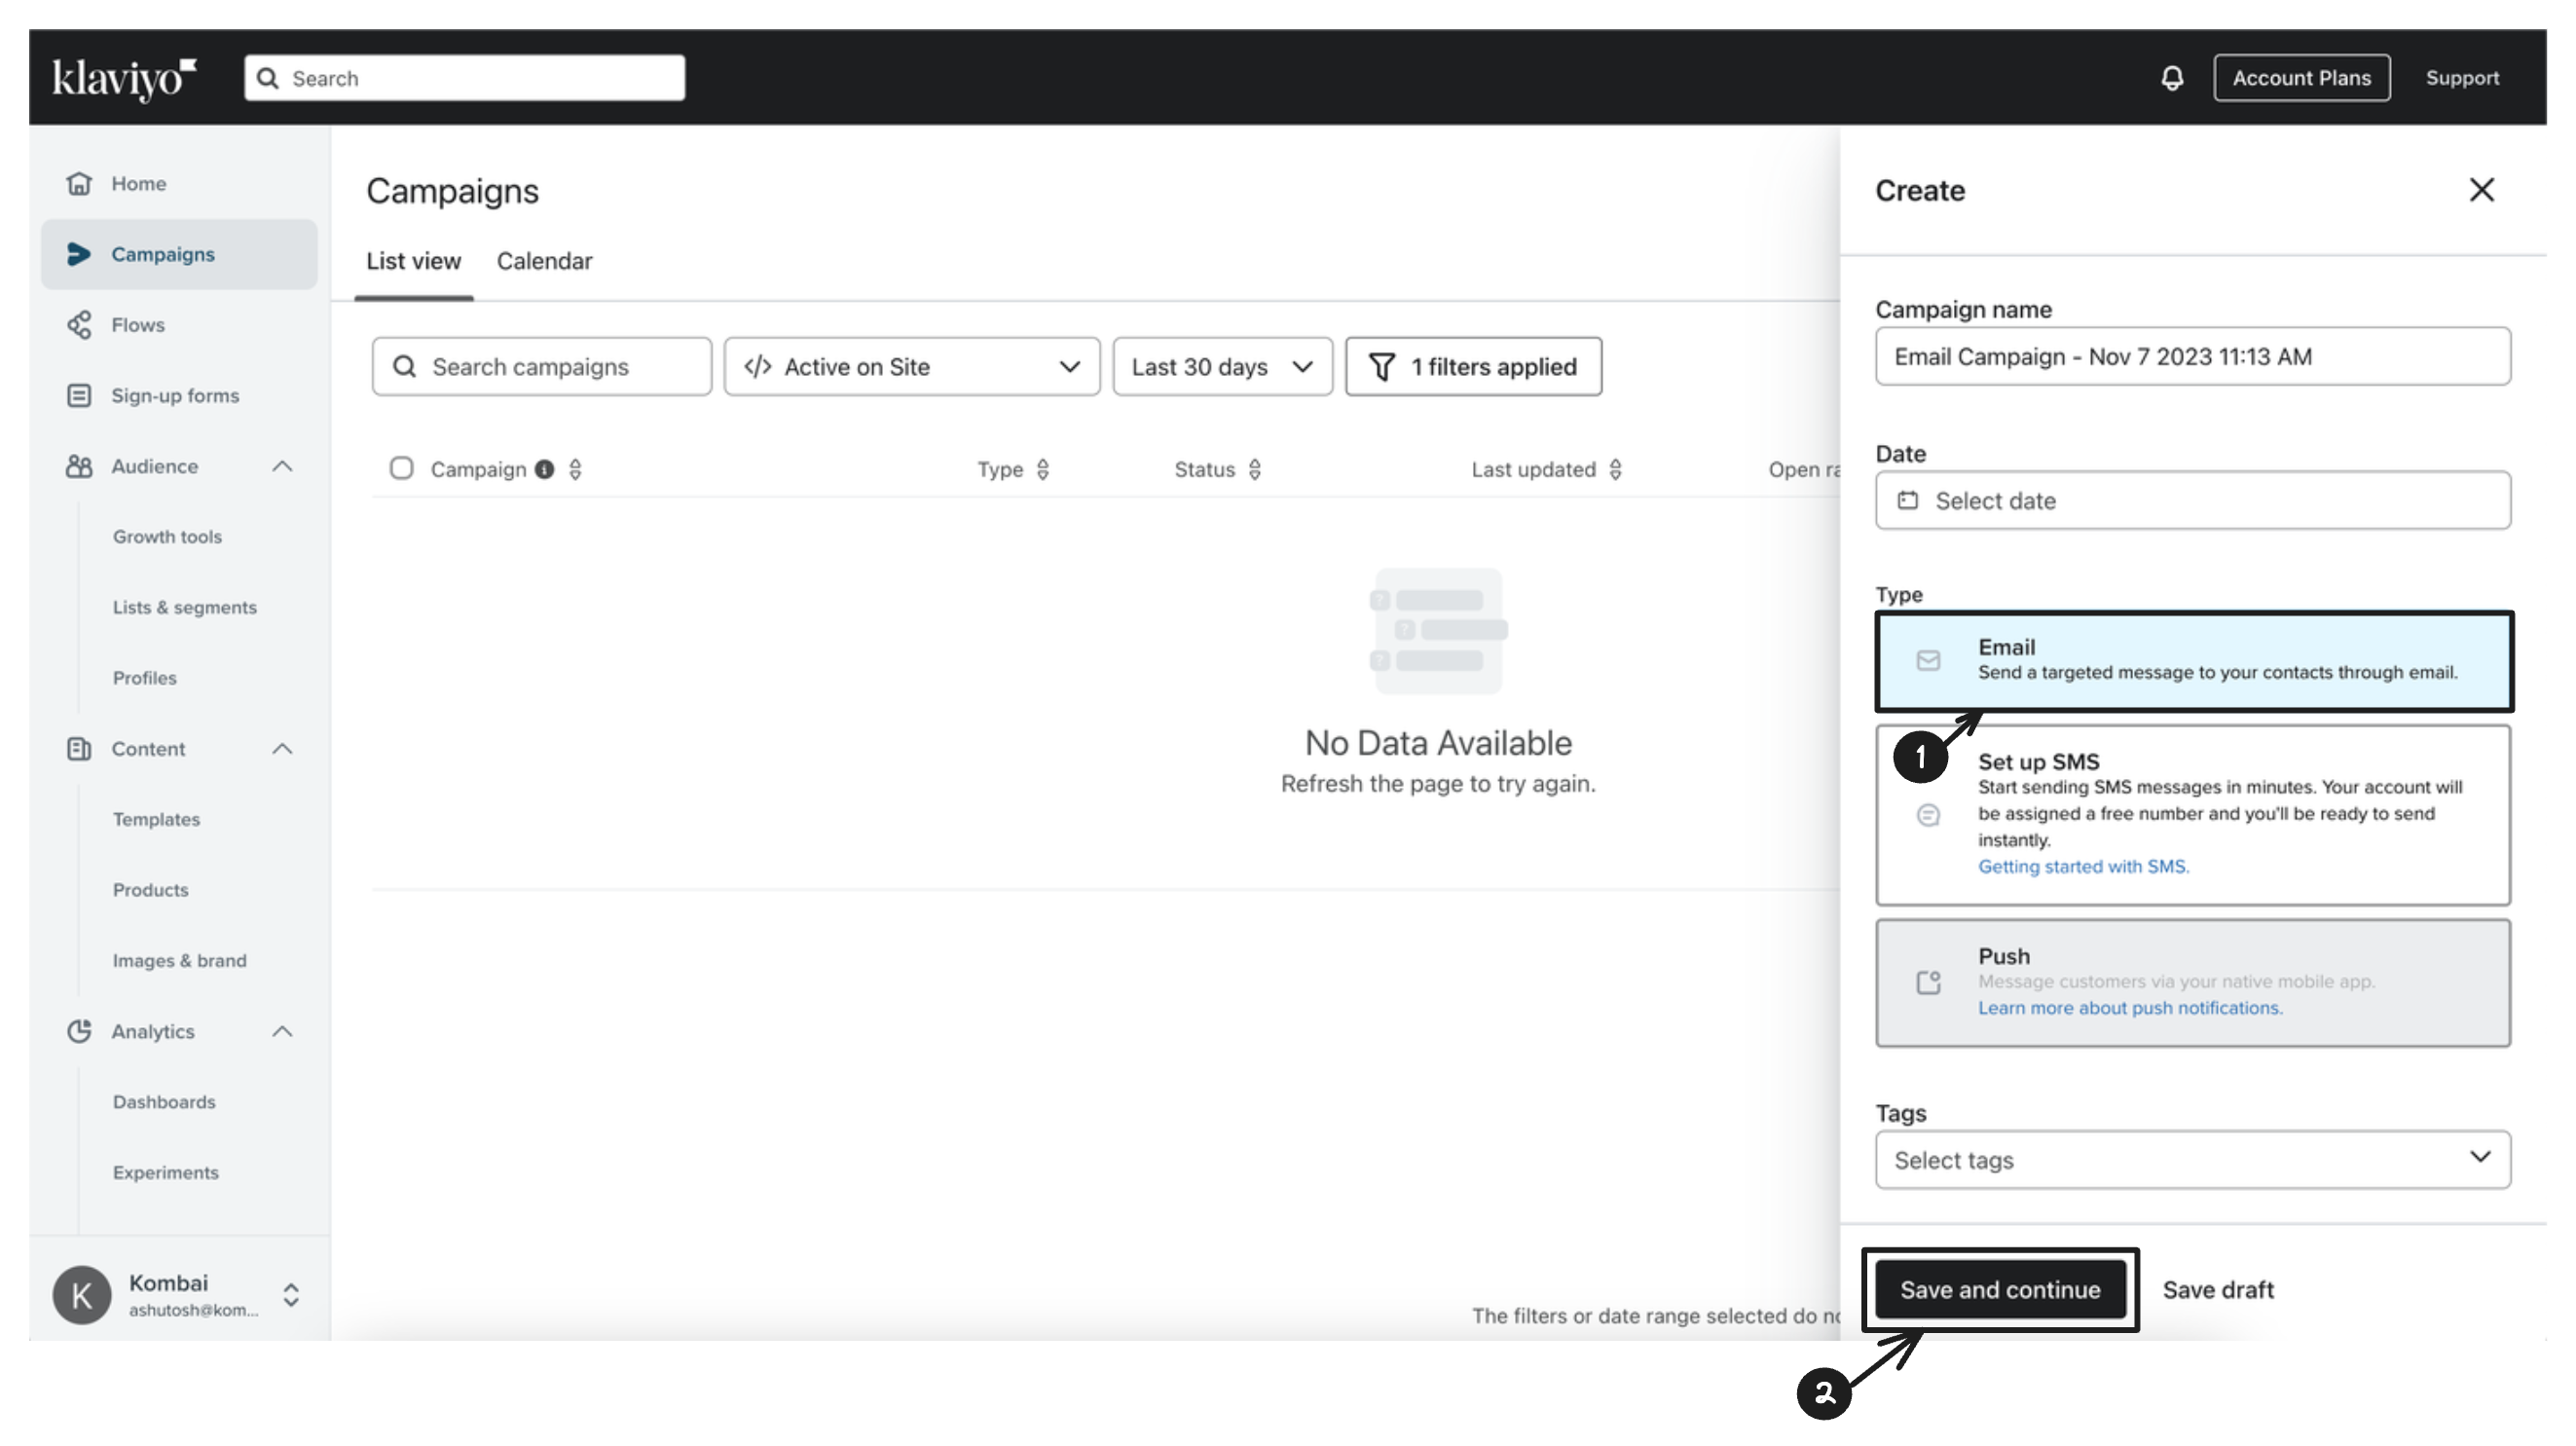
-
Select Email in Type and click Save and Continue.
-
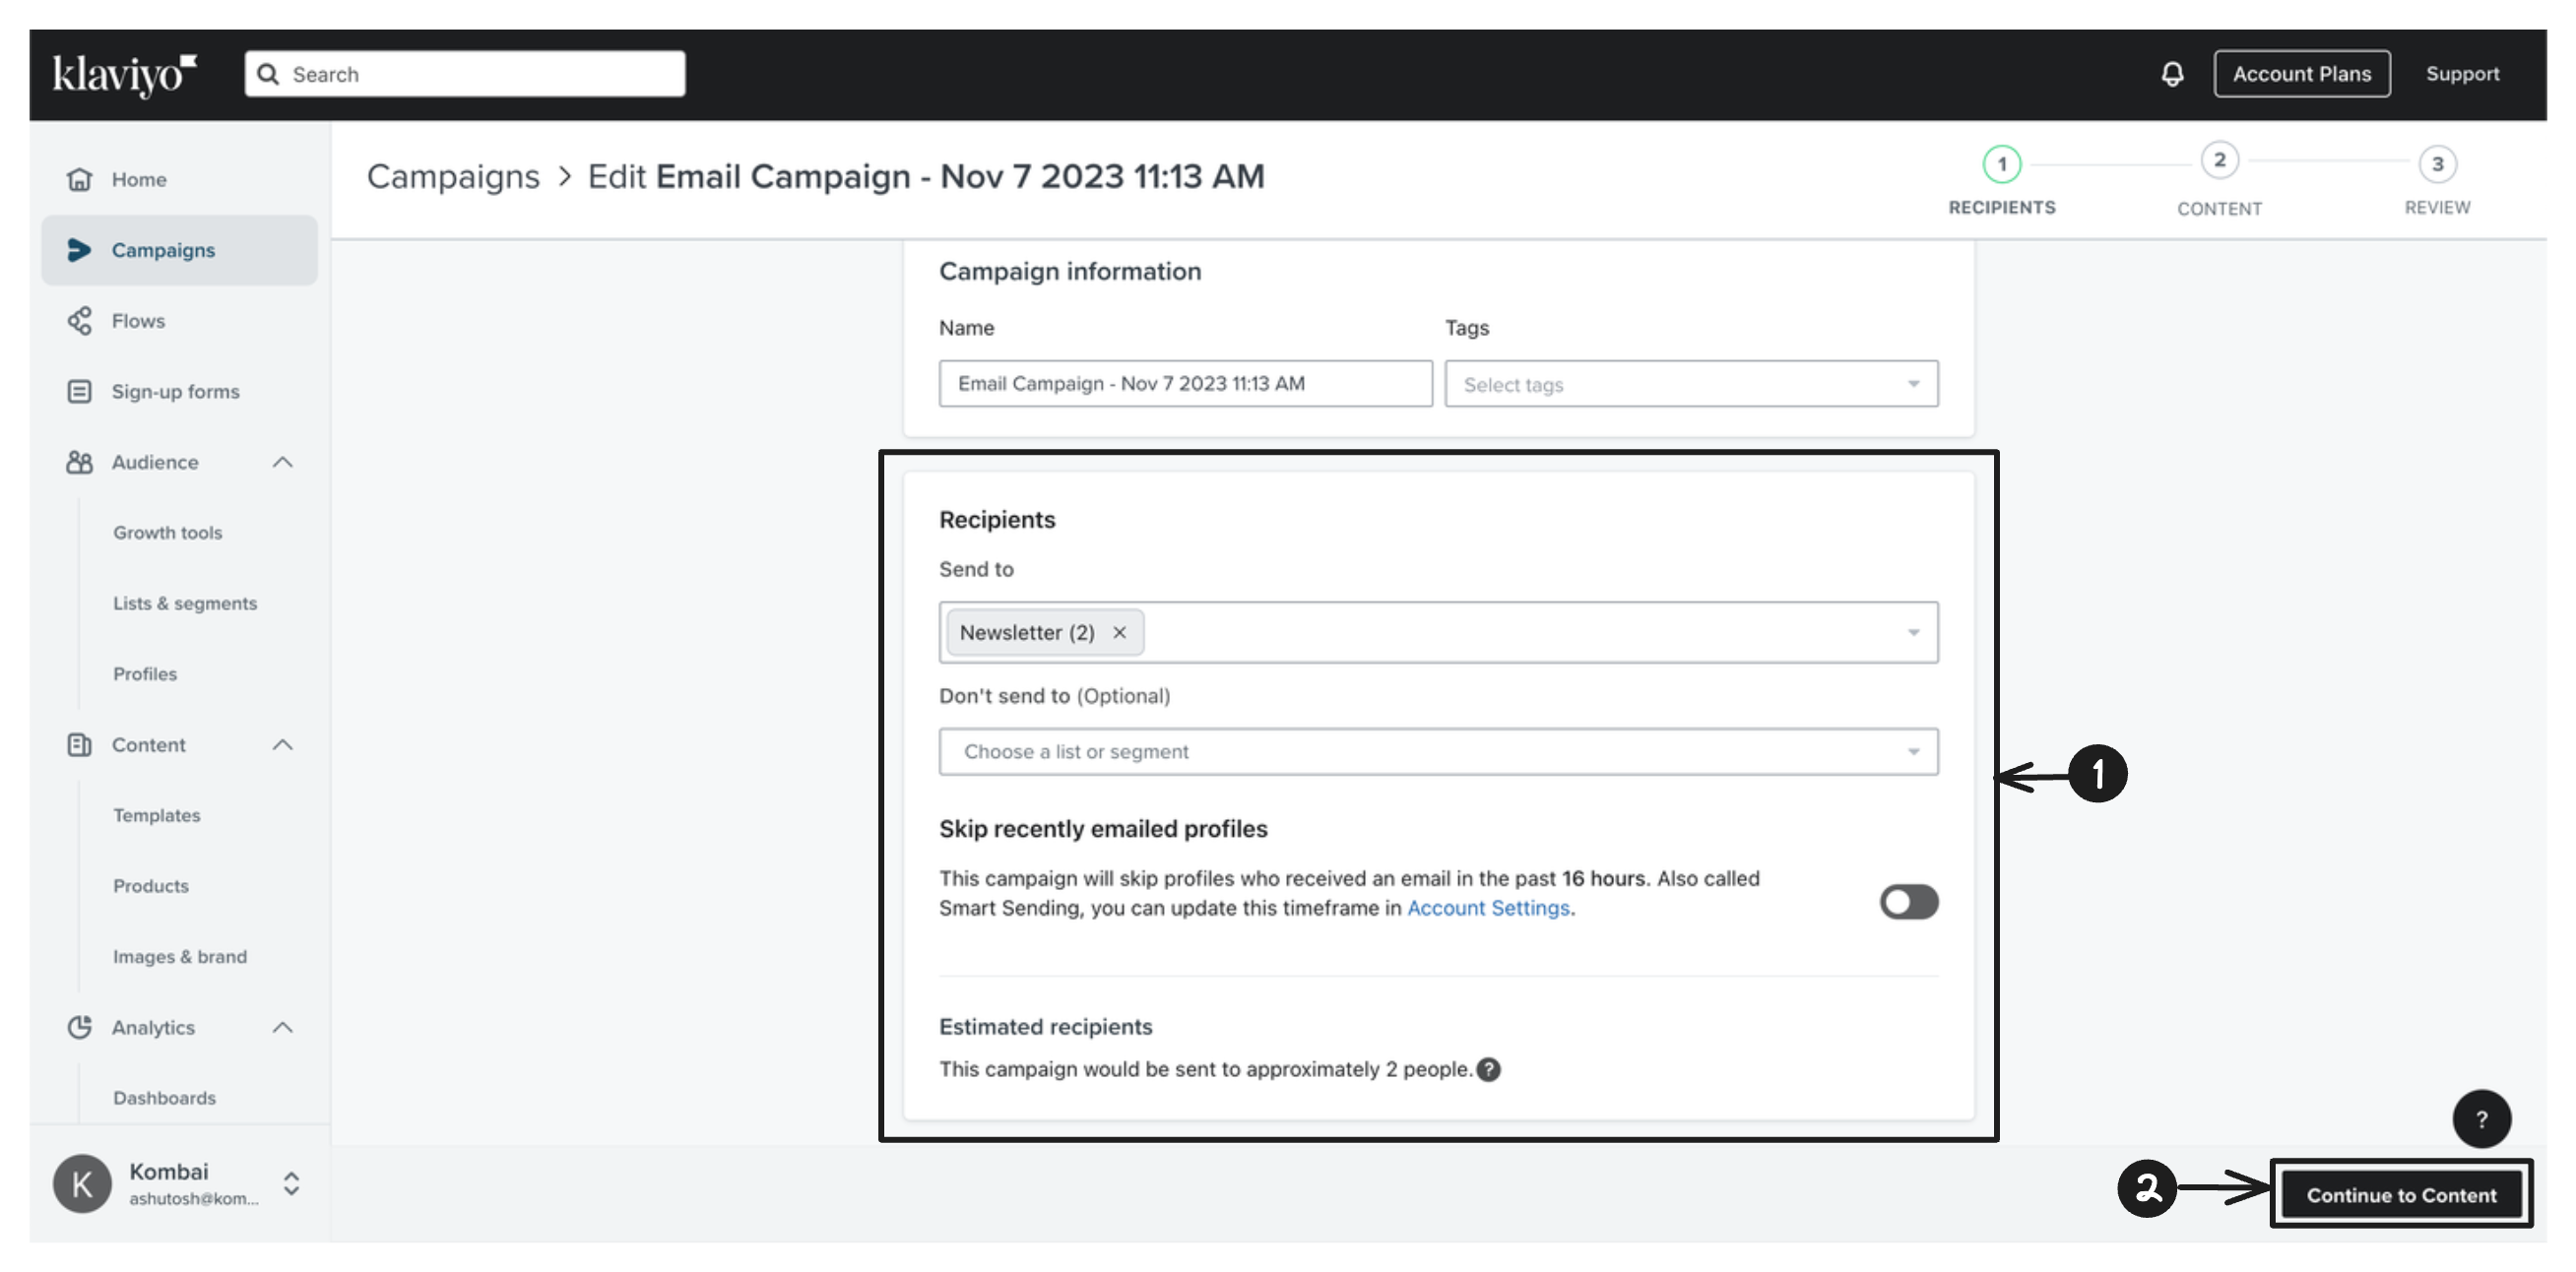
Now, add your recipients and click Continue to Content.
-
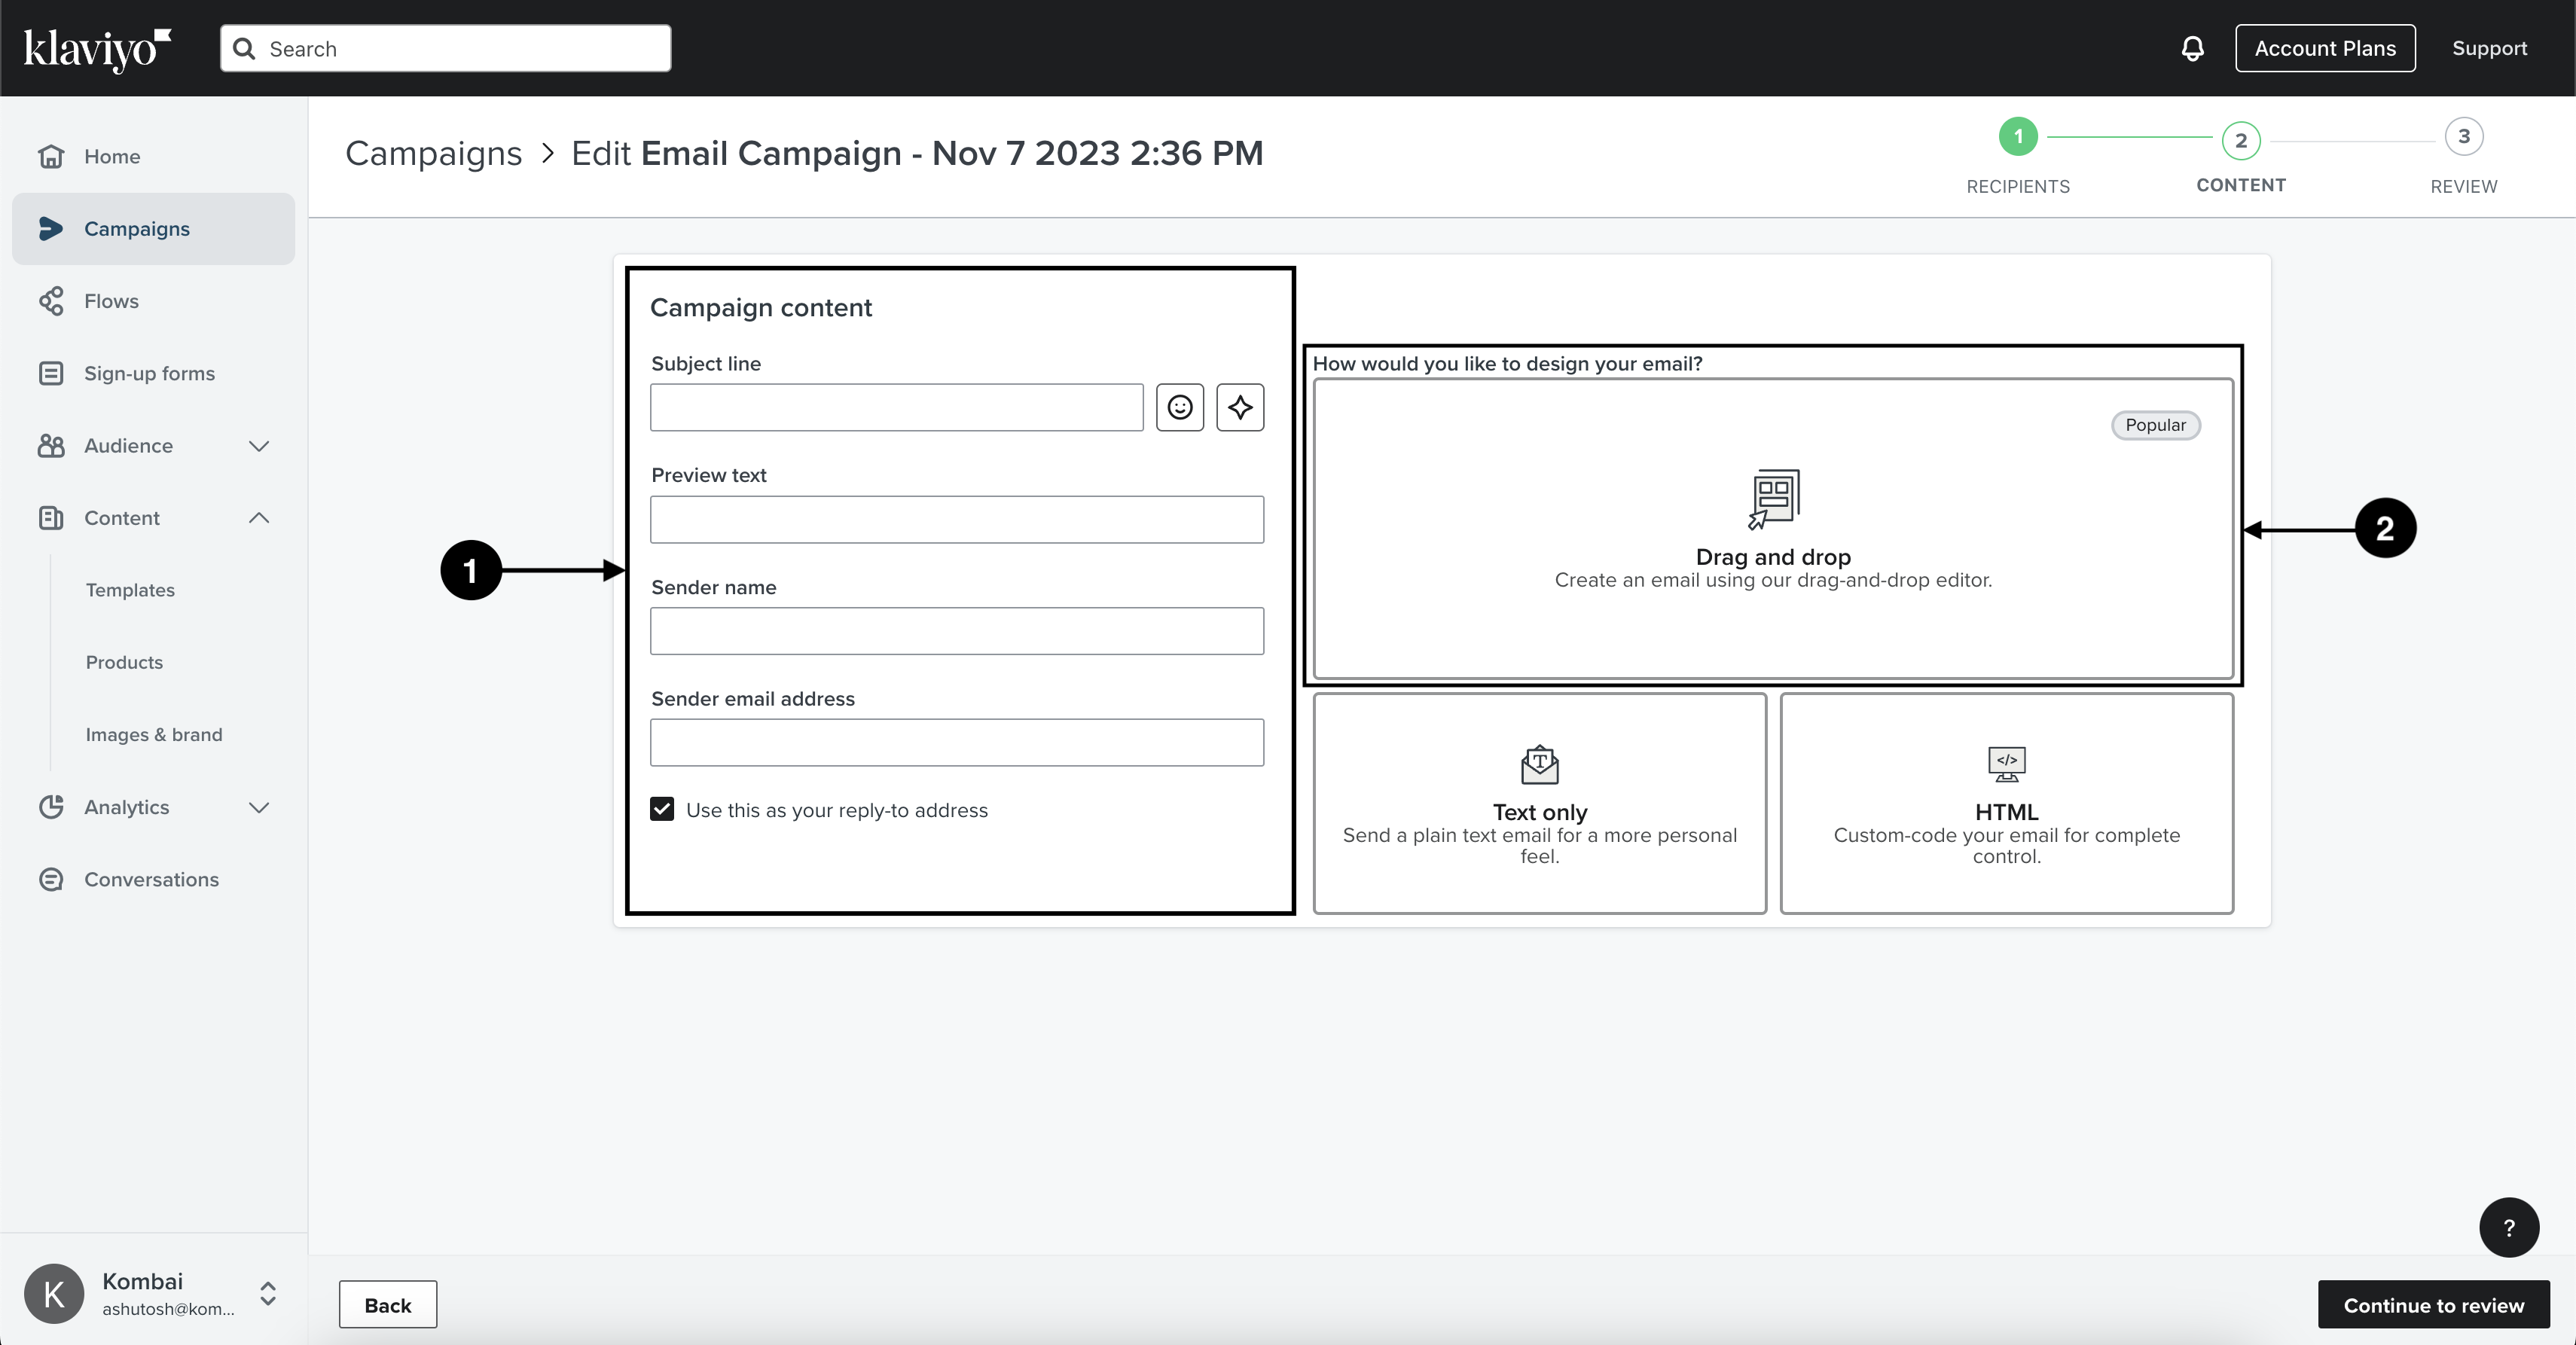
In the Campaign Content box, add the email title, preview text, etc, and hit Drag and Drop in How would you like to design your email? section.
-
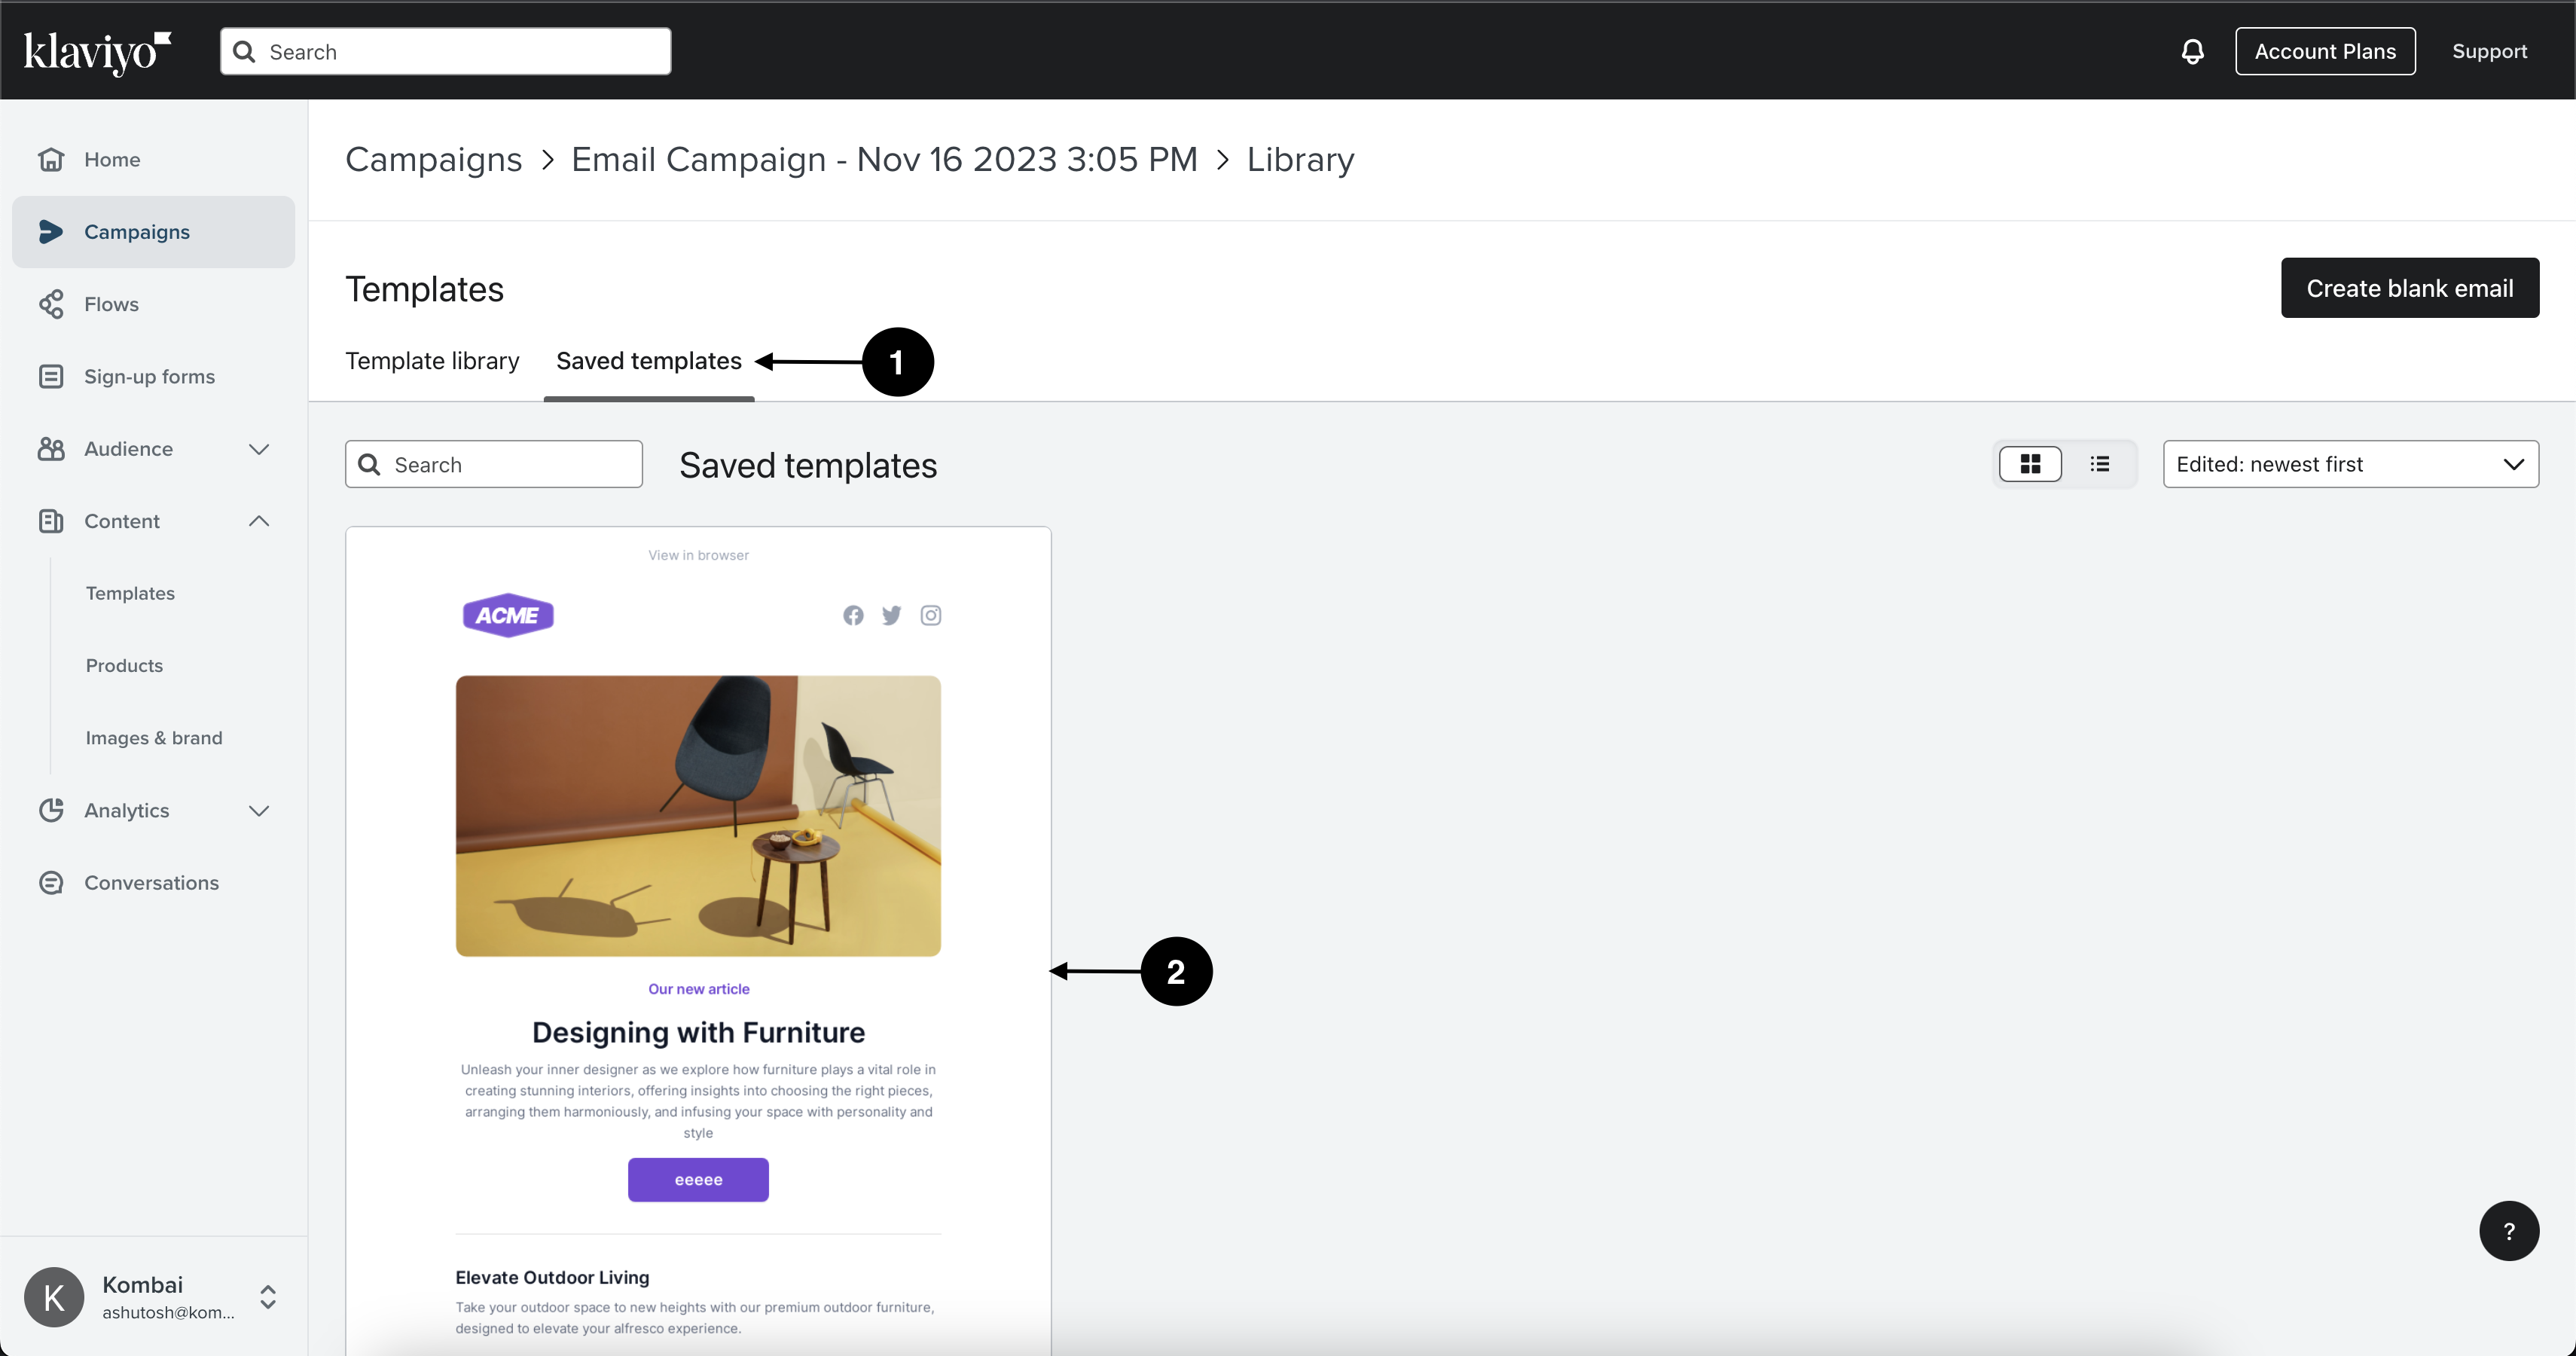
Click Saved templates, select your template and click Use template.
-
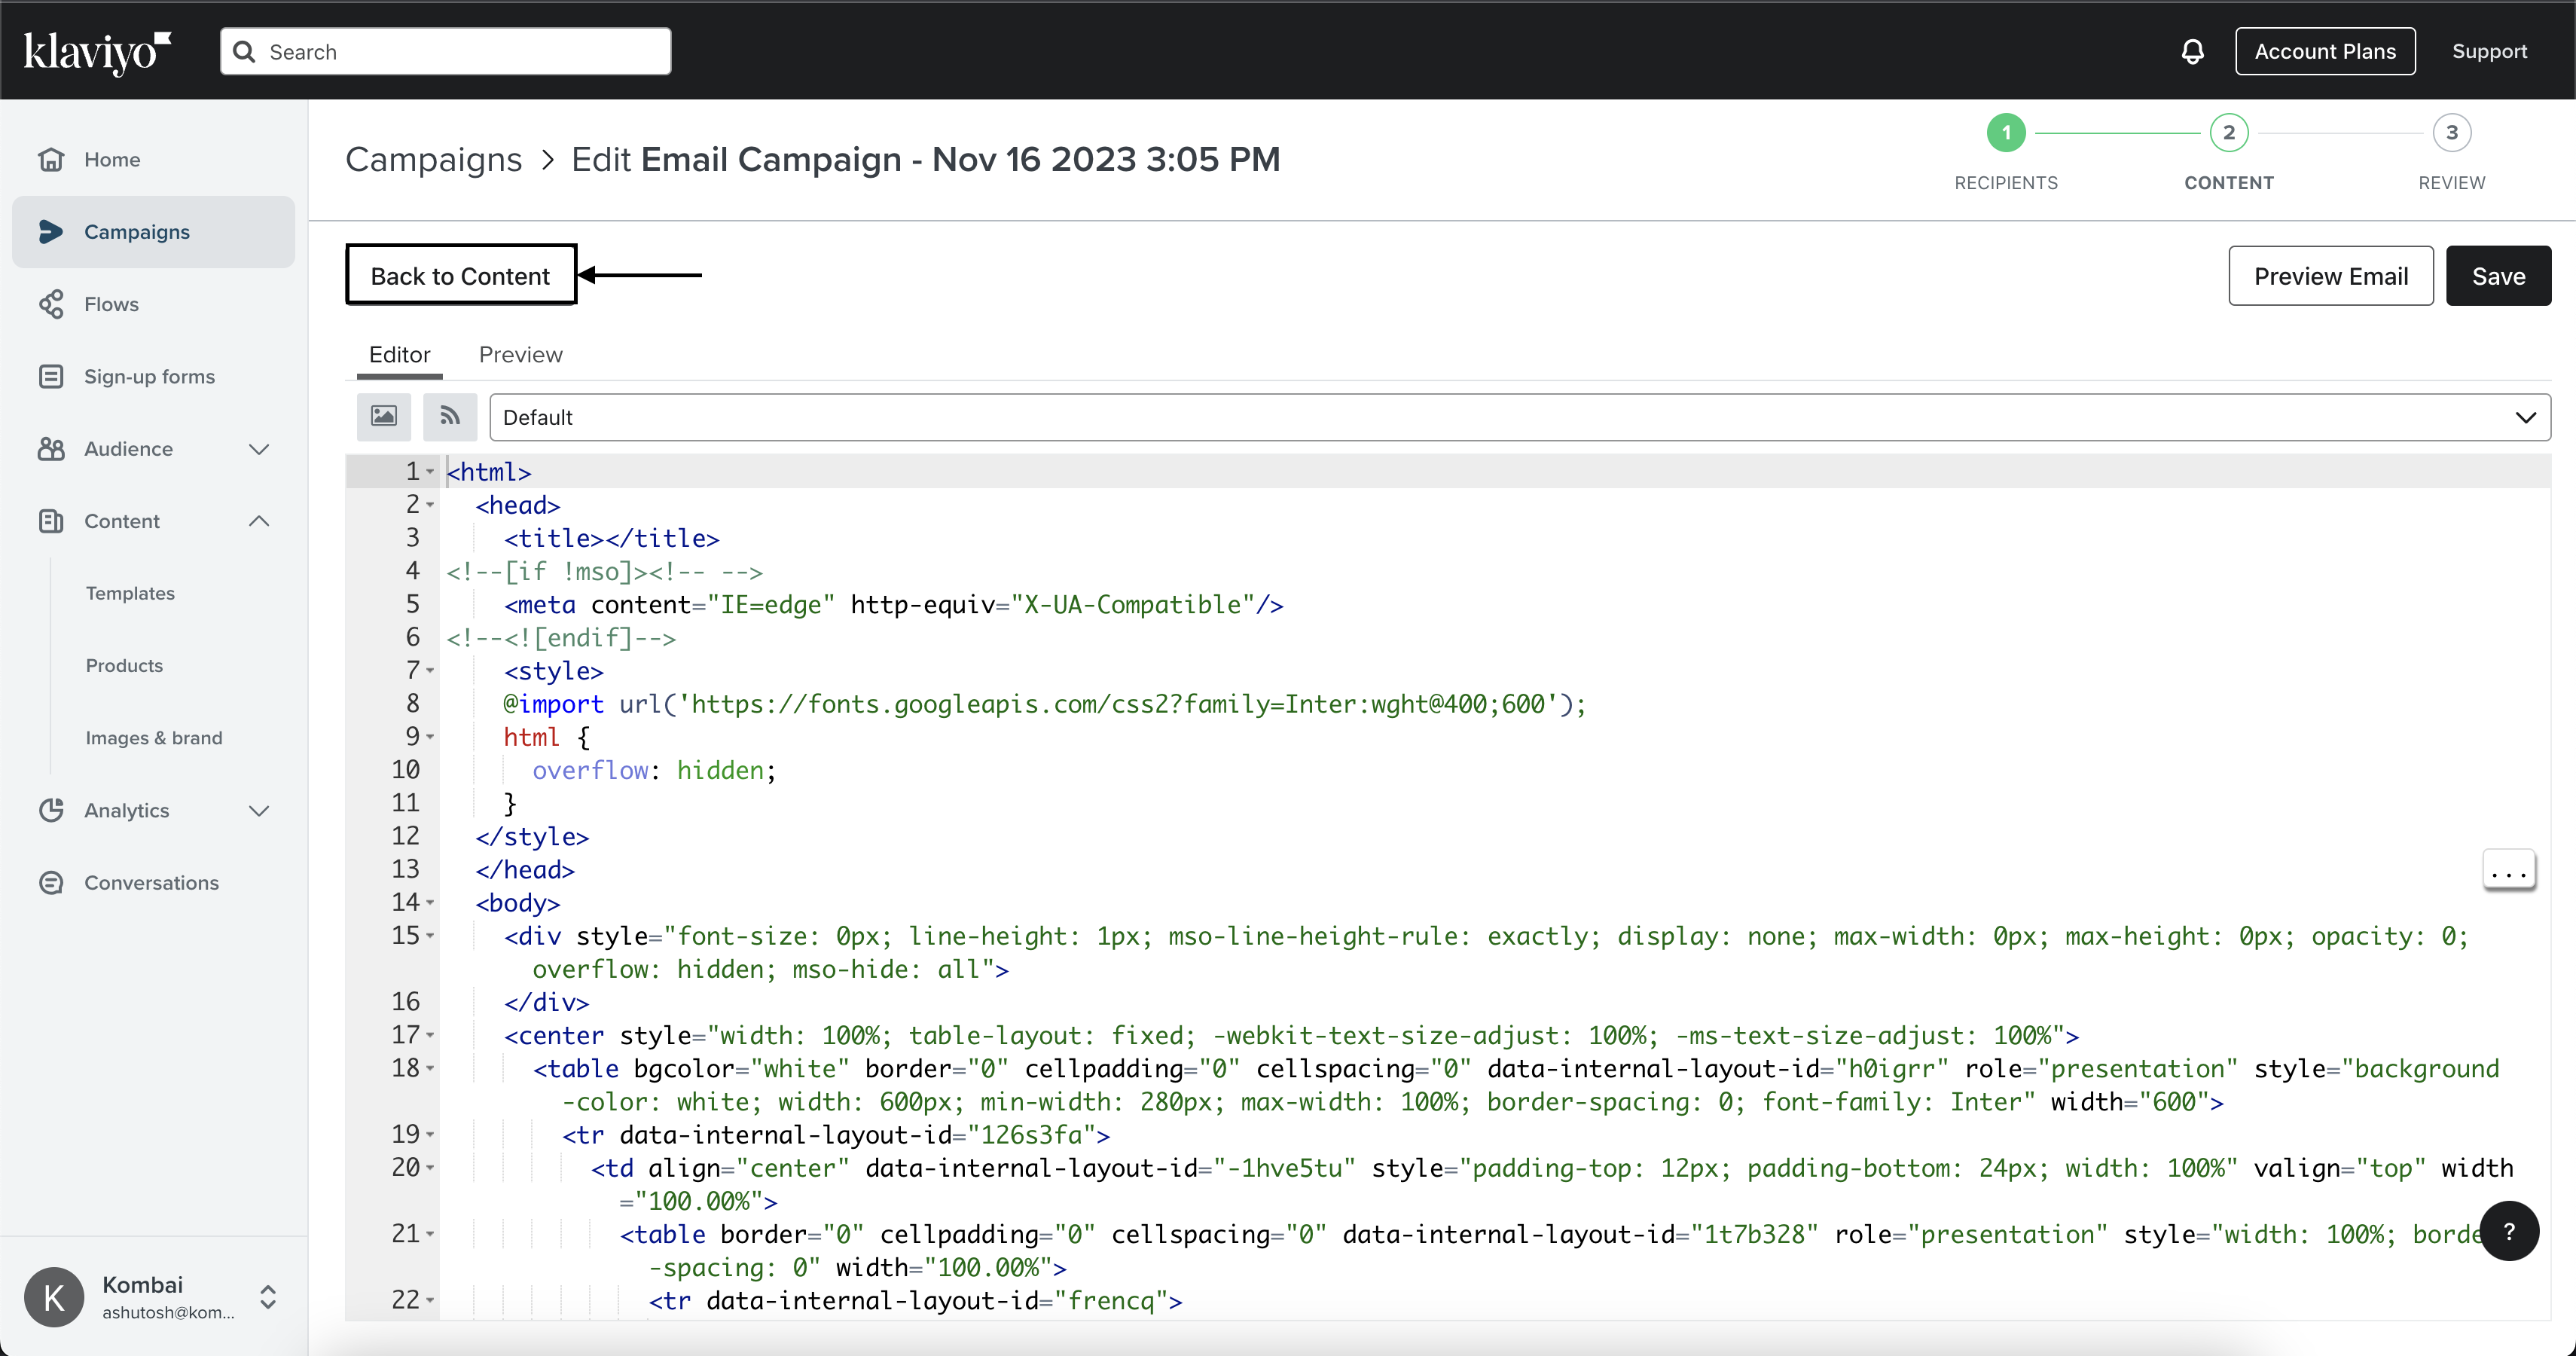
Once the template is loaded in the editor, click Back to Content.
-
Now, continue further to review your details and schedule or send the mail.
Sending Kombai-generated HTML containing Base64 embedded images
To send the generated HTML code through Klaviyo:
- Copy/Download the code with Base64 embedded images from Kombai.
- Repeat steps 1 to 3 of Creating a Campaign in Klaviyo.
- In the Campaign Content box, add the email title, preview text, etc, and hit HTML in How would you like to design your email? section.
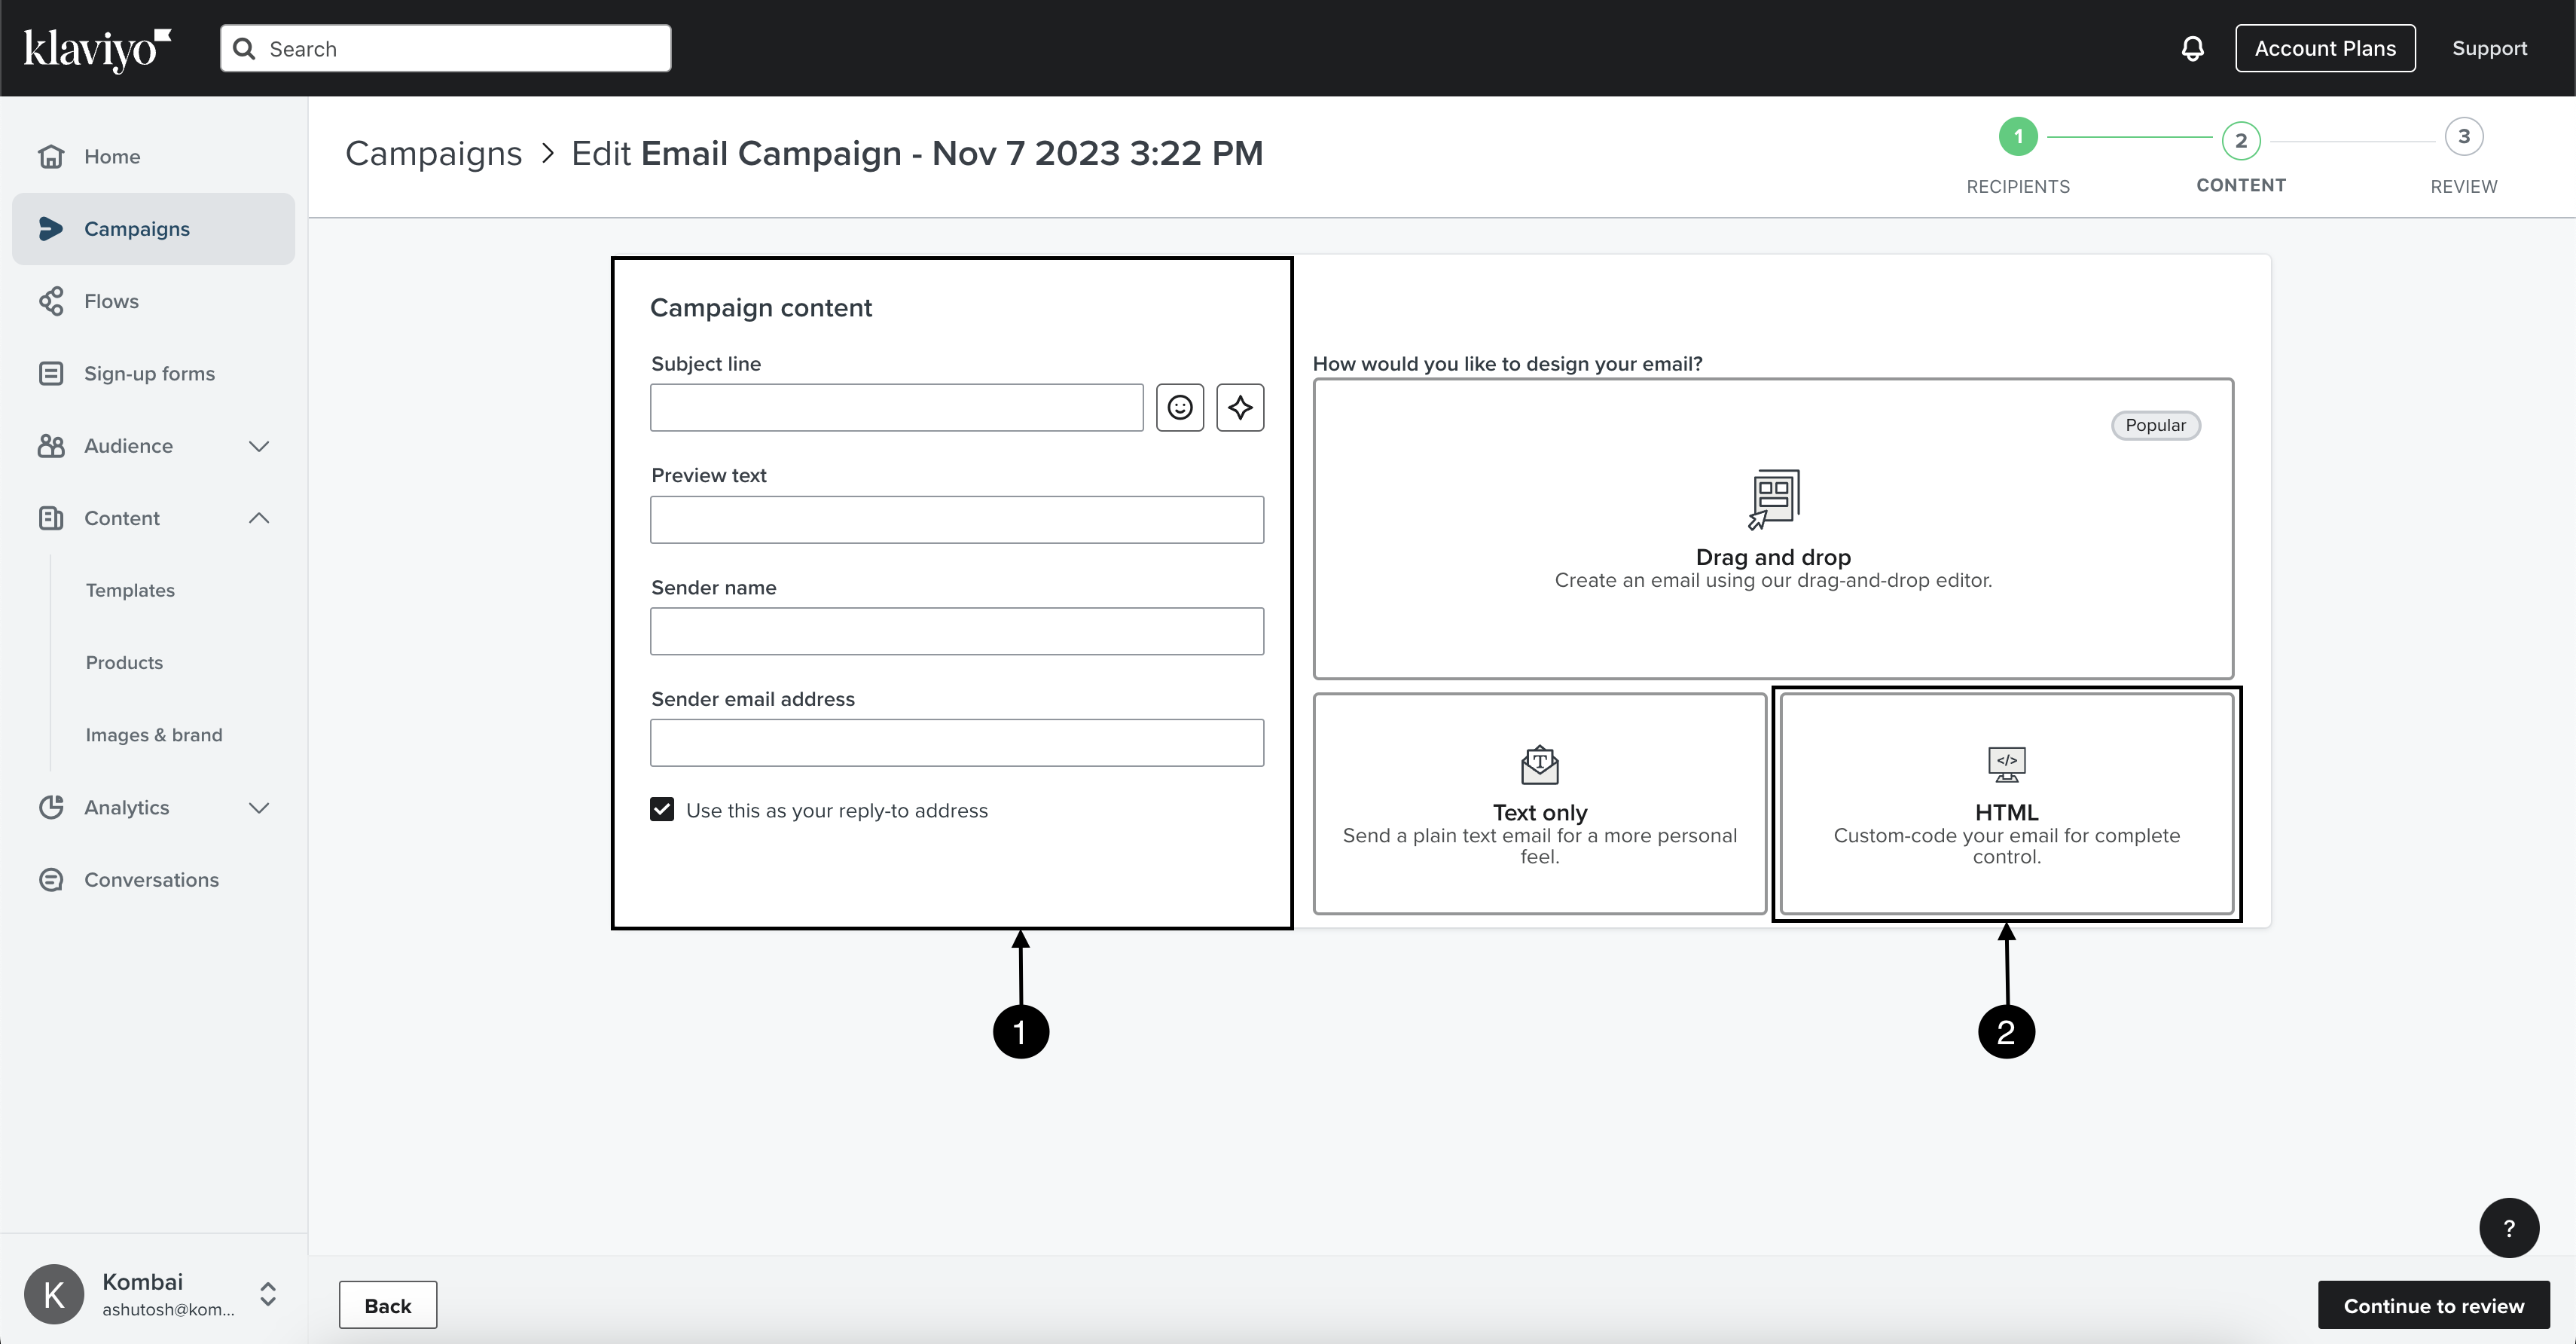
-
Paste the HTML code you downloaded from Kombai into the editor, save, and click Back to Content.
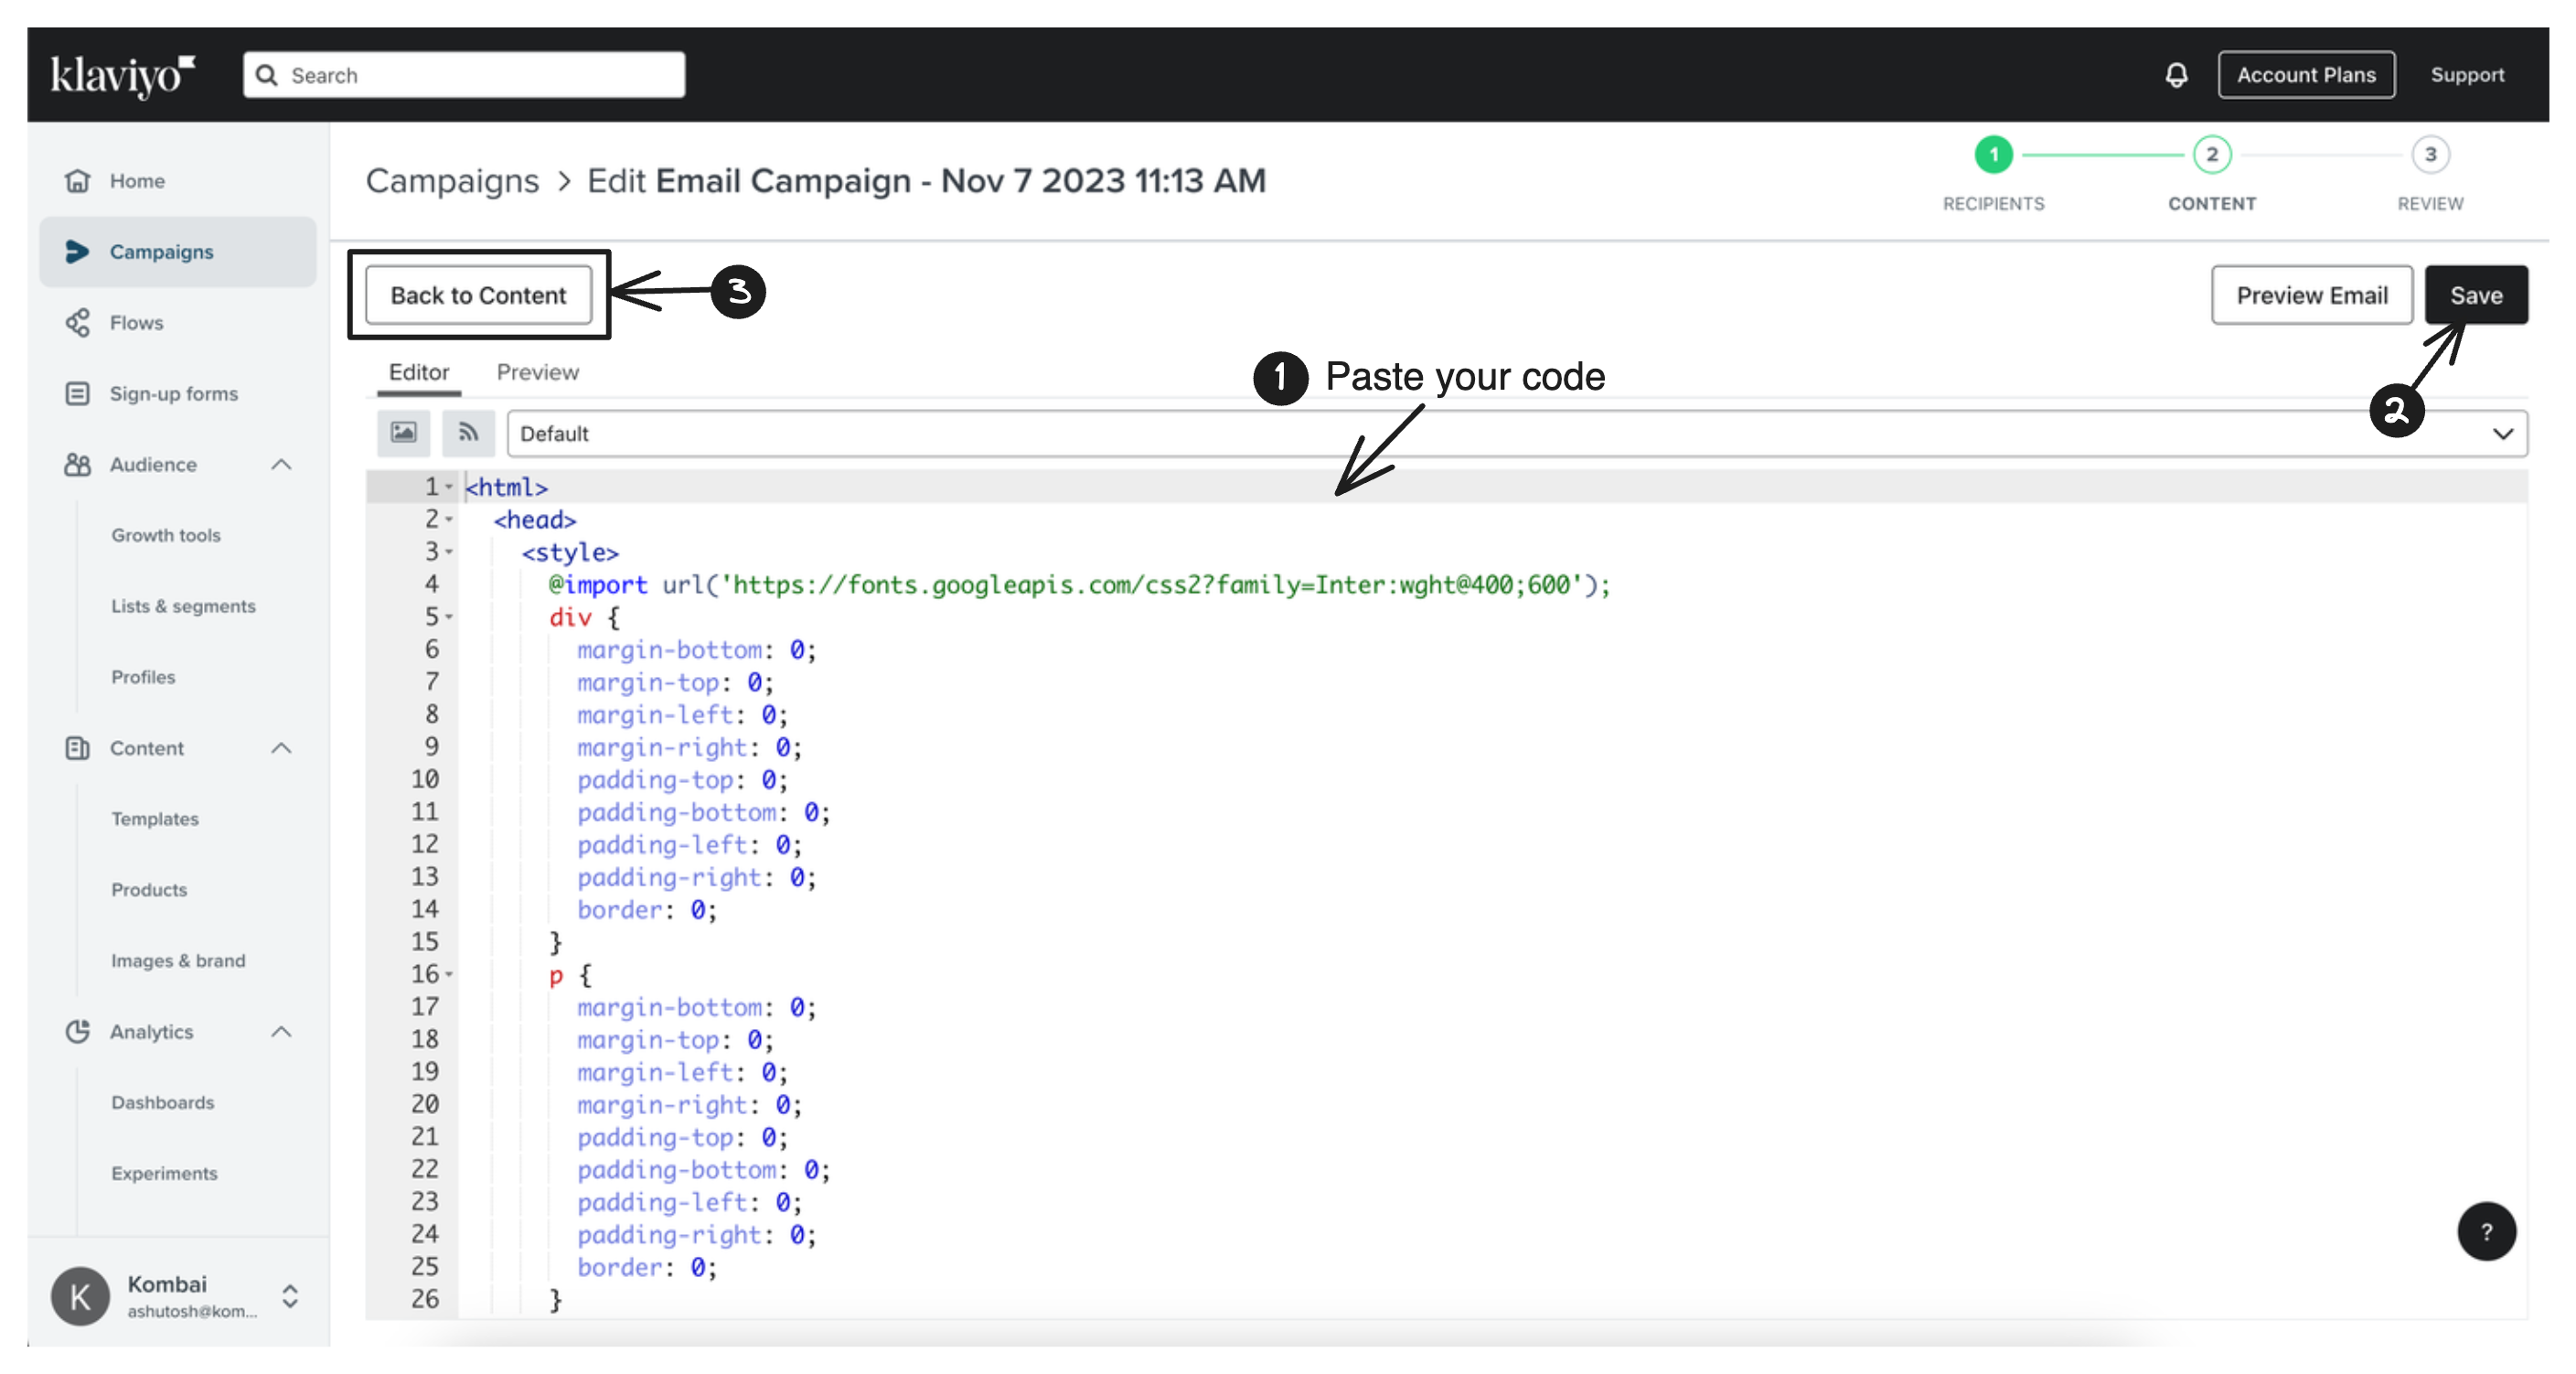
-
Now, continue to review your details and schedule or send the mail.
Mailchimp
Sending Kombai-generated HTML containing assets and linked images
To send the email along with external images through Mailchimp, you can either send it directly through the campaign or create a template. Let's discuss both these steps:
Creating a Campaign in Mailchimp
-
In the Mailchimp dashboard, click Create.
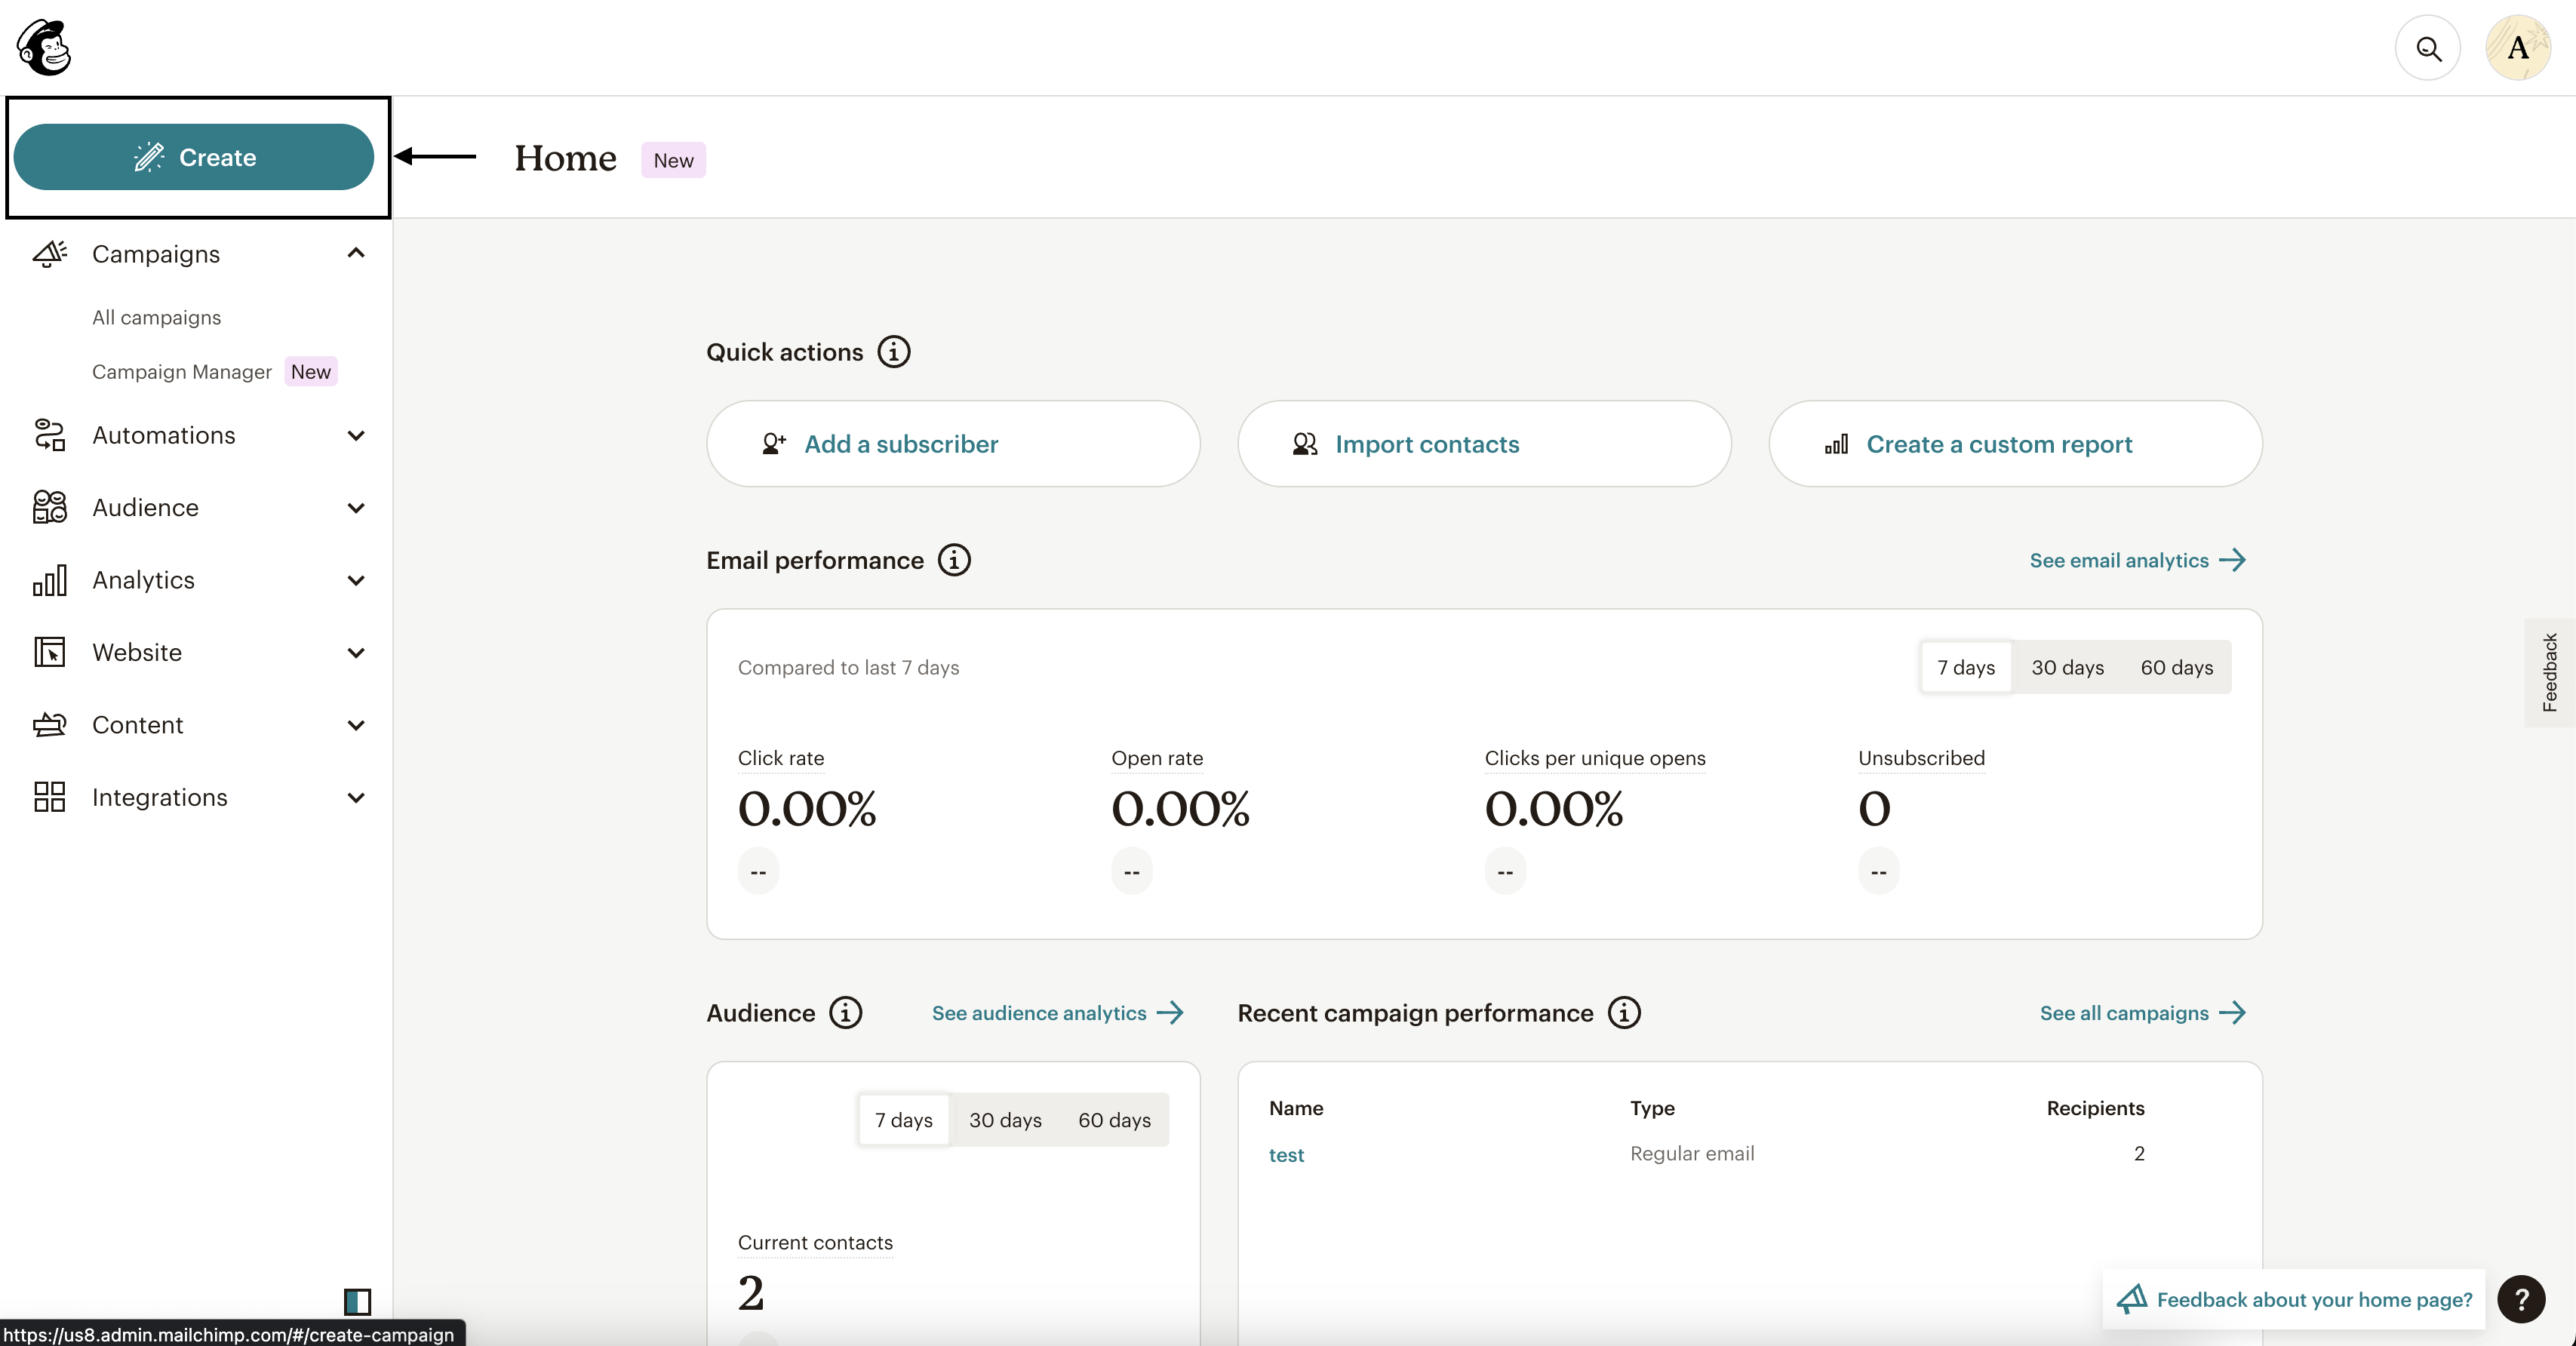
-
Name your email and click Create email.
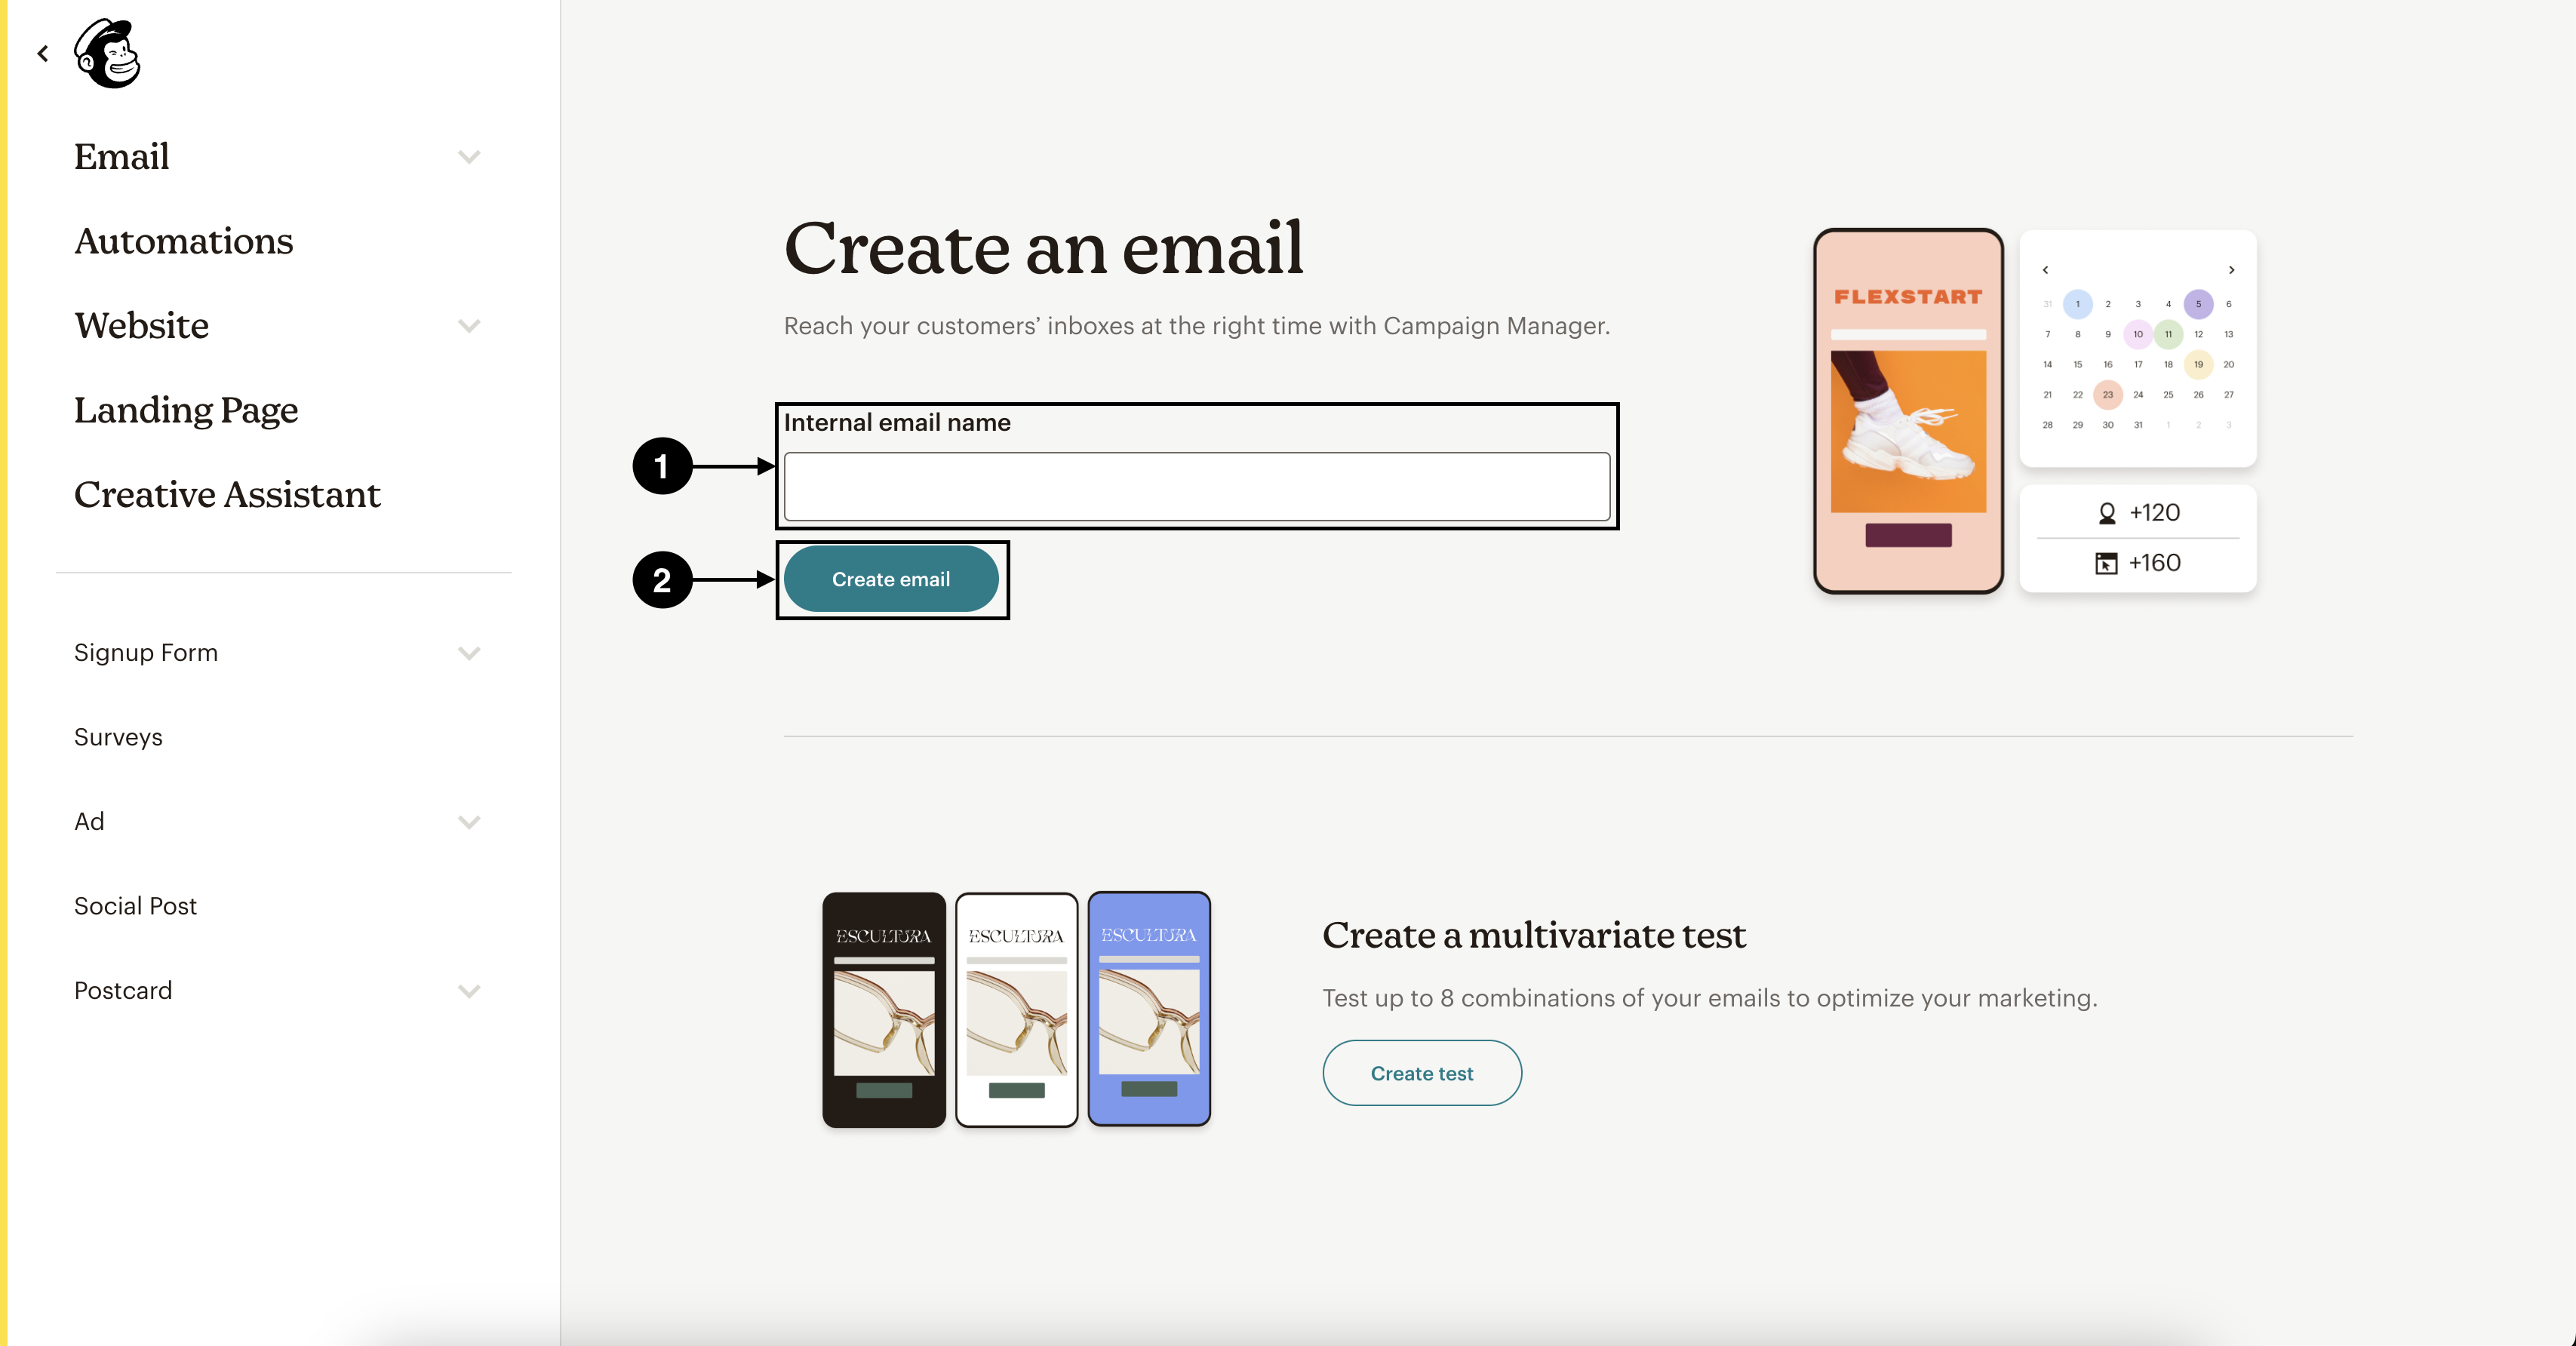
-
Fill all email related info(sender, subject, send time etc.) and click Design Email.

-
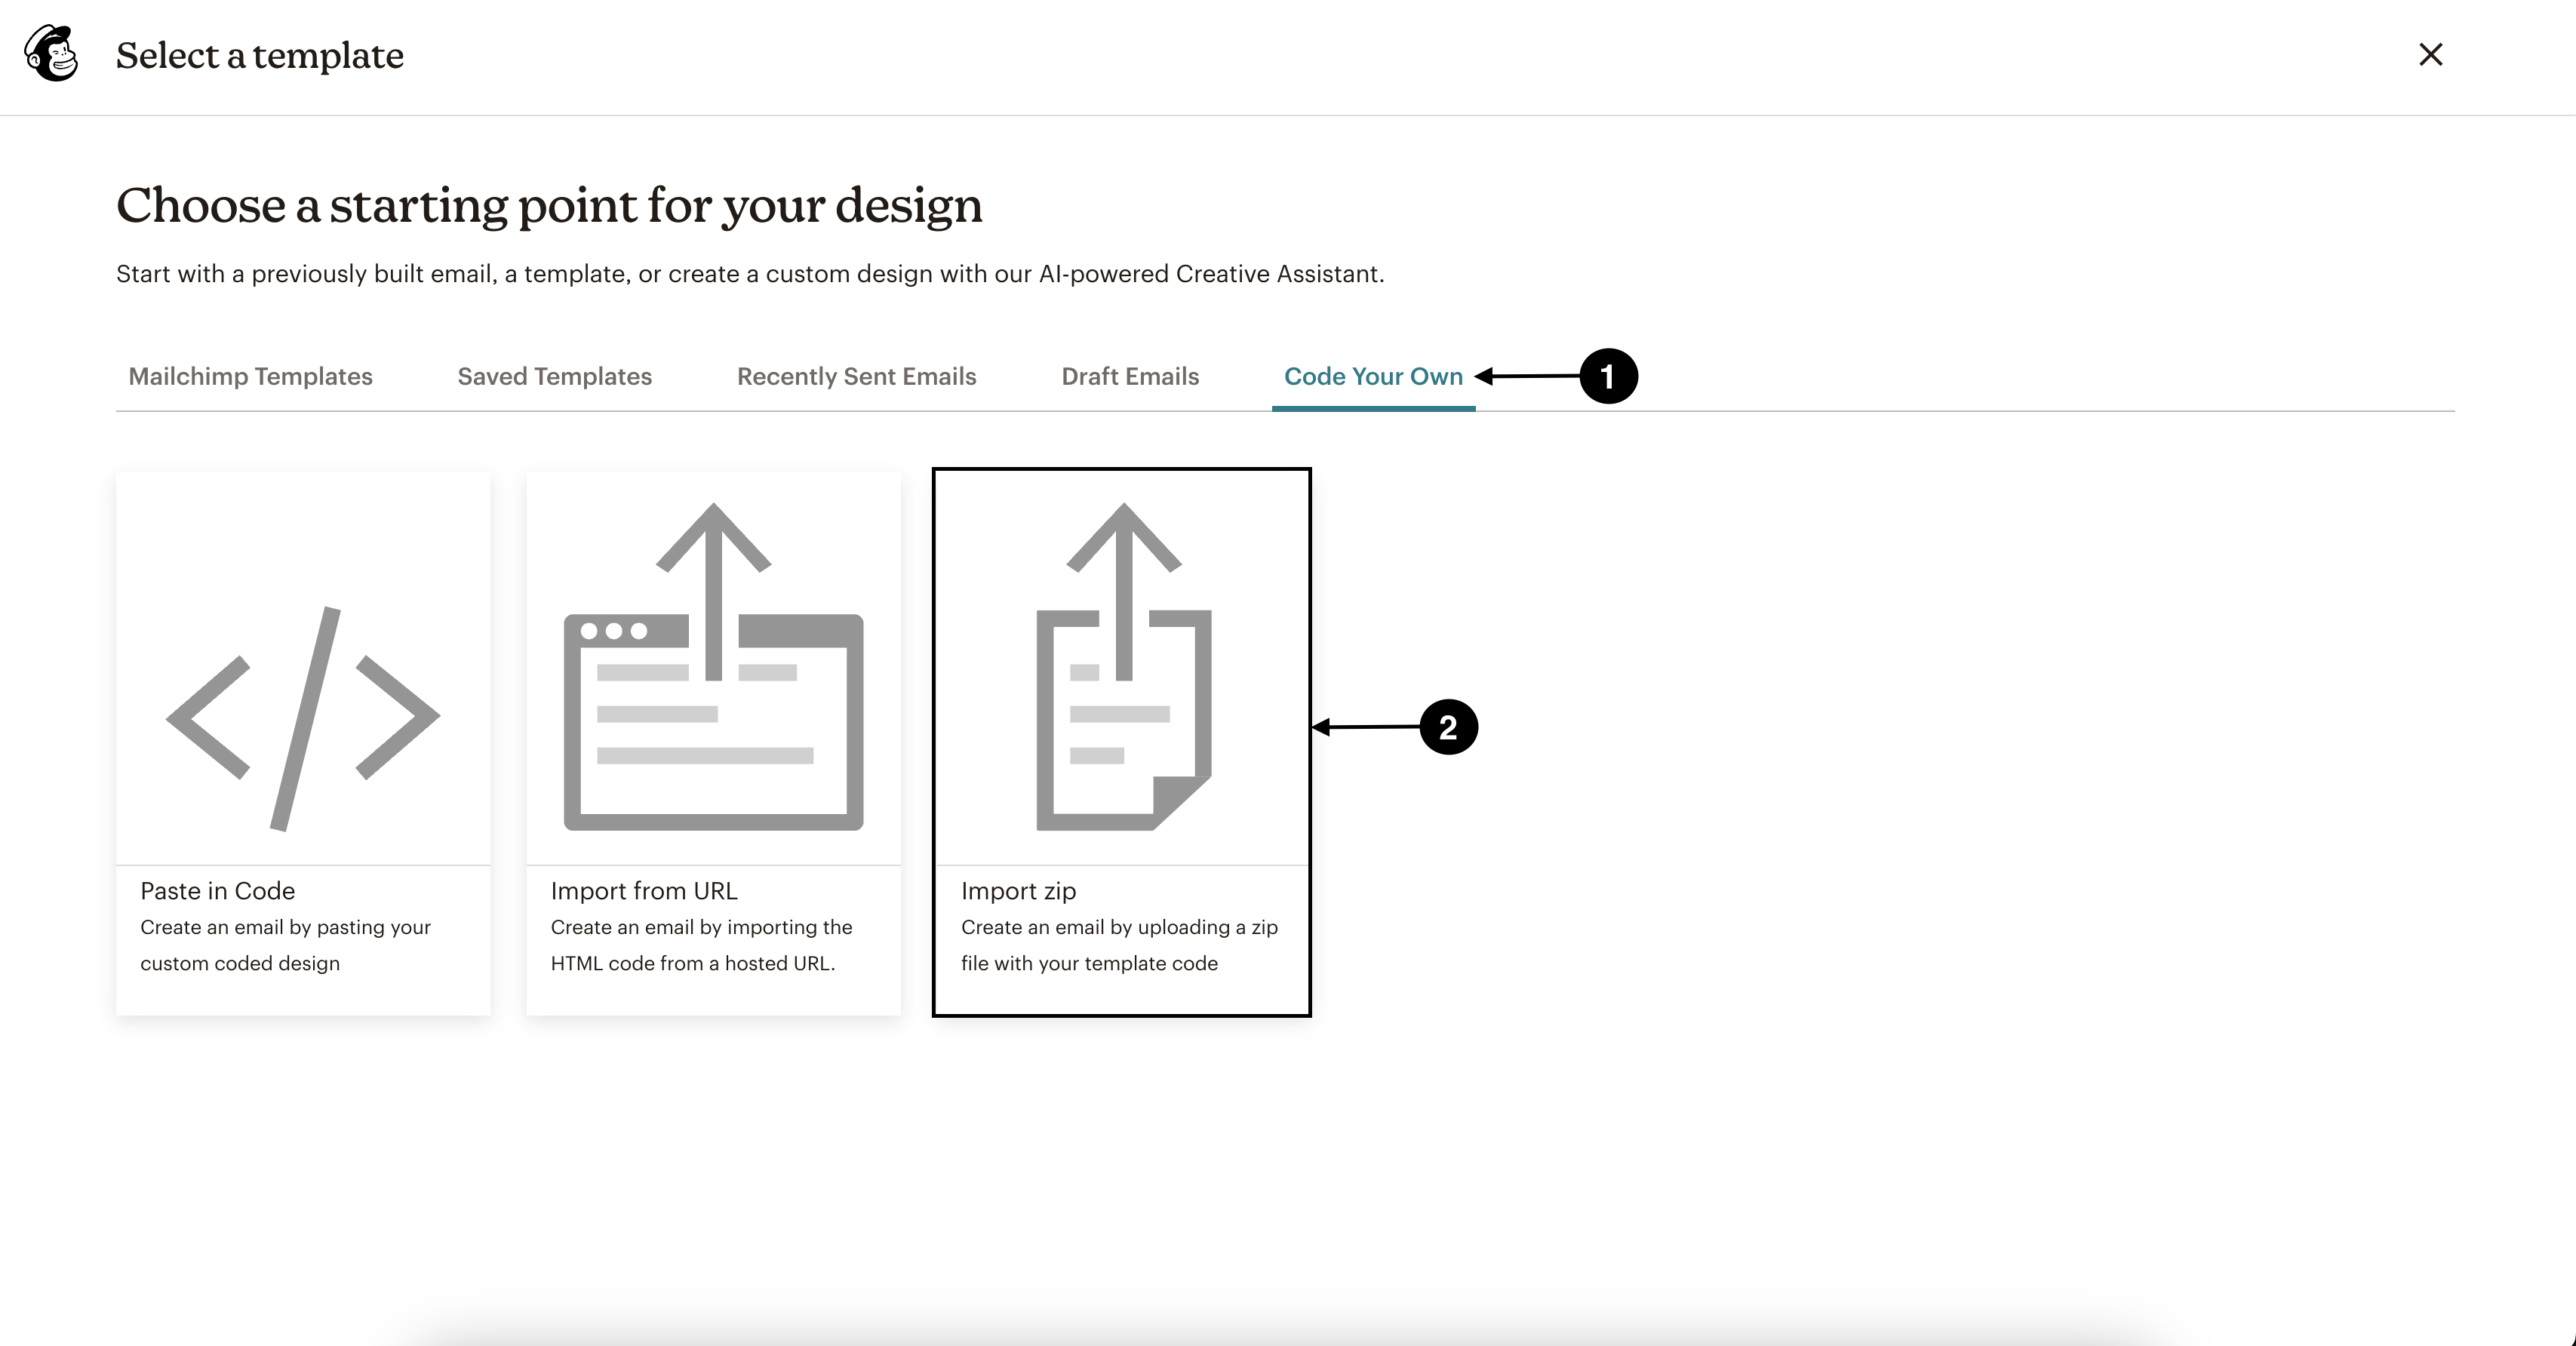
Click Code your own, select Import zip, and upload the zip file you downloaded from Kombai.
-
Continue and send or schedule your mail.
Creating a template in Mailchimp
To create an email template in Mailchimp:
-
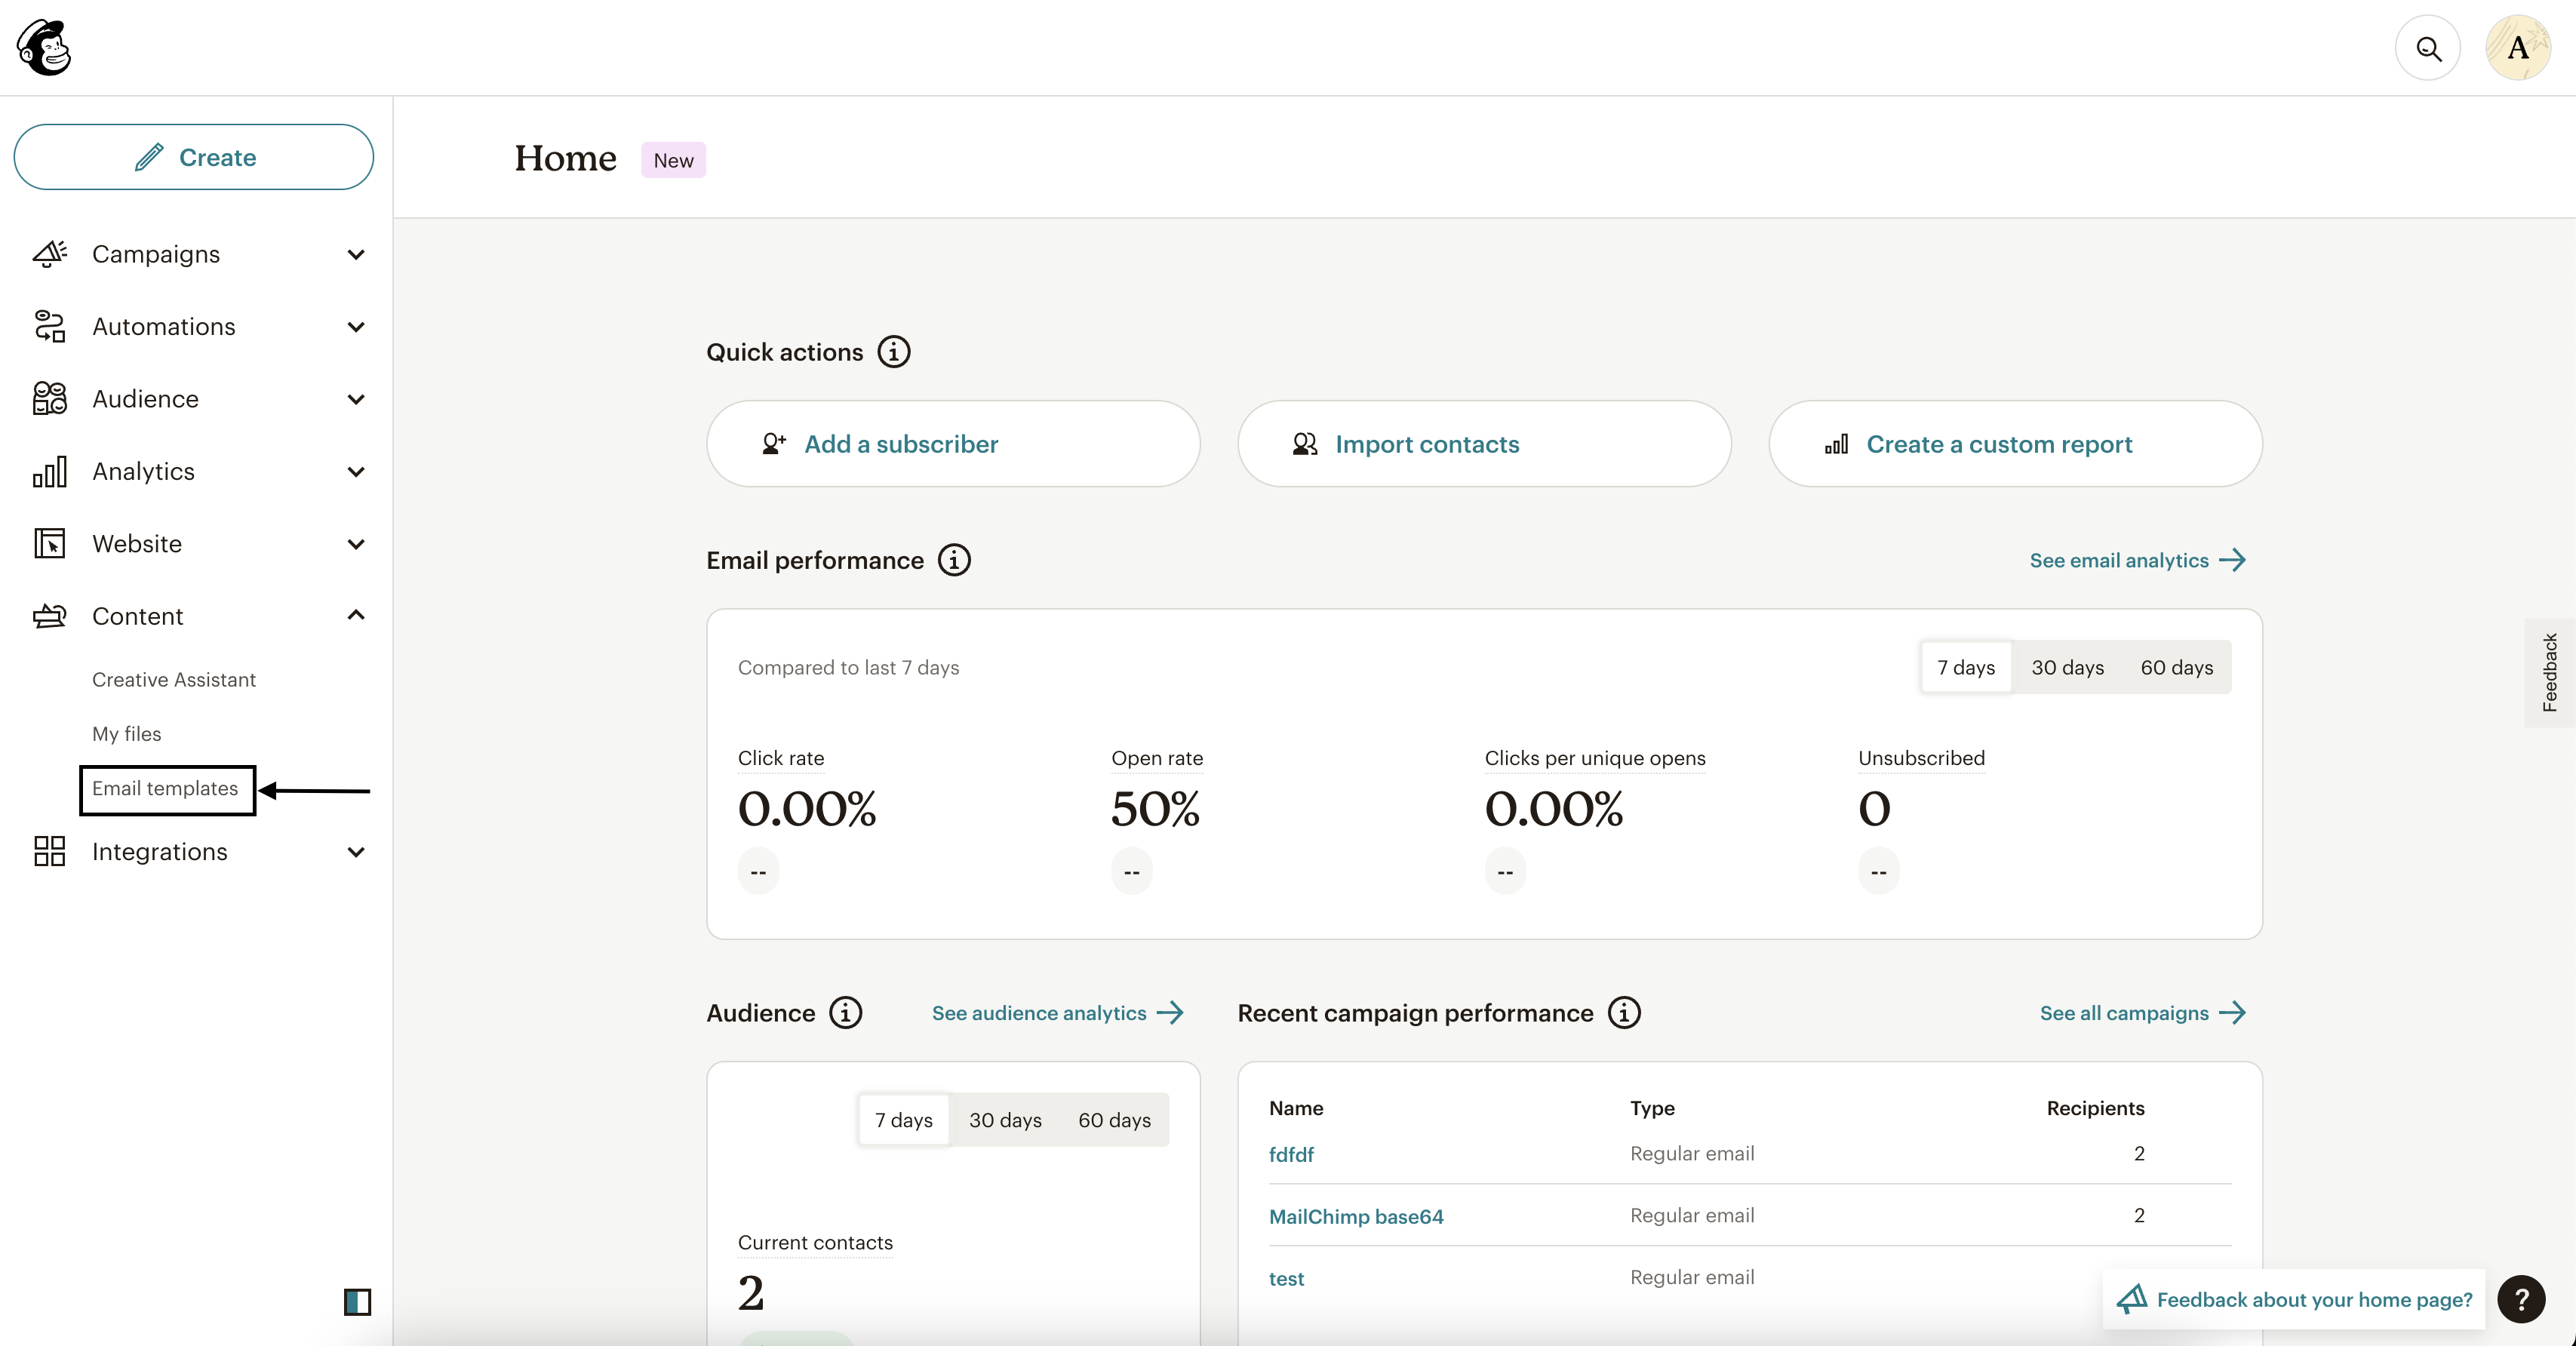
Click Content > Email templates in the dashboard.
-
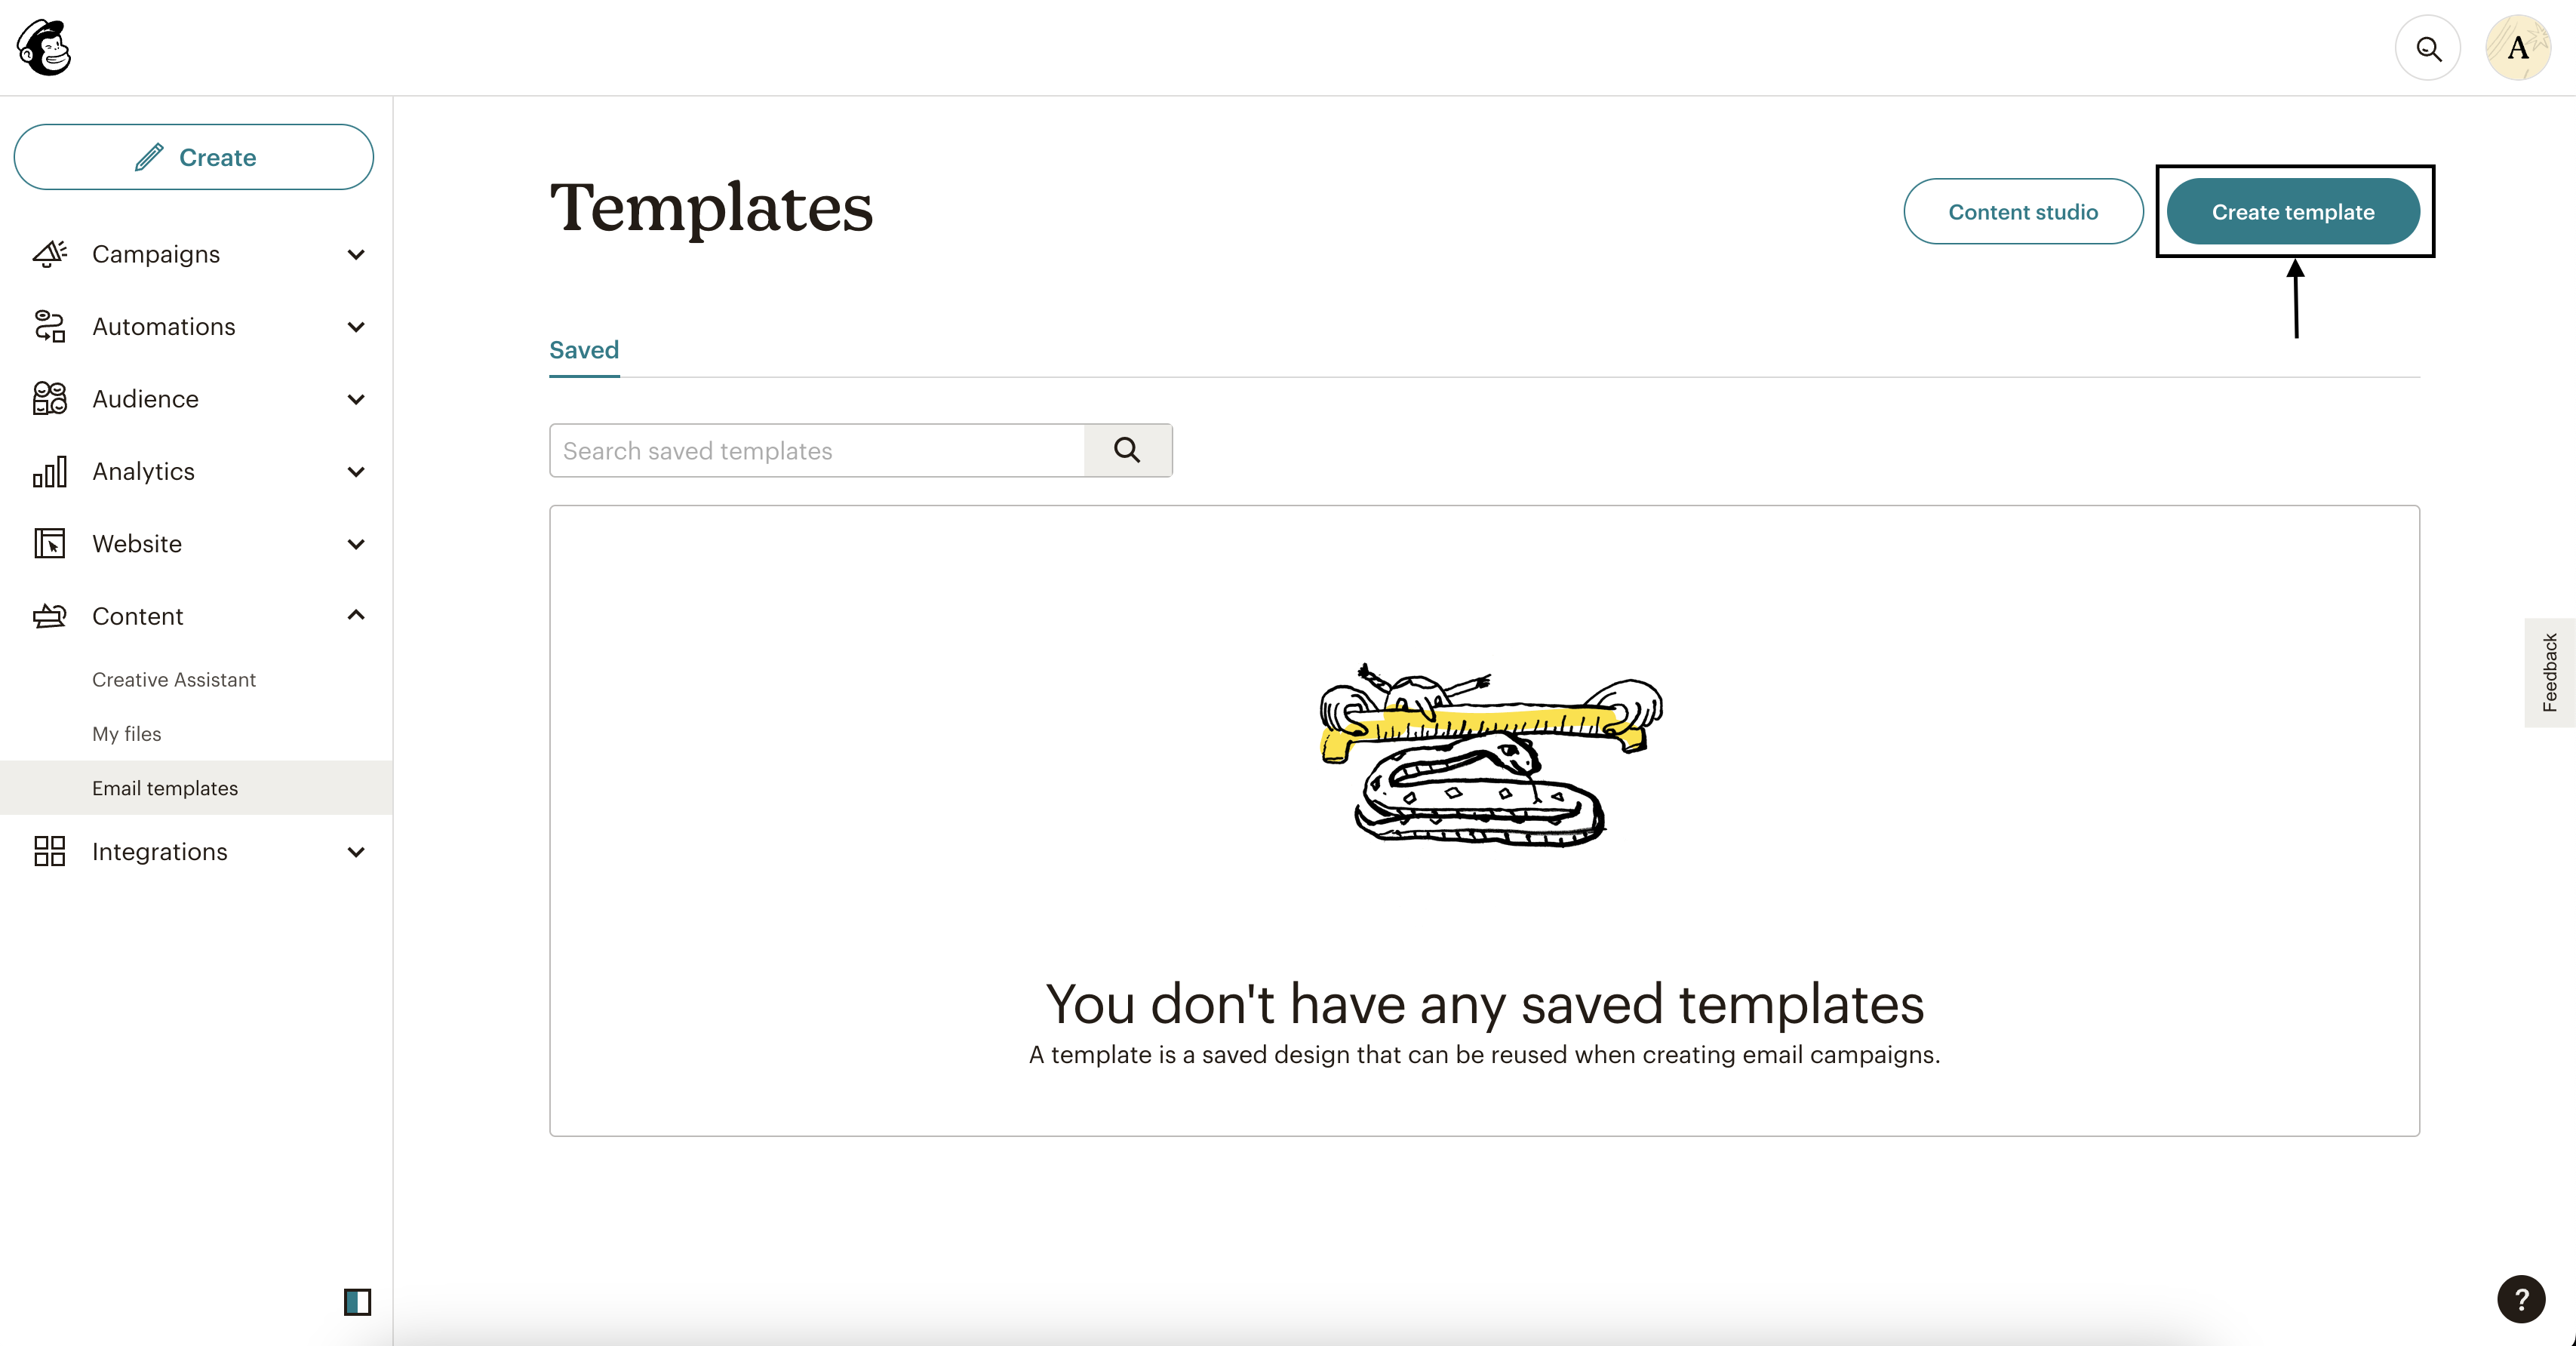
Click Create Template.
-
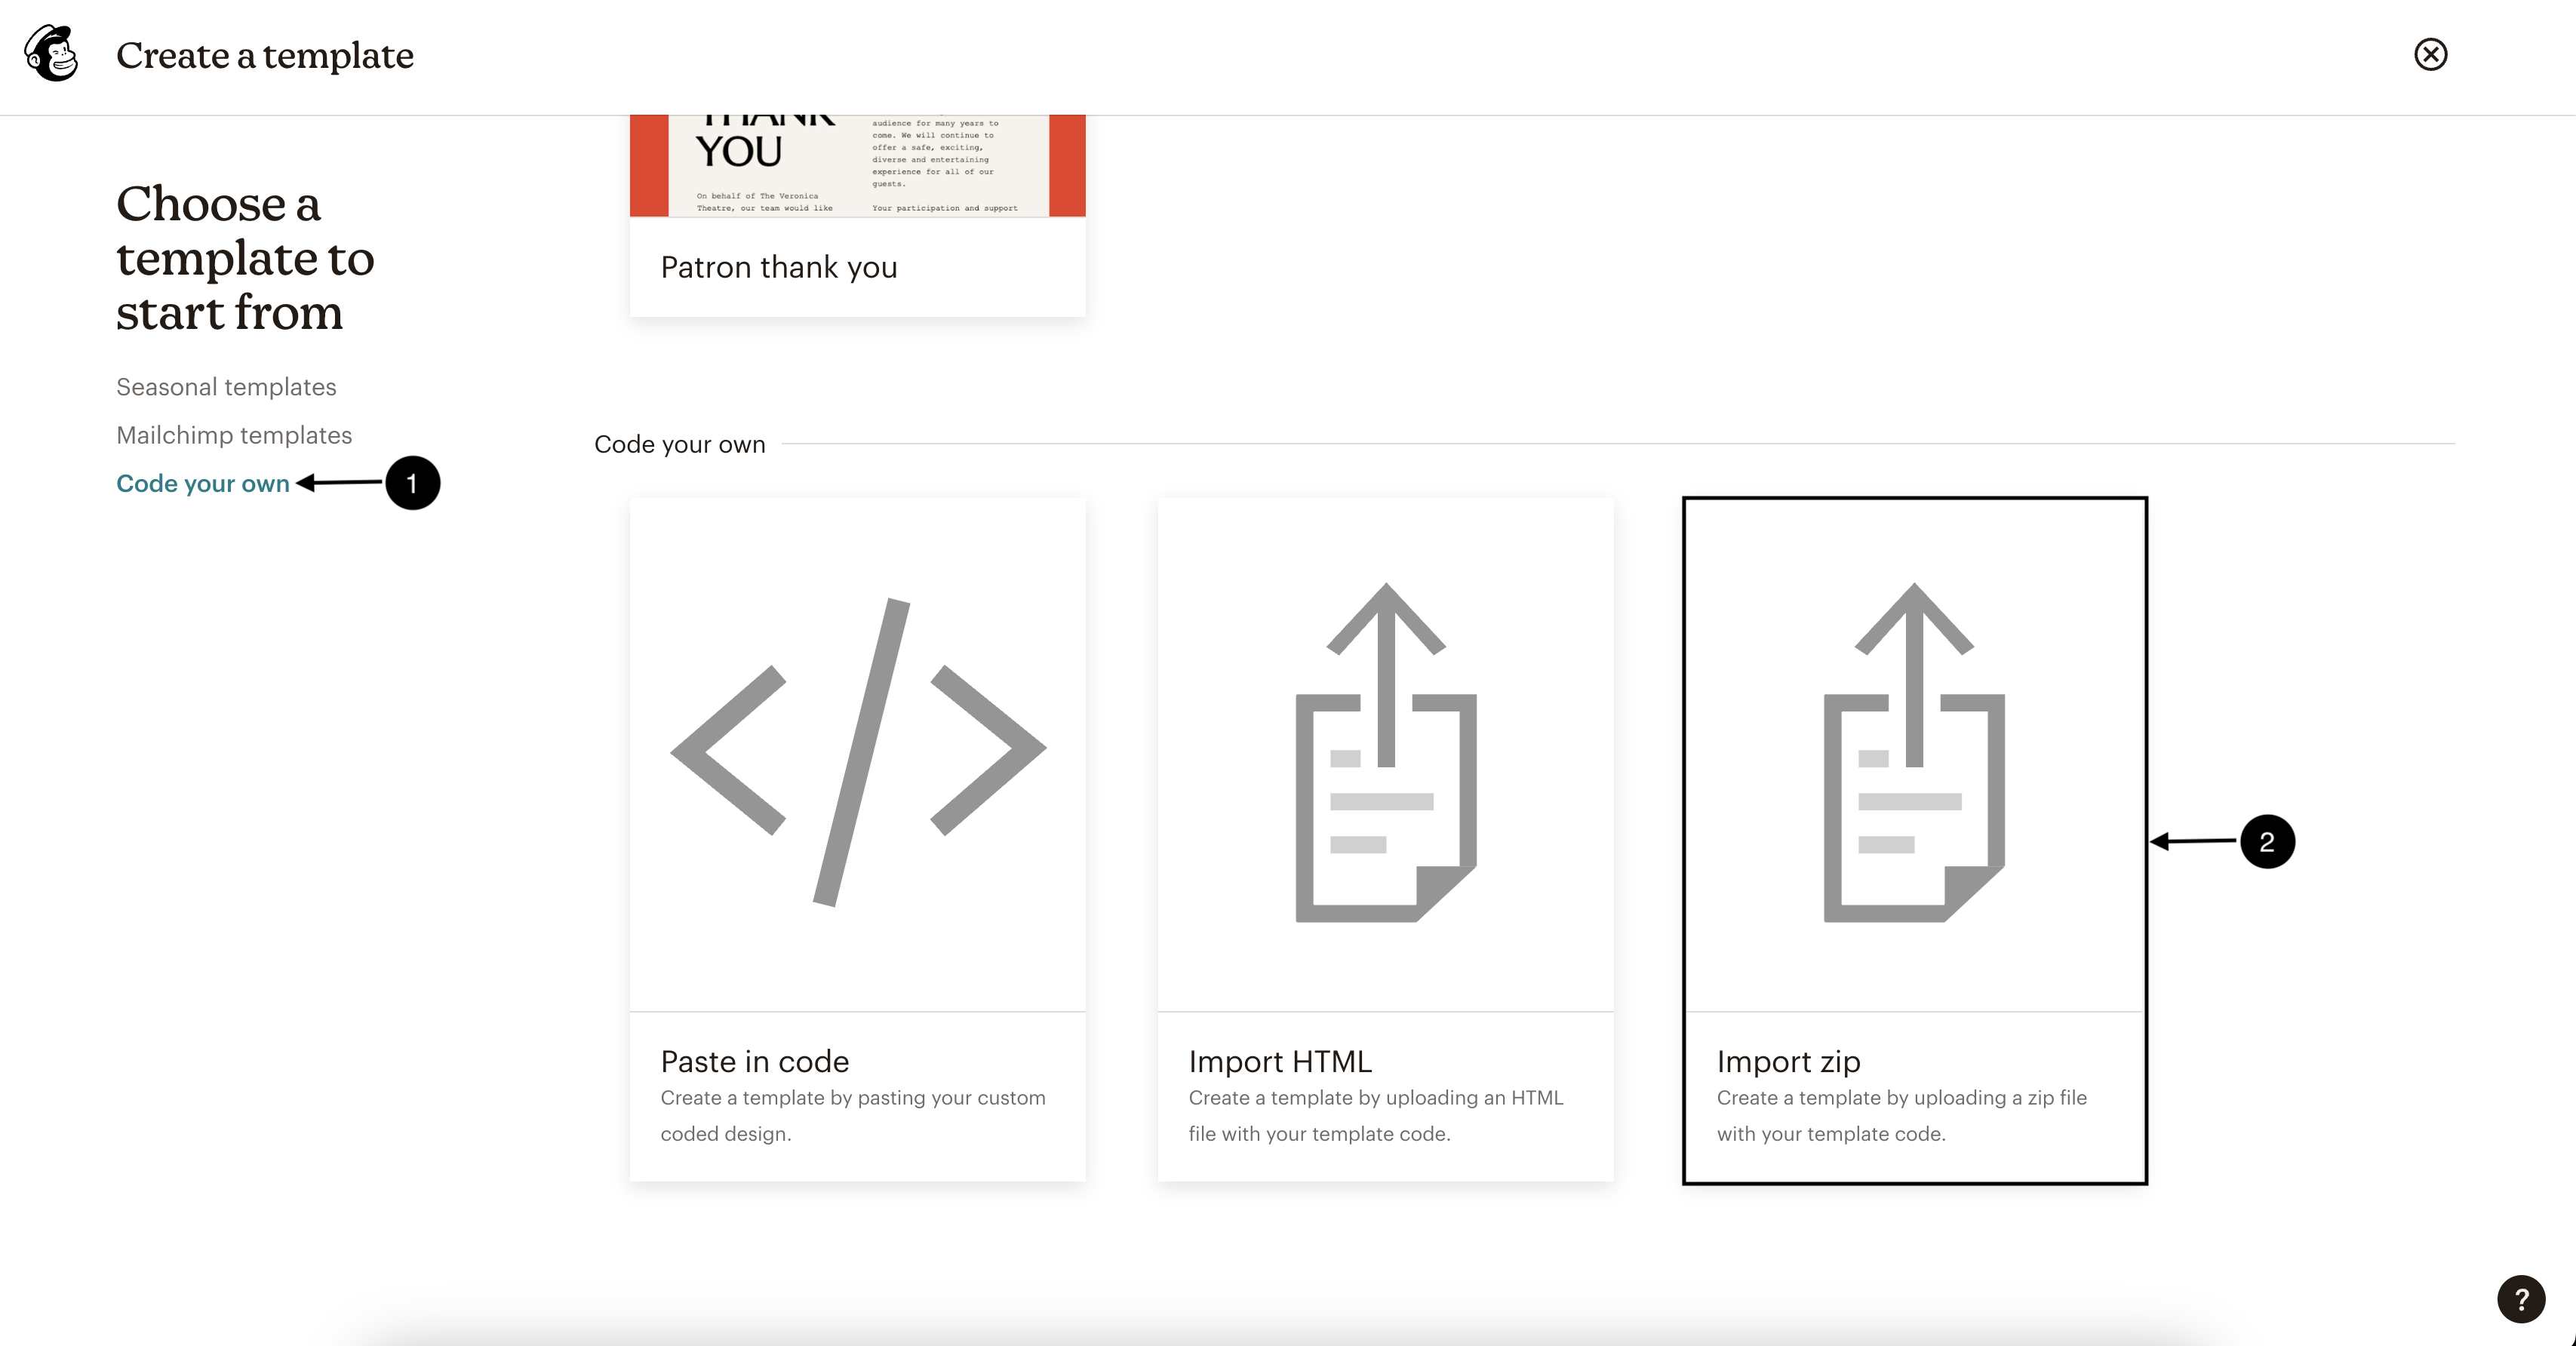
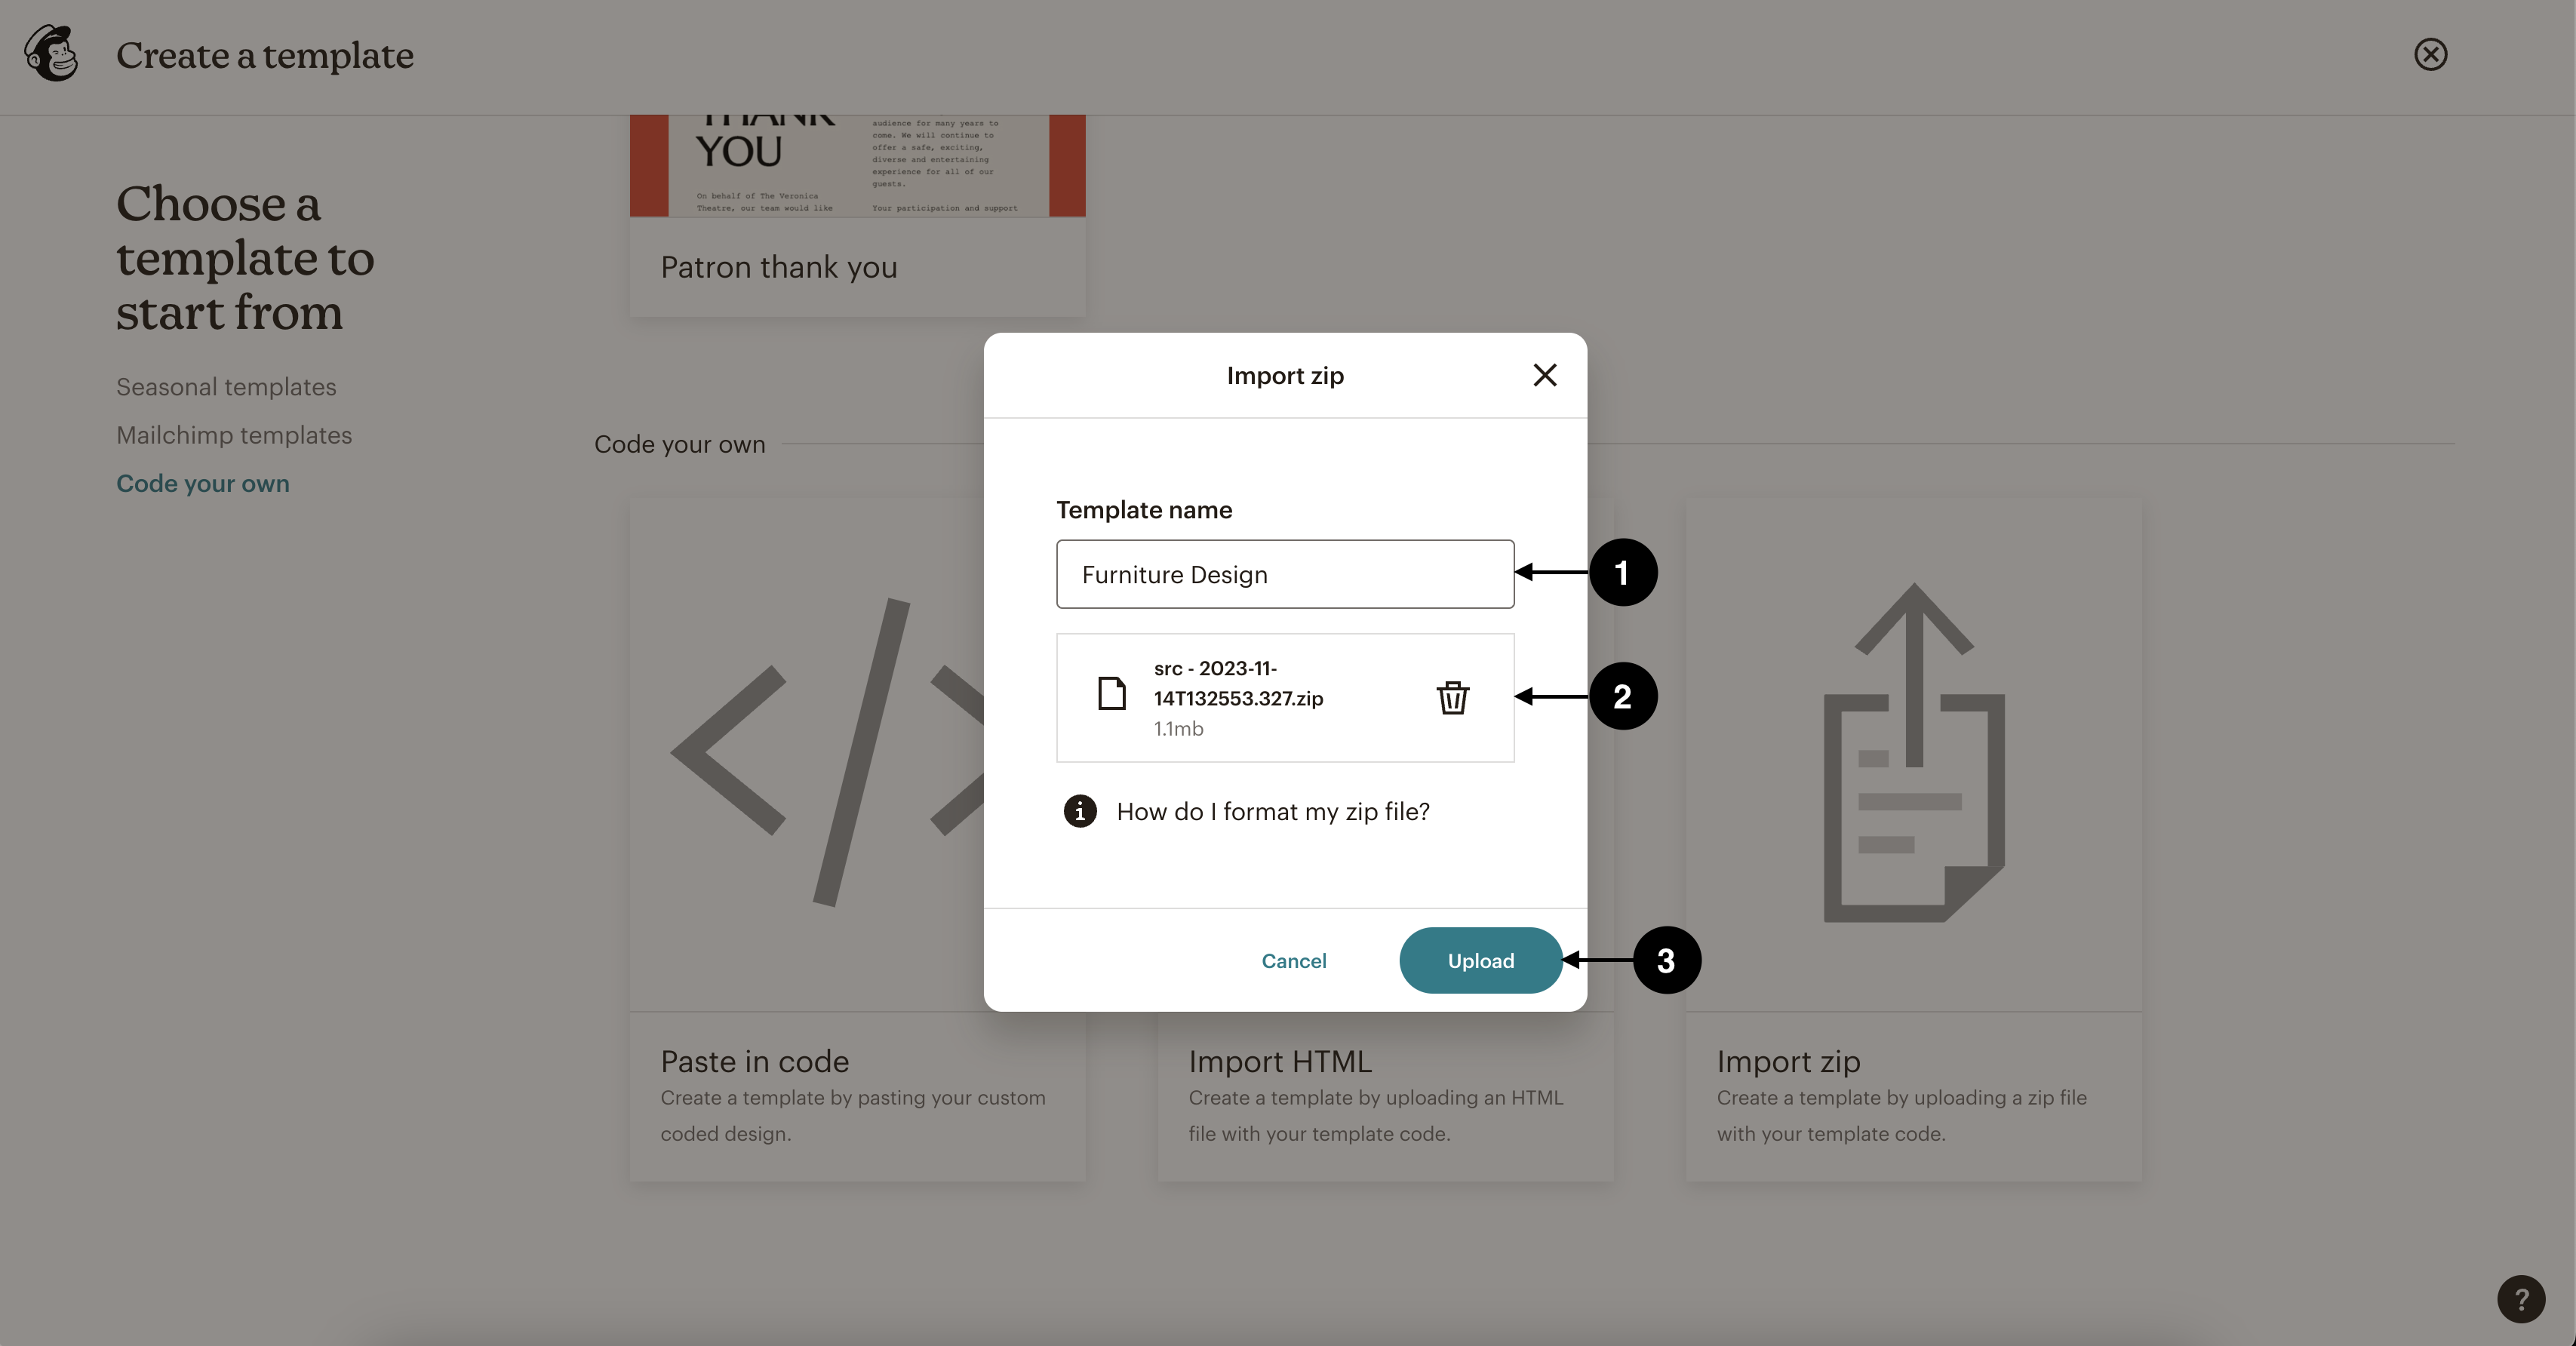
Go to Code your own and click Import zip.
-
Name your template, upload the zip file, and click Upload.
-
Save the template once it's loaded in the Mailchimp editor.
Sending the email template
- Repeat steps 1-3 of Creating a Campaign in Mailchimp section.
- Go to Saved templates and select the template you saved.
- Continue and send/schedule your email campaign.
Sending Kombai-generated HTML containing Base64 embedded images
To send the generated HTML email code through Klaviyo, you have to:
-
Copy/Download the code with Base64 embedded images from Kombai.
-
Repeat steps 1-3 of Creating a Campaign in Mailchimp.
-
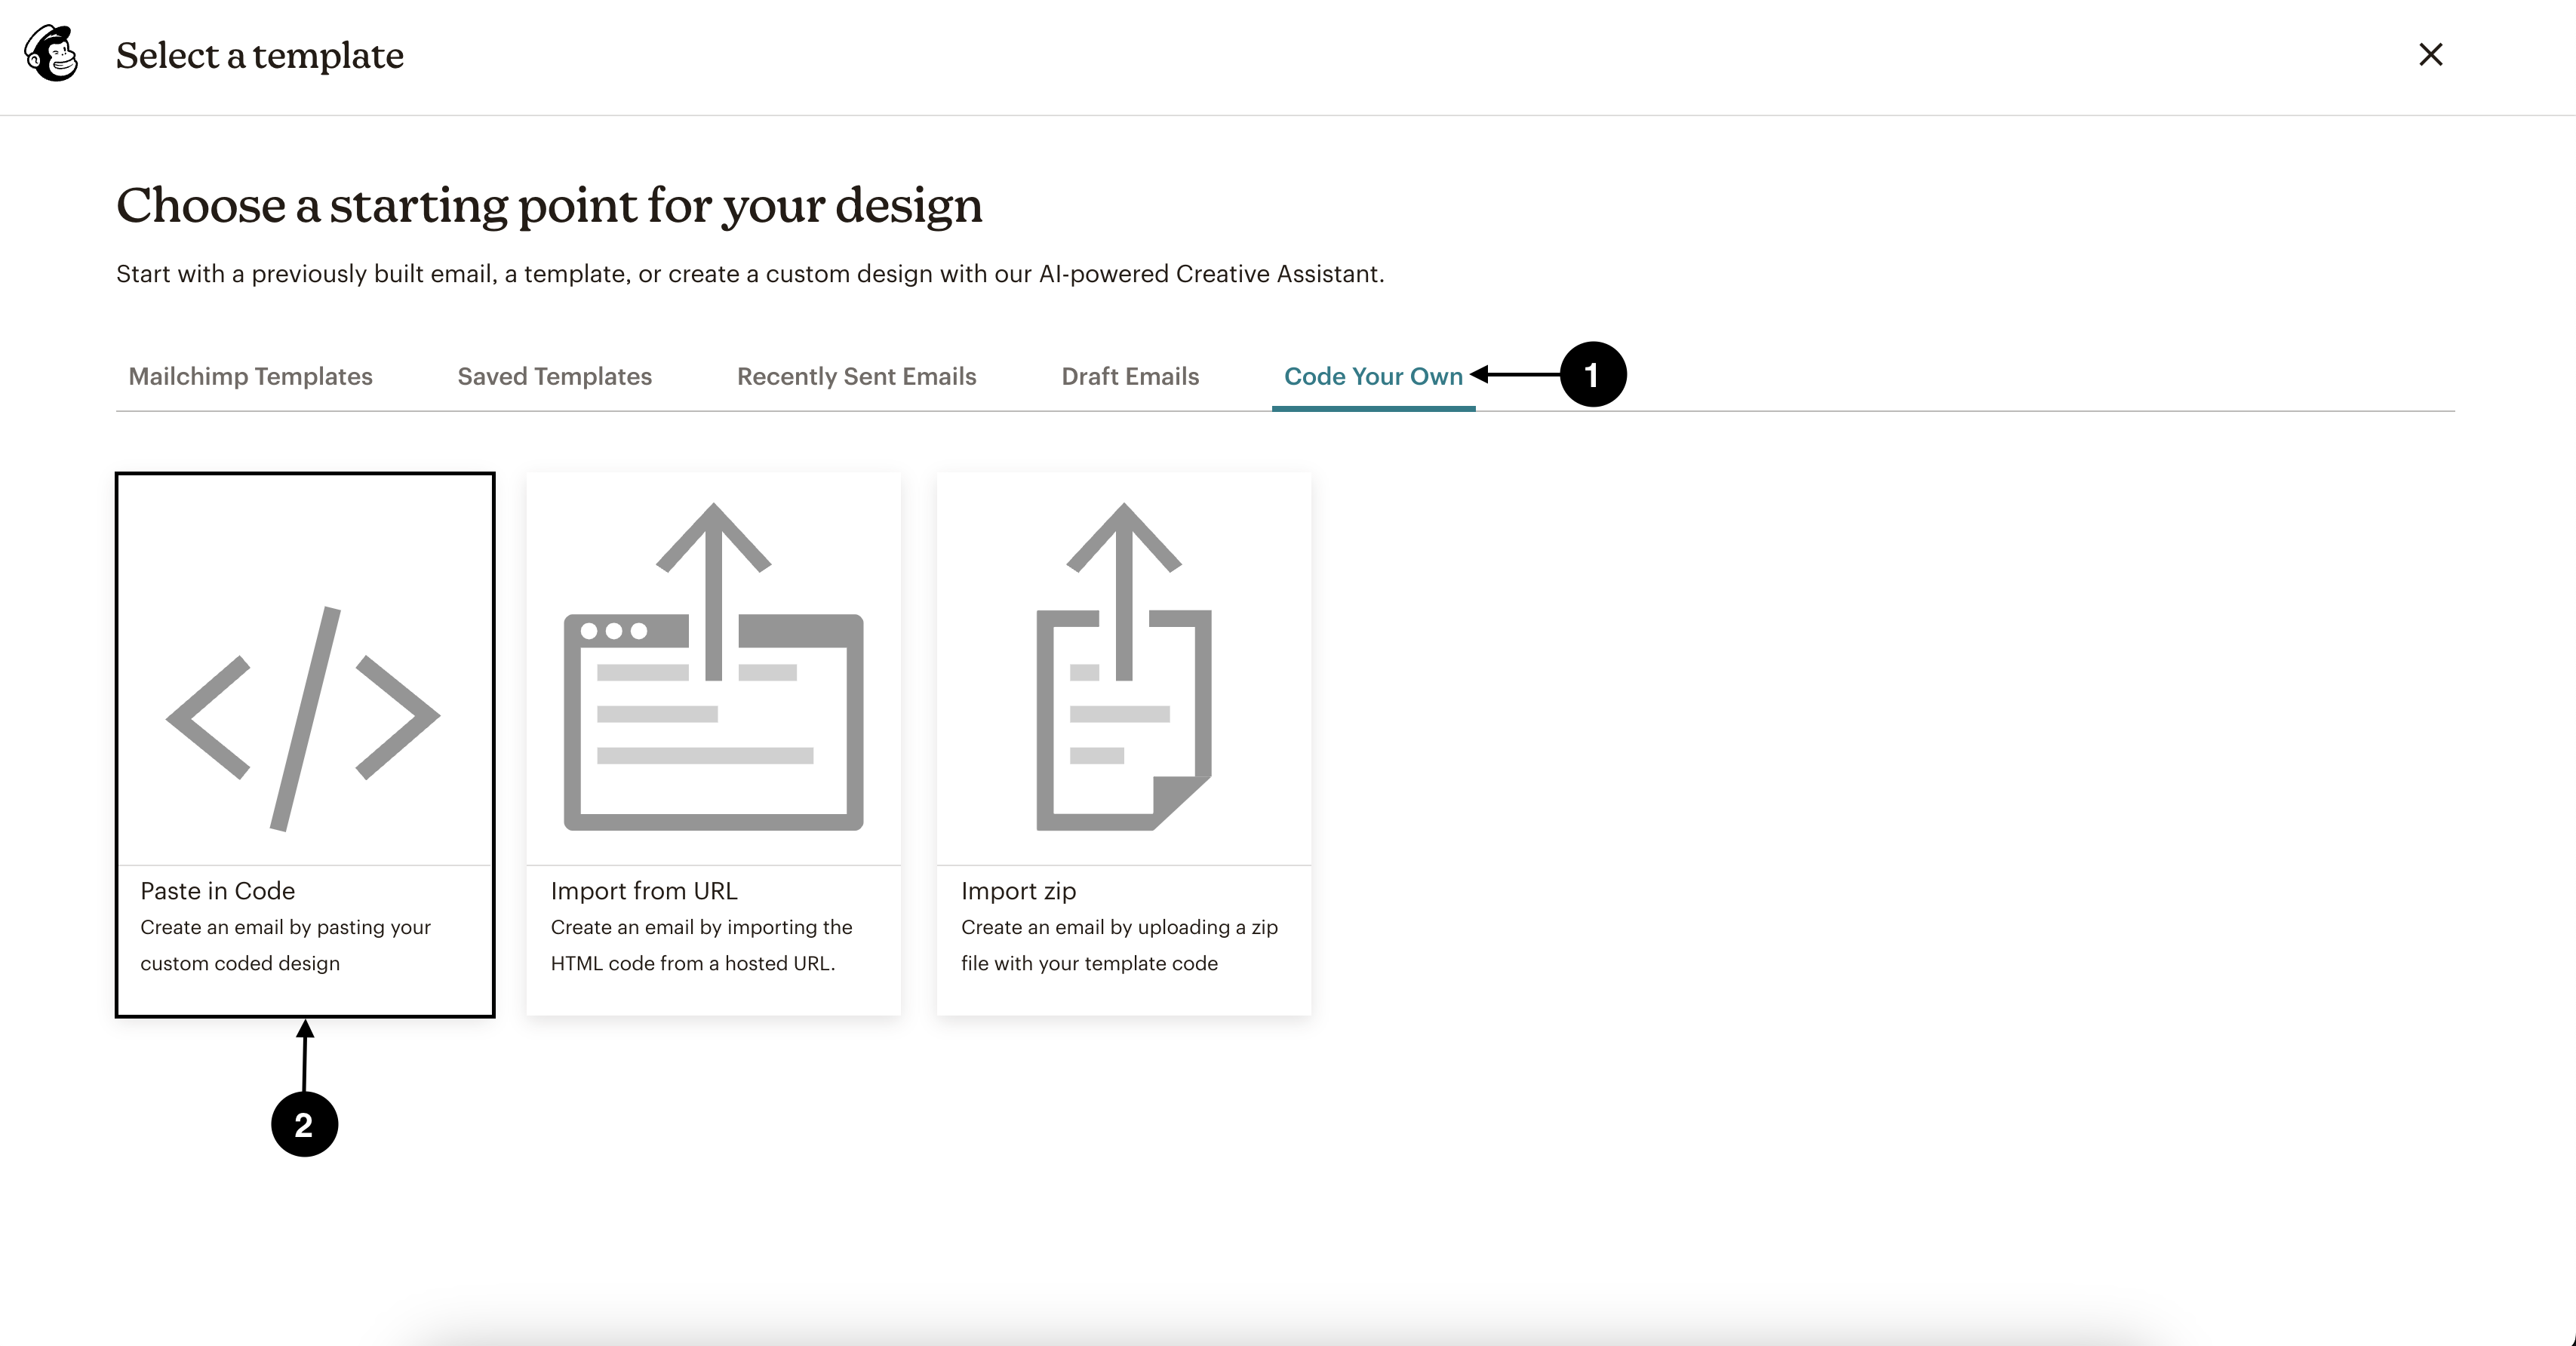
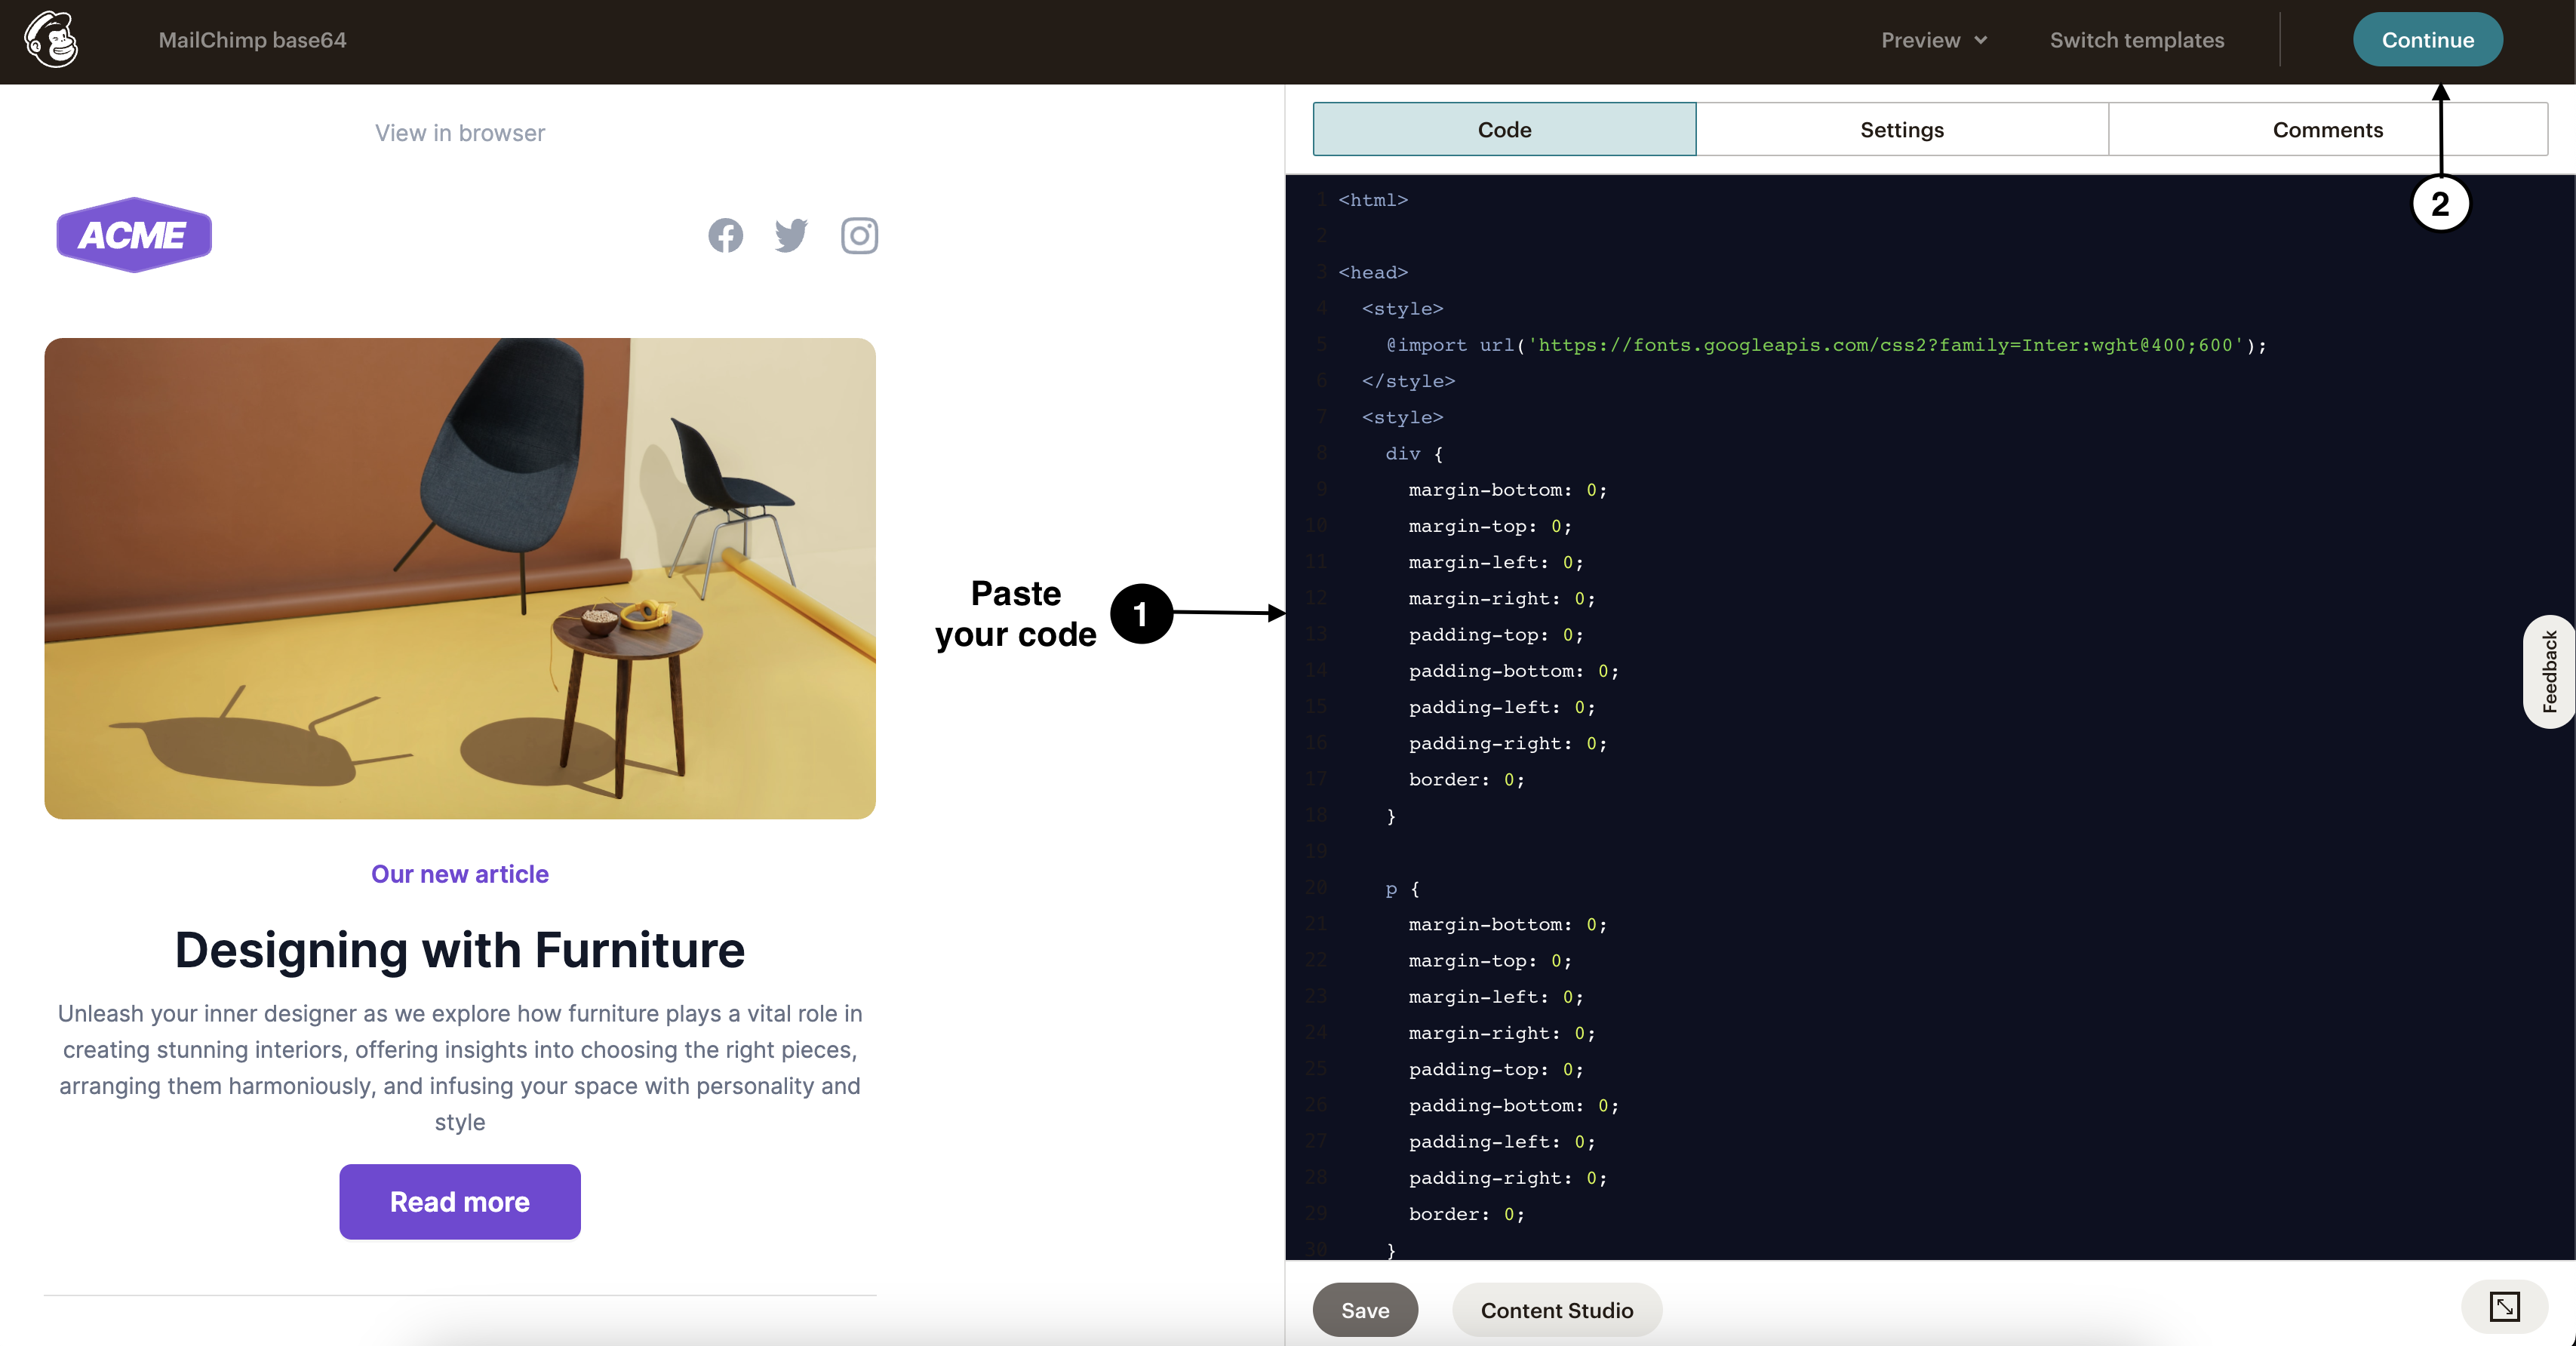
Click Code your own and select Paste in Code.
-
Paste the code inside the editor and click Continue.
-
Now, send/schedule the email.
HubSpot
Sending Kombai-generated HTML containing assets and linked images
To send the generated HTML code through HubSpot, you have to create a template and send it through a campaign. Download the code from Kombai along with external images and follow the below steps:
Creating a template in HubSpot
-
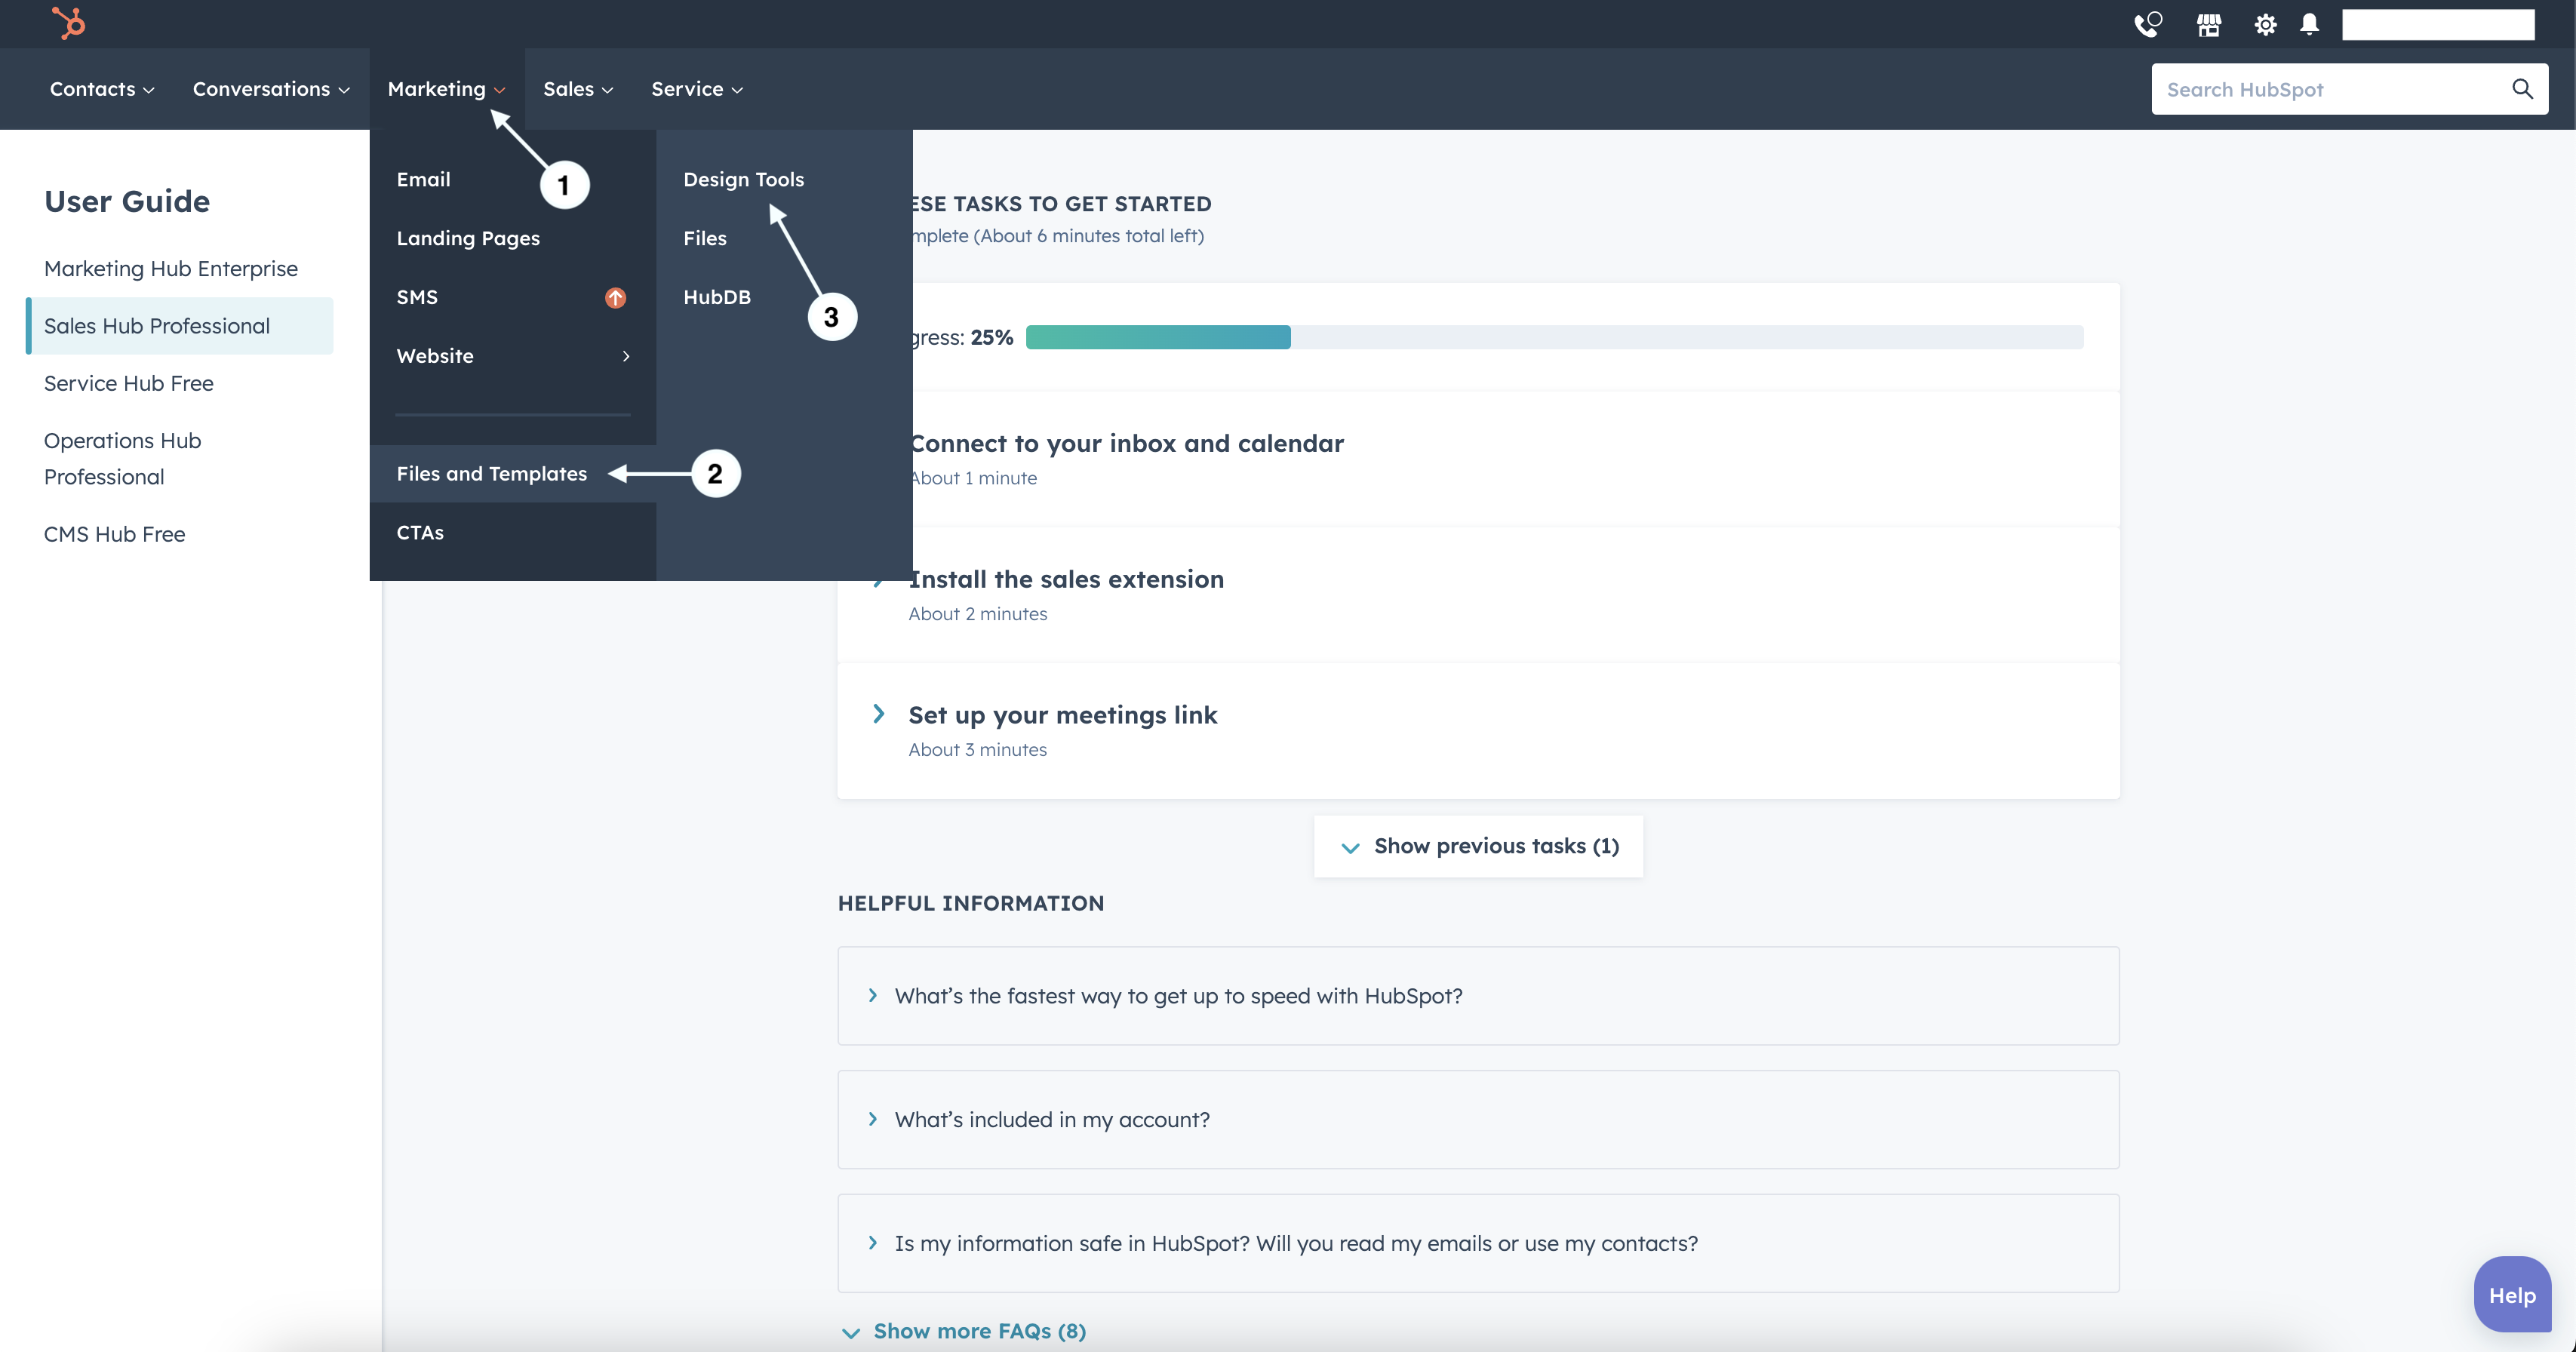
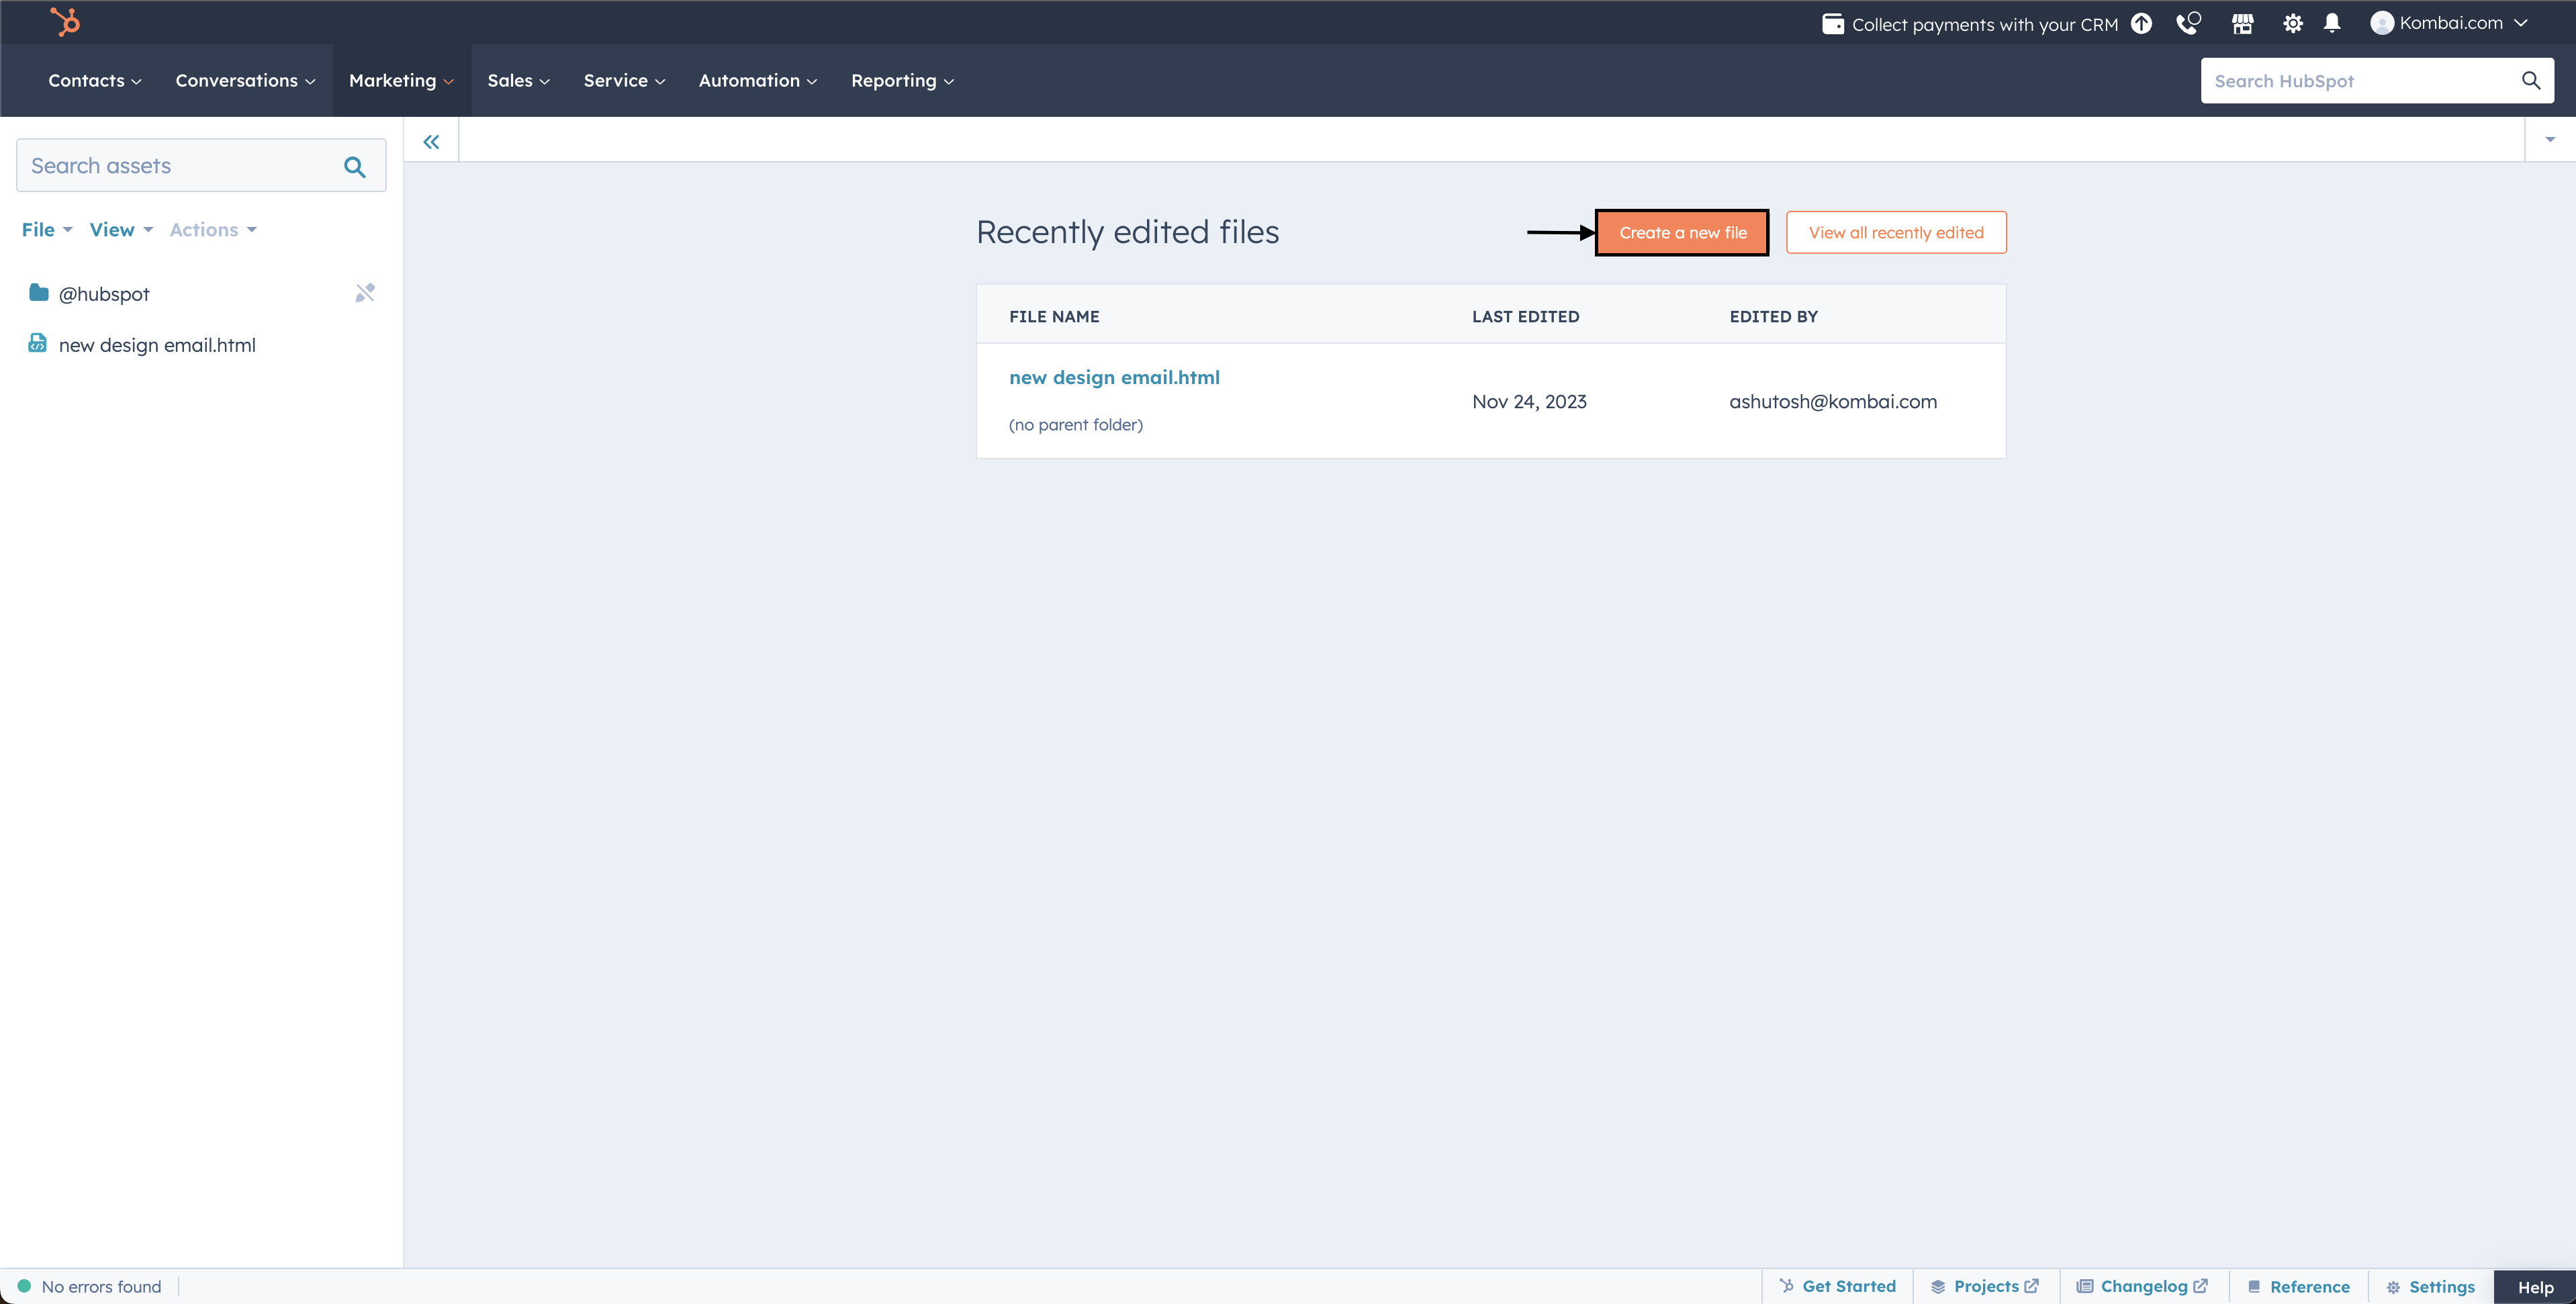
From your dashboard, go to Marketing > Files and Templates > Design Tools.
-
Click Create a new file.
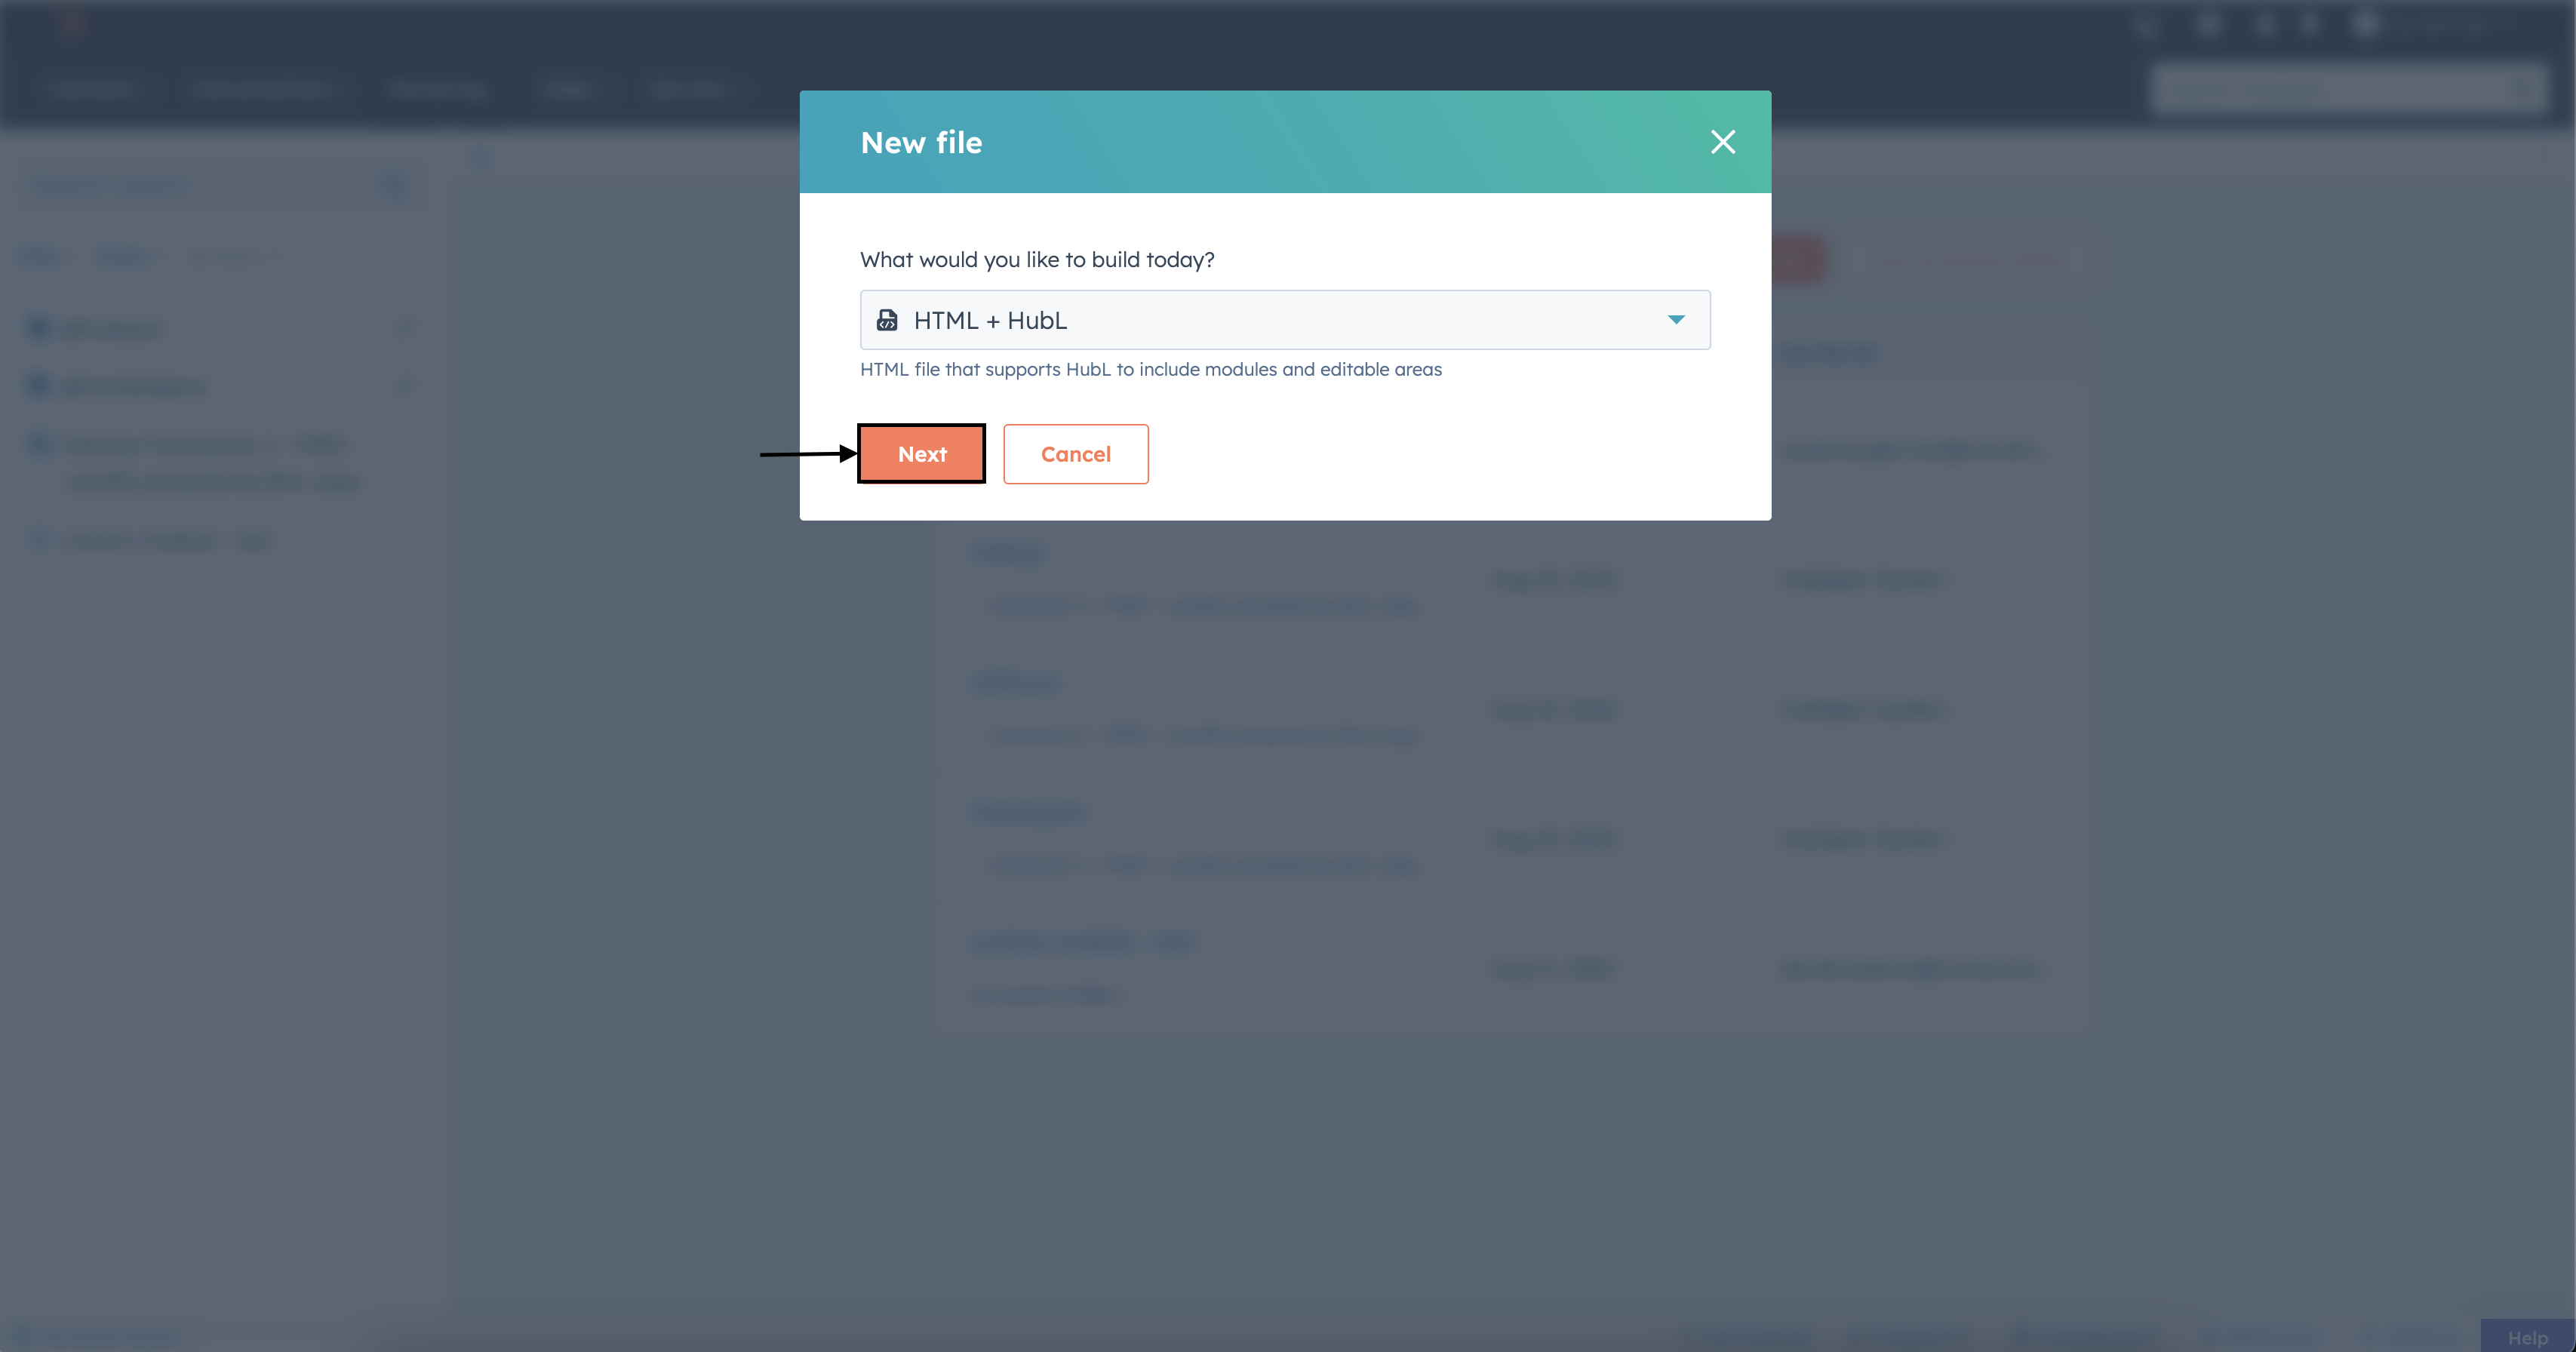
-
In the new popup, select HTML + HubL from the dropdown and click Next.
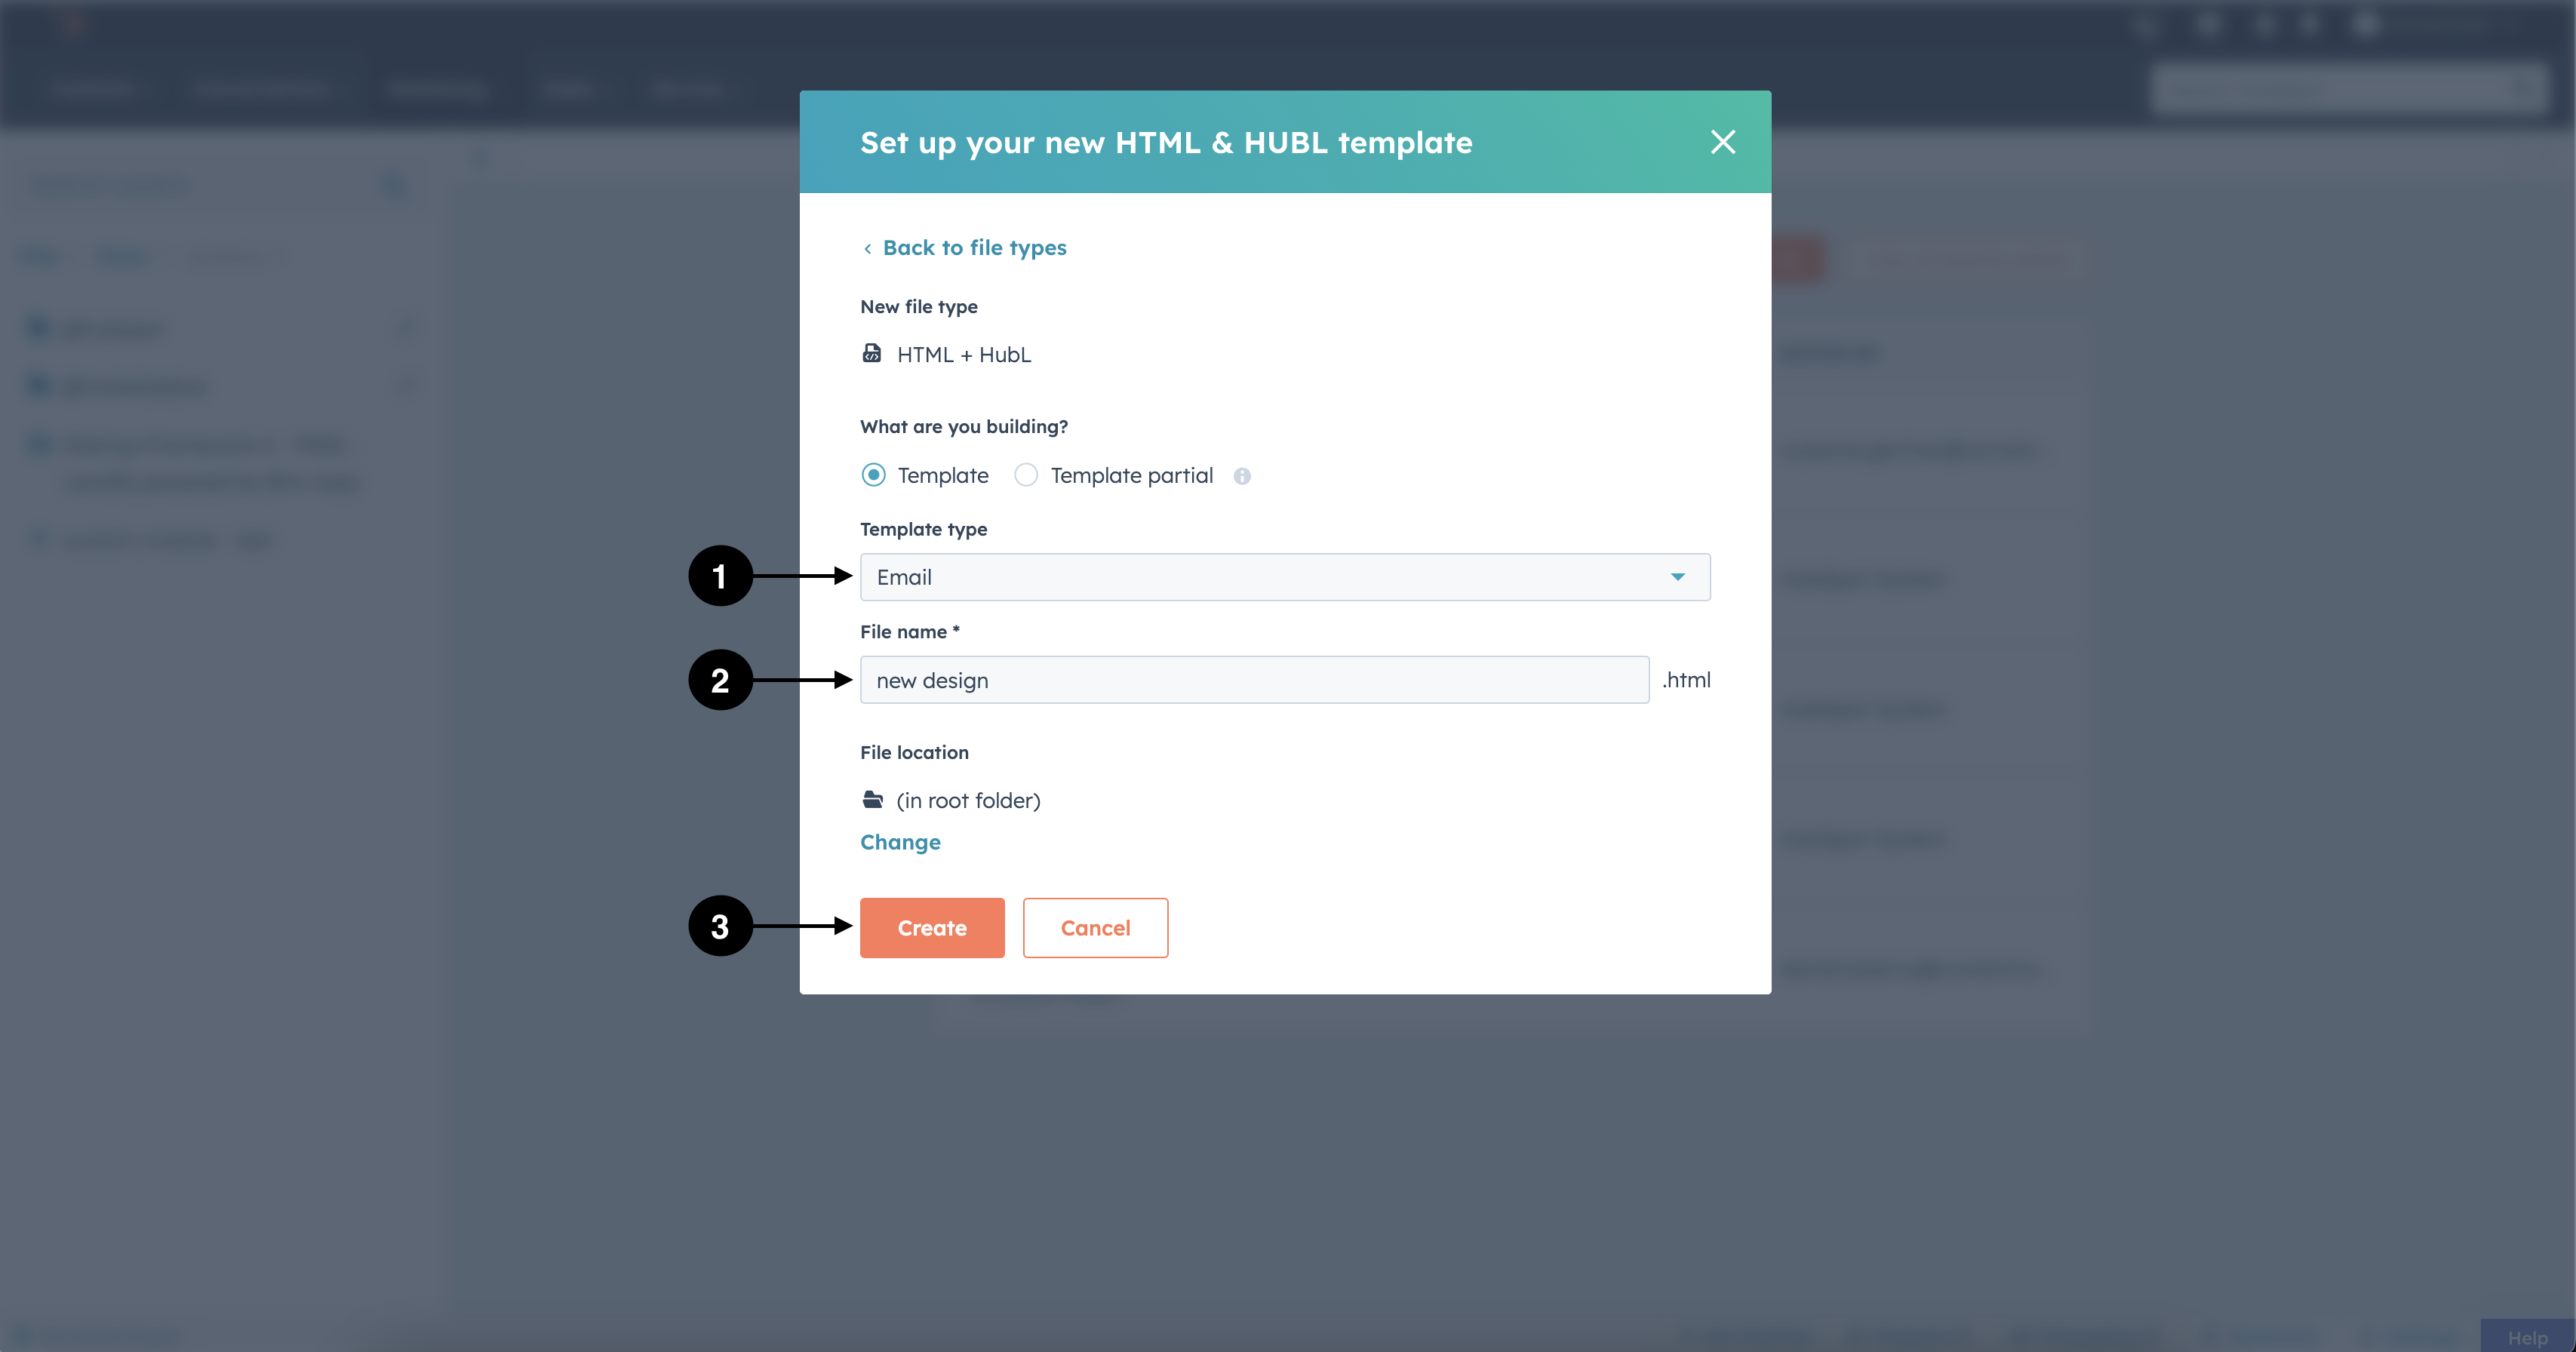
-
Select Email in Template type, name your file, and click Create.
-
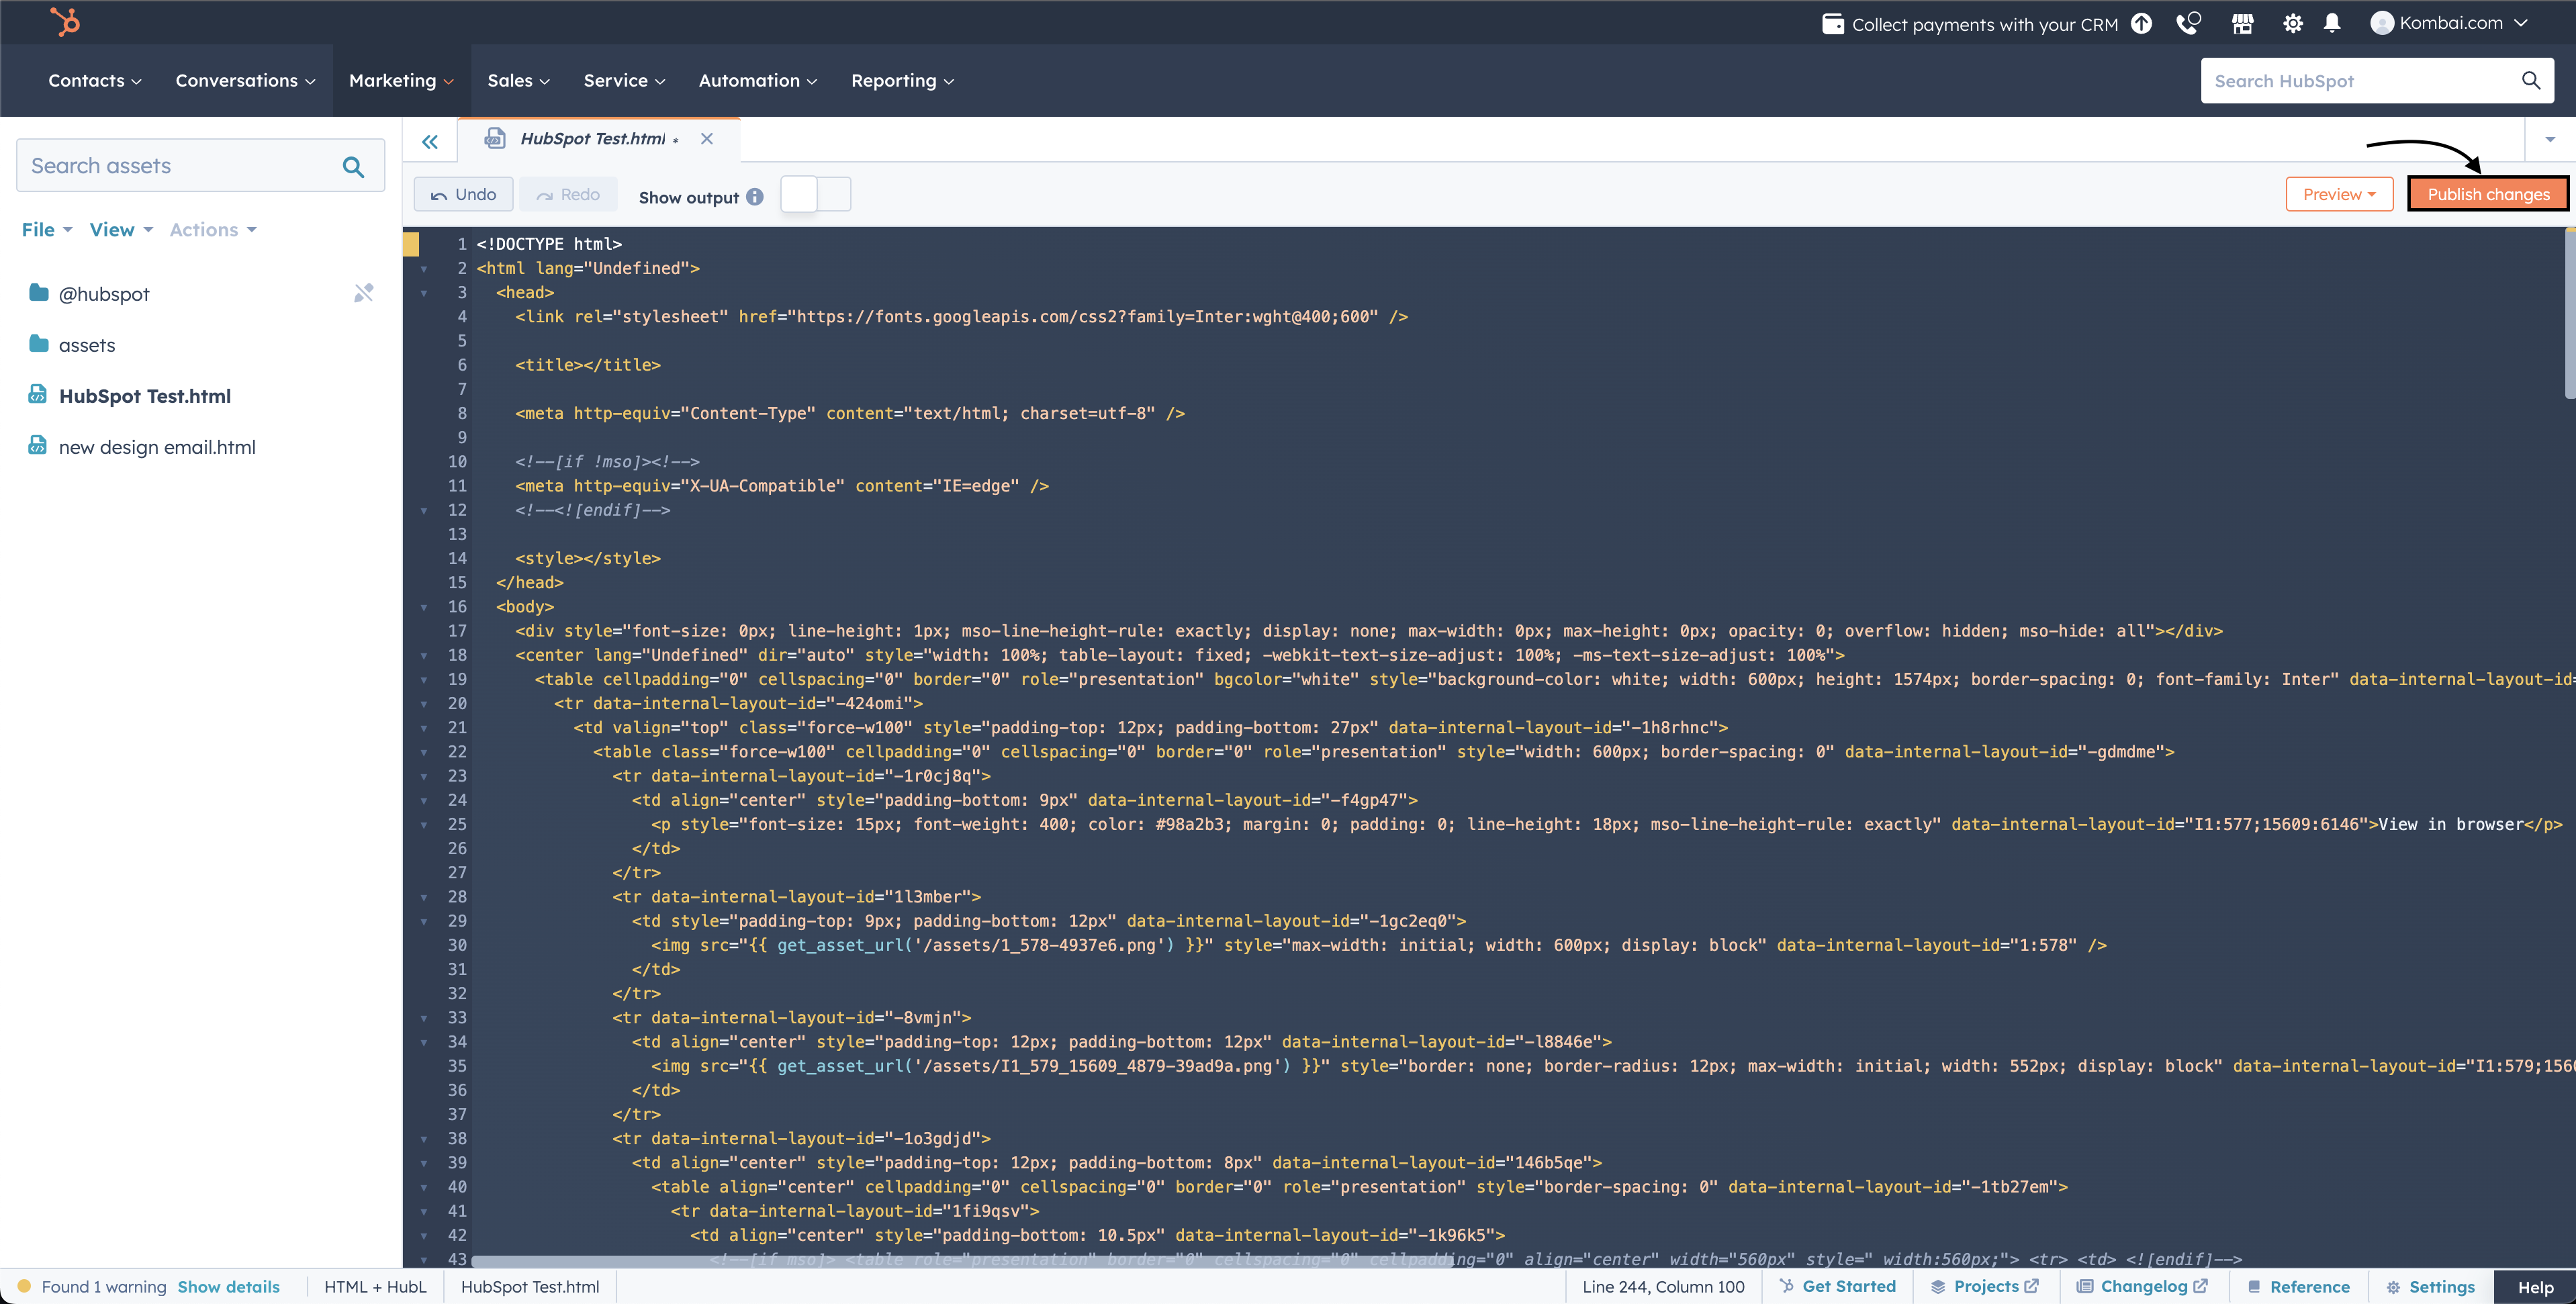
Replace the existing HubSpot code with the Kombai-generated code.
Note: HubSpot requires you to have these variables in the code to be CAN-SPAM compliant: {{ site_settings.company_name }}, {{ site_settings.company_street_address_1 }}, {{ site_settings.company_state }}, {{ site_settings.company_city }}, {{ unsubscribe_link }}. If your design has a dedicated footer, place these variables accordingly in your code. Otherwise, just paste them before the close </body> tag(see the below example).
- Create a new assets folder and upload the design images to it(see the example below).
- Replace the source of each image with the public URL HubSpot provides(see the example below).
Note: HubSpot does not provide any way to automatically replace the image links with their URLs. So, you have to manually replace the source of each image(as shown in the recording above).
- Once all the image sources are replaced, click Publish changes.
Creating an Email campaign in HubSpot
- In the top menubar, go to Marketing > Email.
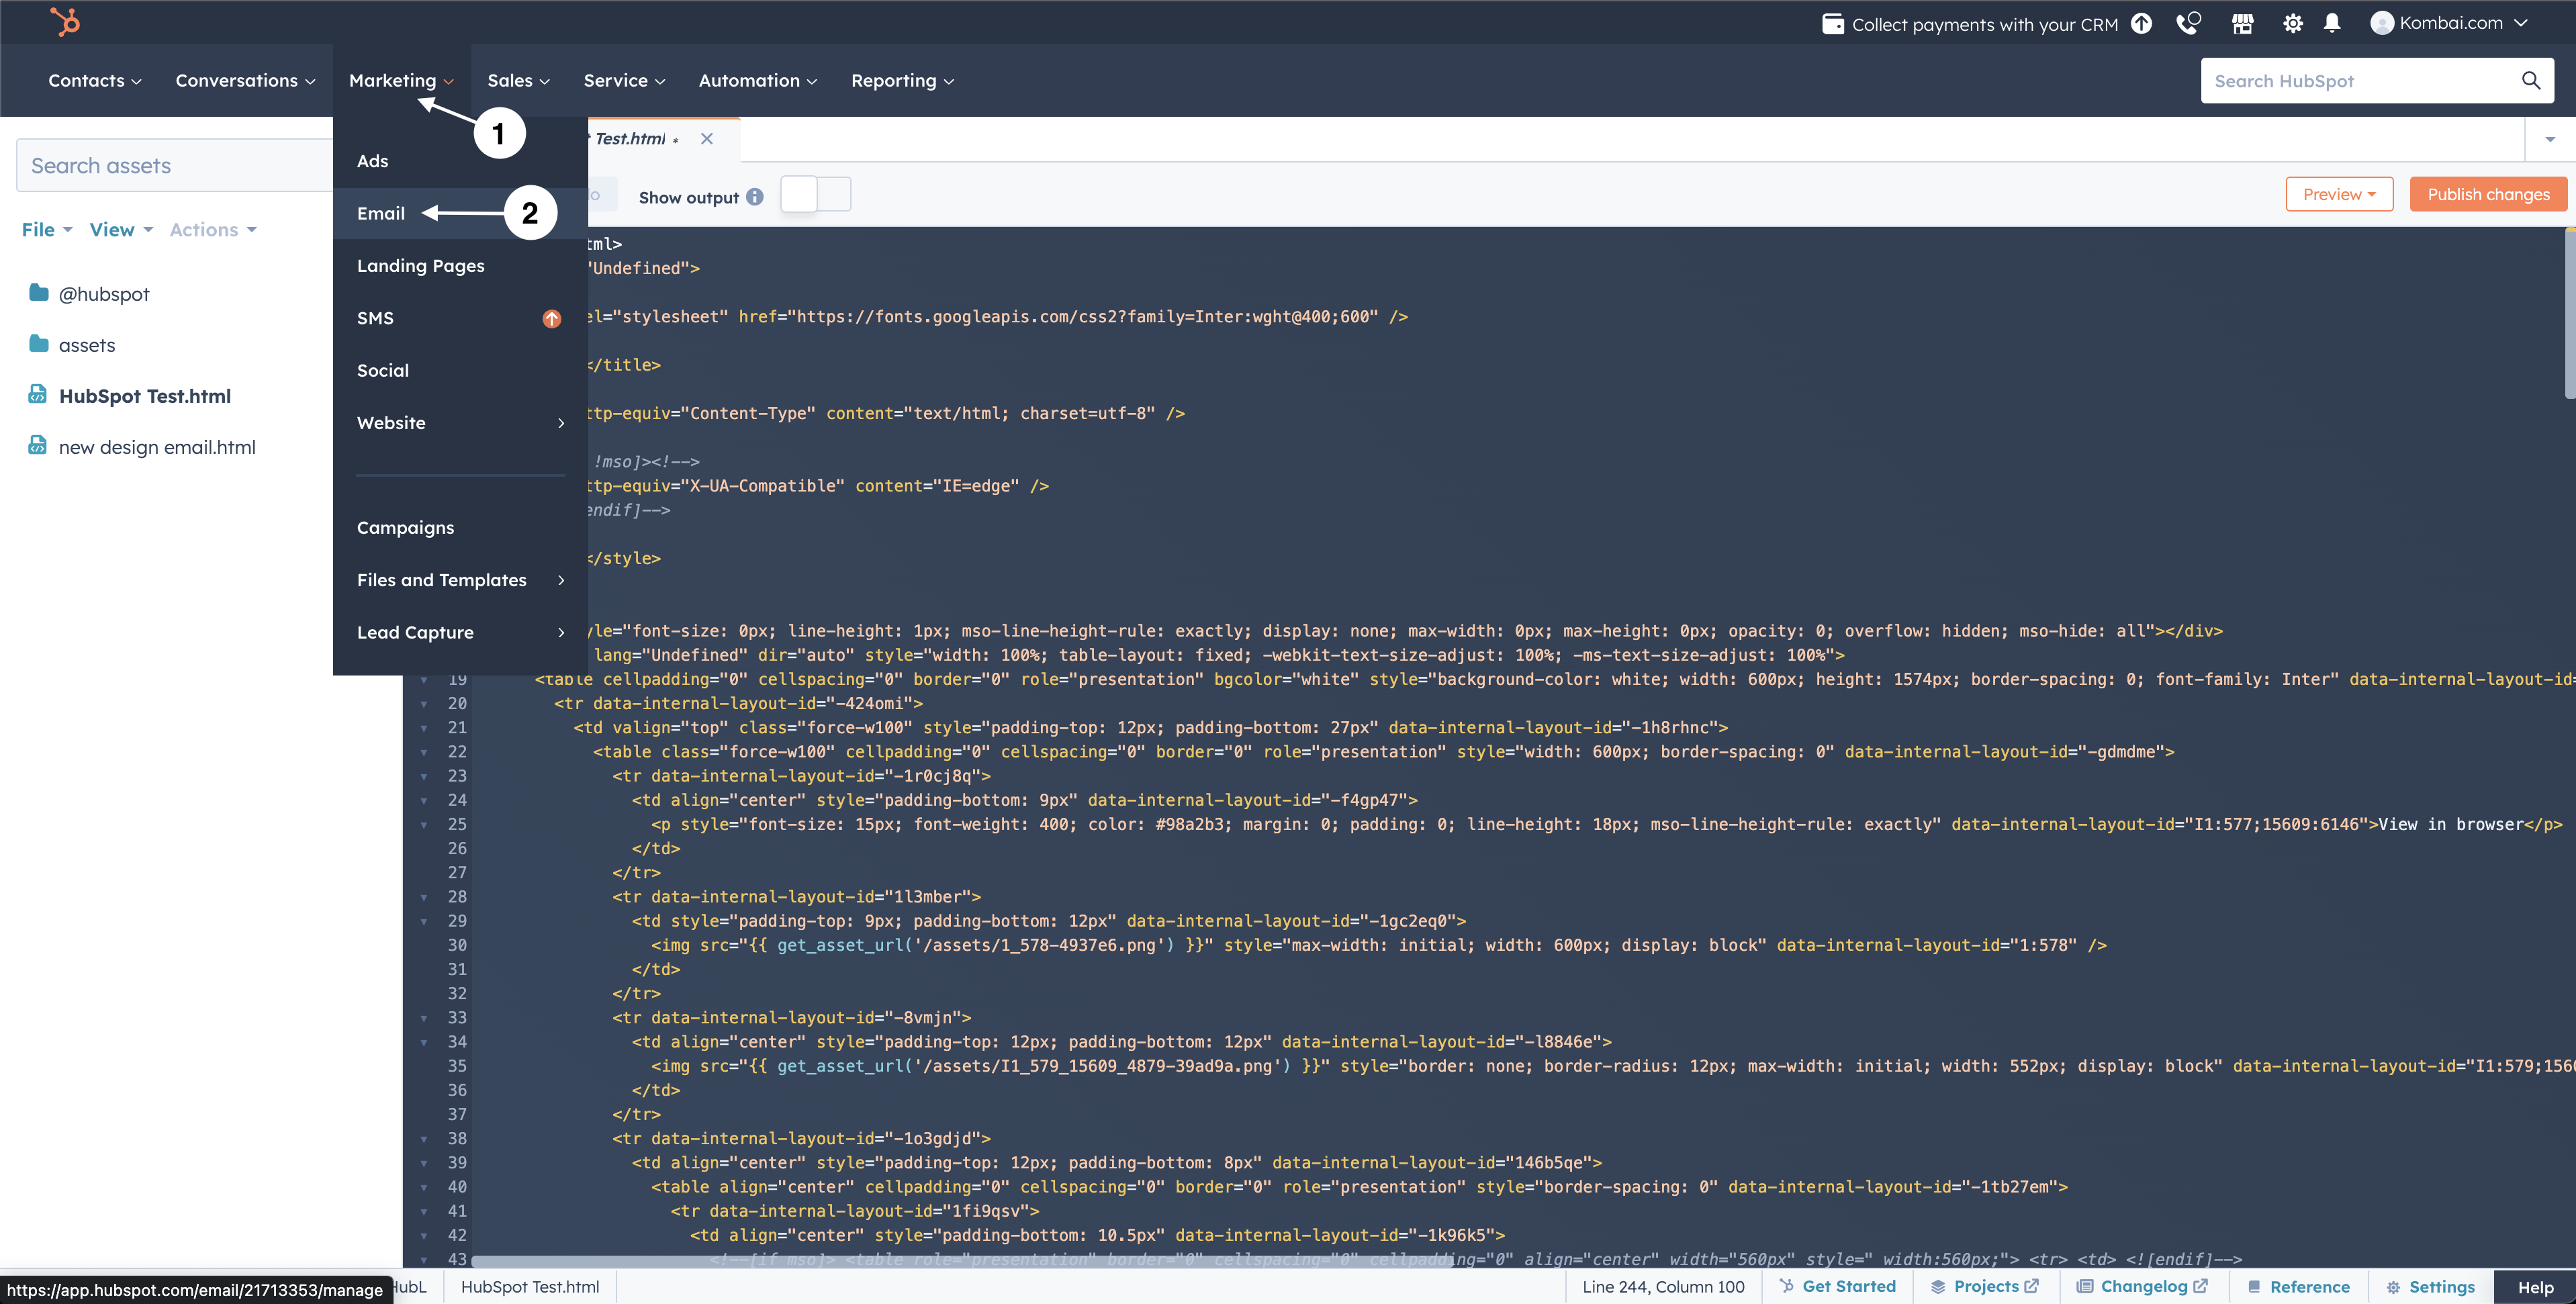
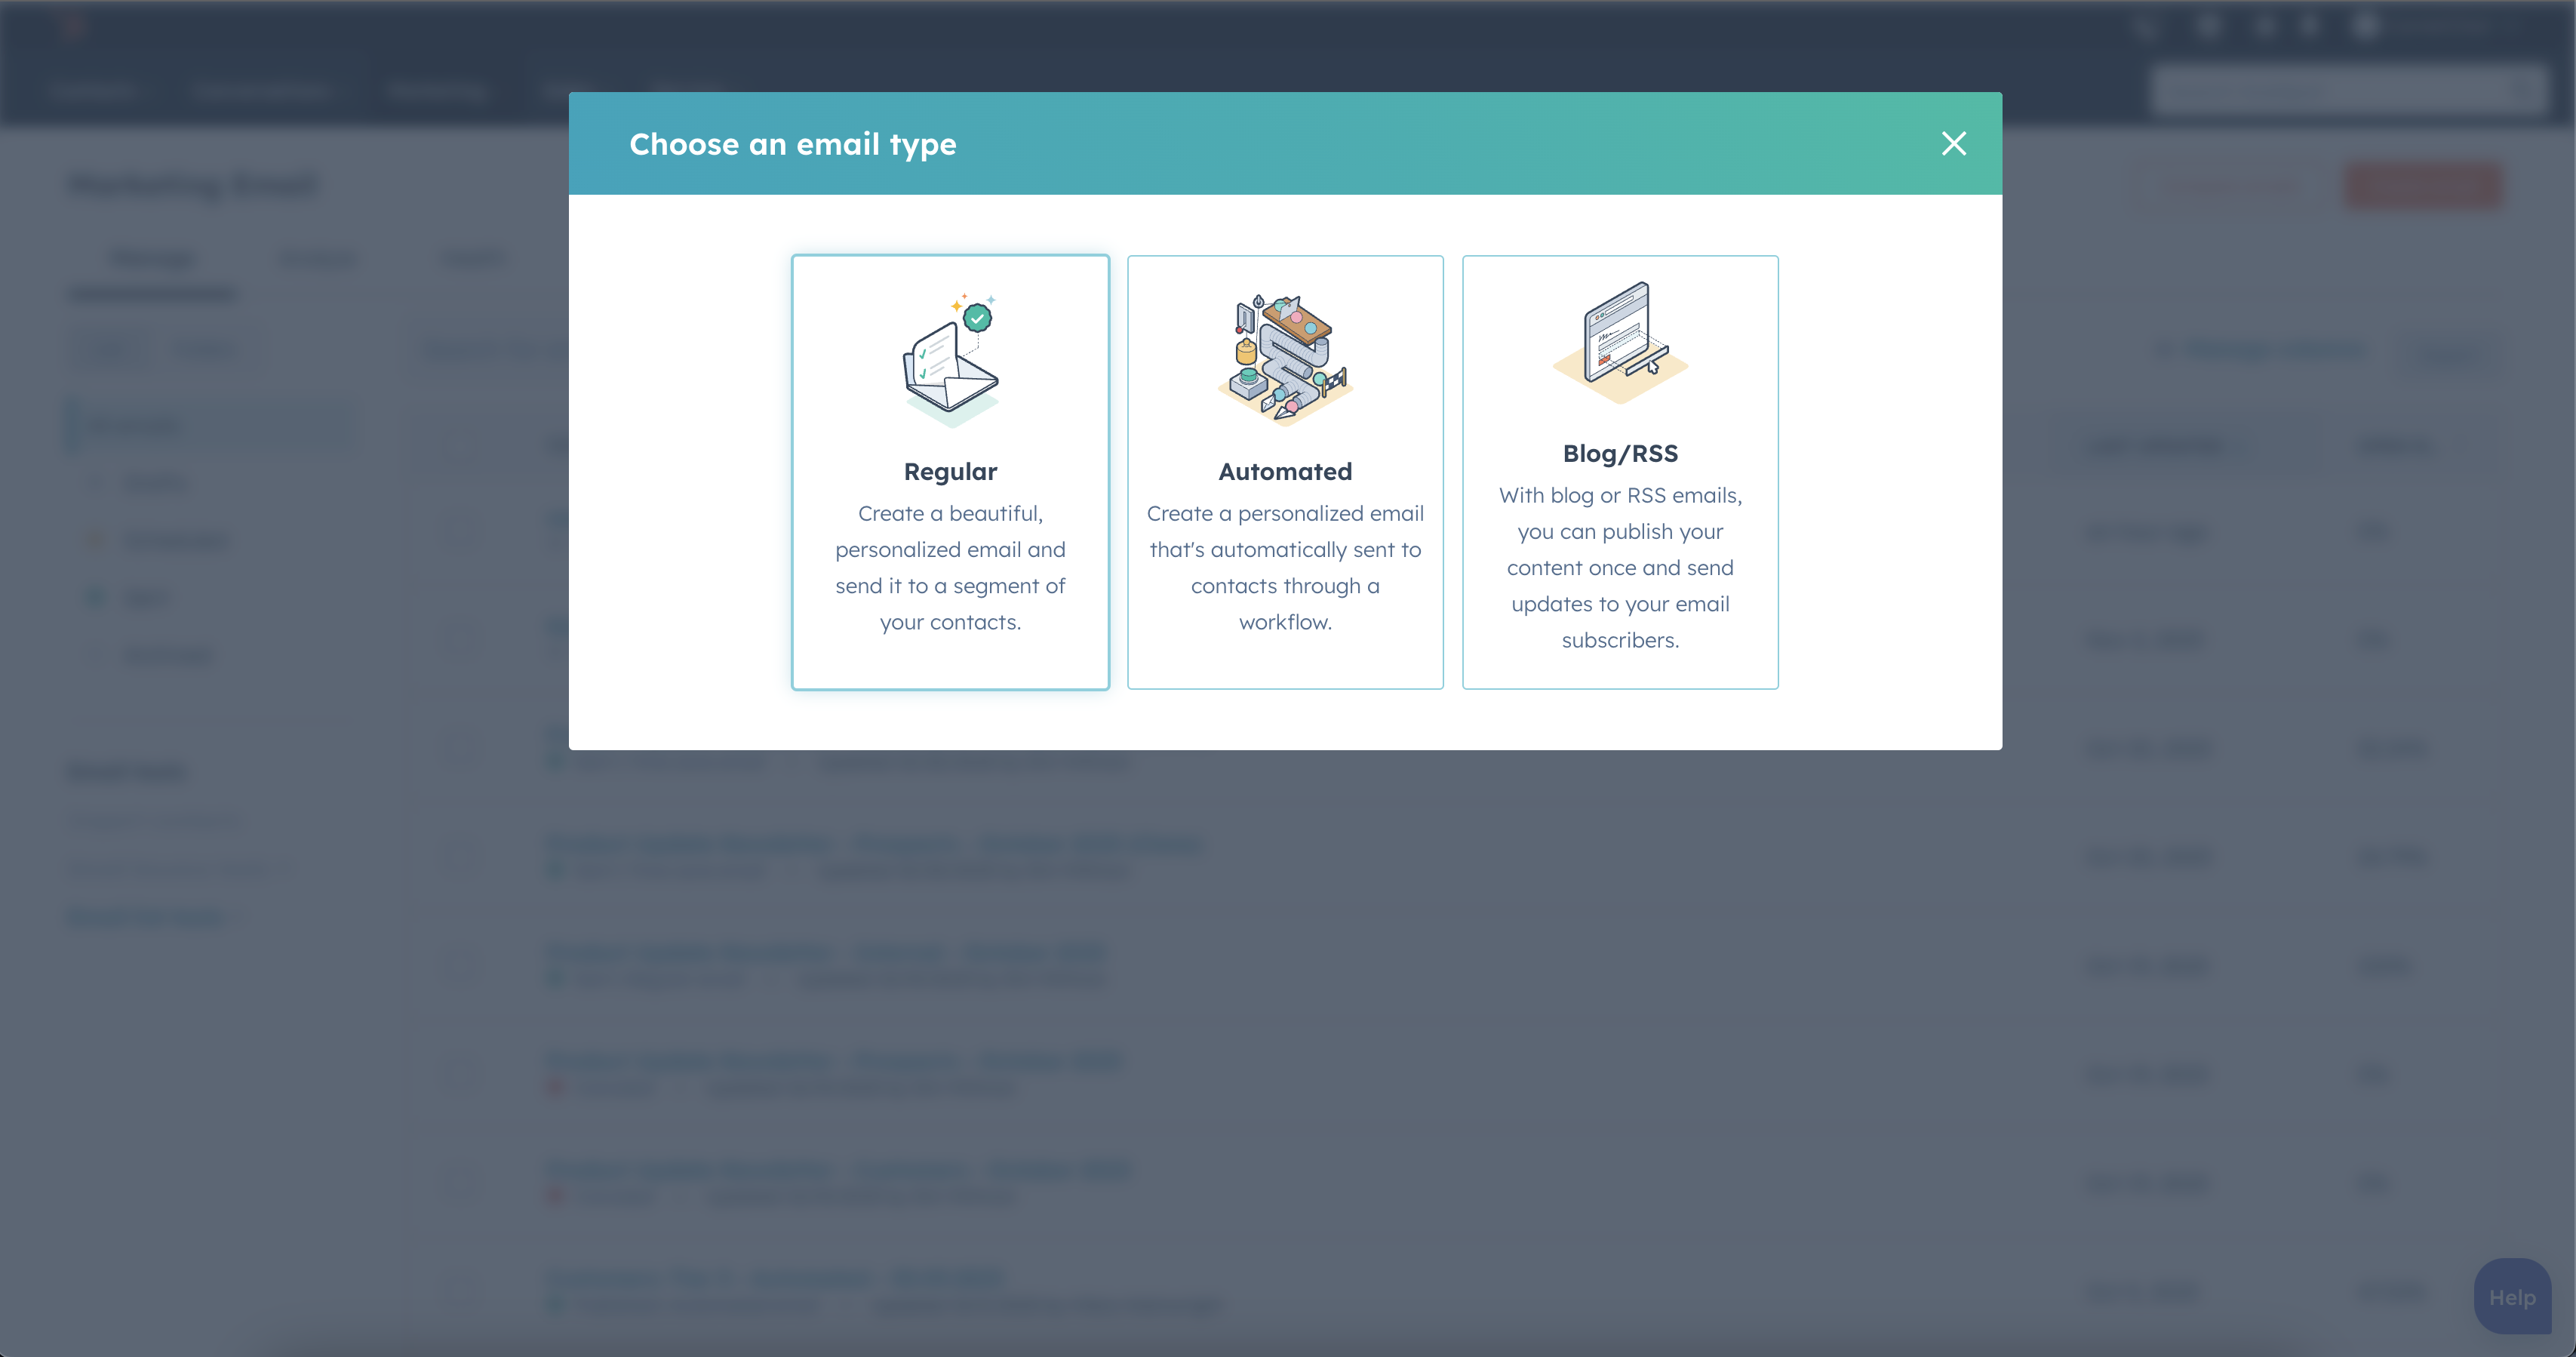
- Click Create email.

- Select Regular.
- Go to Custom and select your template.
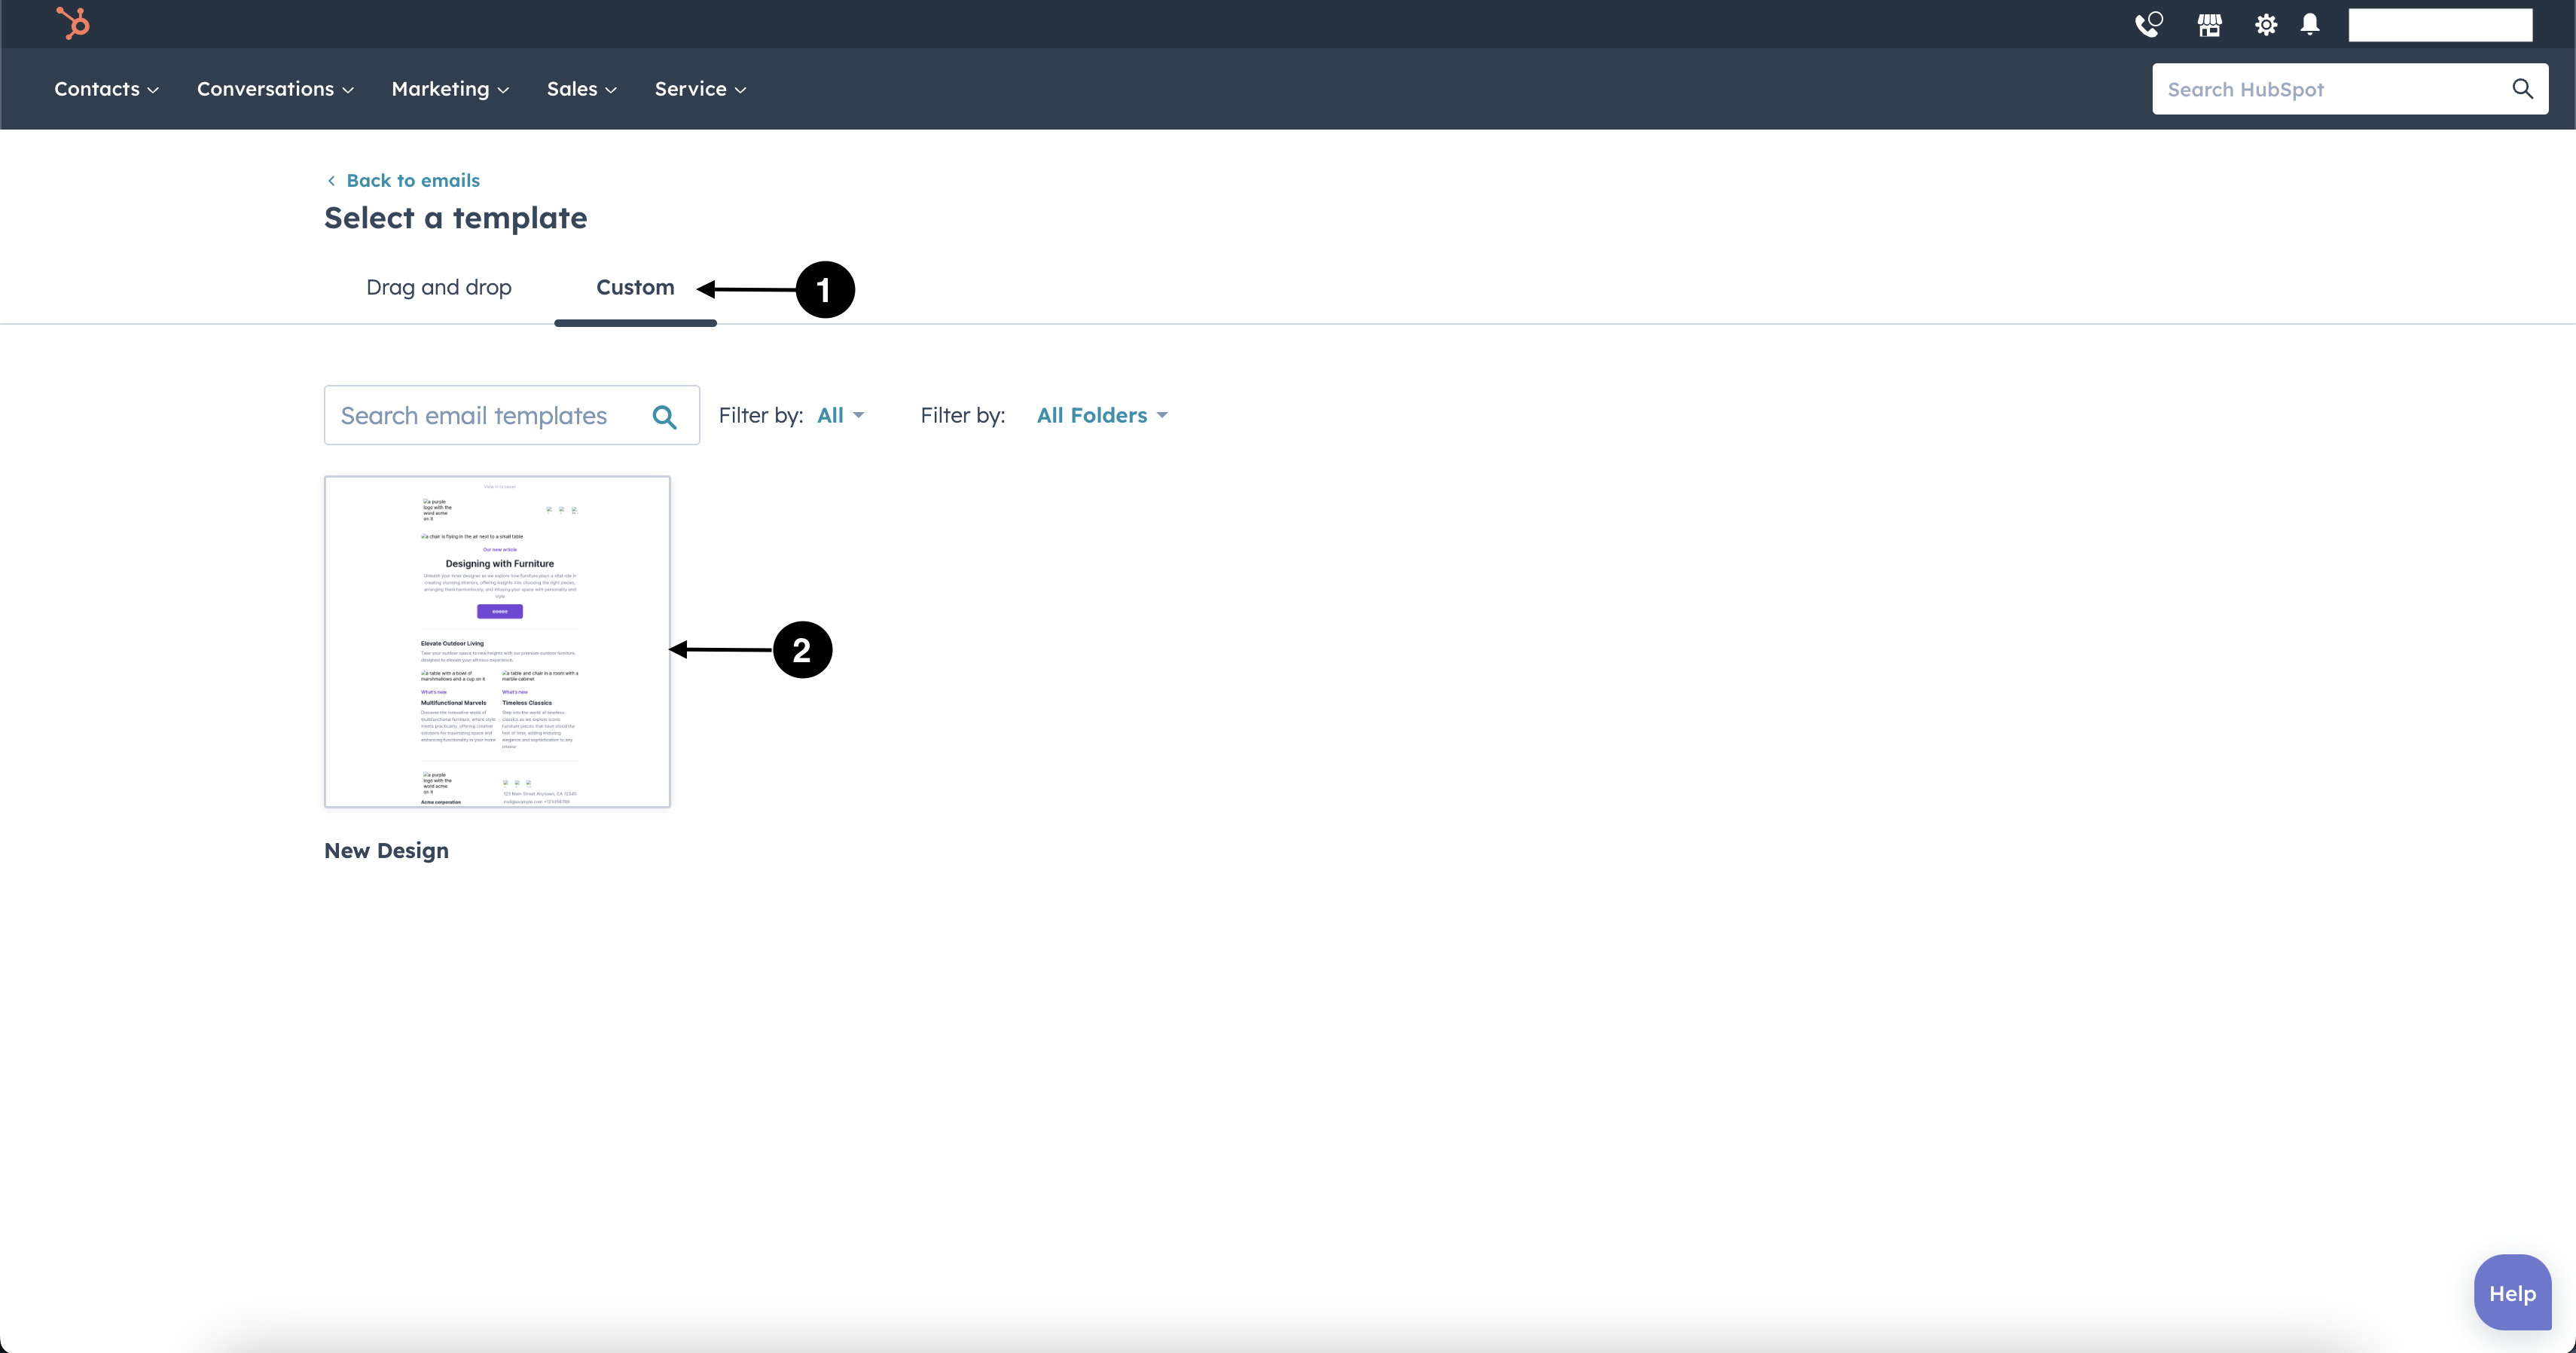
- Fill all email-related info(sender details, recipients, etc.) and send the email.
Sending Kombai-generated HTML containing Base64 embedded images
To send the generated HTML code through Mailjet, you have to:
- Copy/Download the code from Kombai with Base64 embedded images.
- Repeat steps 1 to 5 of Creating a template in HubSpot and publish your template.
- Repeat steps 1 to 5 of Creating a campaign in HubSpot.
Constant Contact
Sending Kombai-generated HTML containing assets and linked images
Constant Contact does not support direct upload of zip file for images. So you have to upload the HTML code in the editor, upload the images in the library, and replace them manually in the code:
Creating a campaign in Constant Contact
- Download the code from Kombai and sign up for Constant Contact.
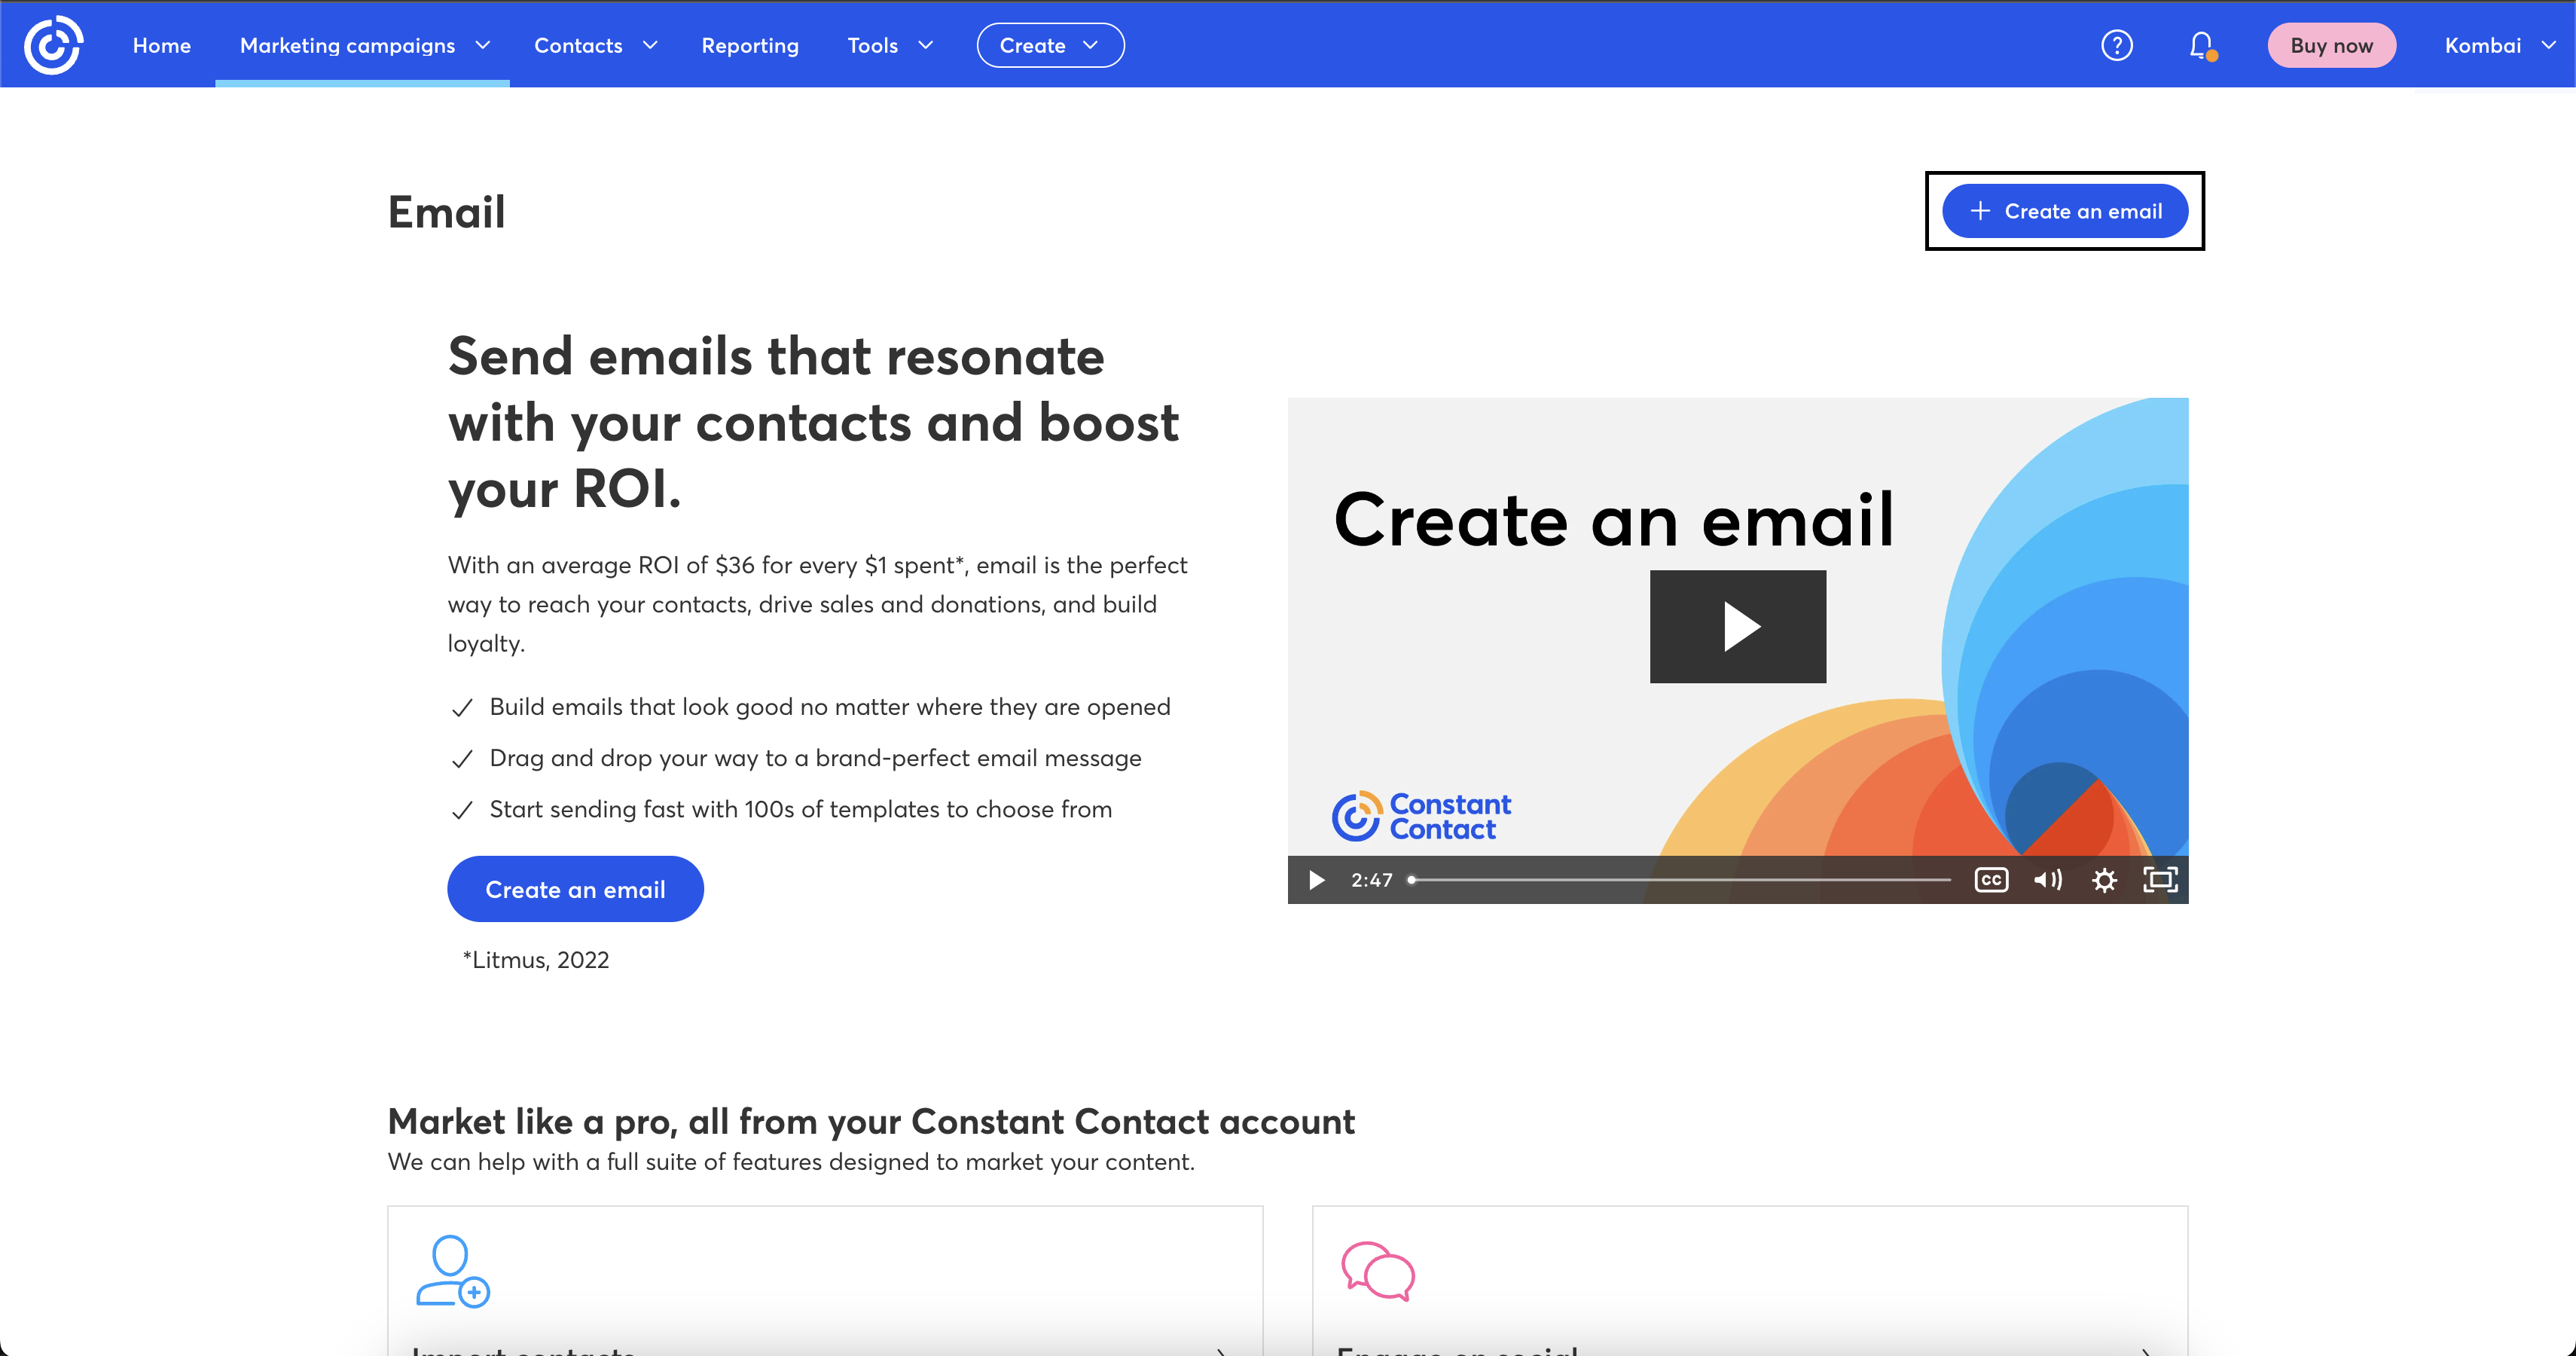
- On the Constant Contact website, click Marketing Campaigns > Email.
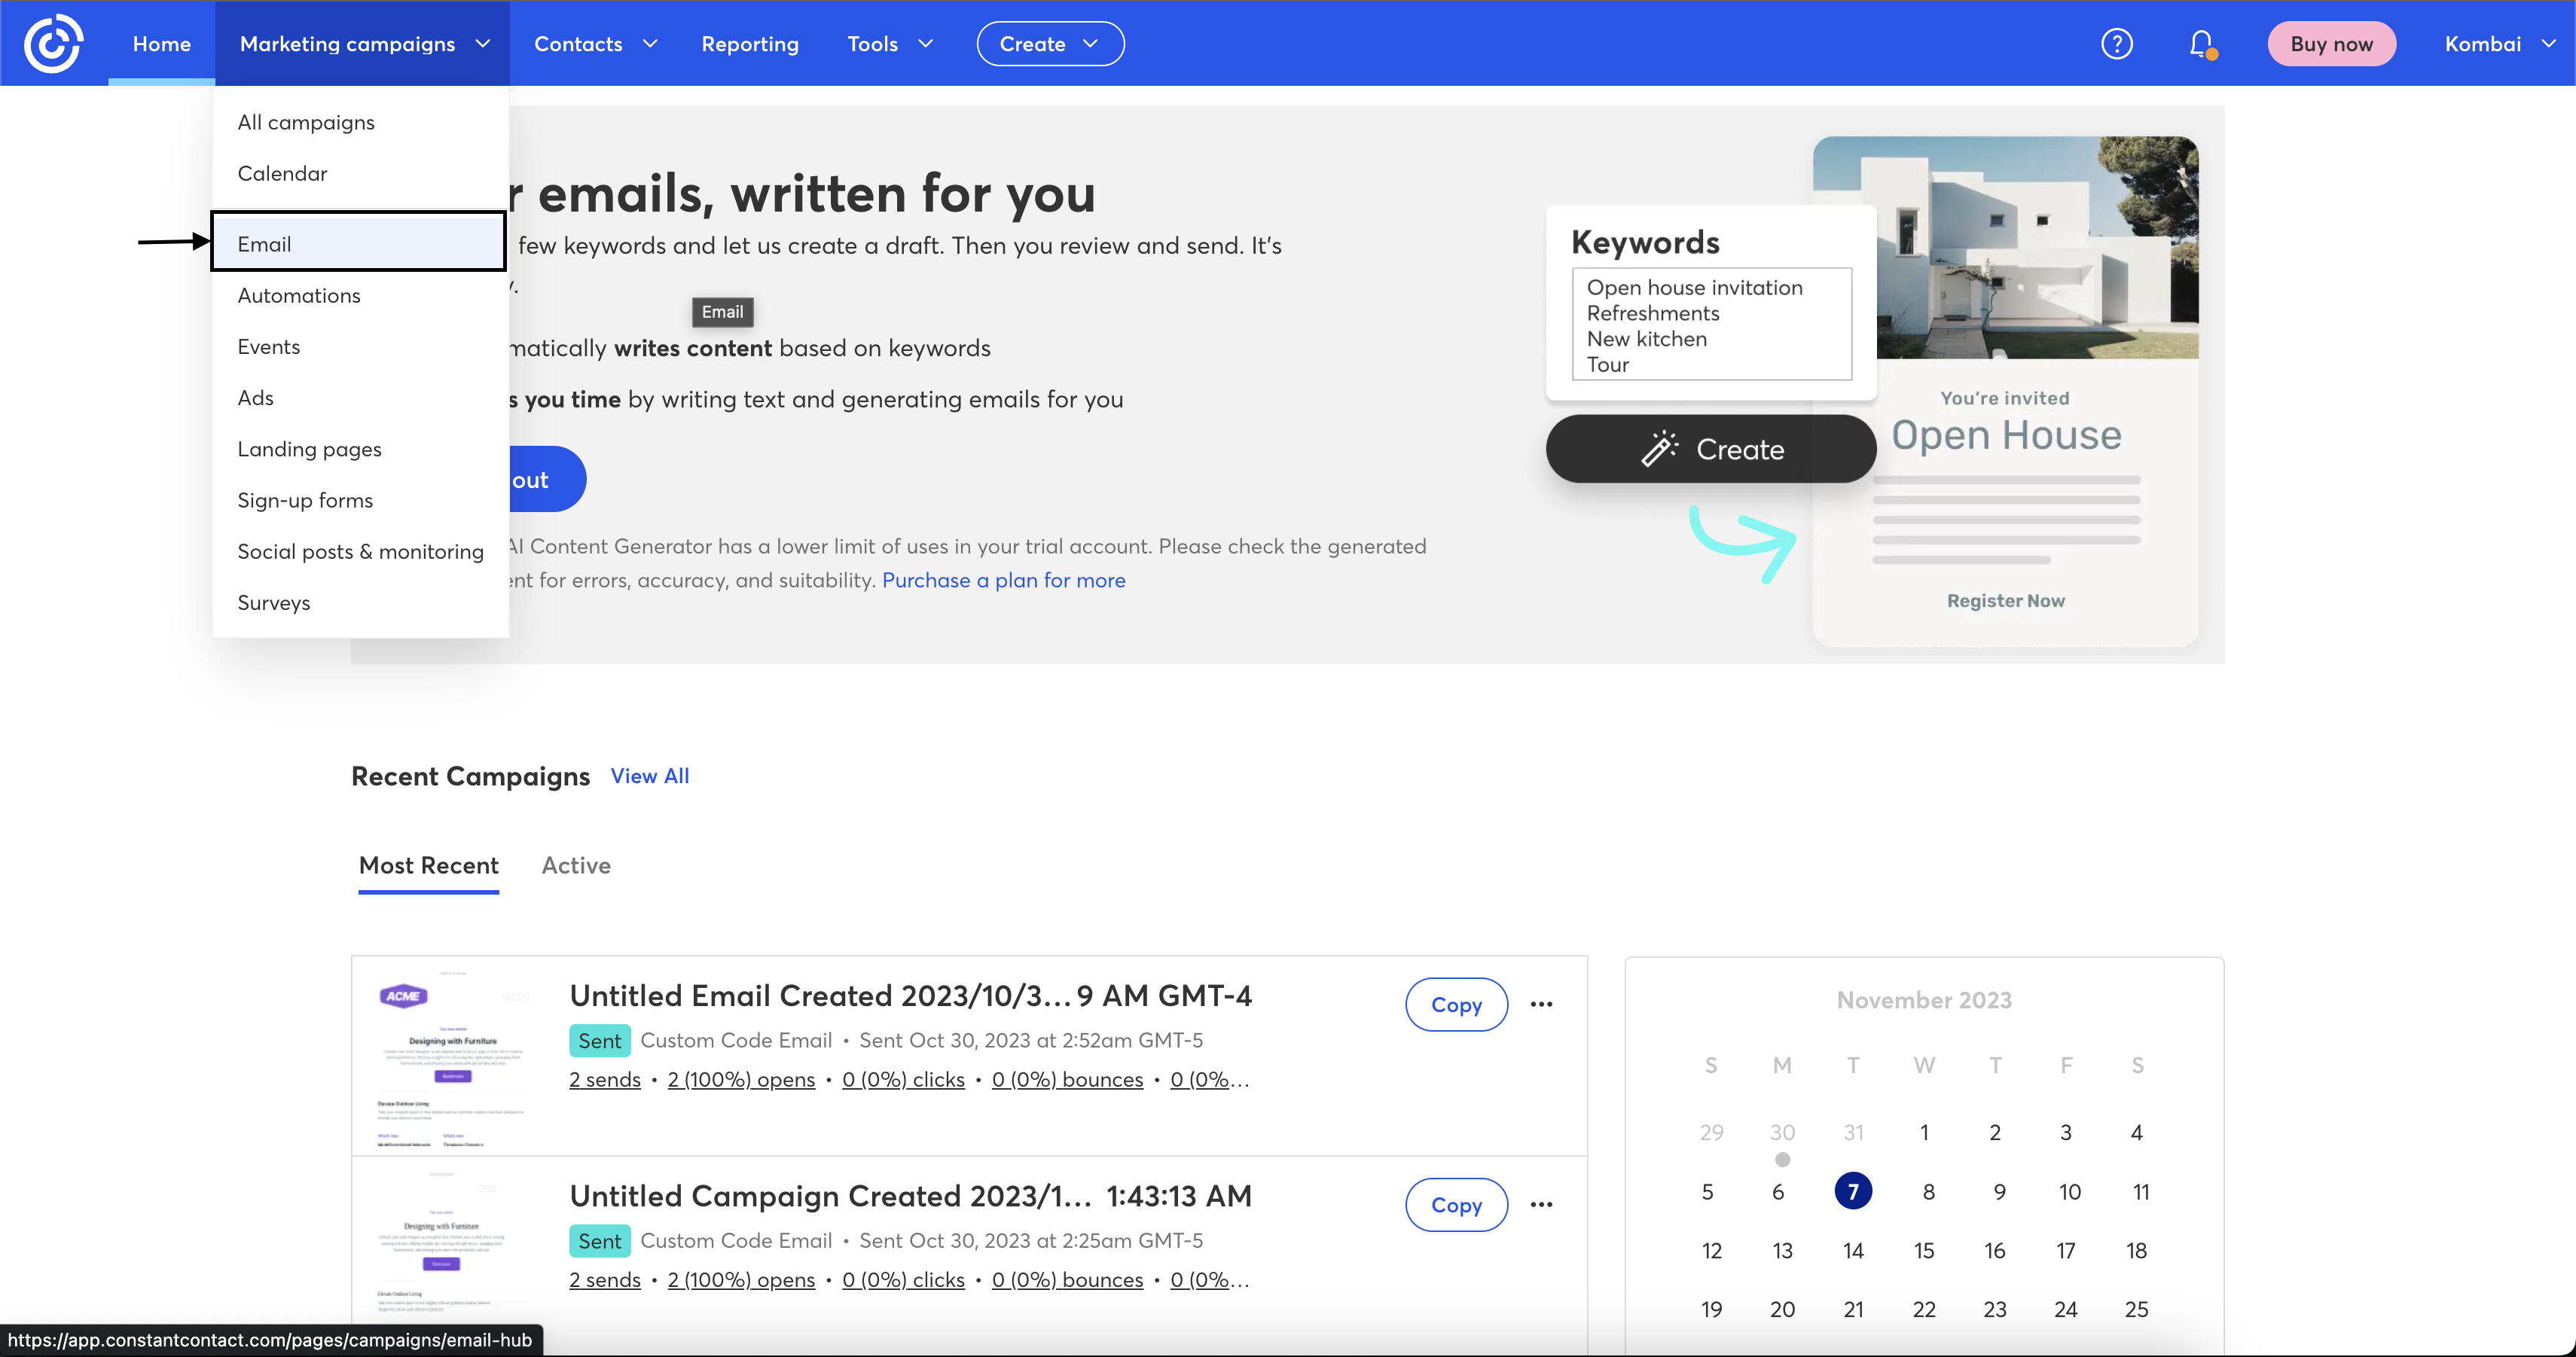
- Click Create an Email.
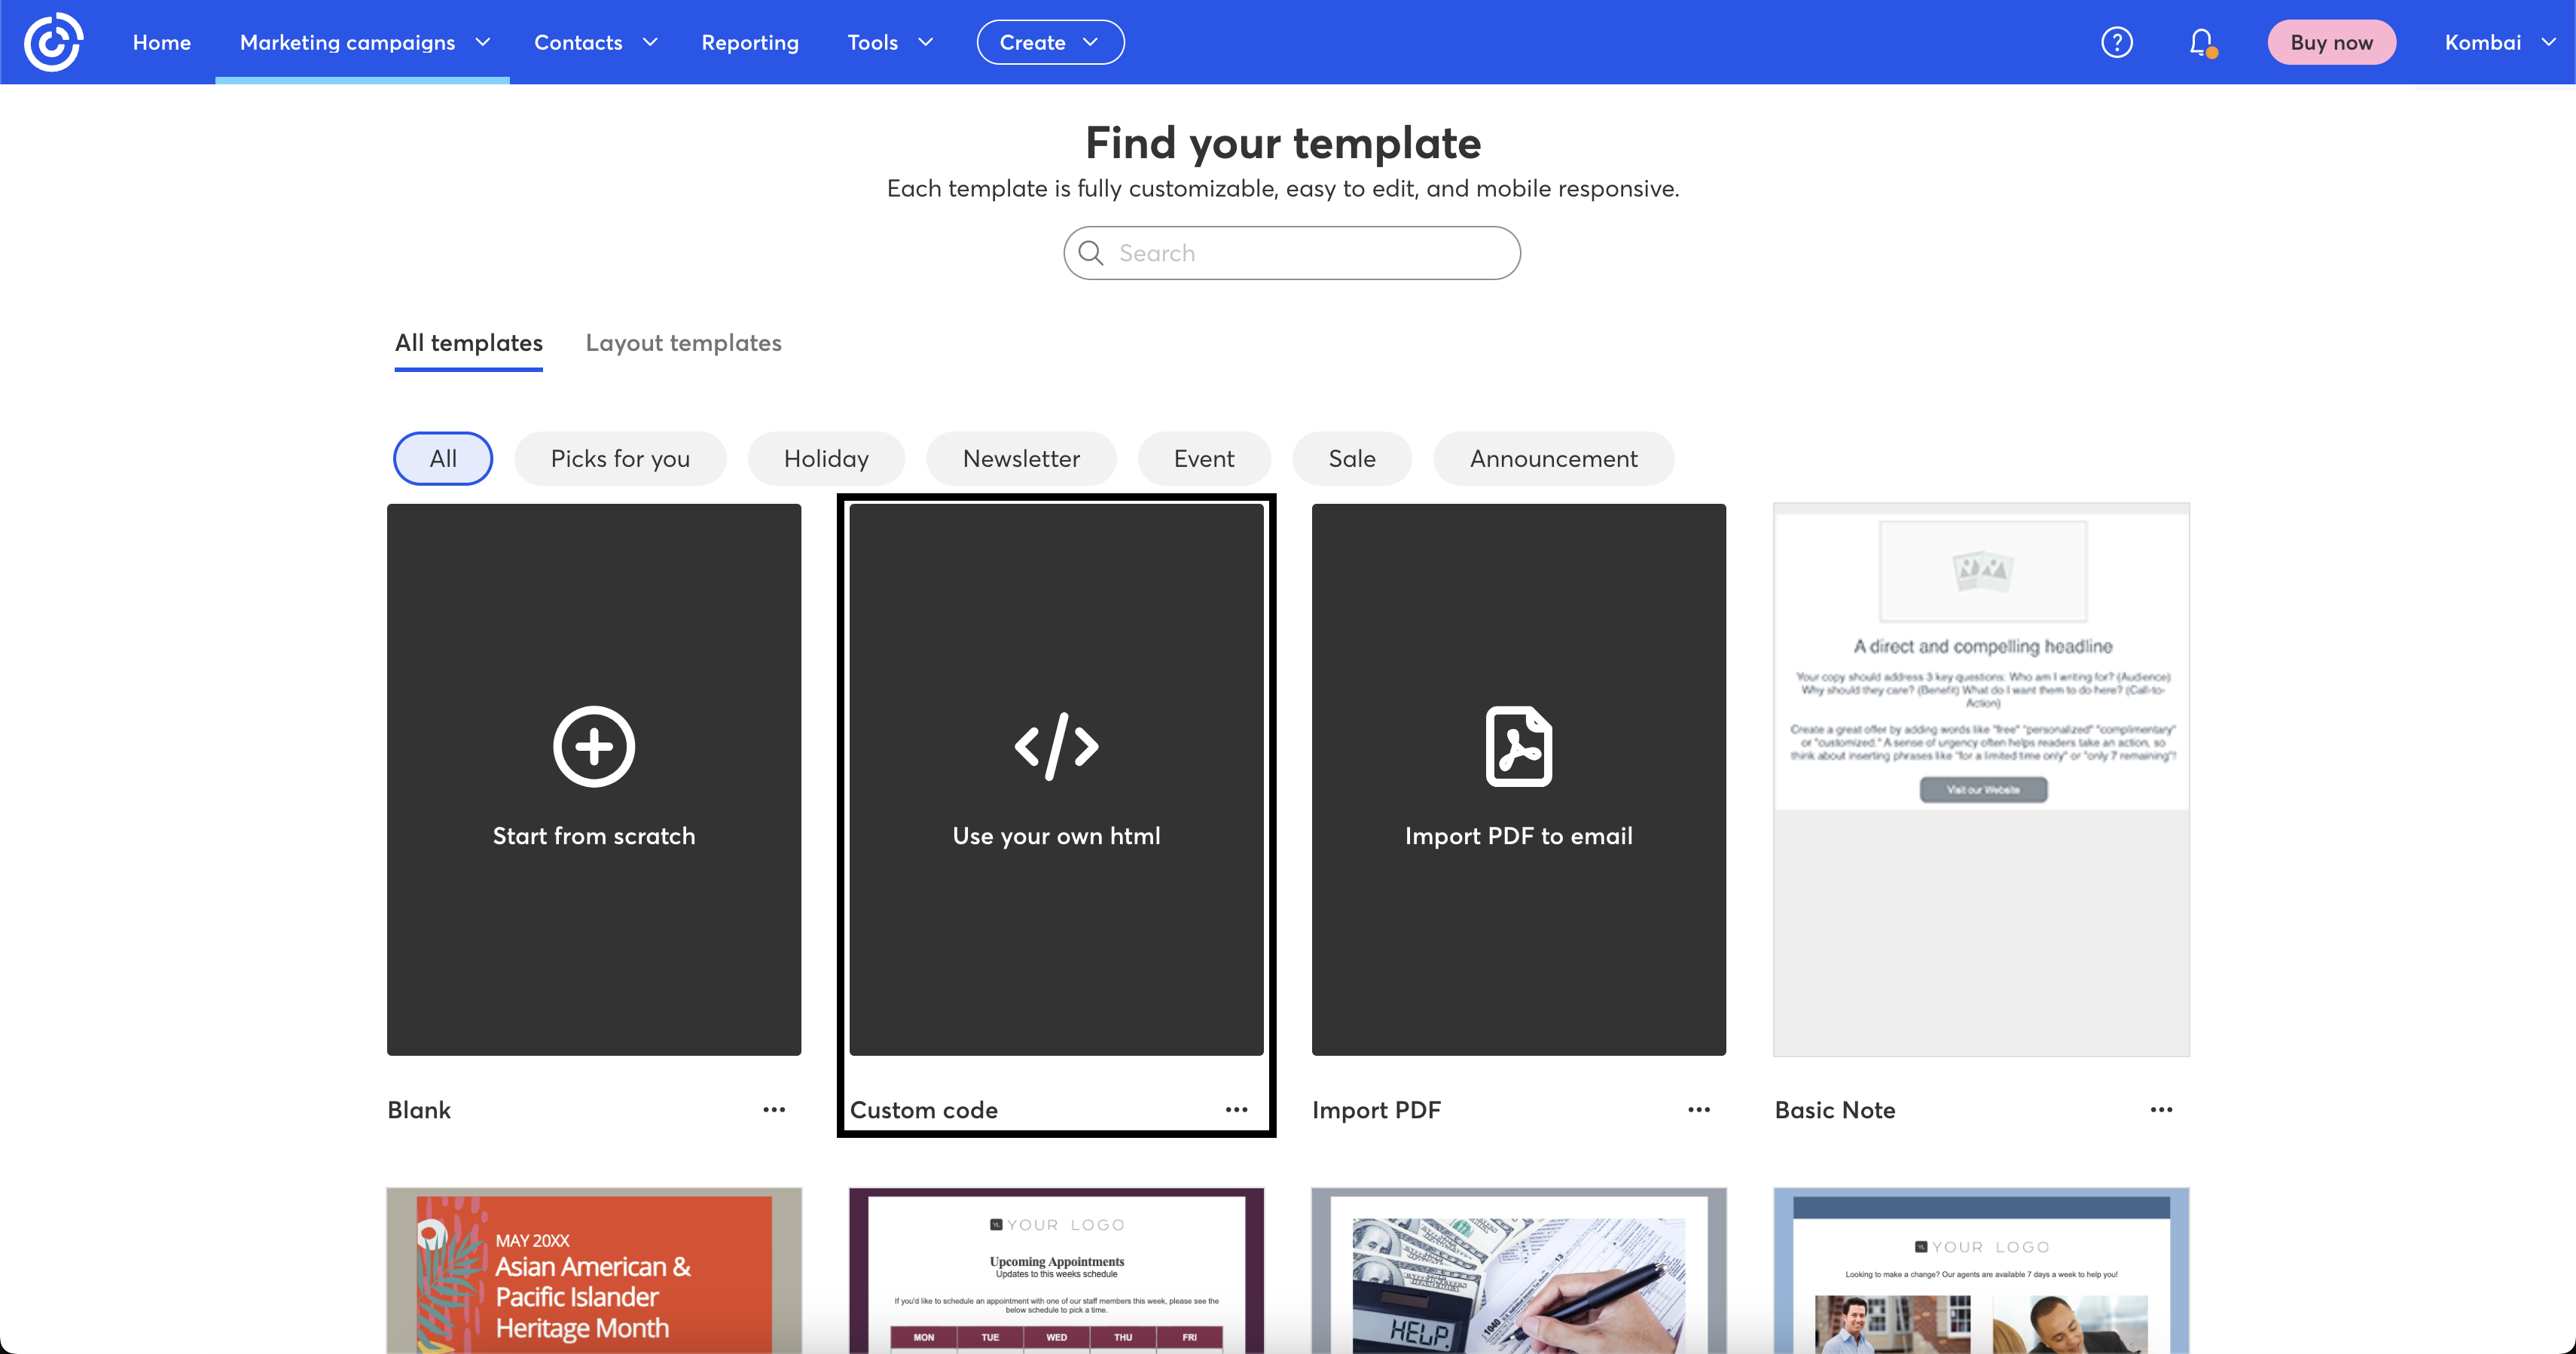
- Select Use your own HTML.
-
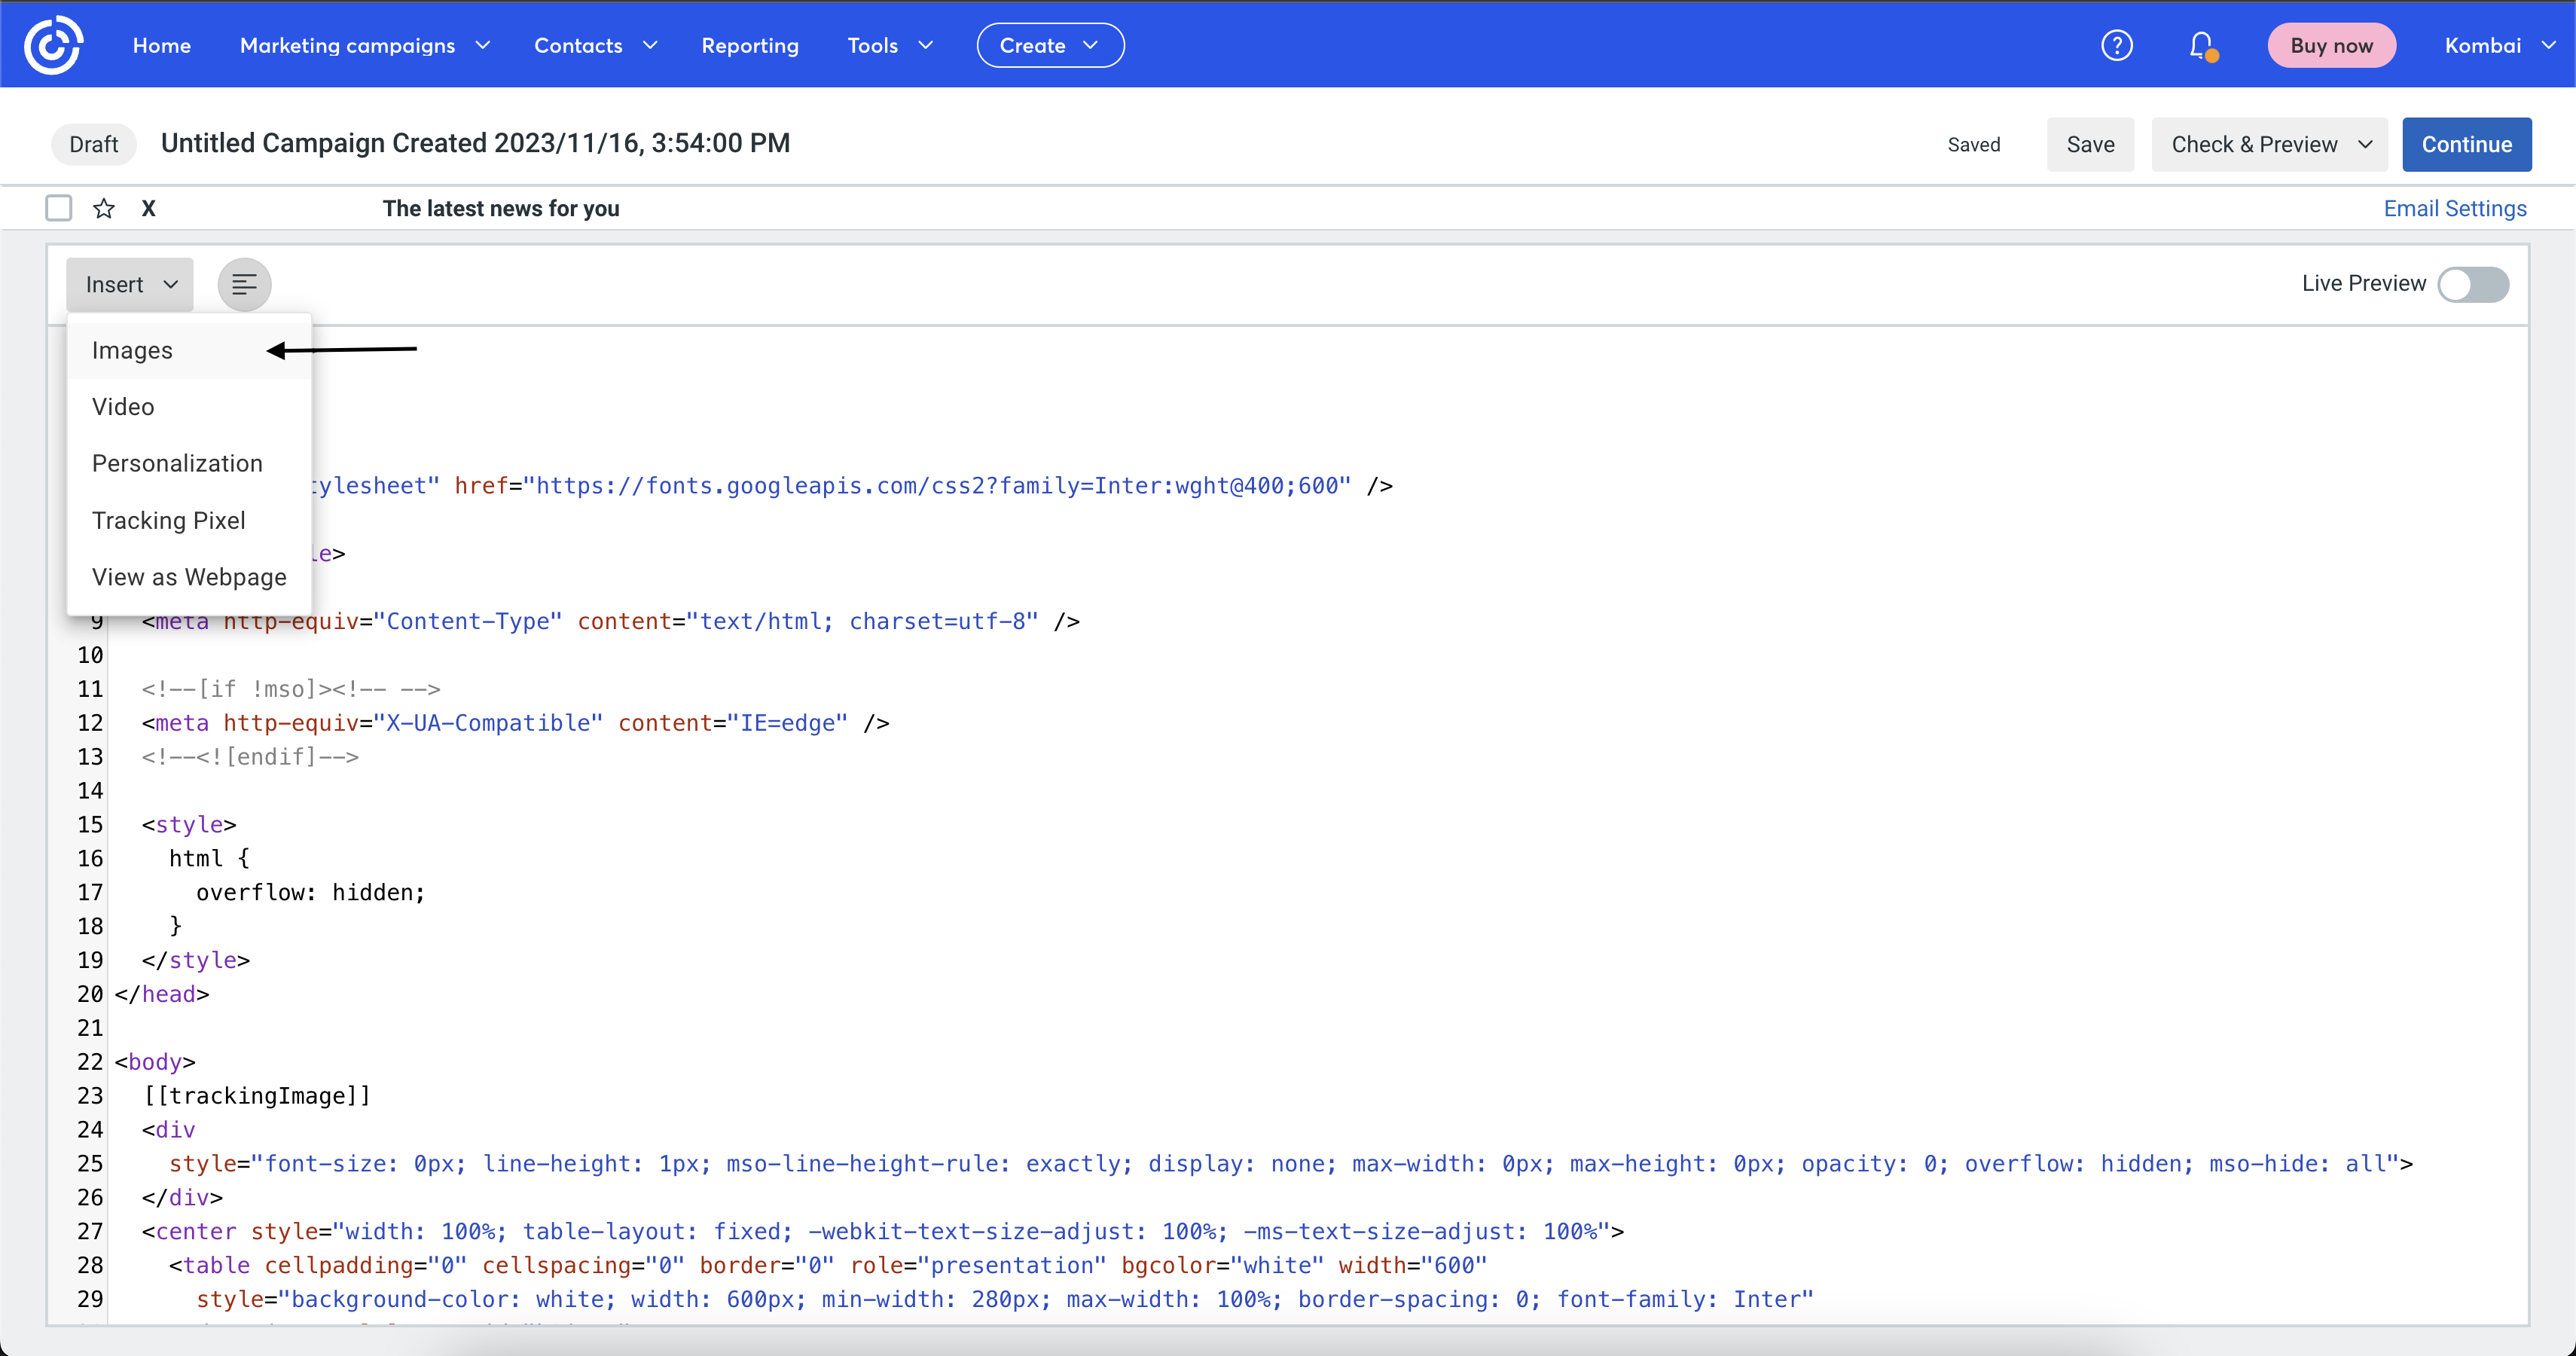
In the HTML editor, replace the existing code with Kombai-generated code and add the
[[trackingImage]]tag just below the opening body tag(see the example below).💡Note:
[[trackingImage]]tag is mandatory to have in your code. -
Now, select Images from the Insert dropdown.
- Upload the images to Constant Contact.
- Replace the source of your existing images with the URLs provided by Constant Contact(see the example below).
- Save the template, add email info (subject, sender details, recipients, etc.), and send your mail.
Sending Kombai-generated HTML containing Base64 embedded images
To send generated HTML email code through Constant Contact, you have to:
- Copy/Download the code with Base64 embedded images from Kombai.
- Repeat steps 1-5 of Creating a campaign in Constant Contact.
- Save the template, add email info (subject, sender details, recipients, etc.), and send your mail.
ActiveCampaign
Sending Kombai-generated HTML containing assets and linked images
ActiveCampaign does not support direct upload of zip file for images. You have to upload the images in the library and replace them manually in the code:
Creating a campaign in ActiveCampaign
To send the generated HTML code through ActiveCampaign, you have to:
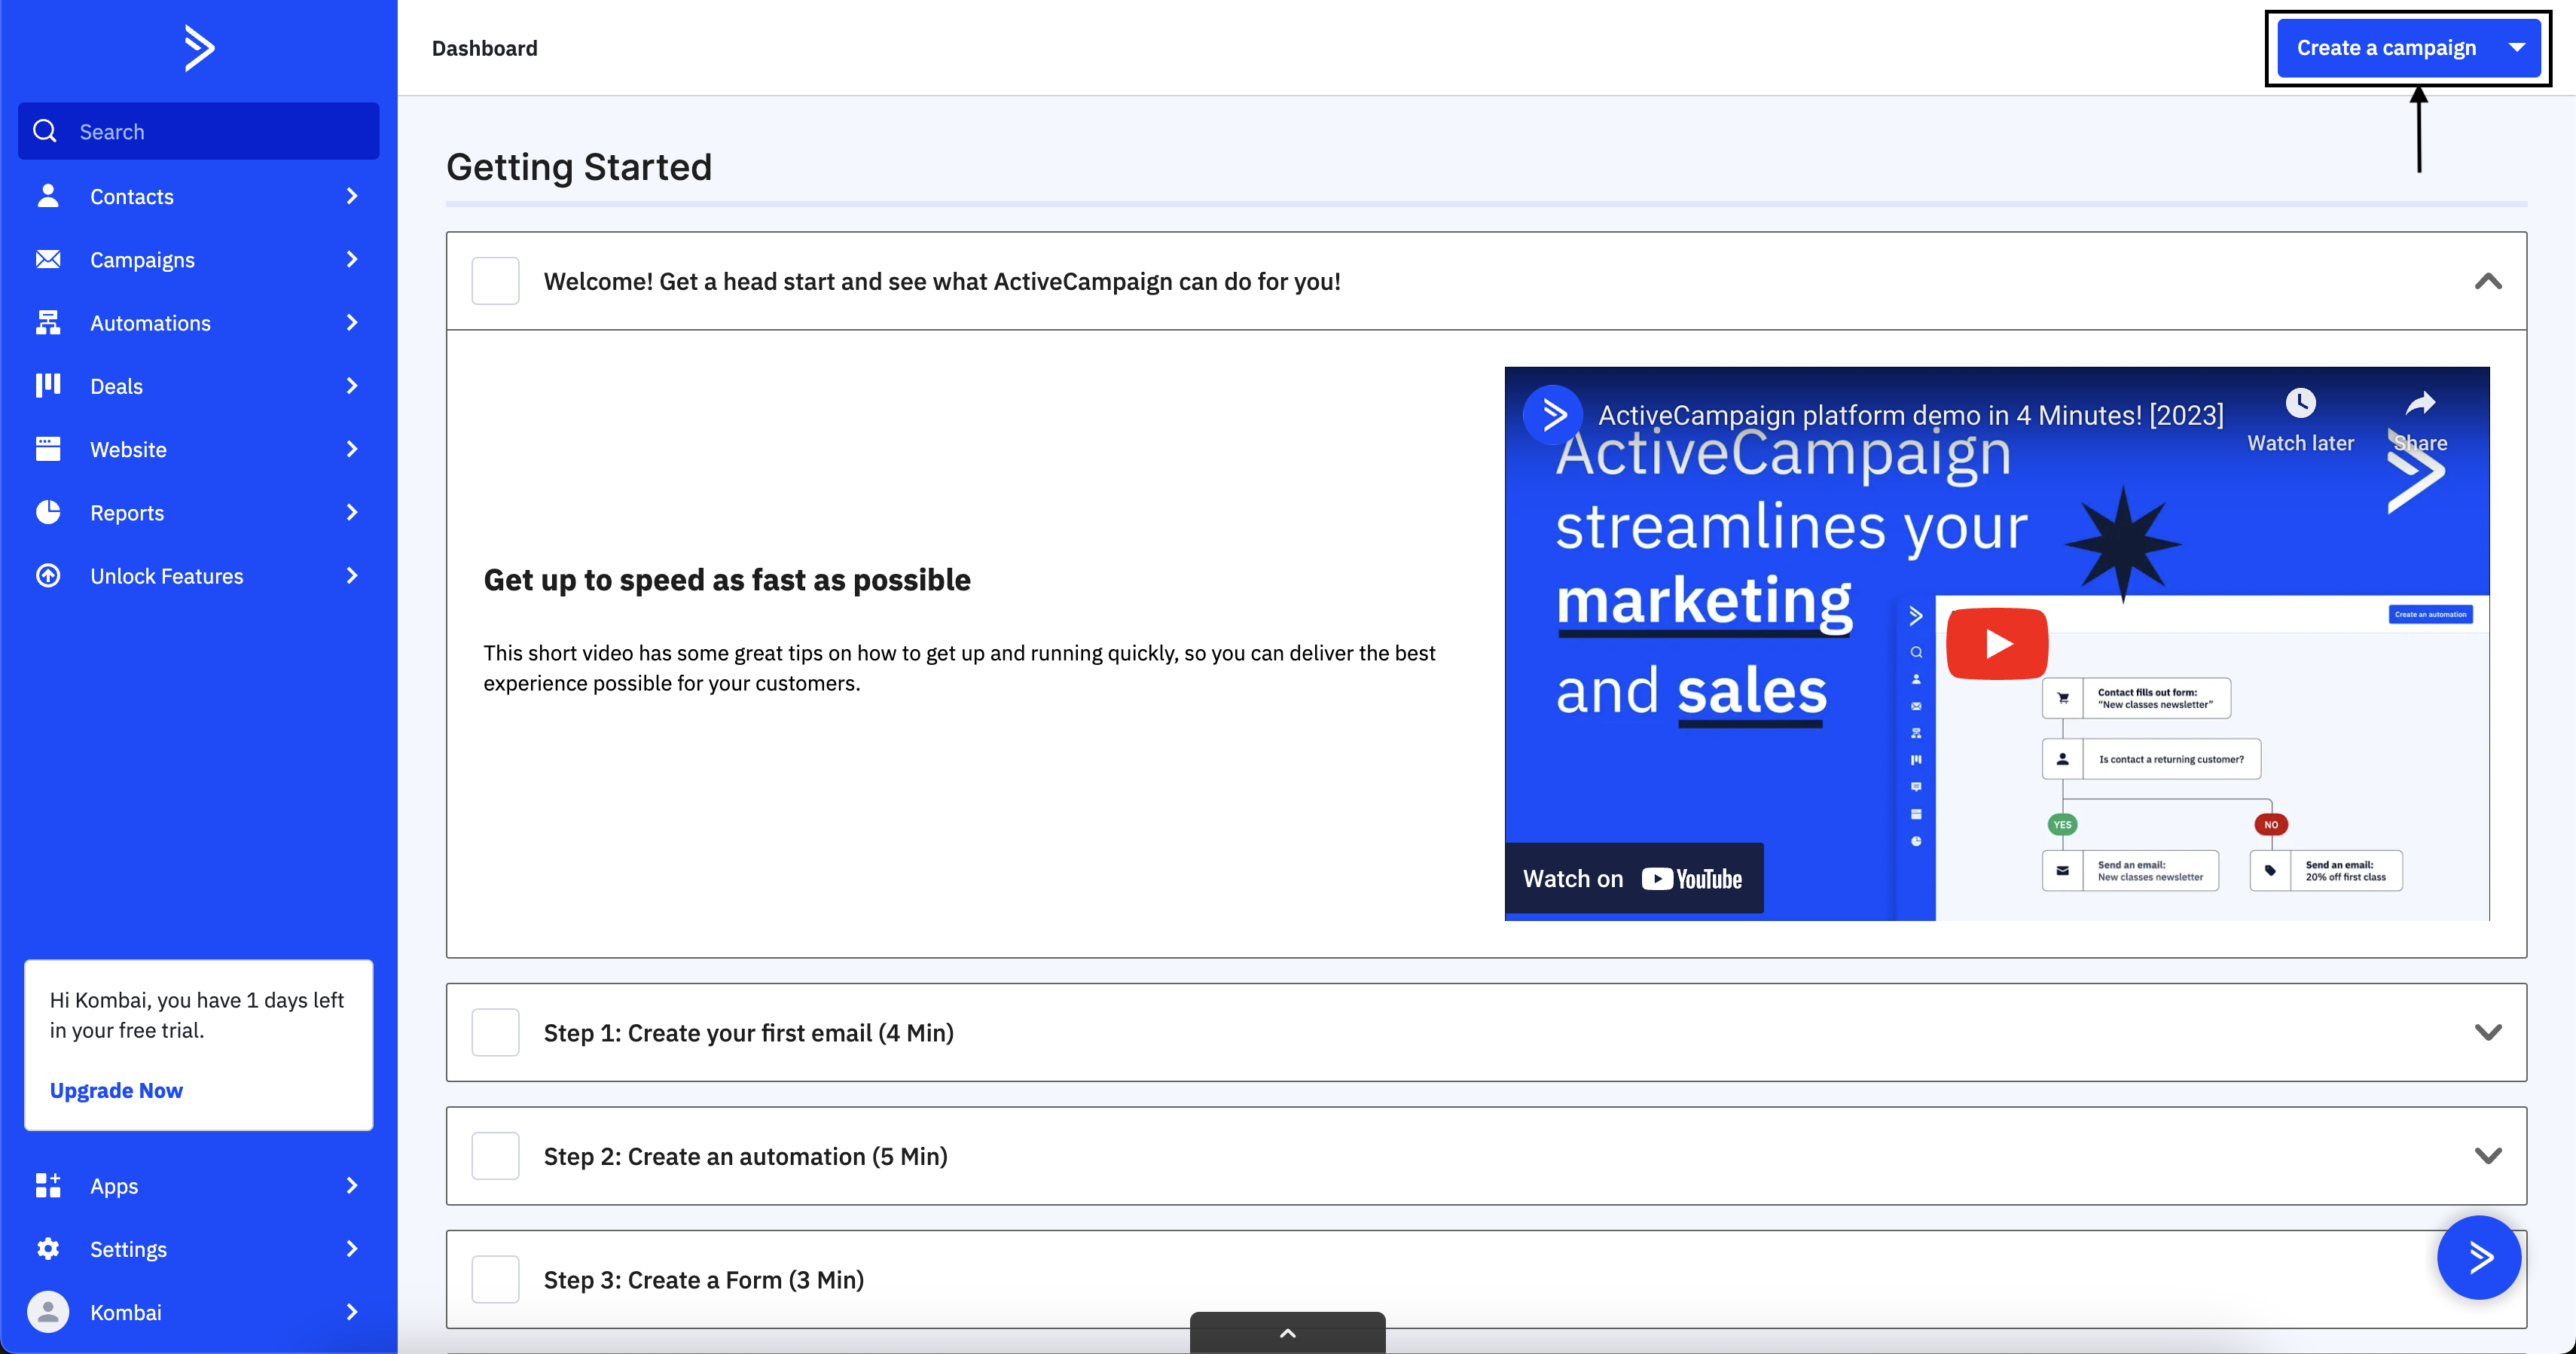
- In your dashboard, click on Create a Campaign.
- Name your campaign, select Standard, and click Next.
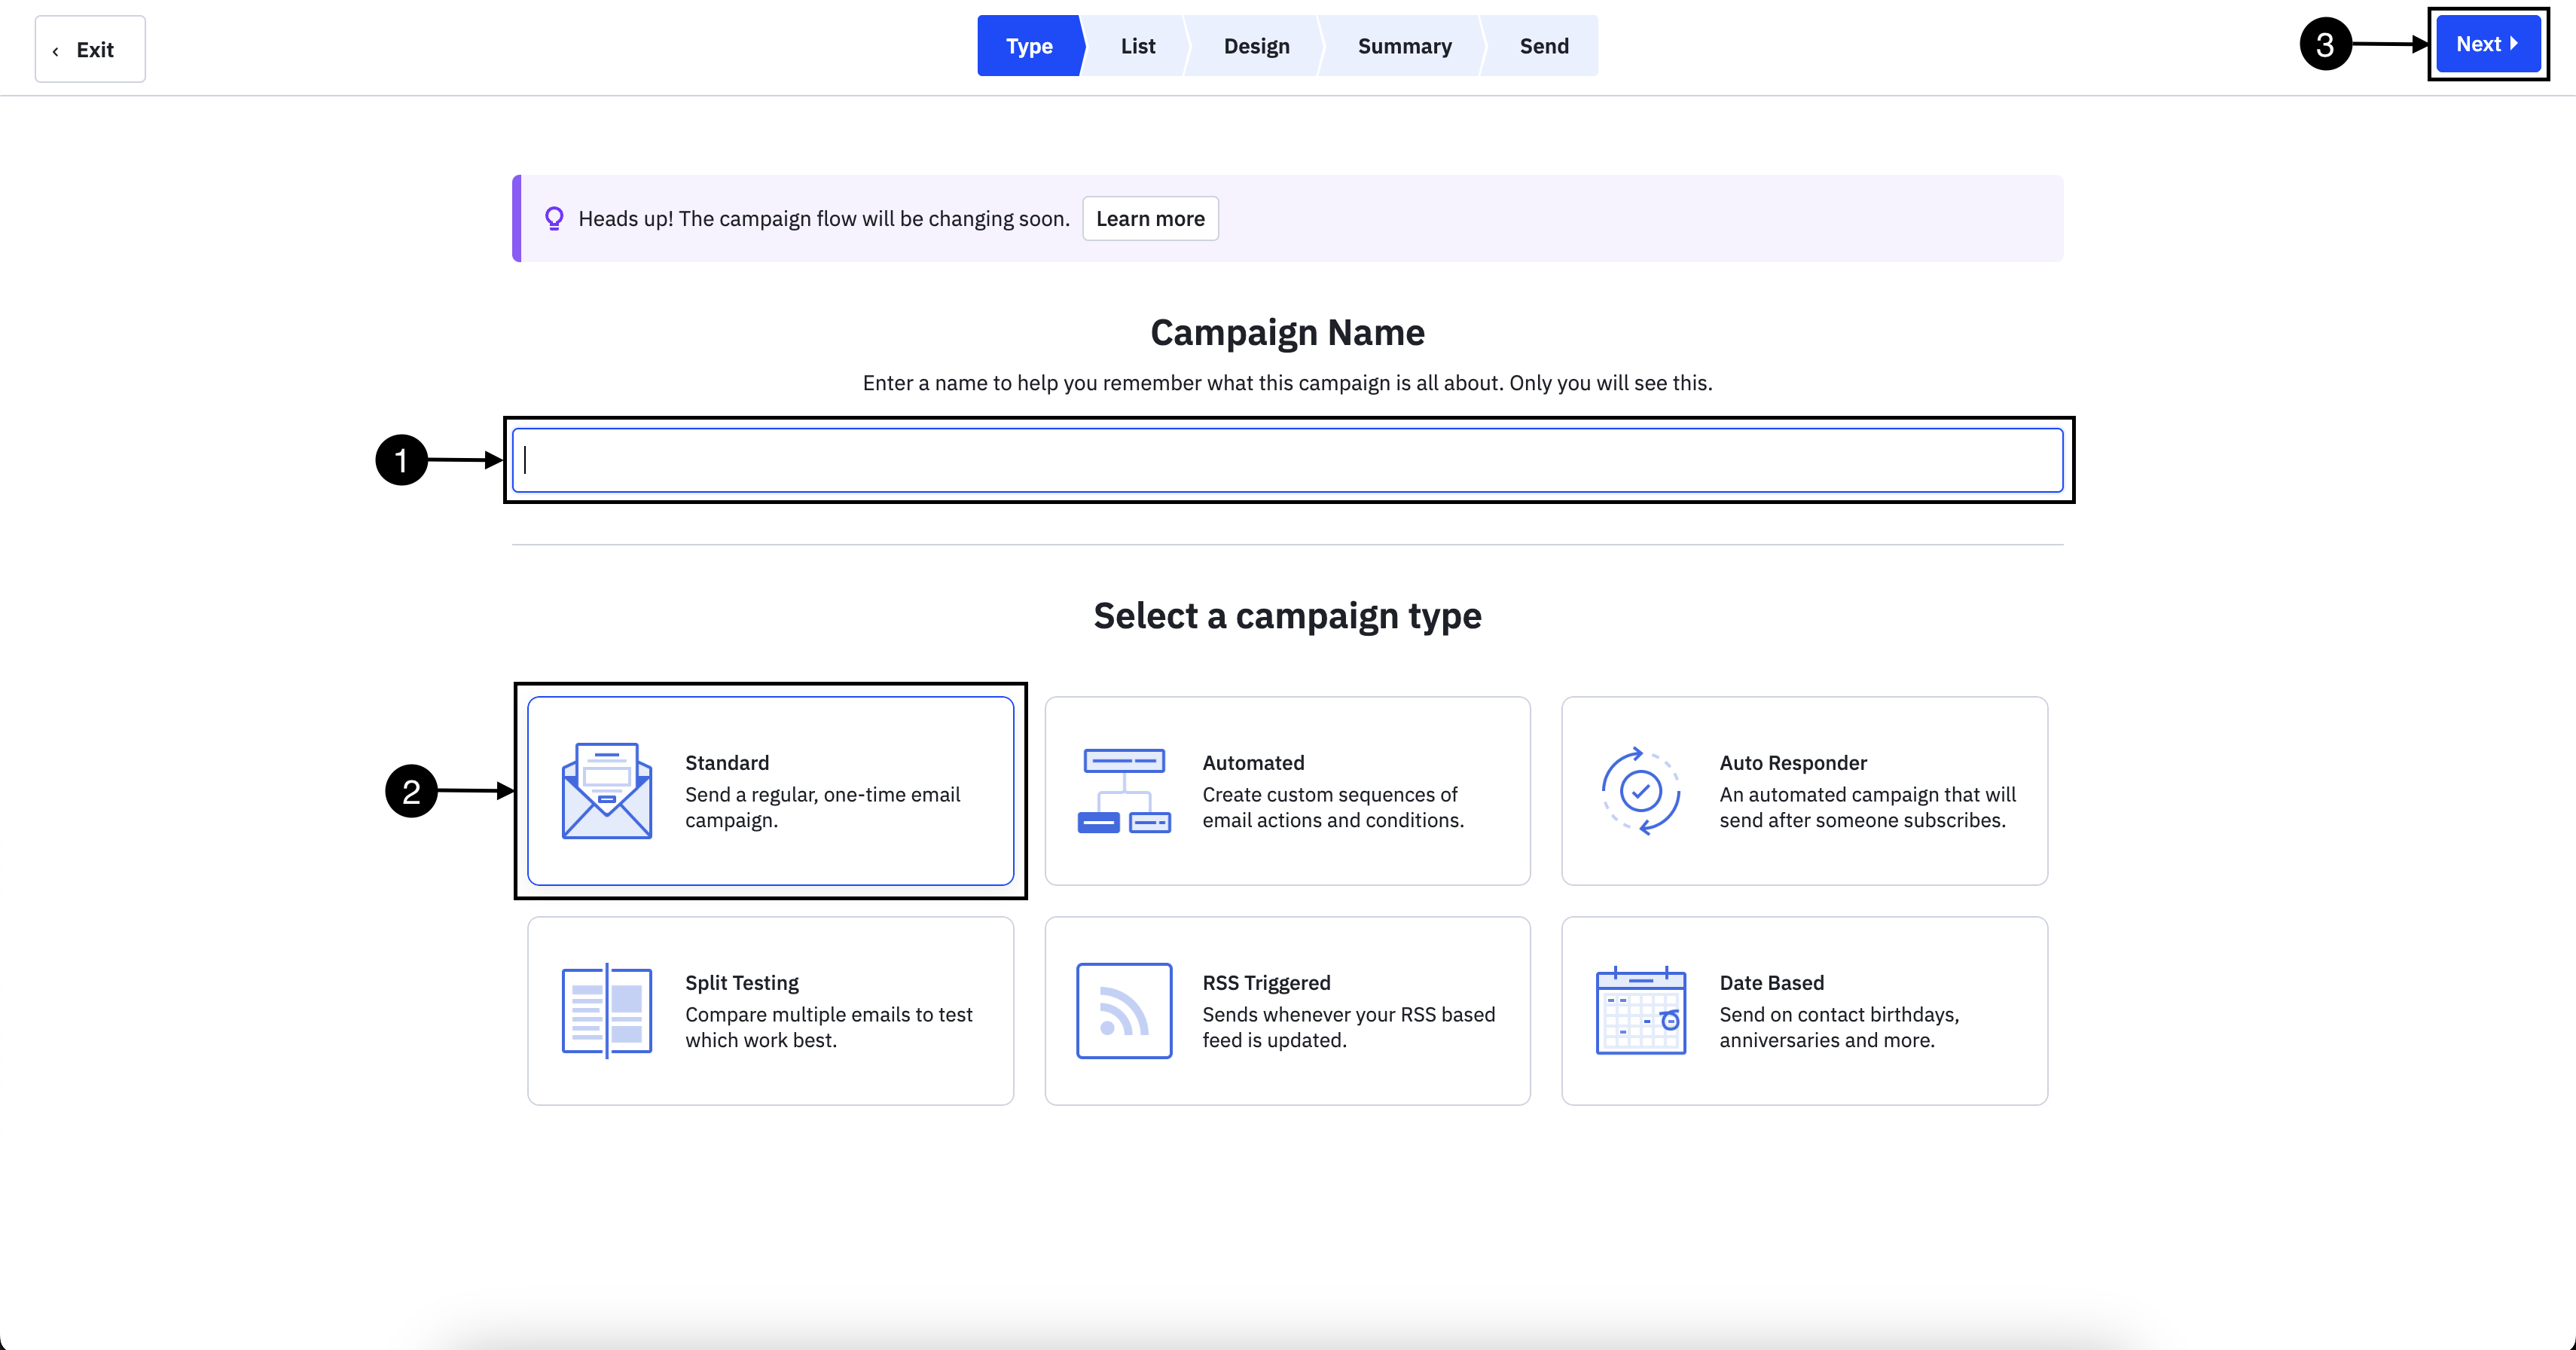
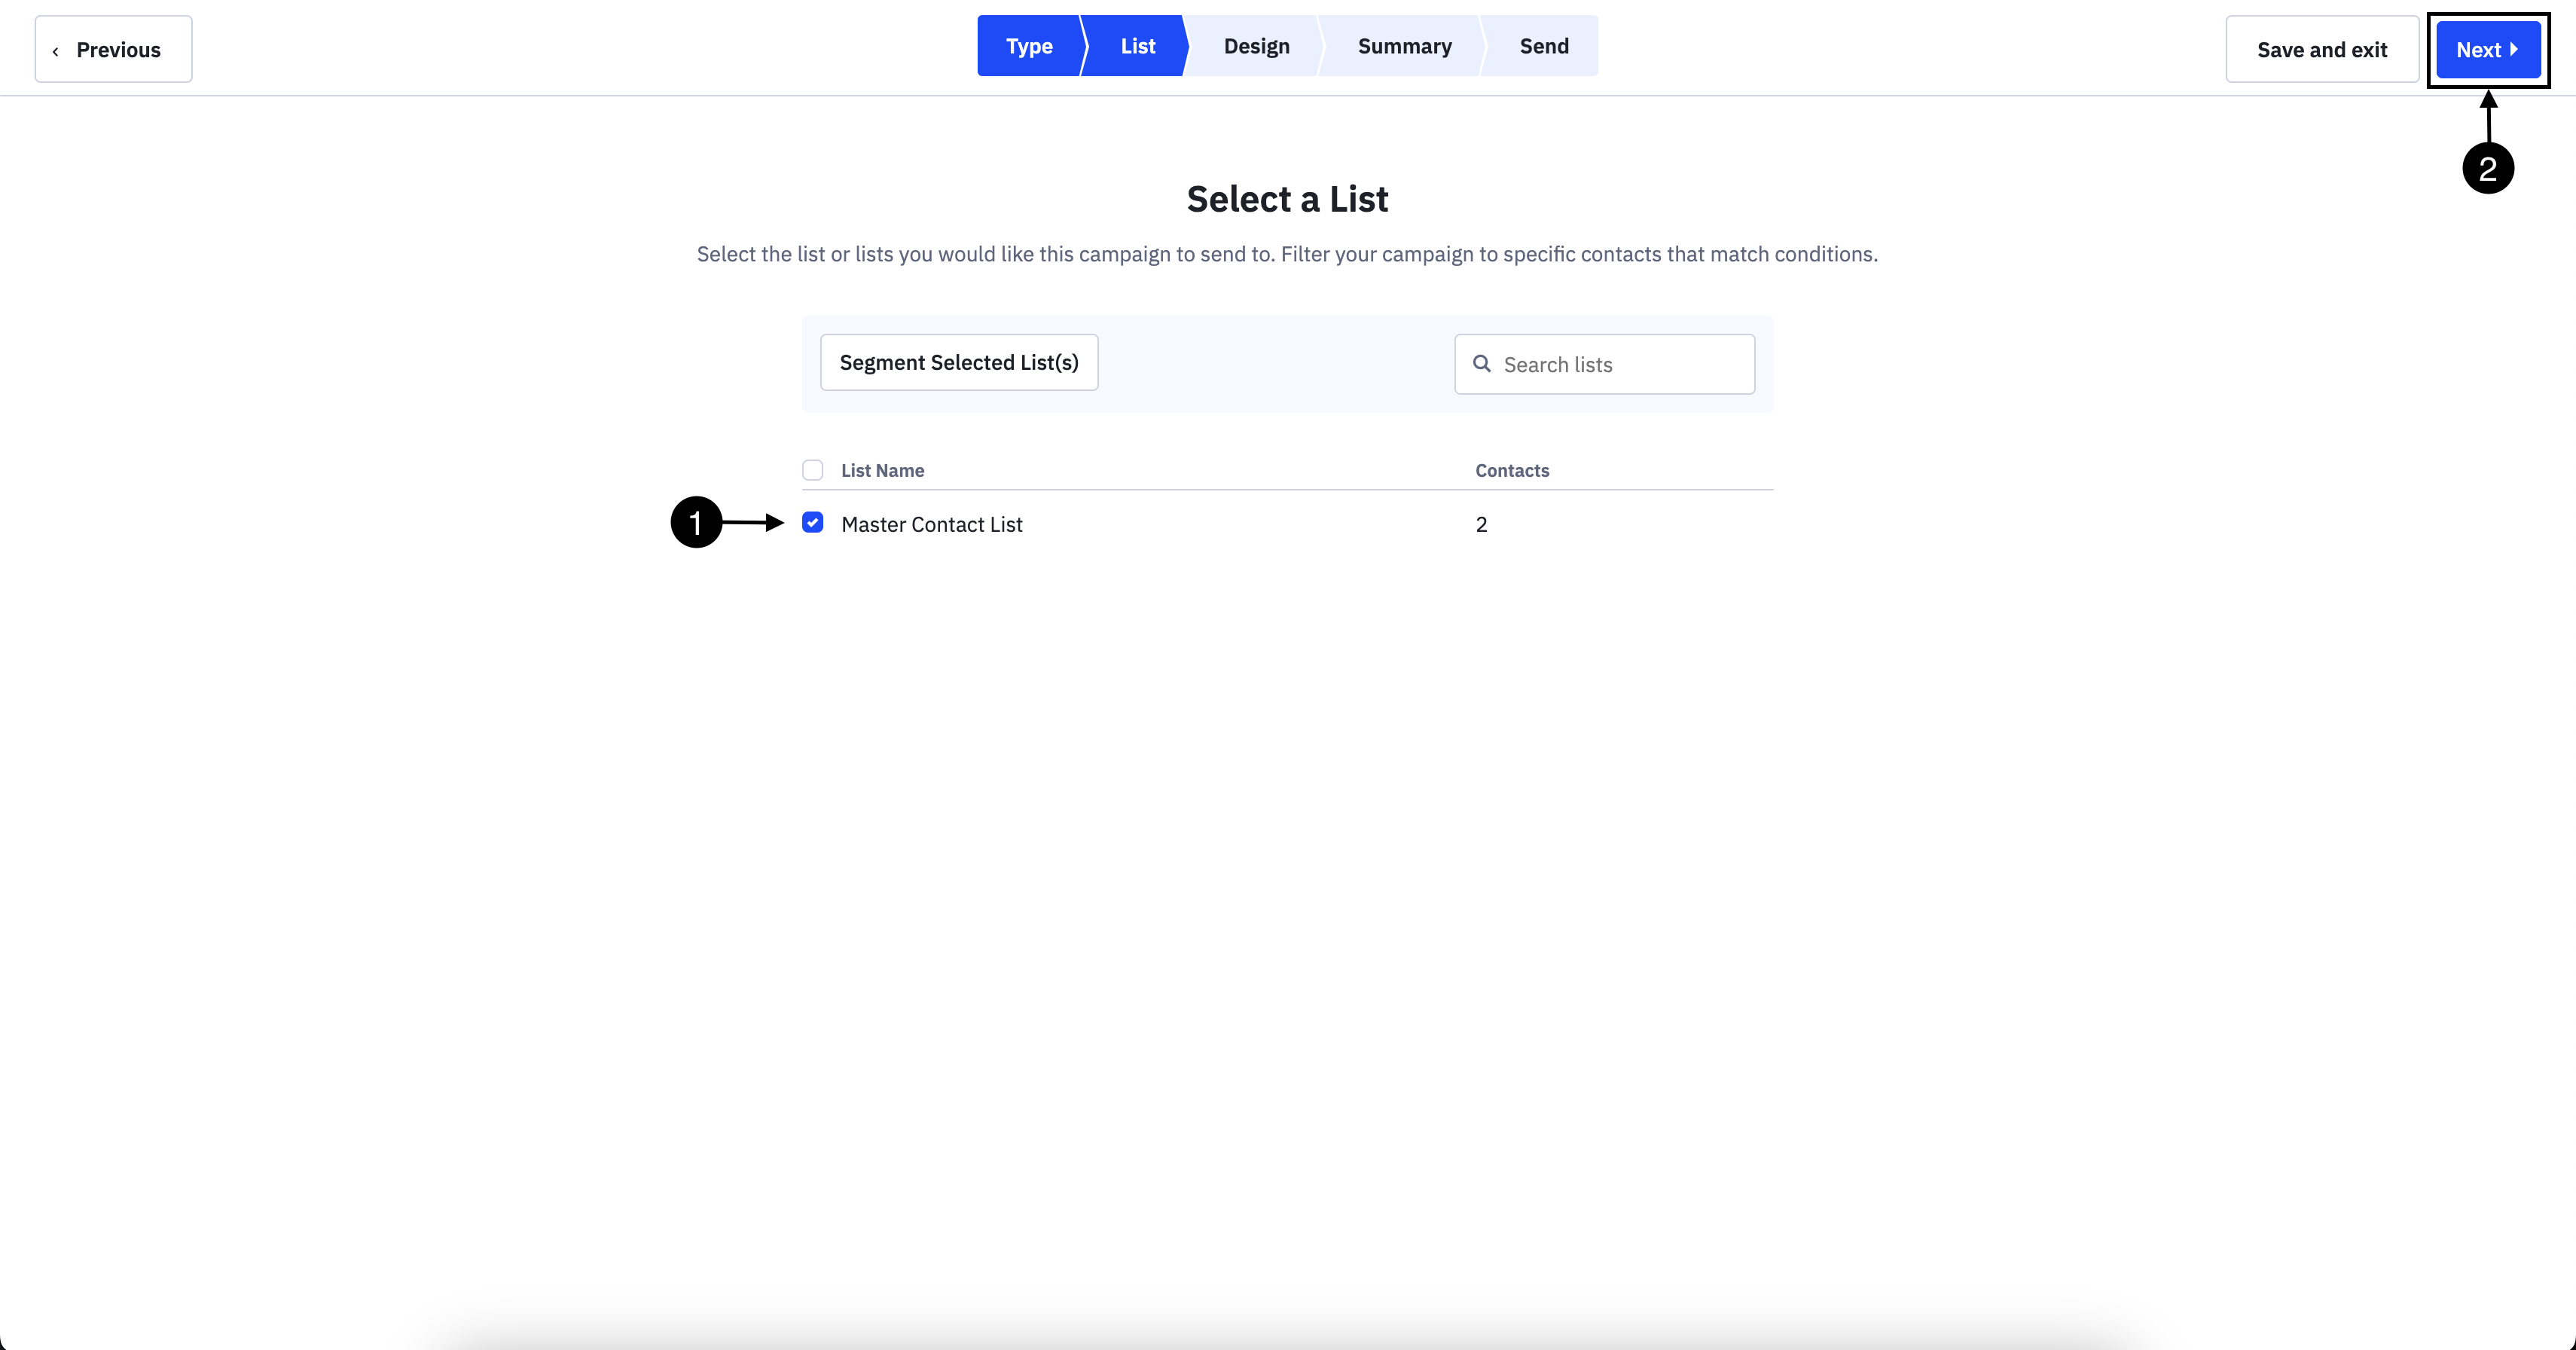
- Select the recipient list and click Next.
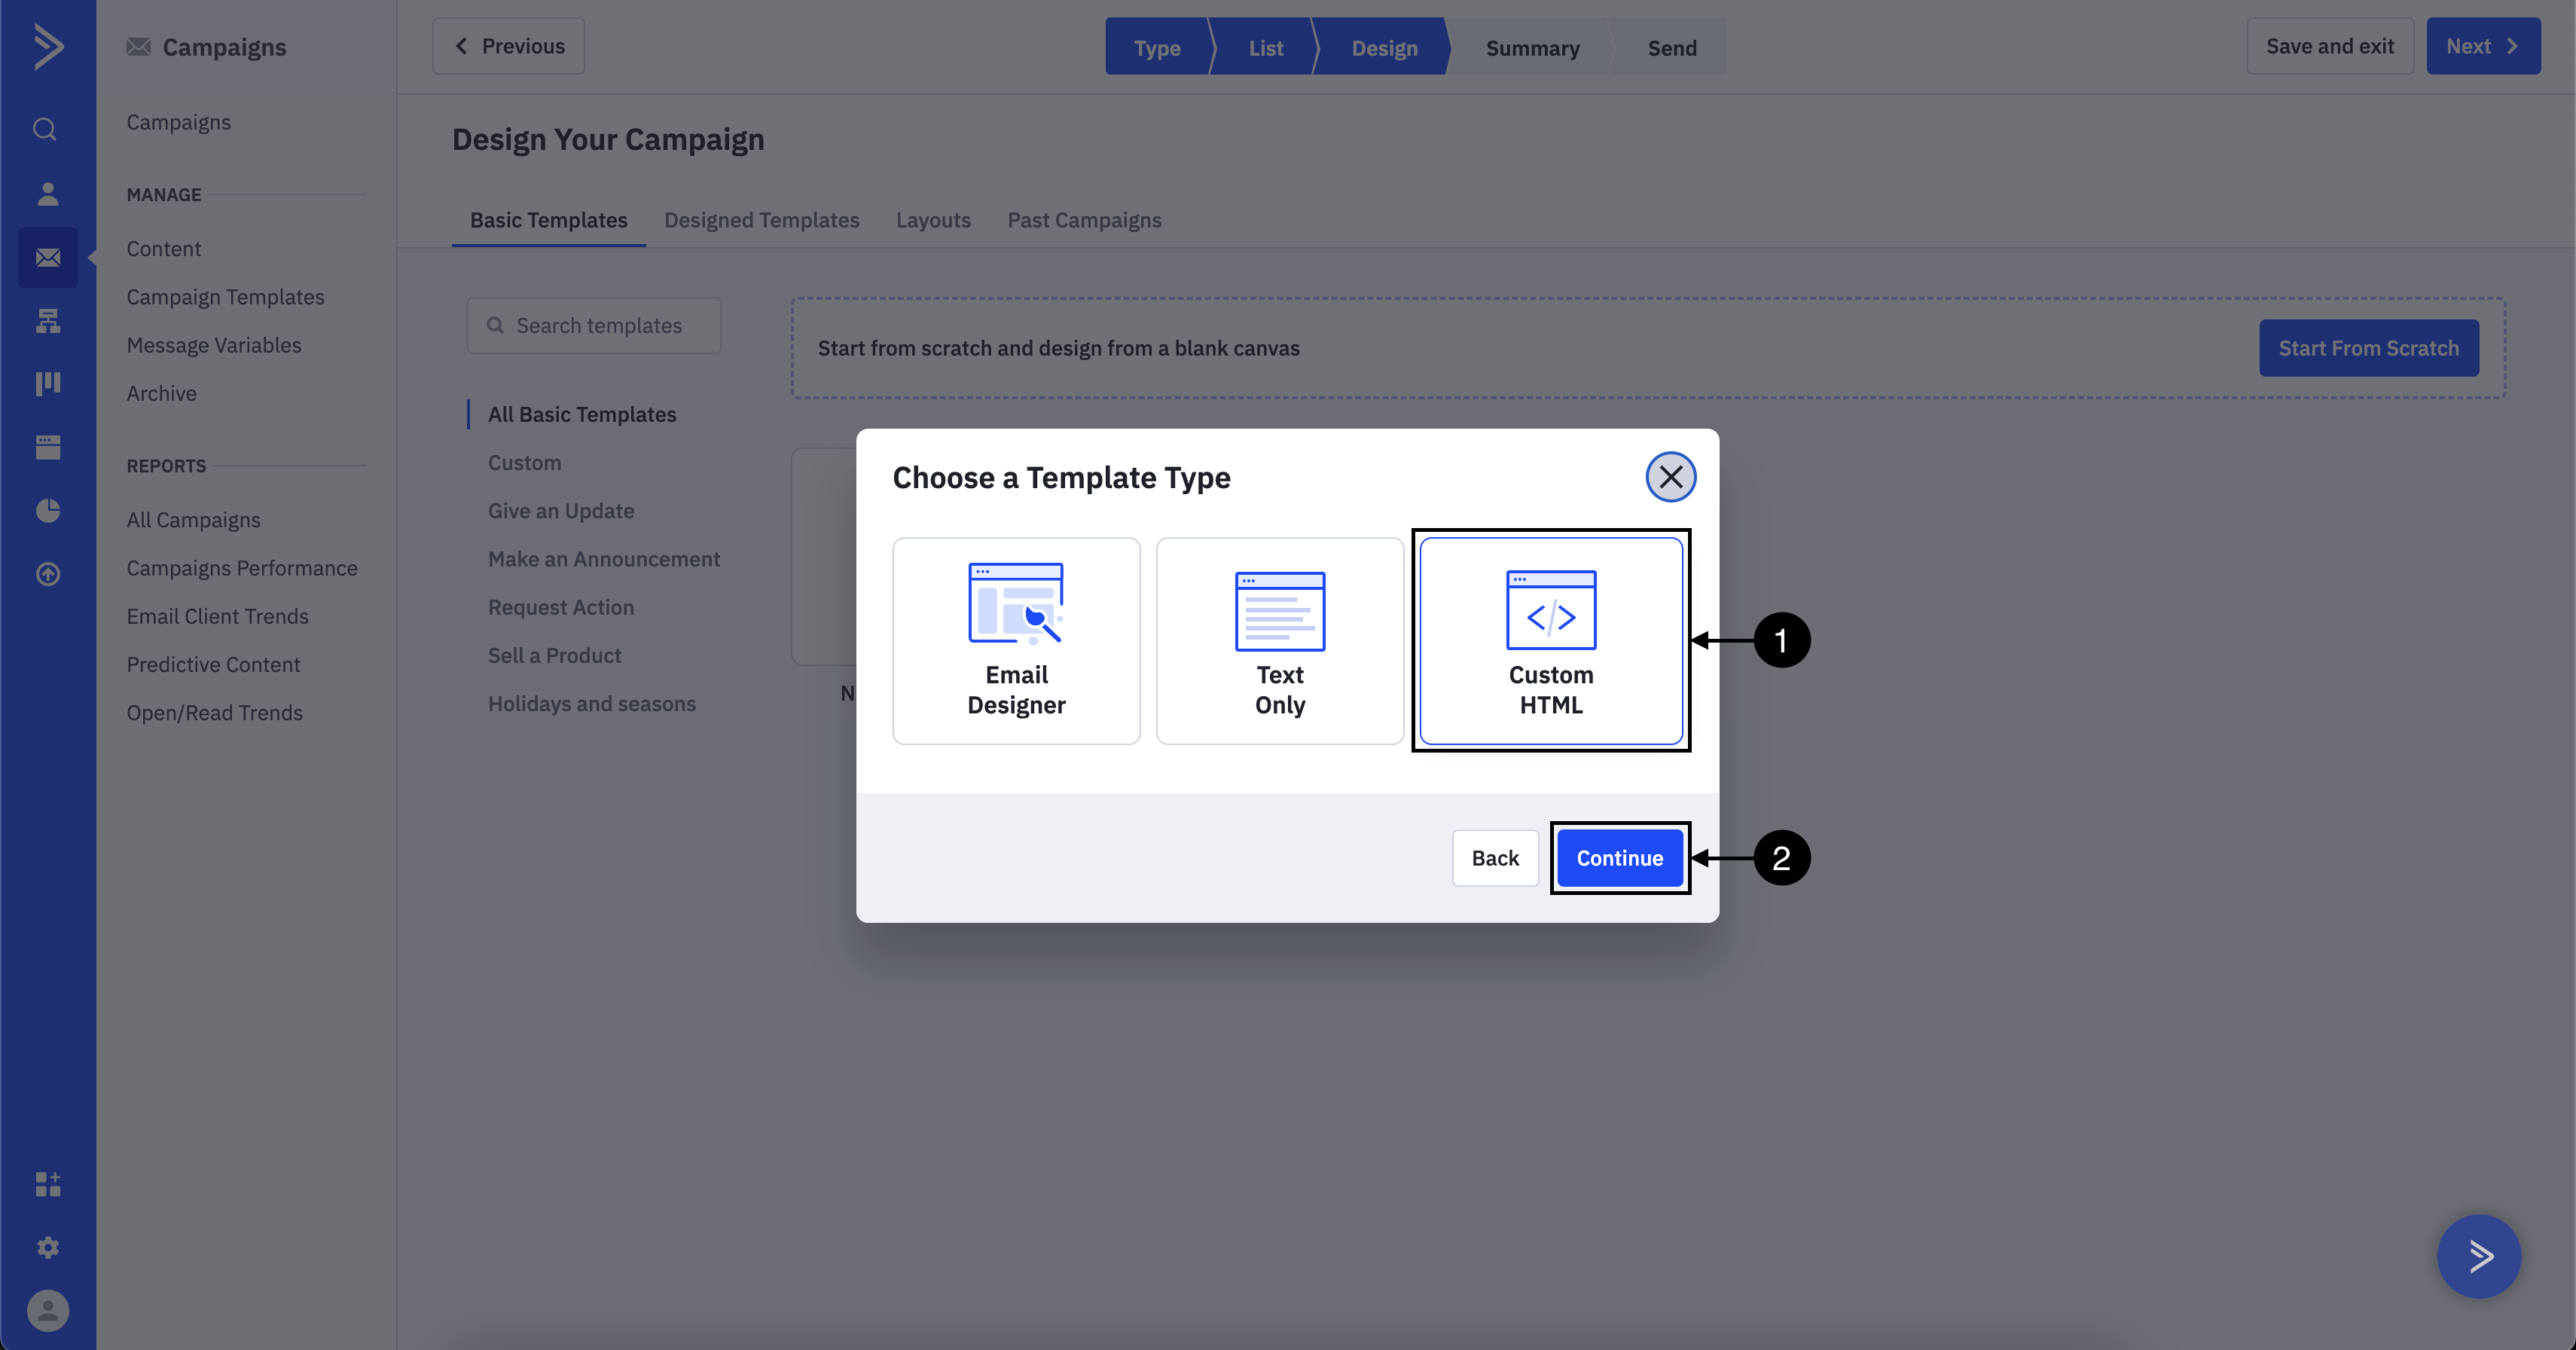
- Choose the Custom HTML template type and continue.
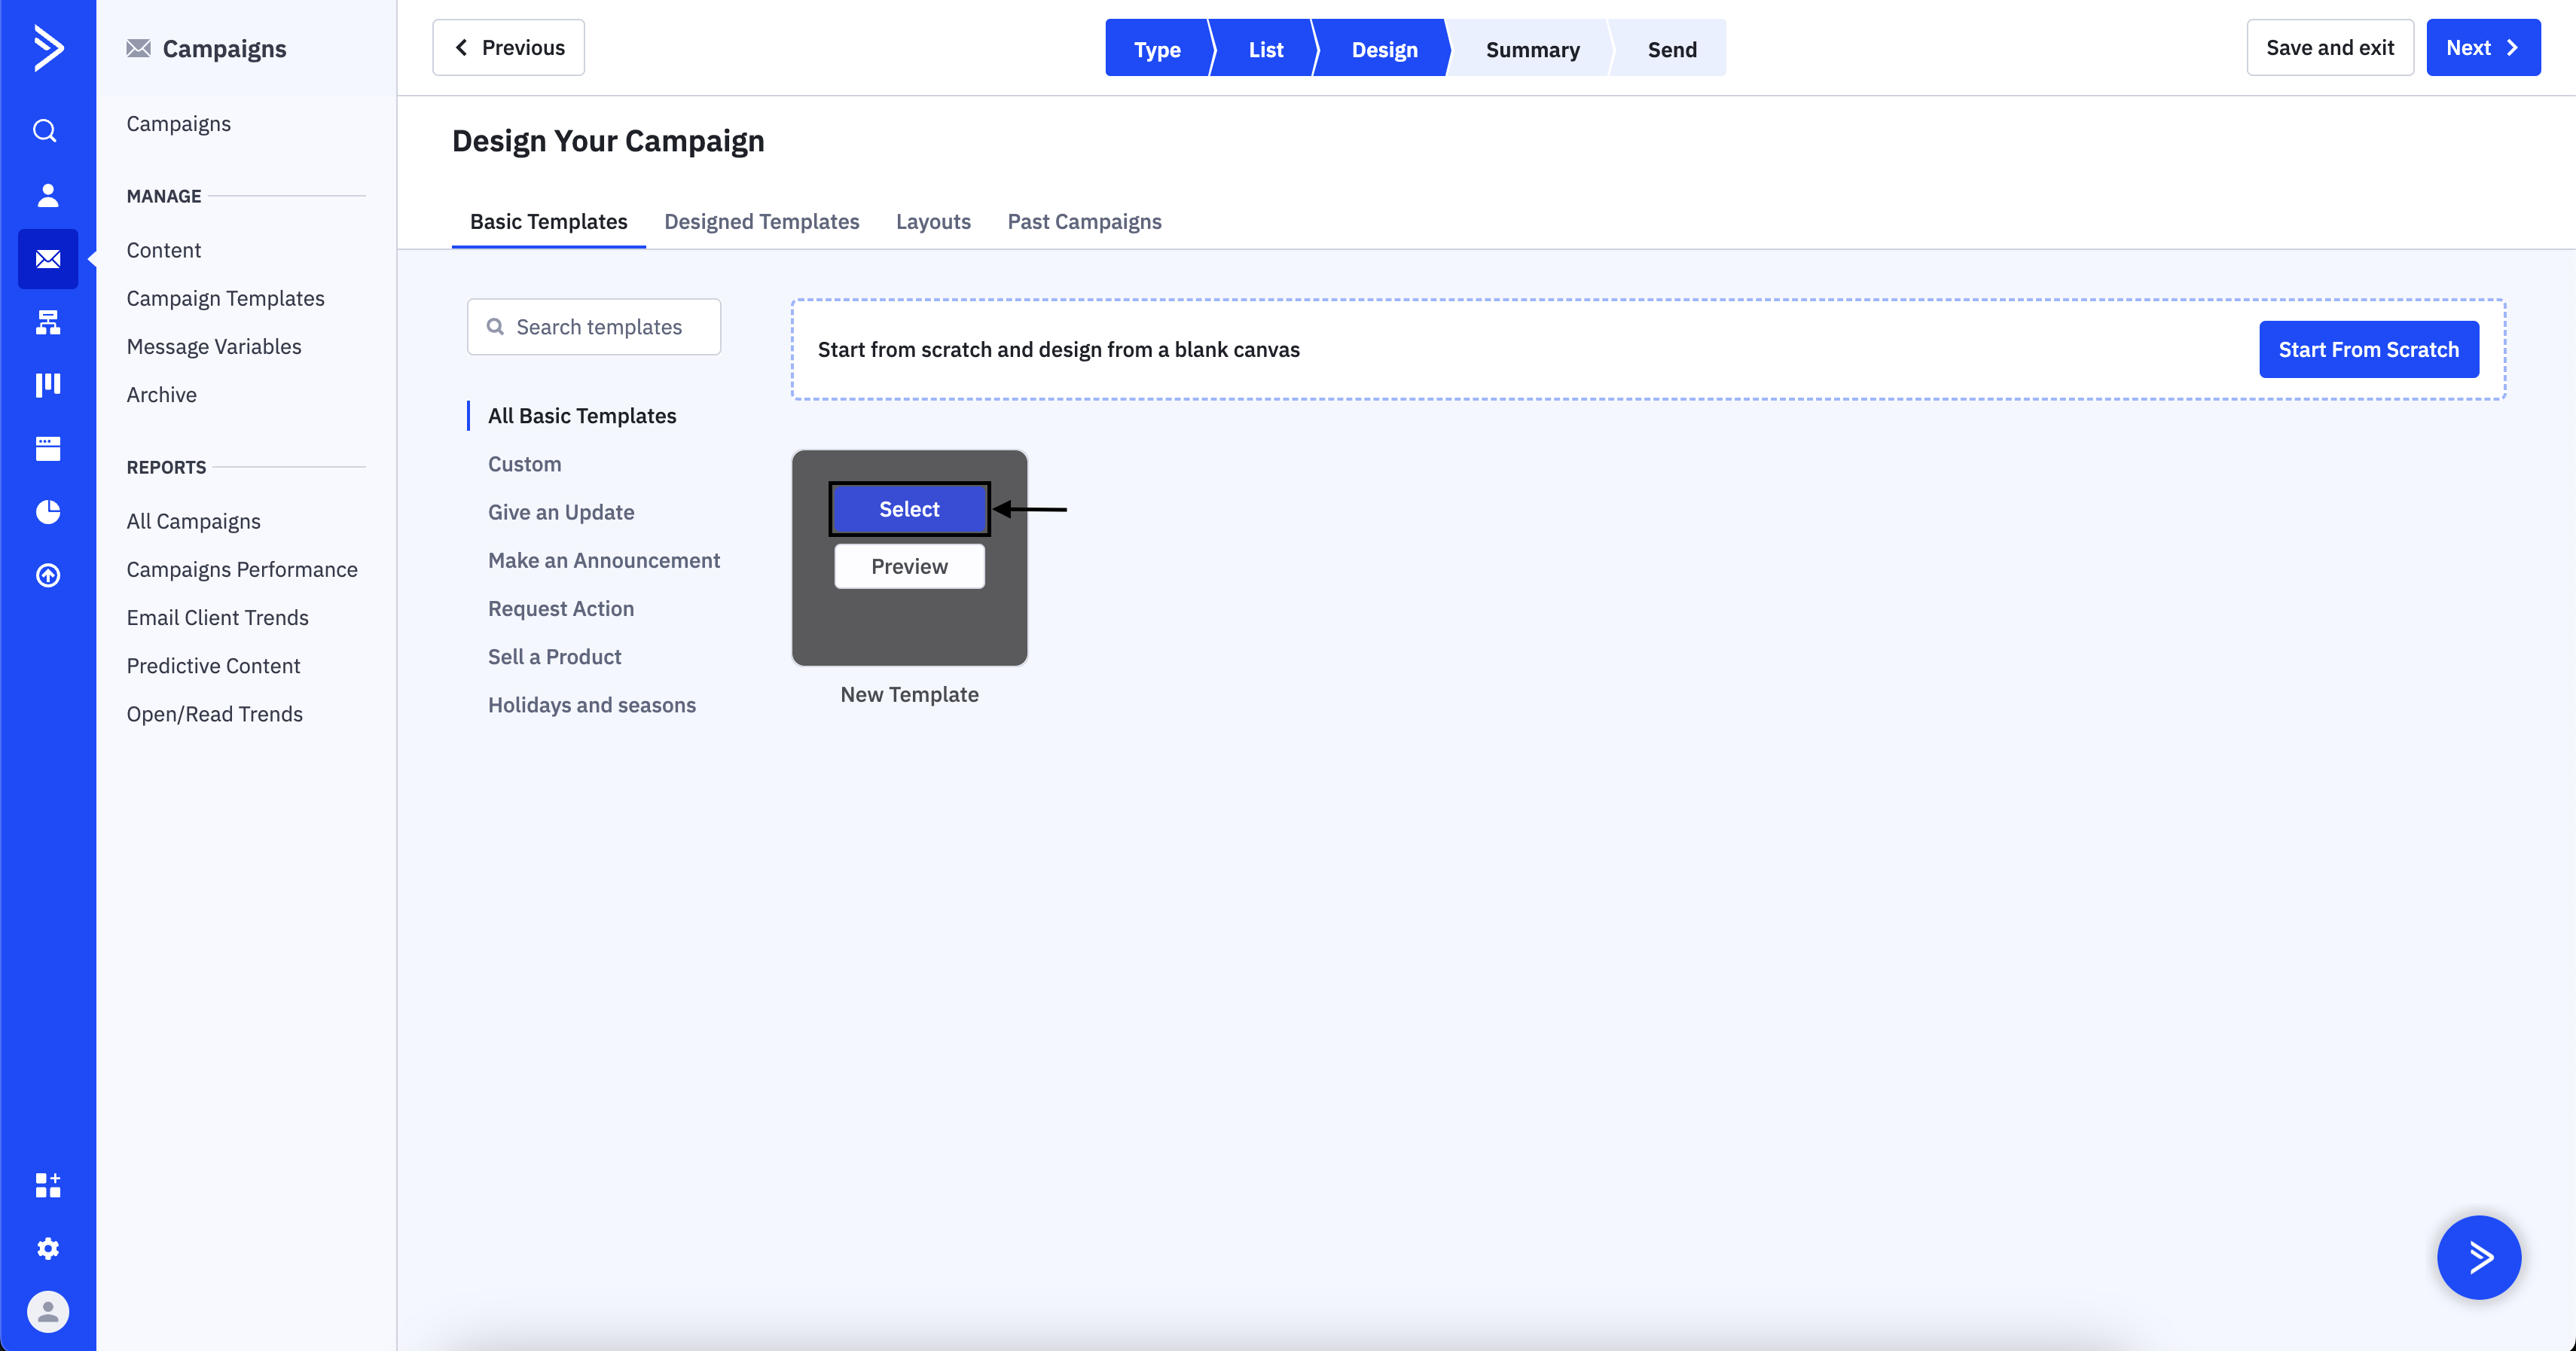
- Select new template, type the email subject, and continue.
- In the editor, paste your code.
- Select Image from the Insert dropdown and upload the images to ActiveCampaign.
- Replace the source of your existing images with the URLs provided by ActiveCampaign(see the example below).
- Fill all the campaign details(sender, subject, etc.) and send/schedule the mail.
Sending Kombai-generated HTML containing Base64 embedded images
To send the generated HTML code through ActiveCampaign, you have to:
- Repeat steps 1-7 from Creating a campaign in ActiveCampaign.
- Save the template, fill all the campaign details(sender, subject, etc.), and send/schedule the mail.
Campaign Monitor
Sending Kombai-generated HTML containing assets and linked images
To send the Kombai-generated(base64) HTML code through Campaign Monitor, you have to:
Creating a campaign in Campaign Monitor
- Download the code from Kombai and sign up for Campaign Monitor.
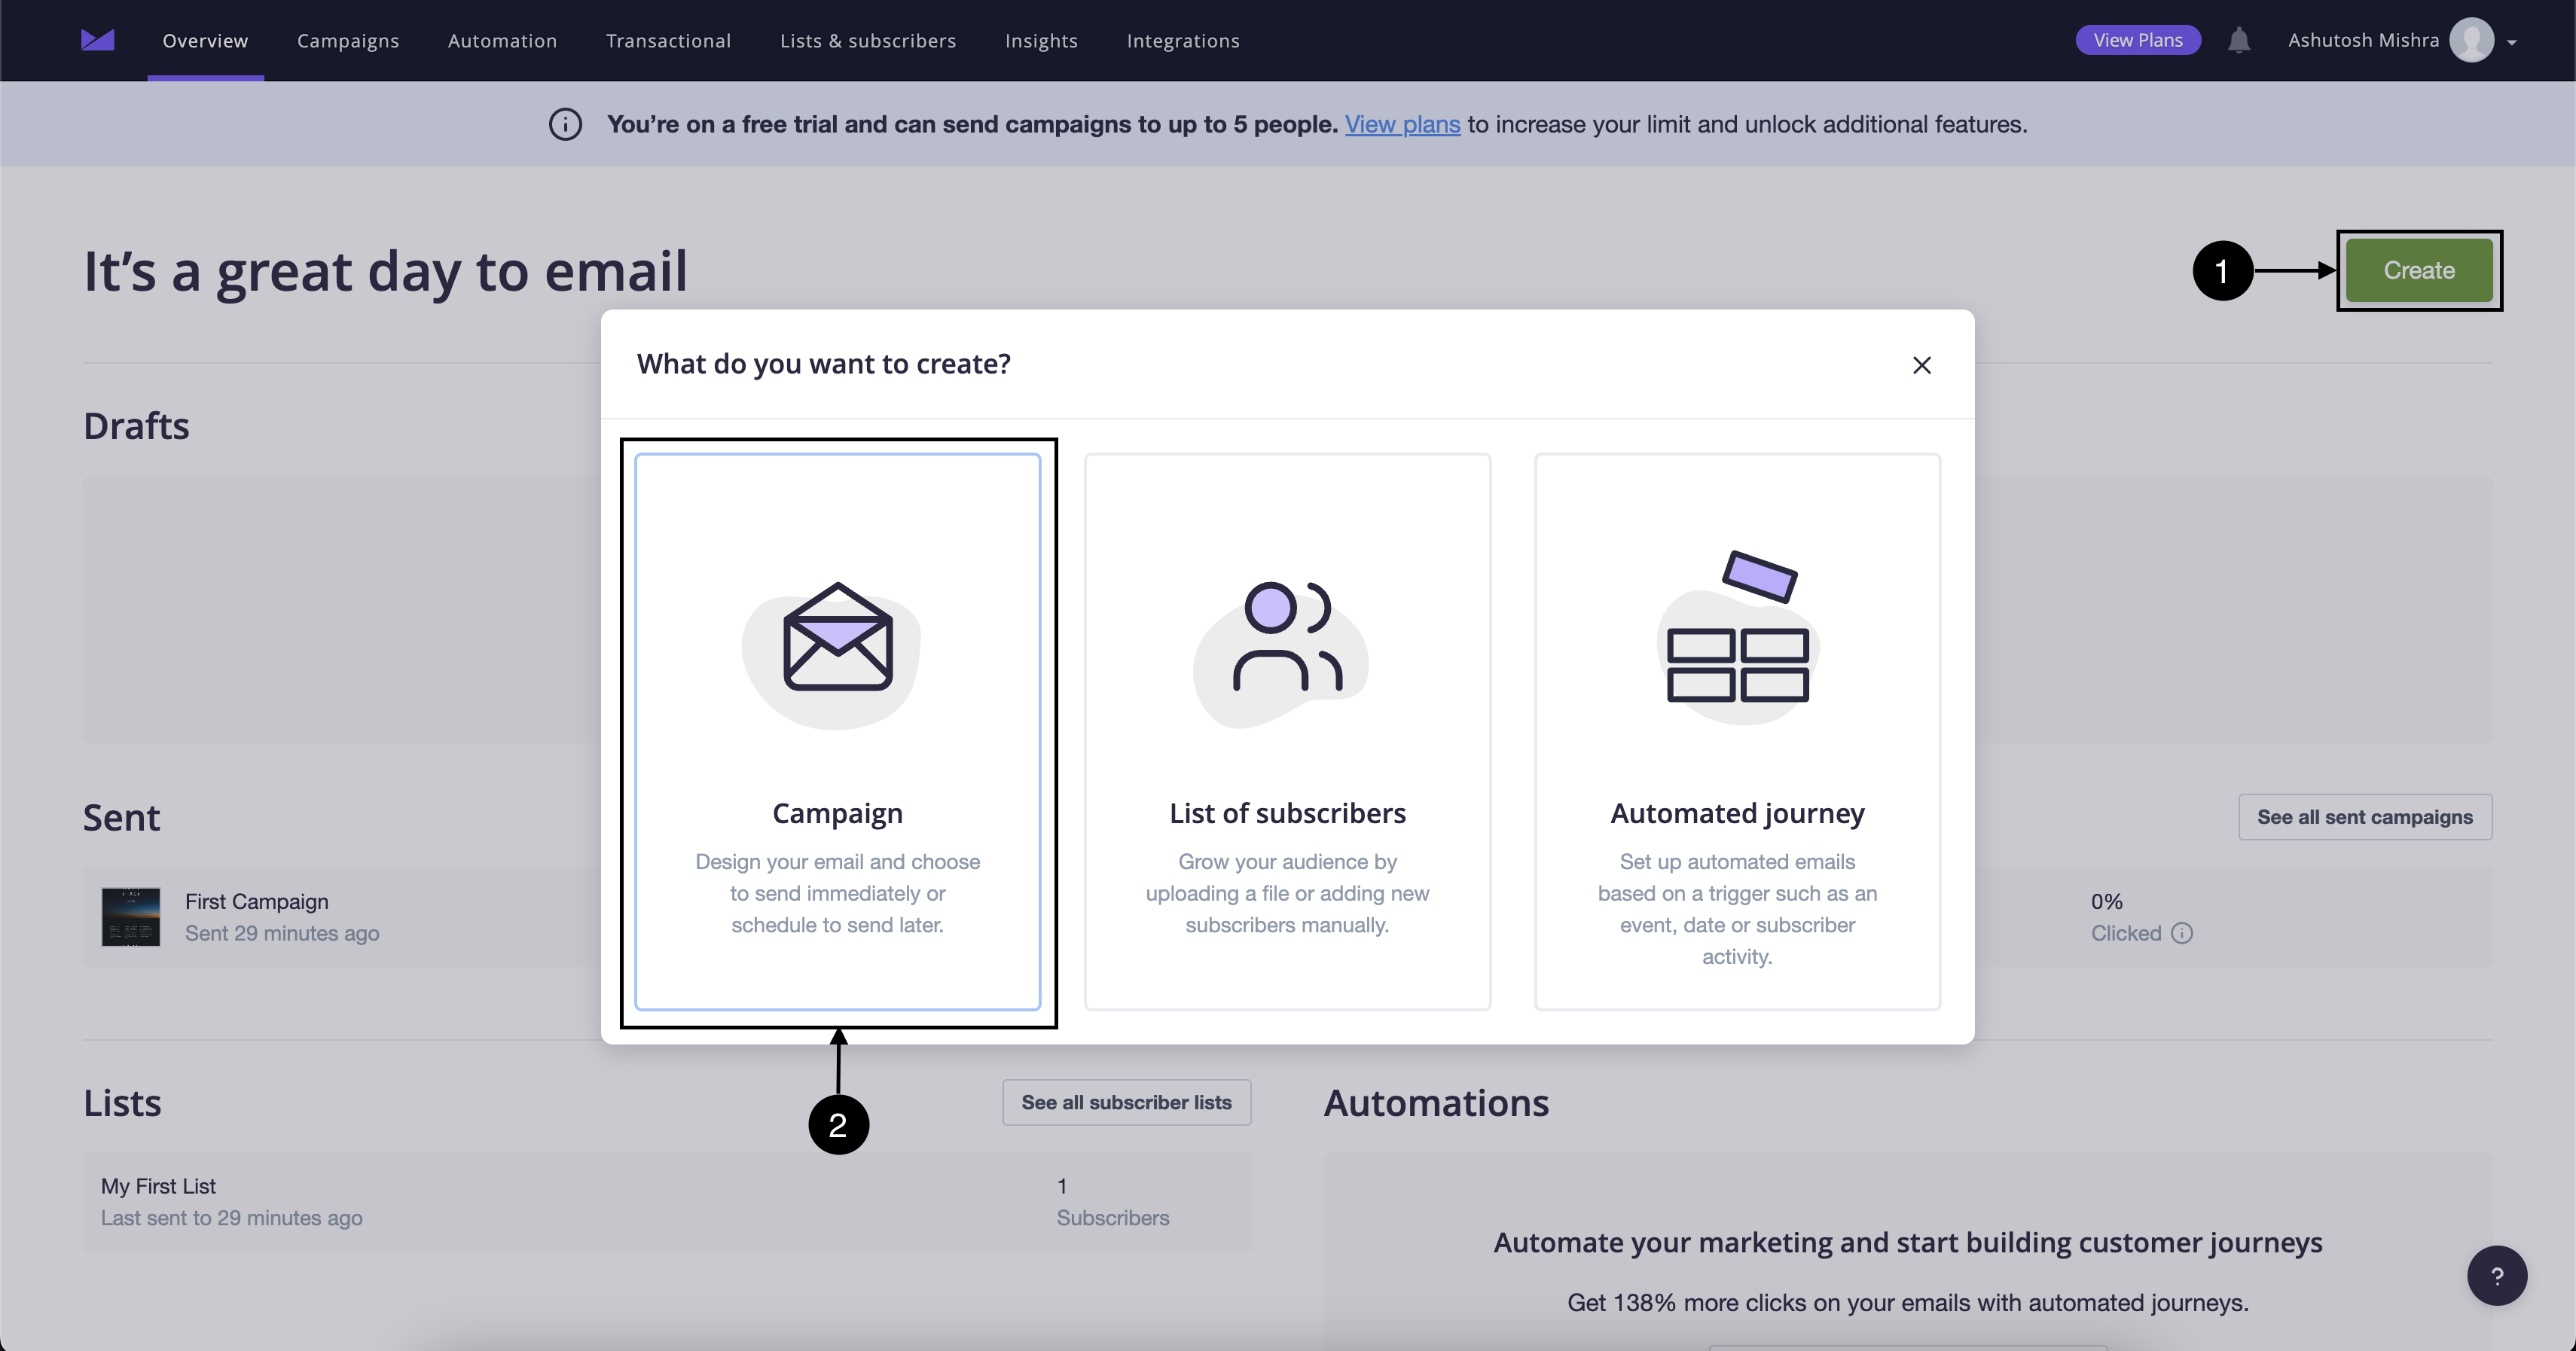
- In the dashboard, click Create, then select Campaign.
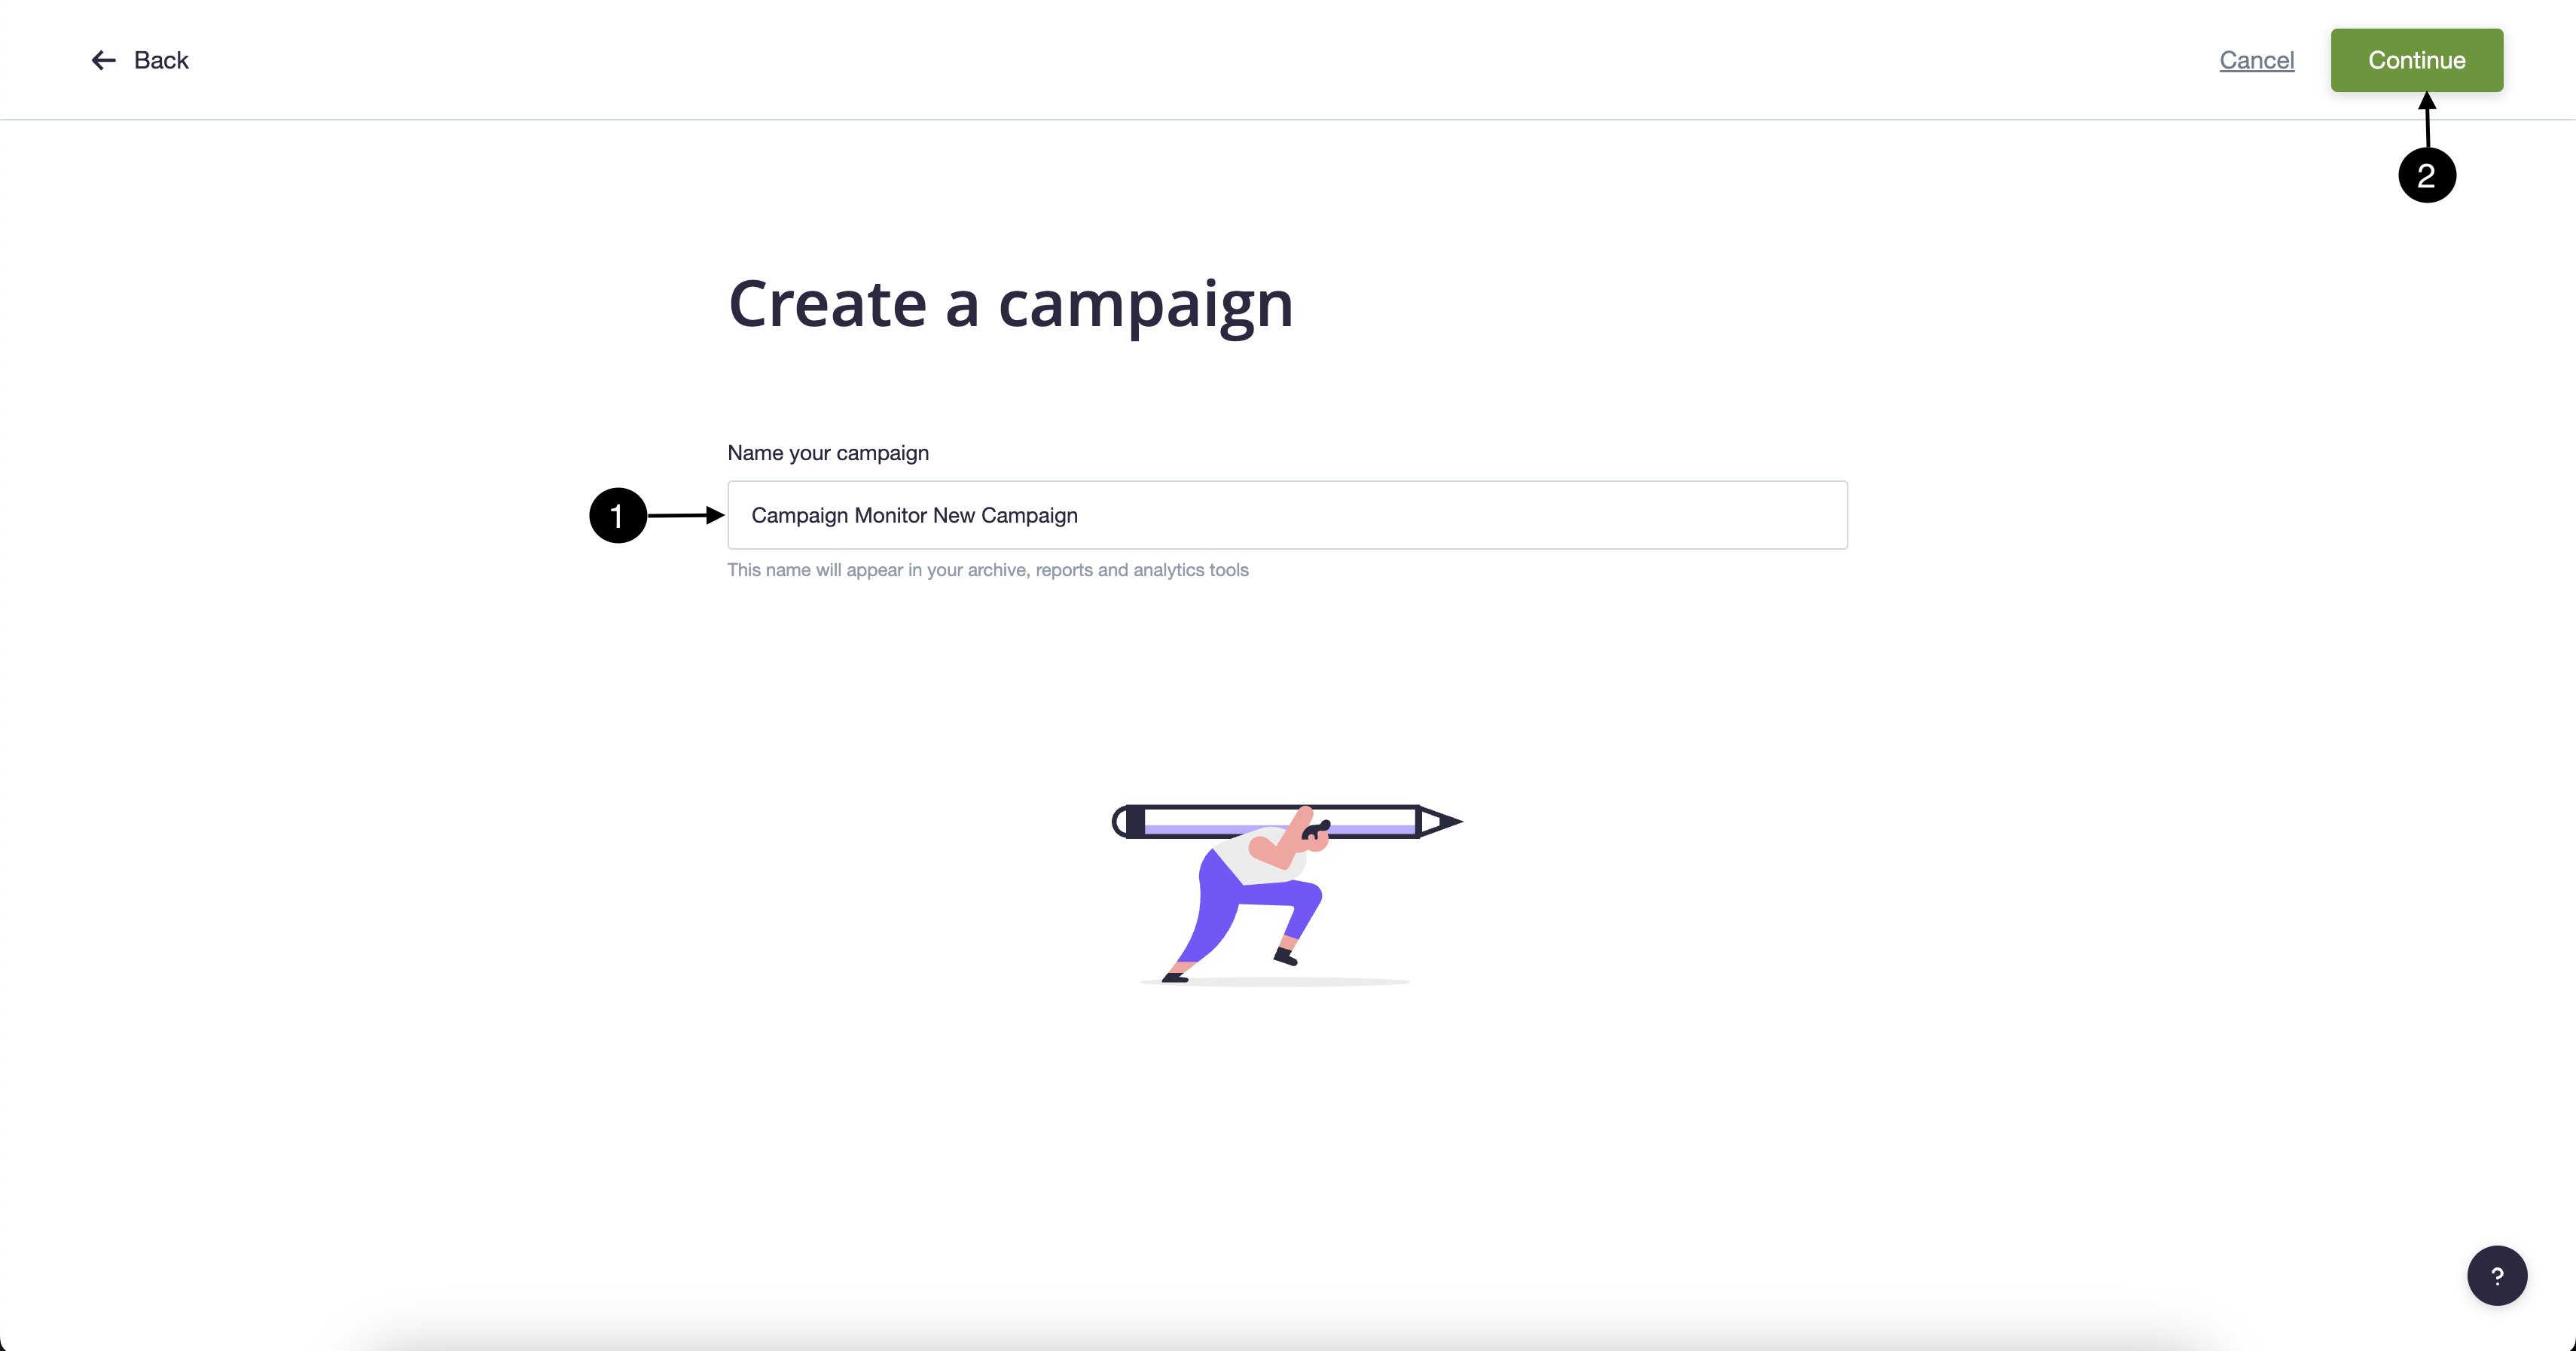
- Name your campaign and continue.
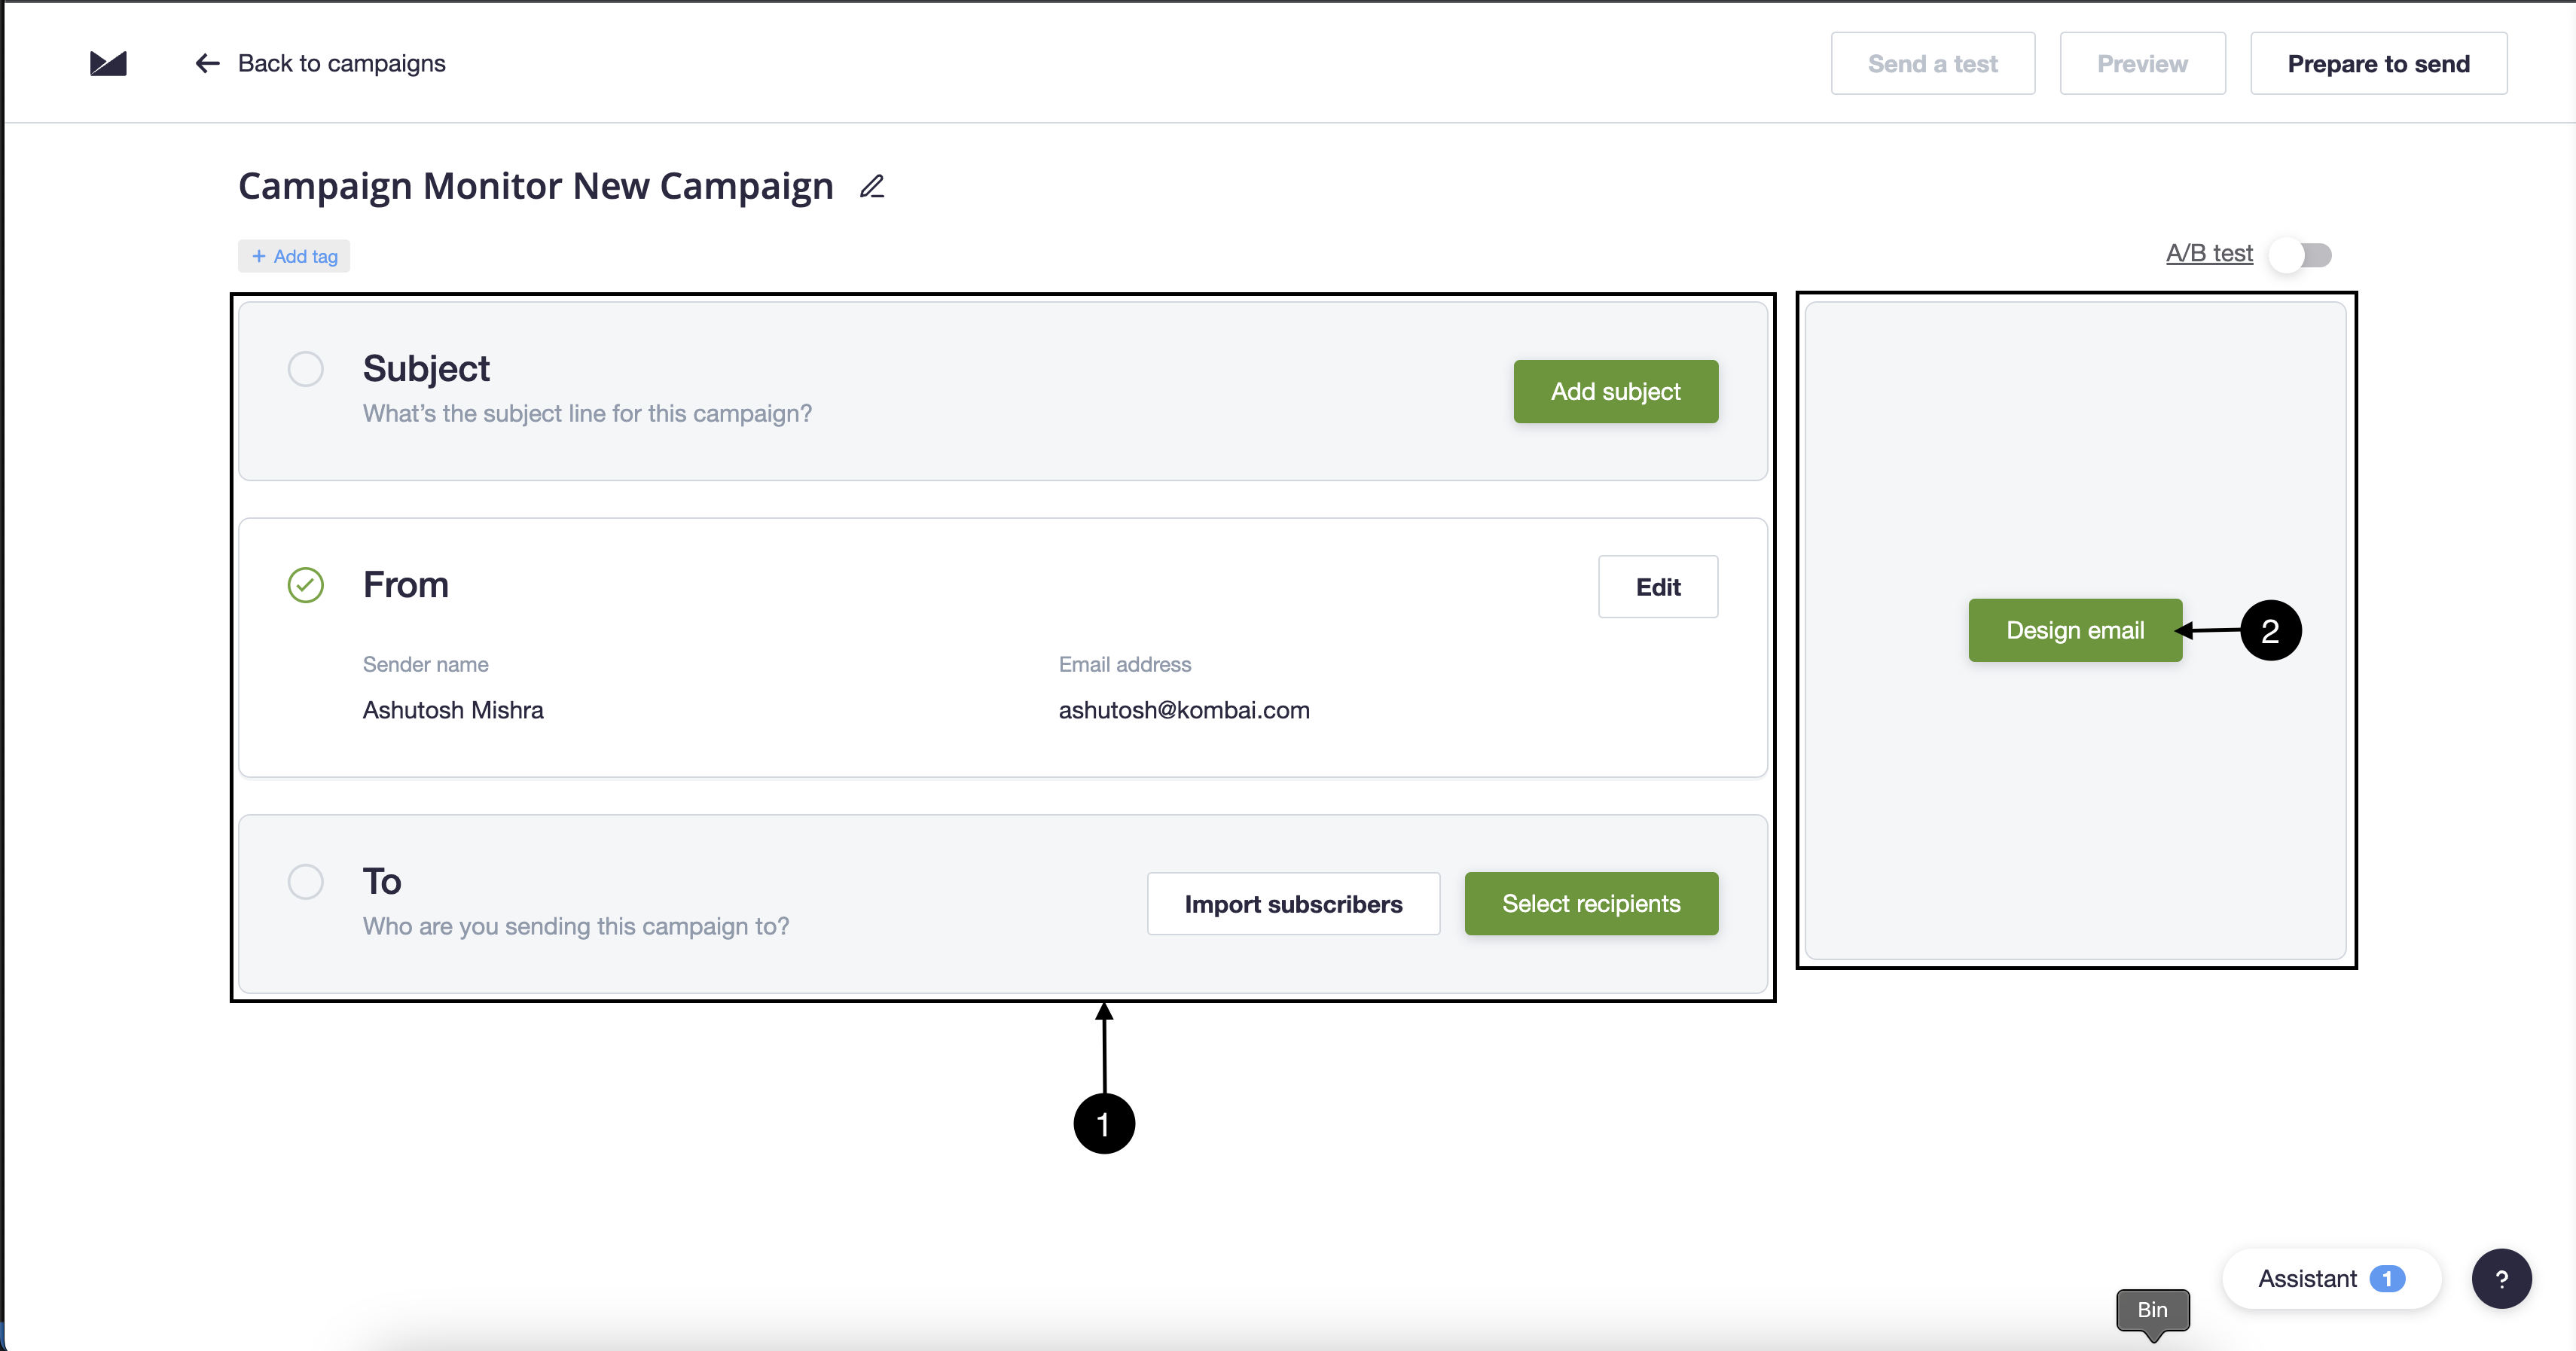
- Fill in the necessary info like subject, from, etc., and click Design Email.
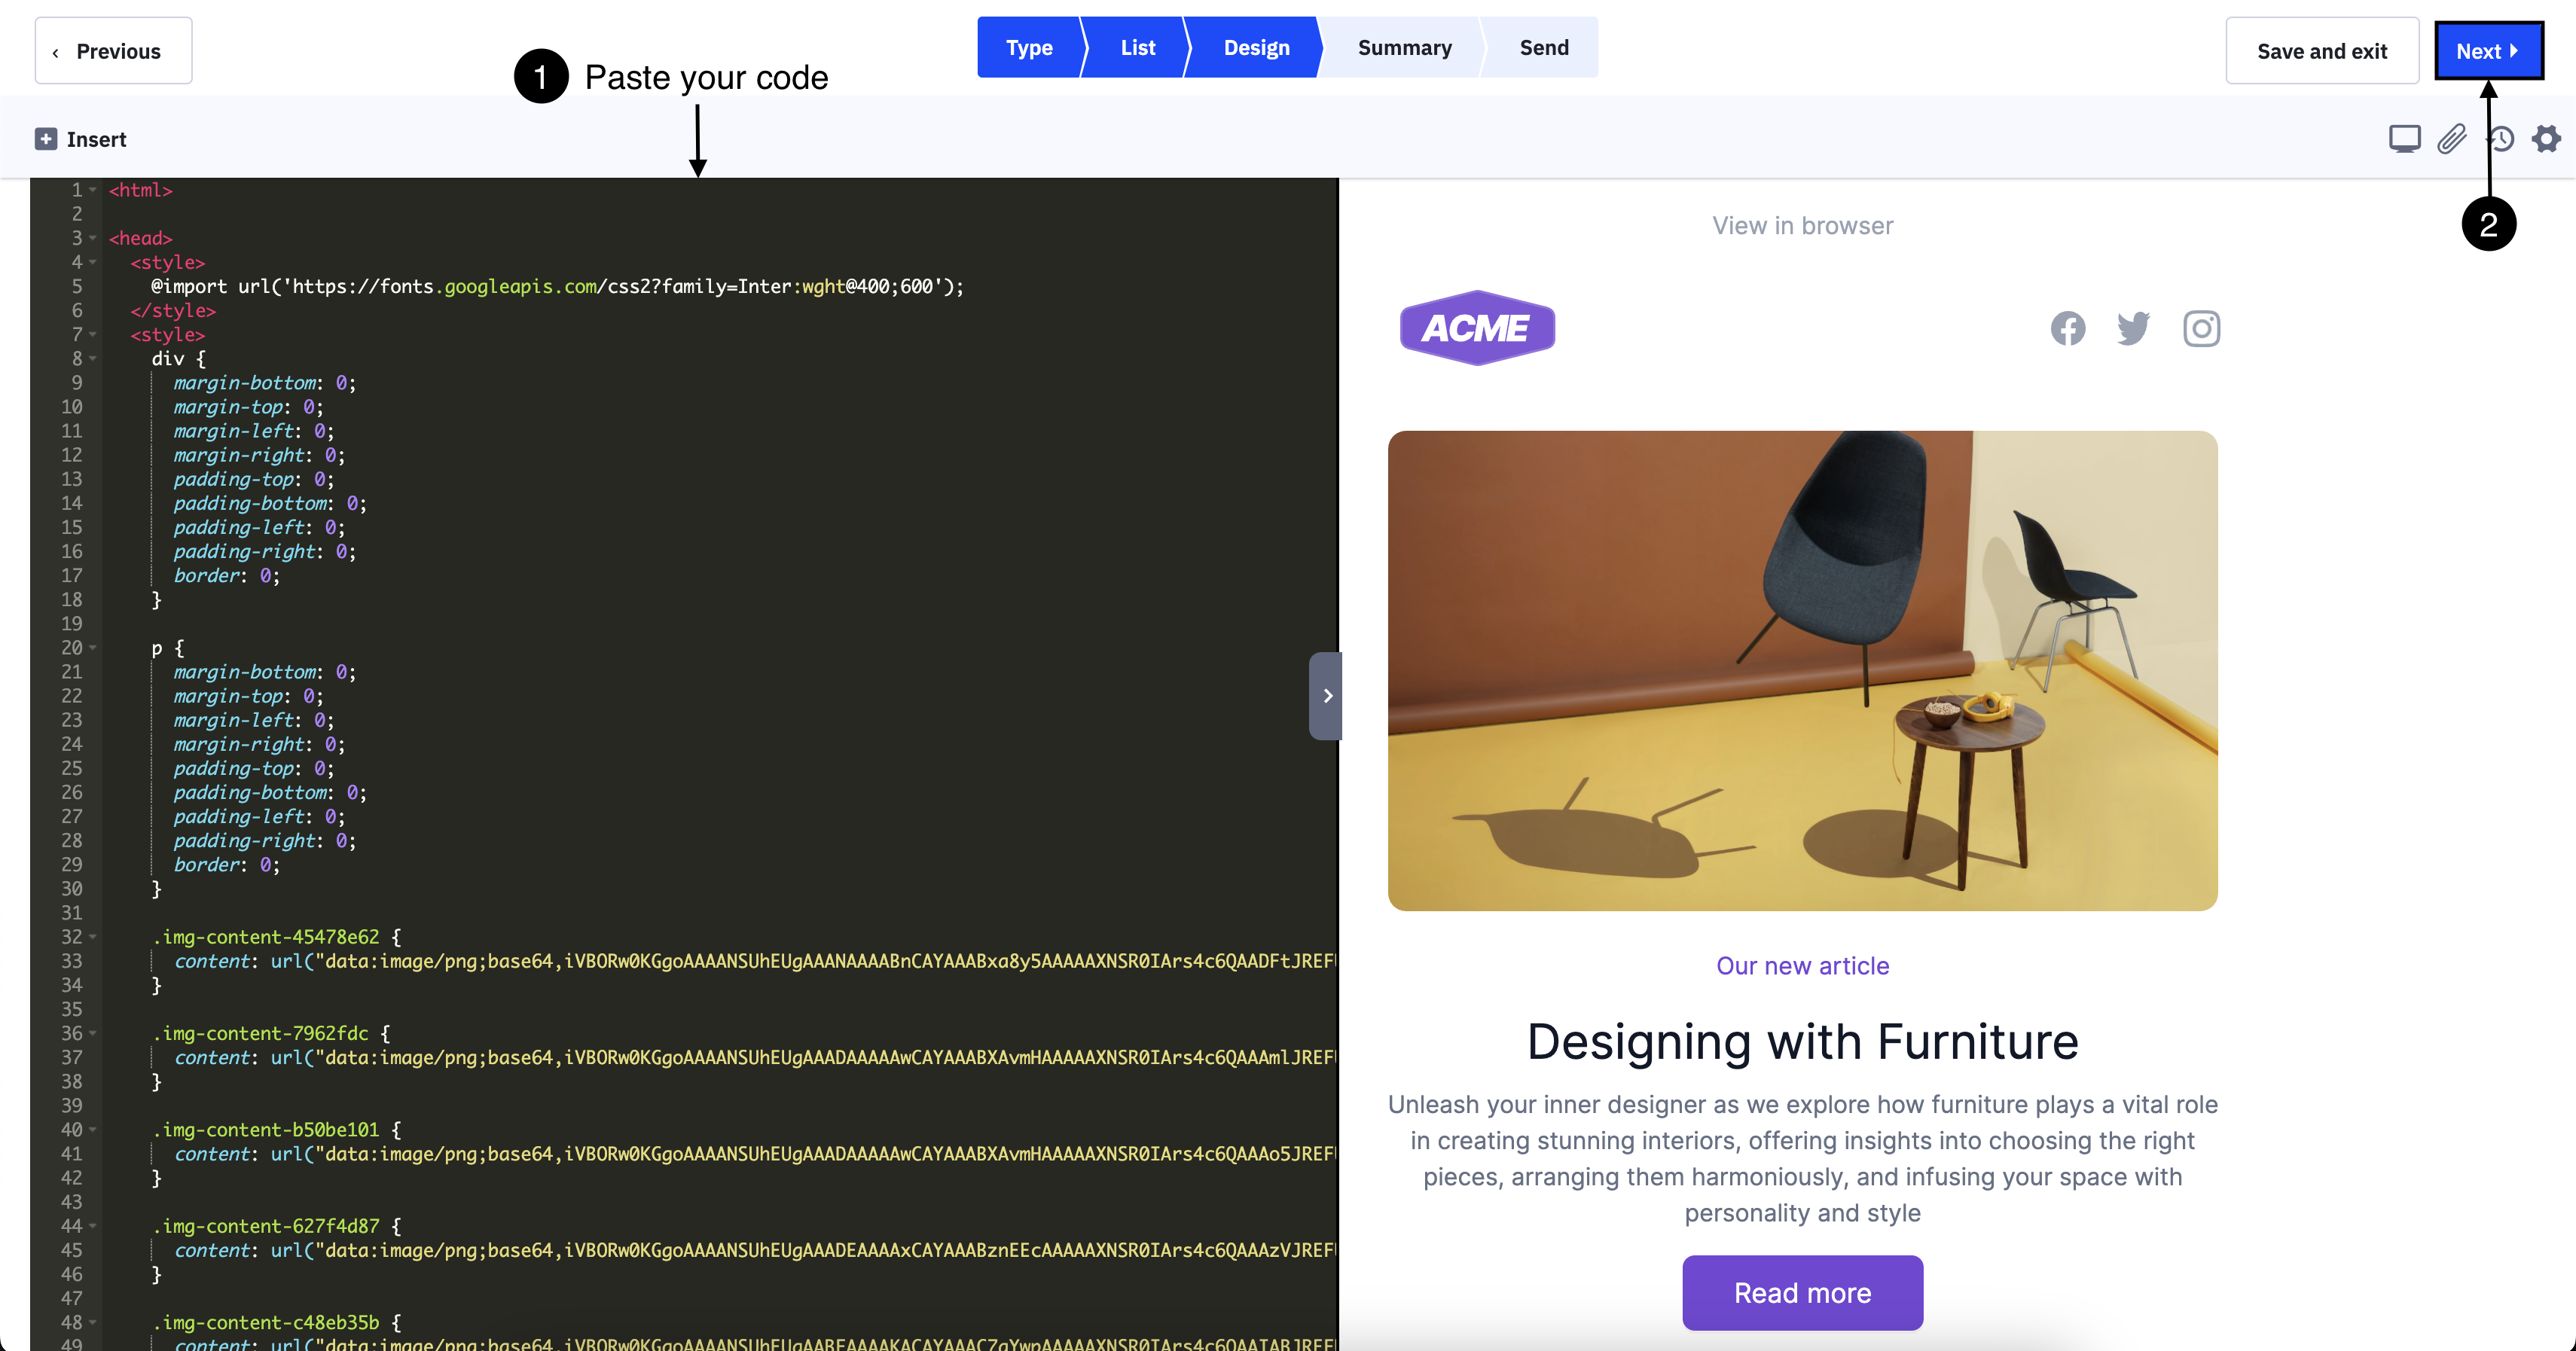
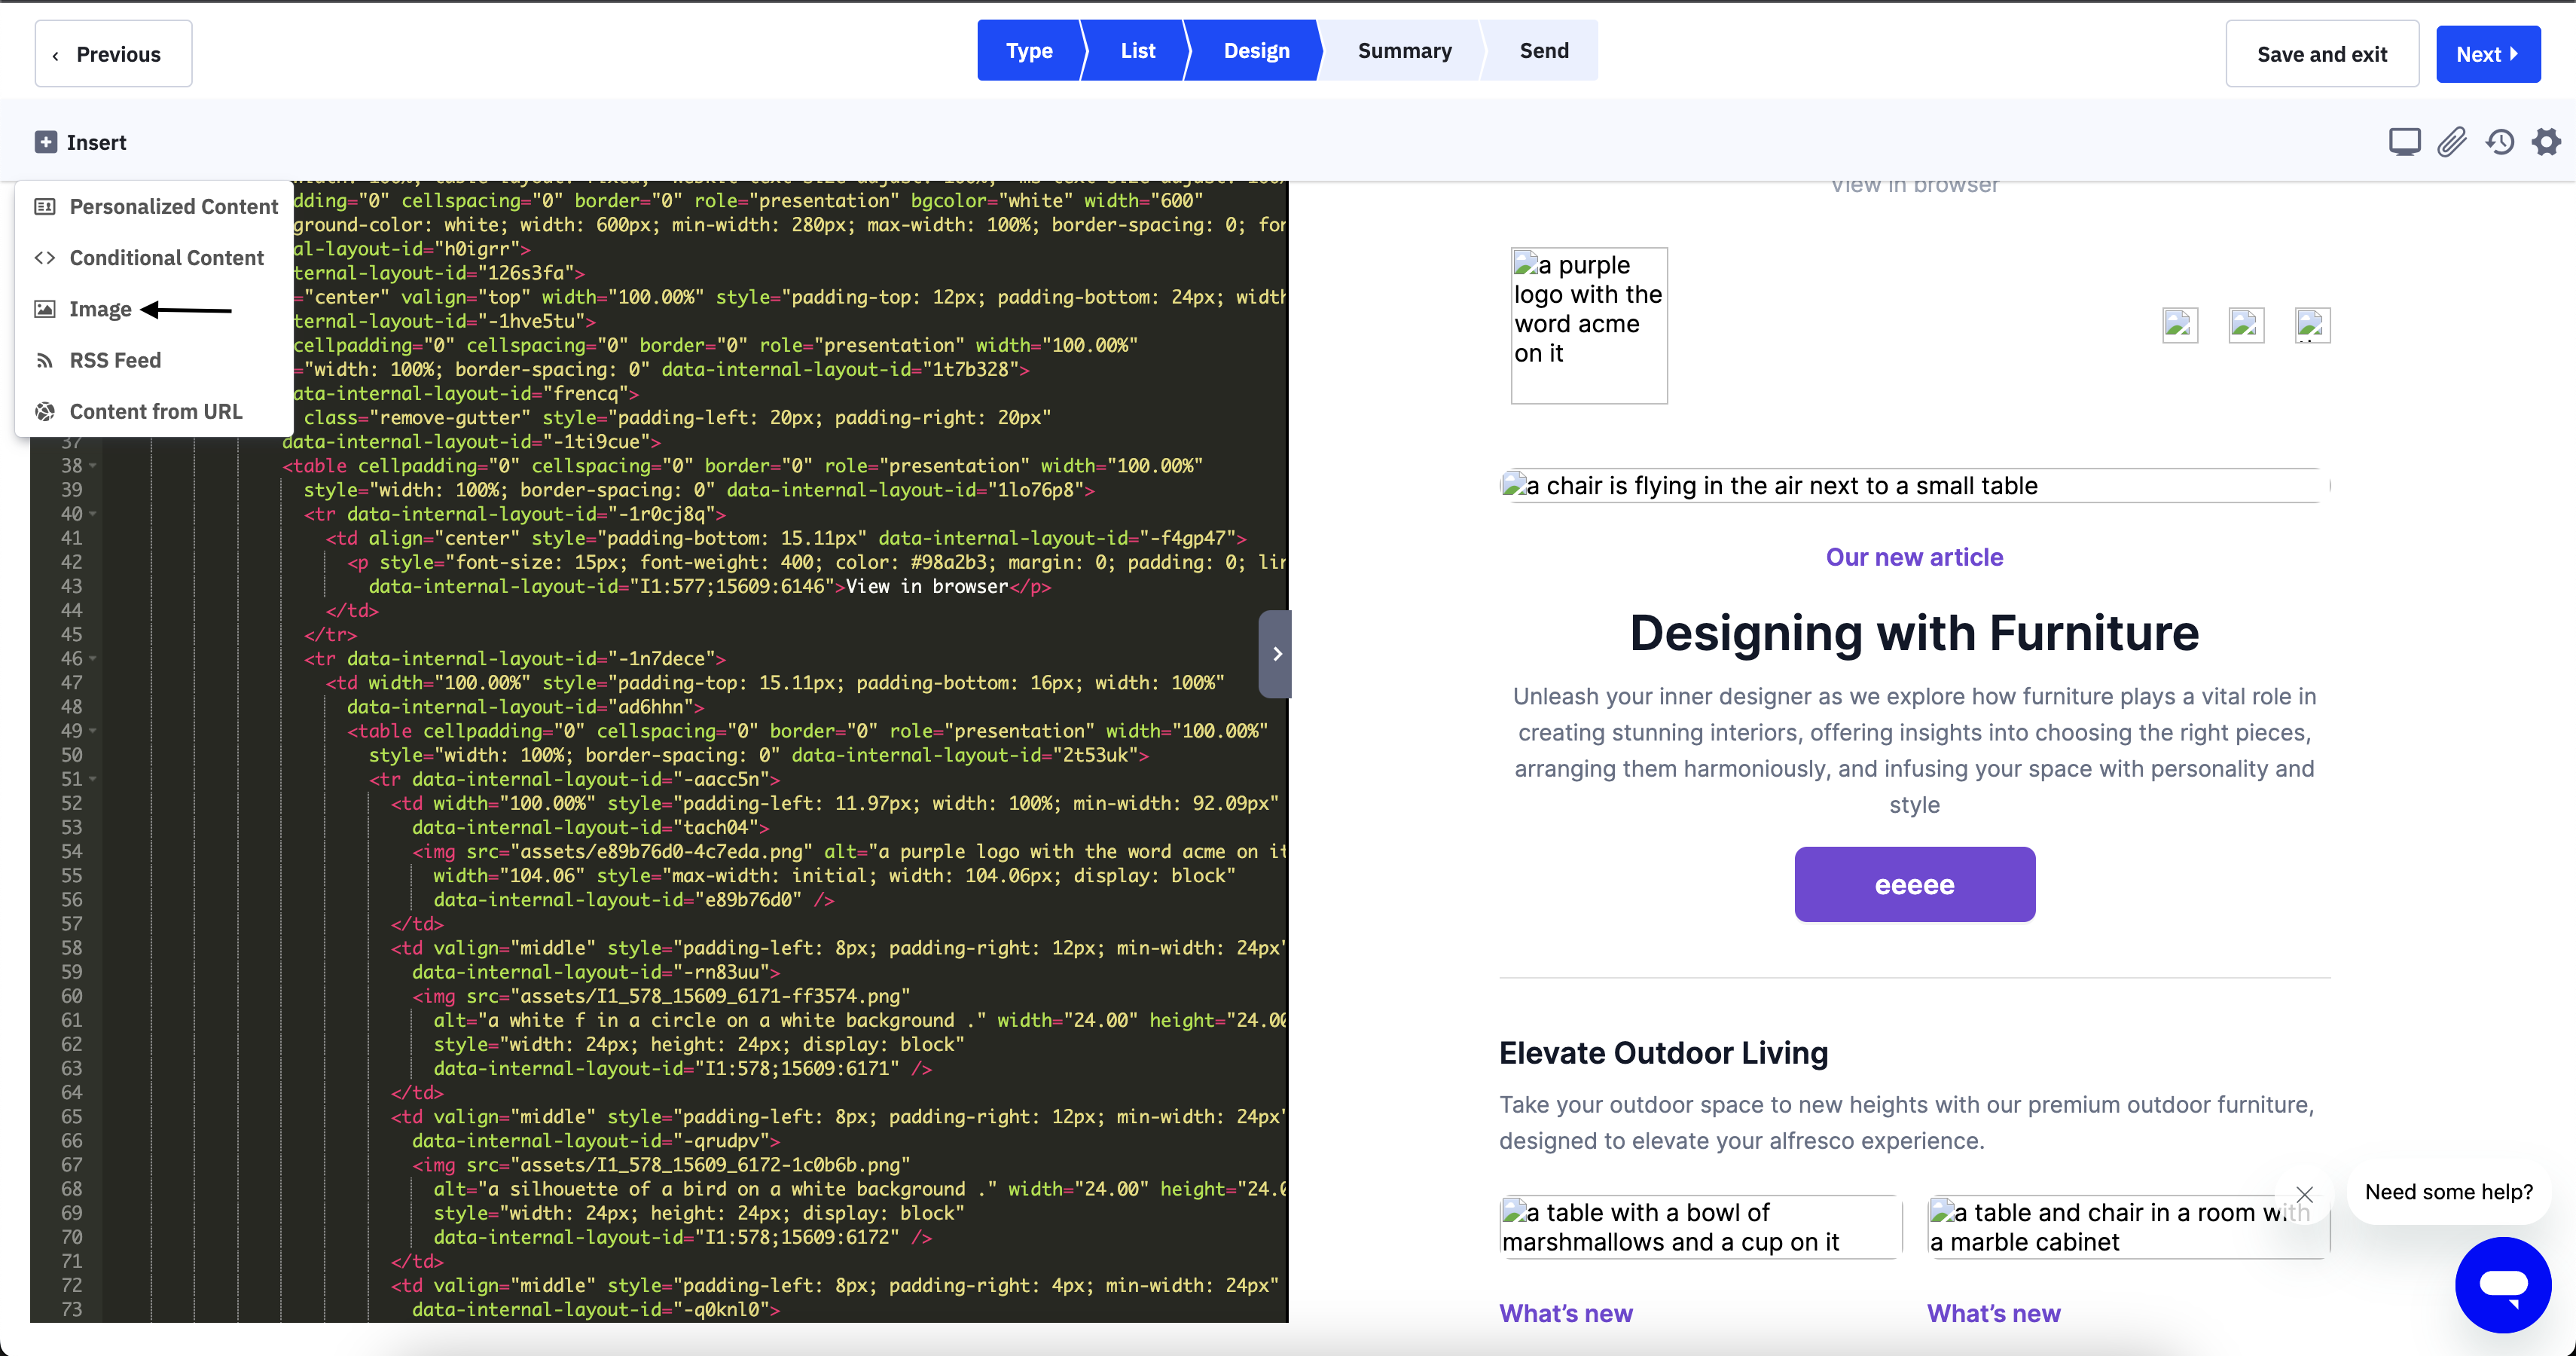
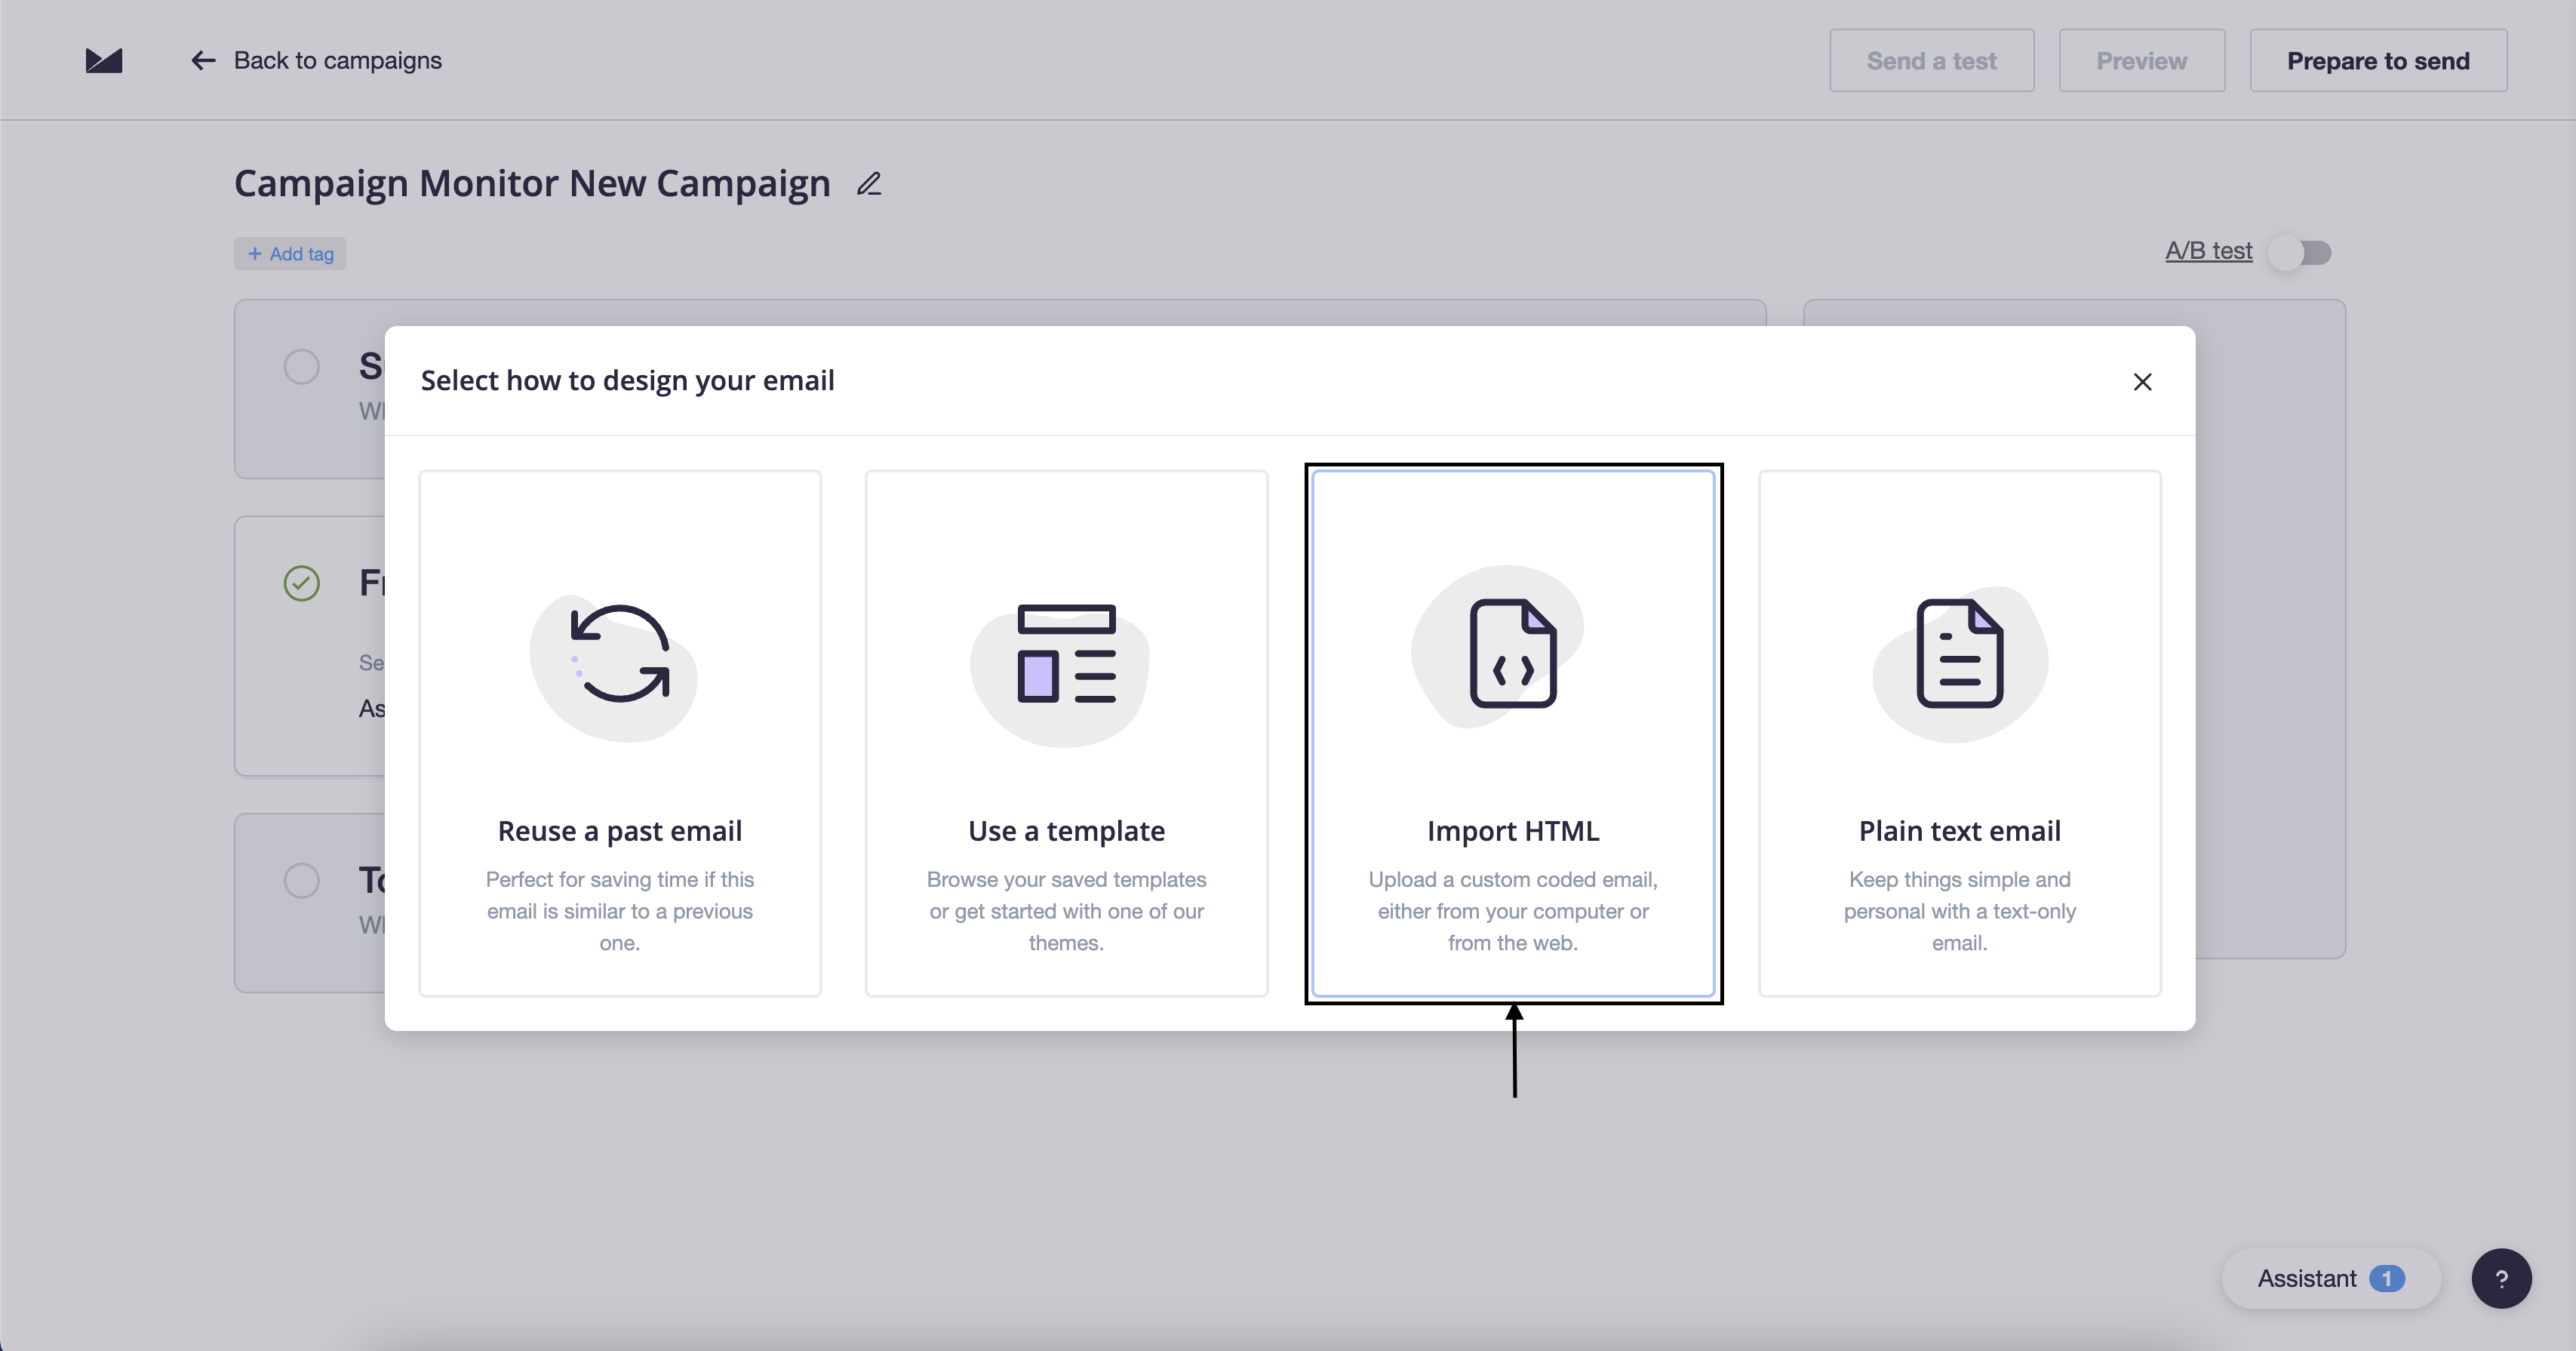
- Select Import HTML.
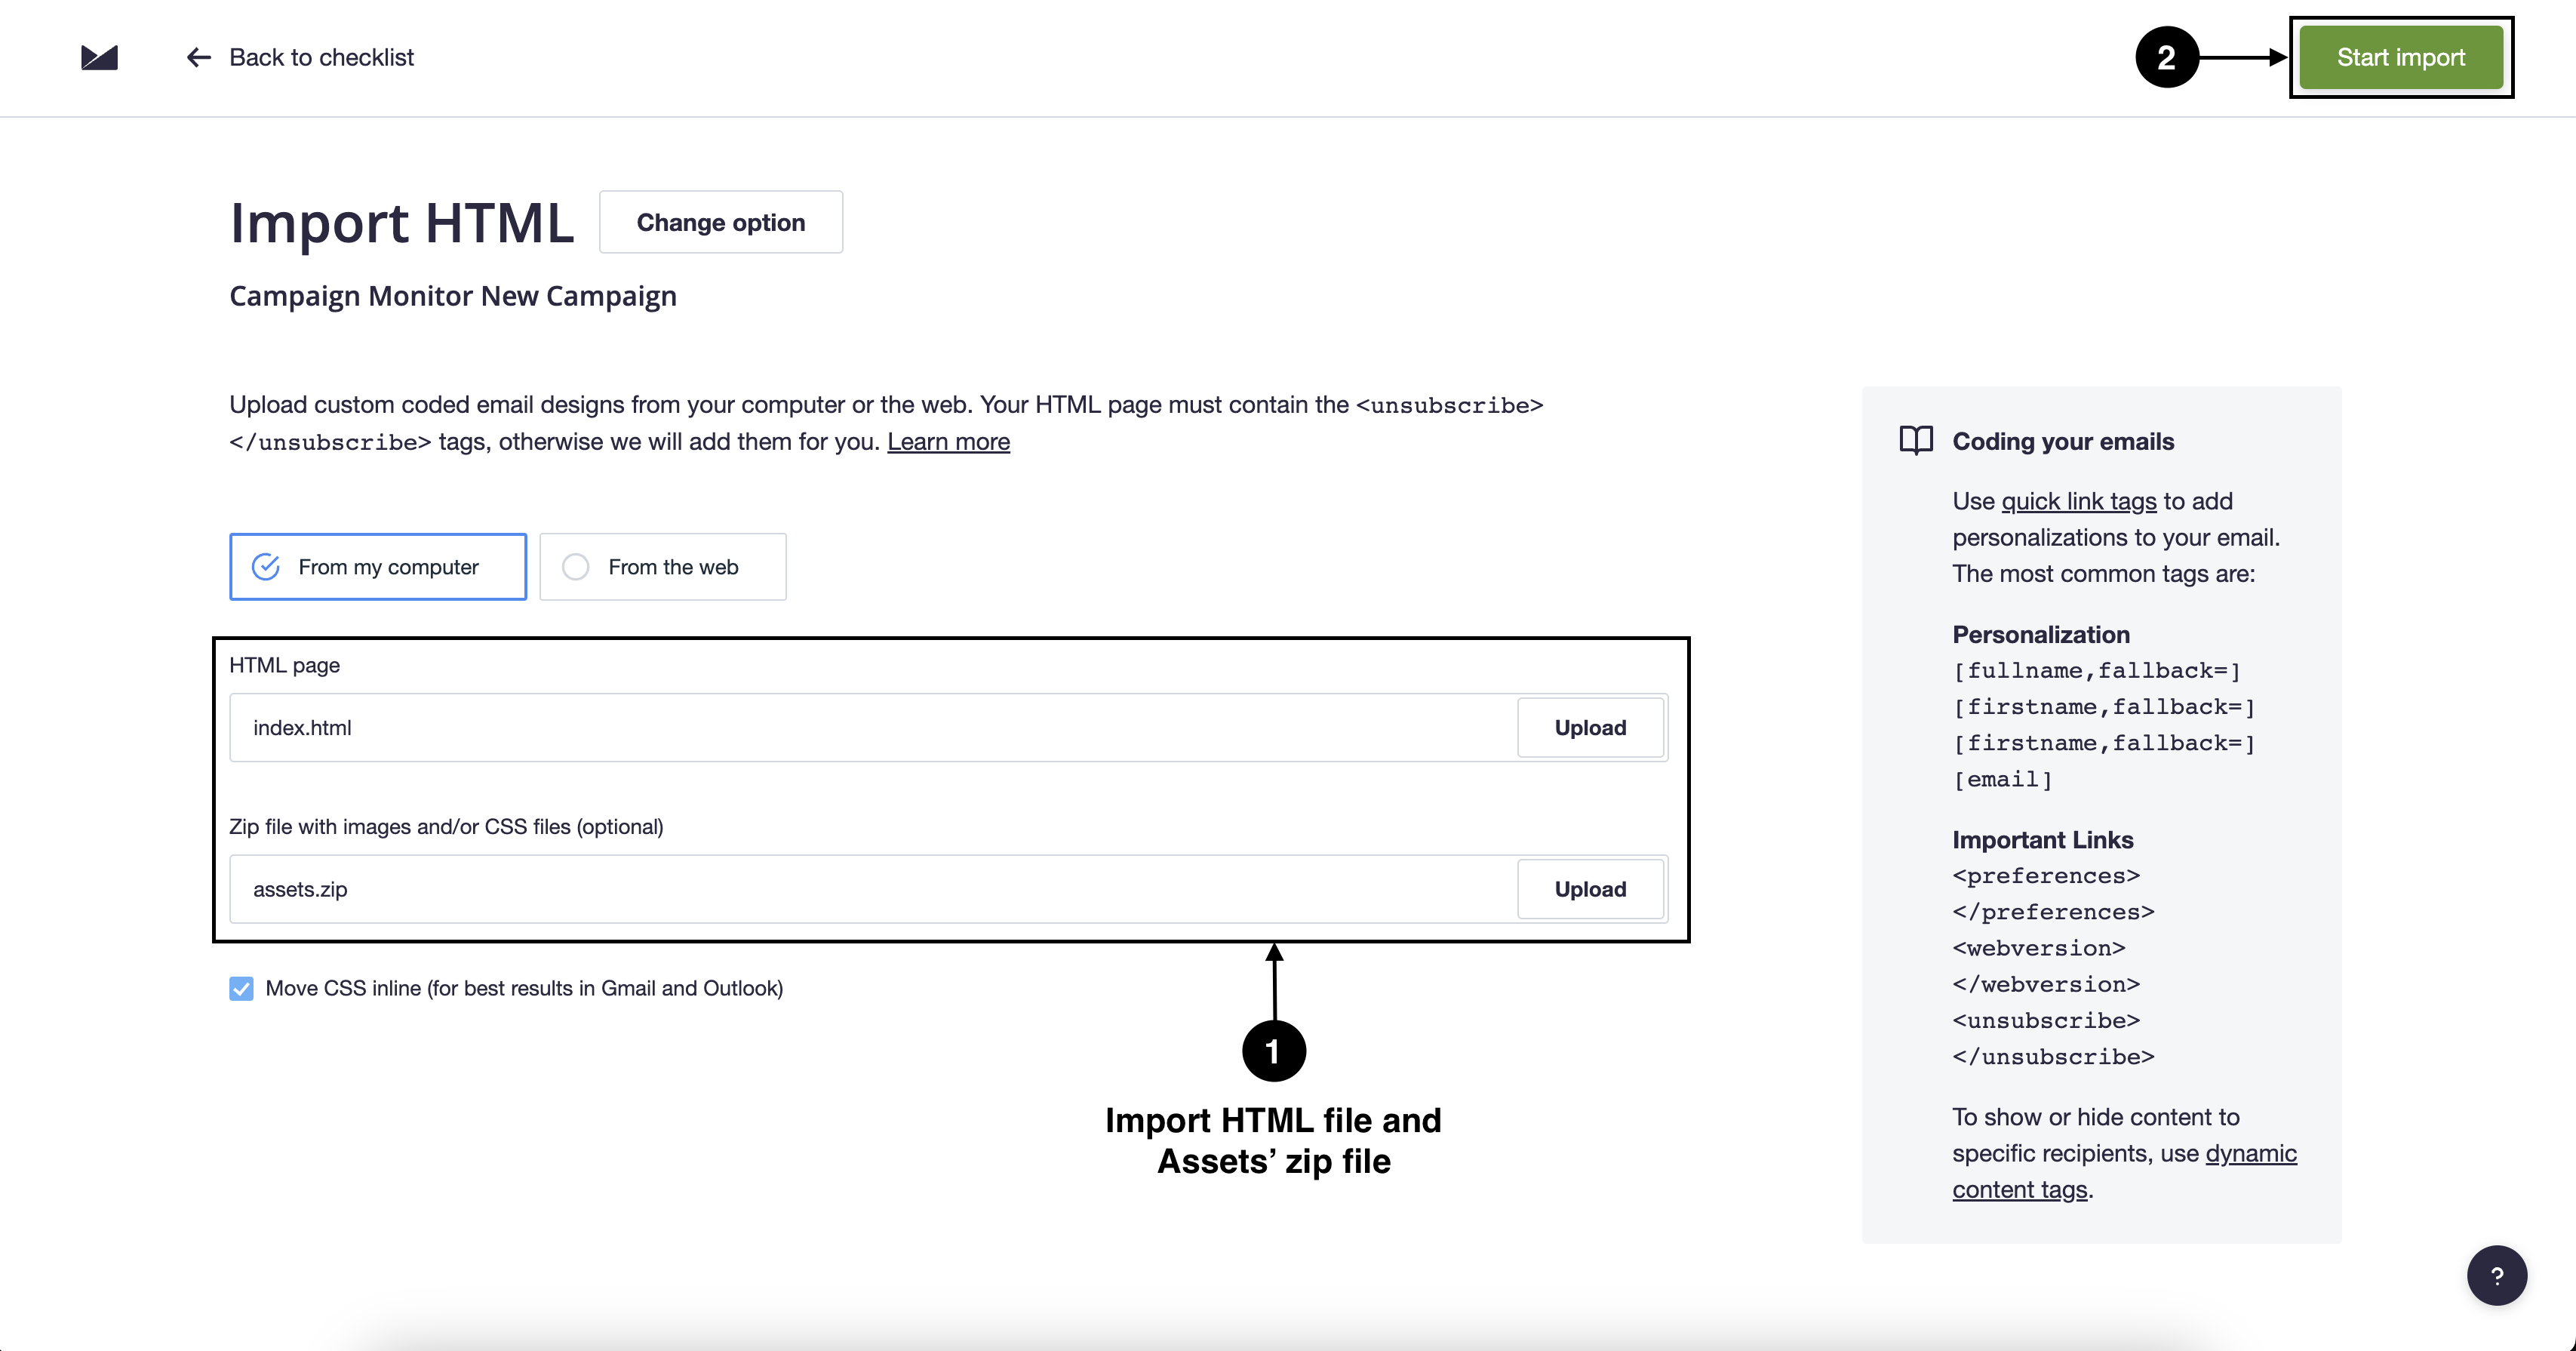
- Import your HTML file and zip file of the assets folder and click Start Import.
- Continue further and send/schedule the mail.
Sending Kombai-generated HTML containing Base64 embedded images
To send the Kombai-generated(base64) HTML code through Campaign Monitor, you have to:
- Repeat steps 1-5 of Creating a campaign in Campaign Monitor.
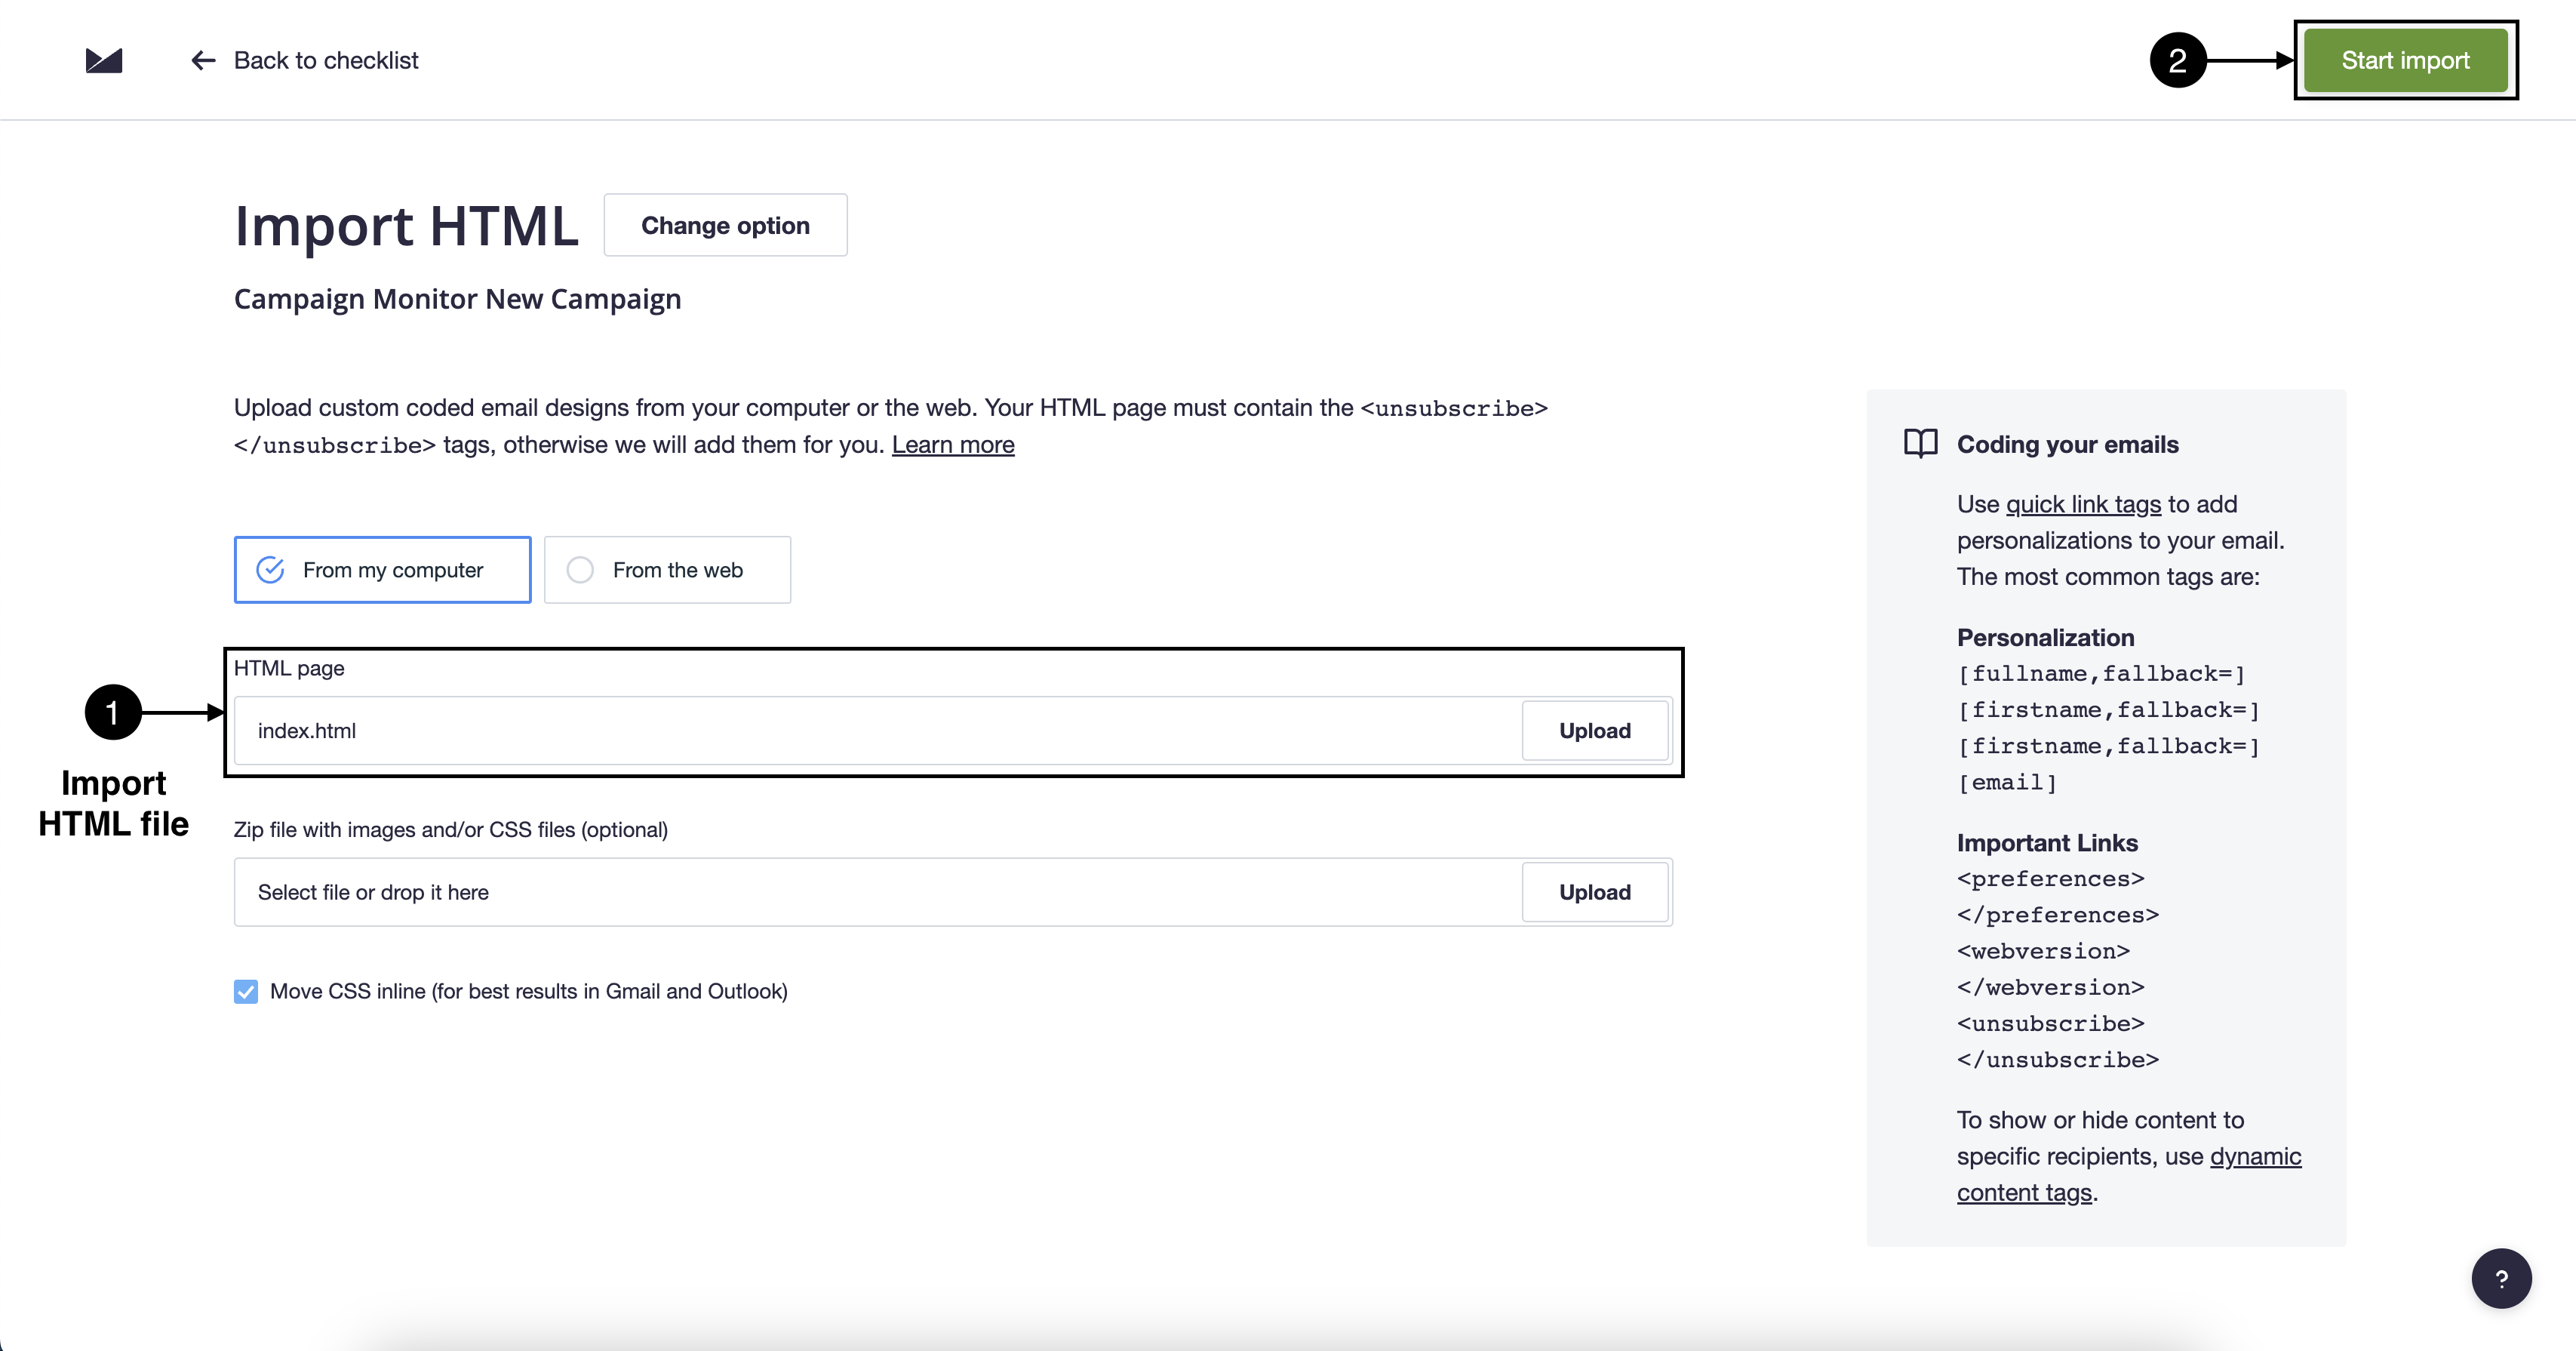
- Import your HTML file and click Start Import.
- Continue further and send/schedule the mail.
Moosend
Sending Kombai-generated HTML containing assets and linked images
To send the generated HTML code through Moosend, you have to:
Creating a campaign in Moosend
- Download the code from Kombai and sign up for Moosend.
- Choose Campaigns > Regular in the menu bar.
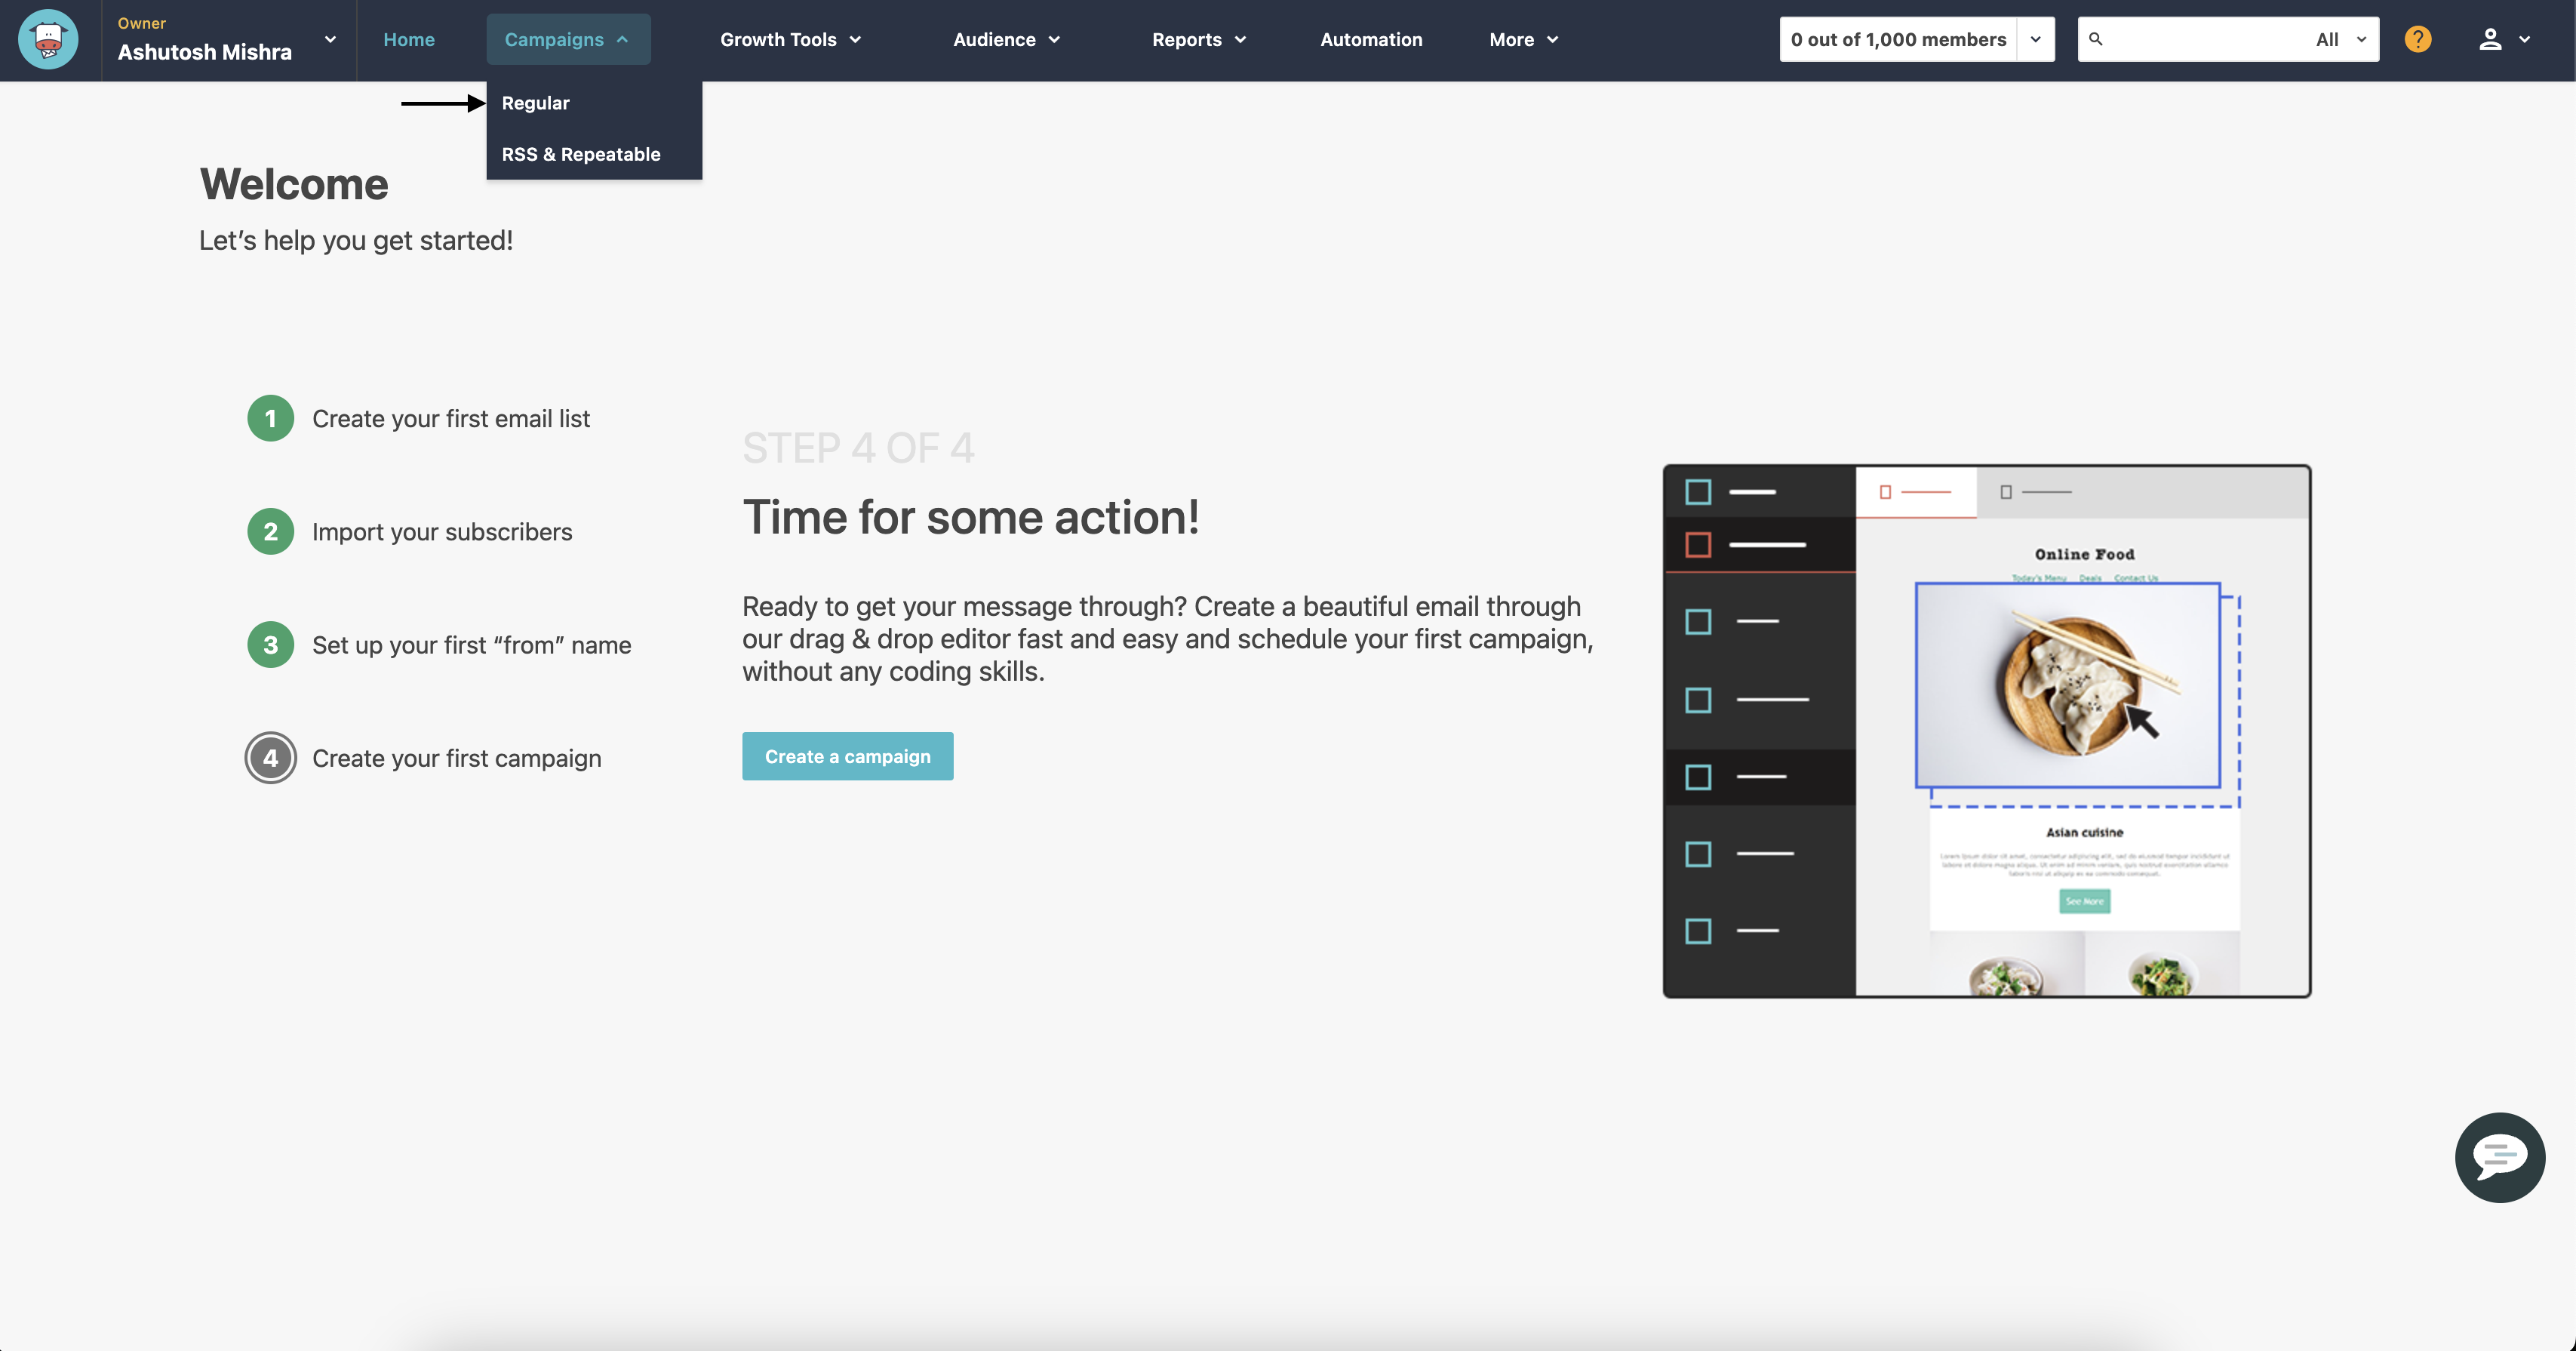
- Click New, then Regular.
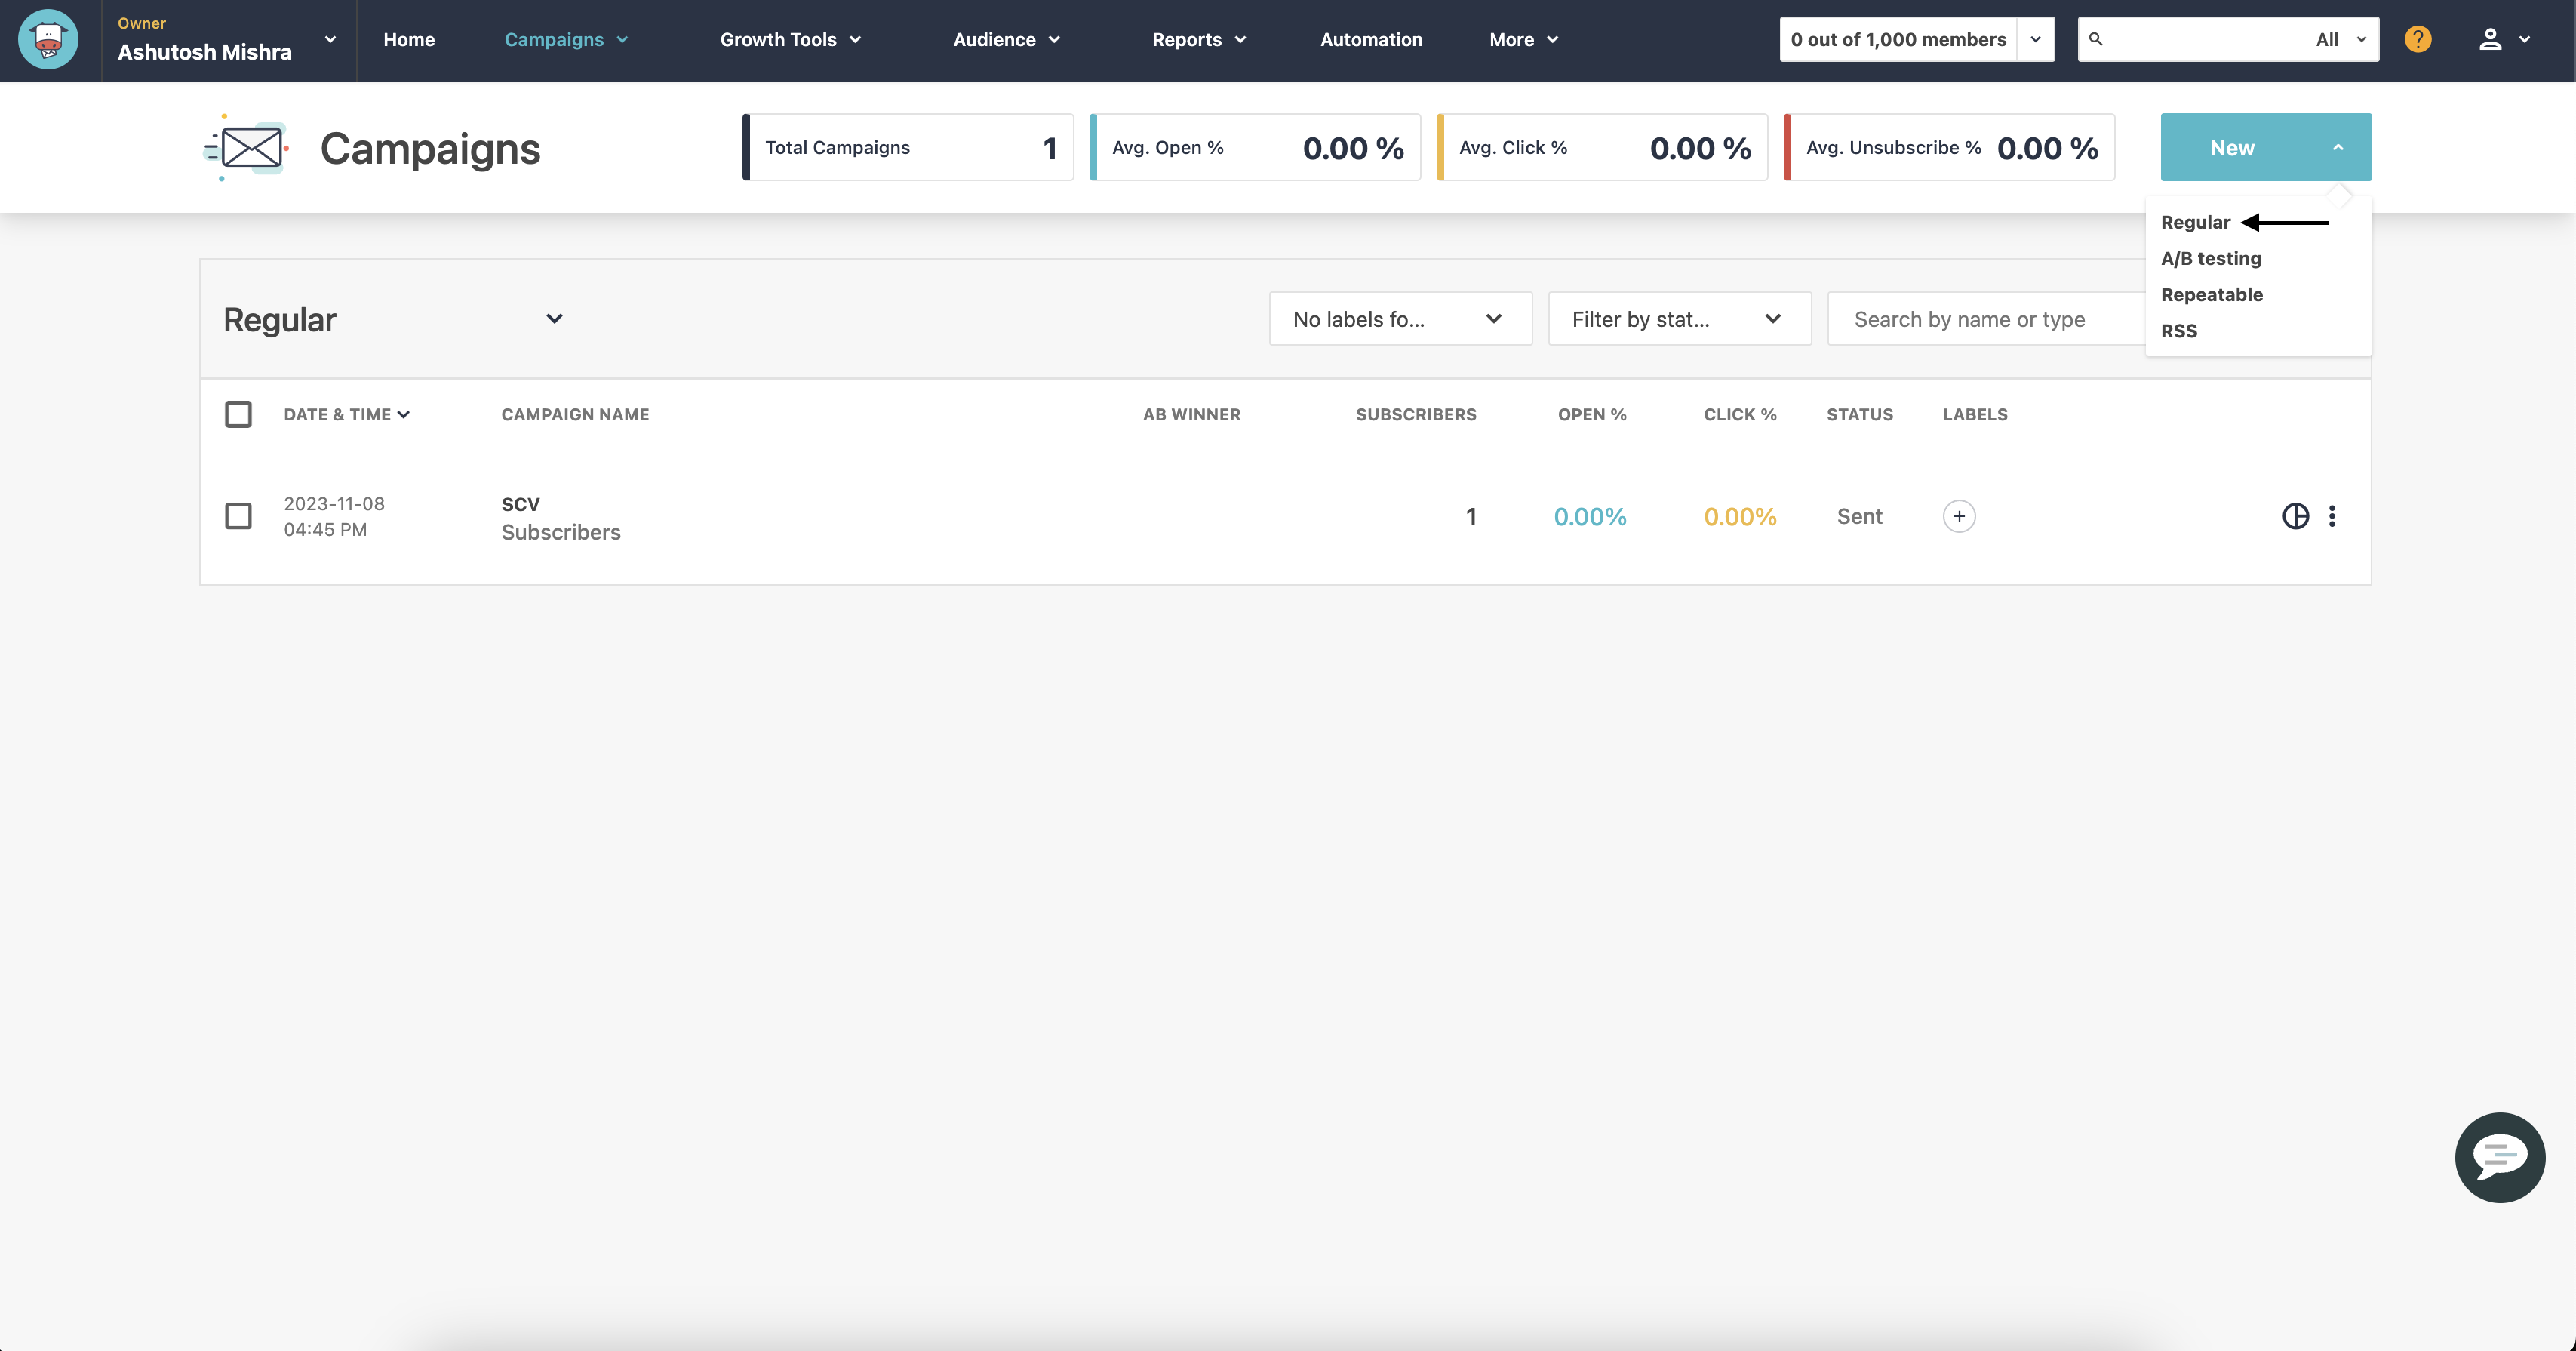
- Fill the email-related details(sender, subject, etc.) and click Next.
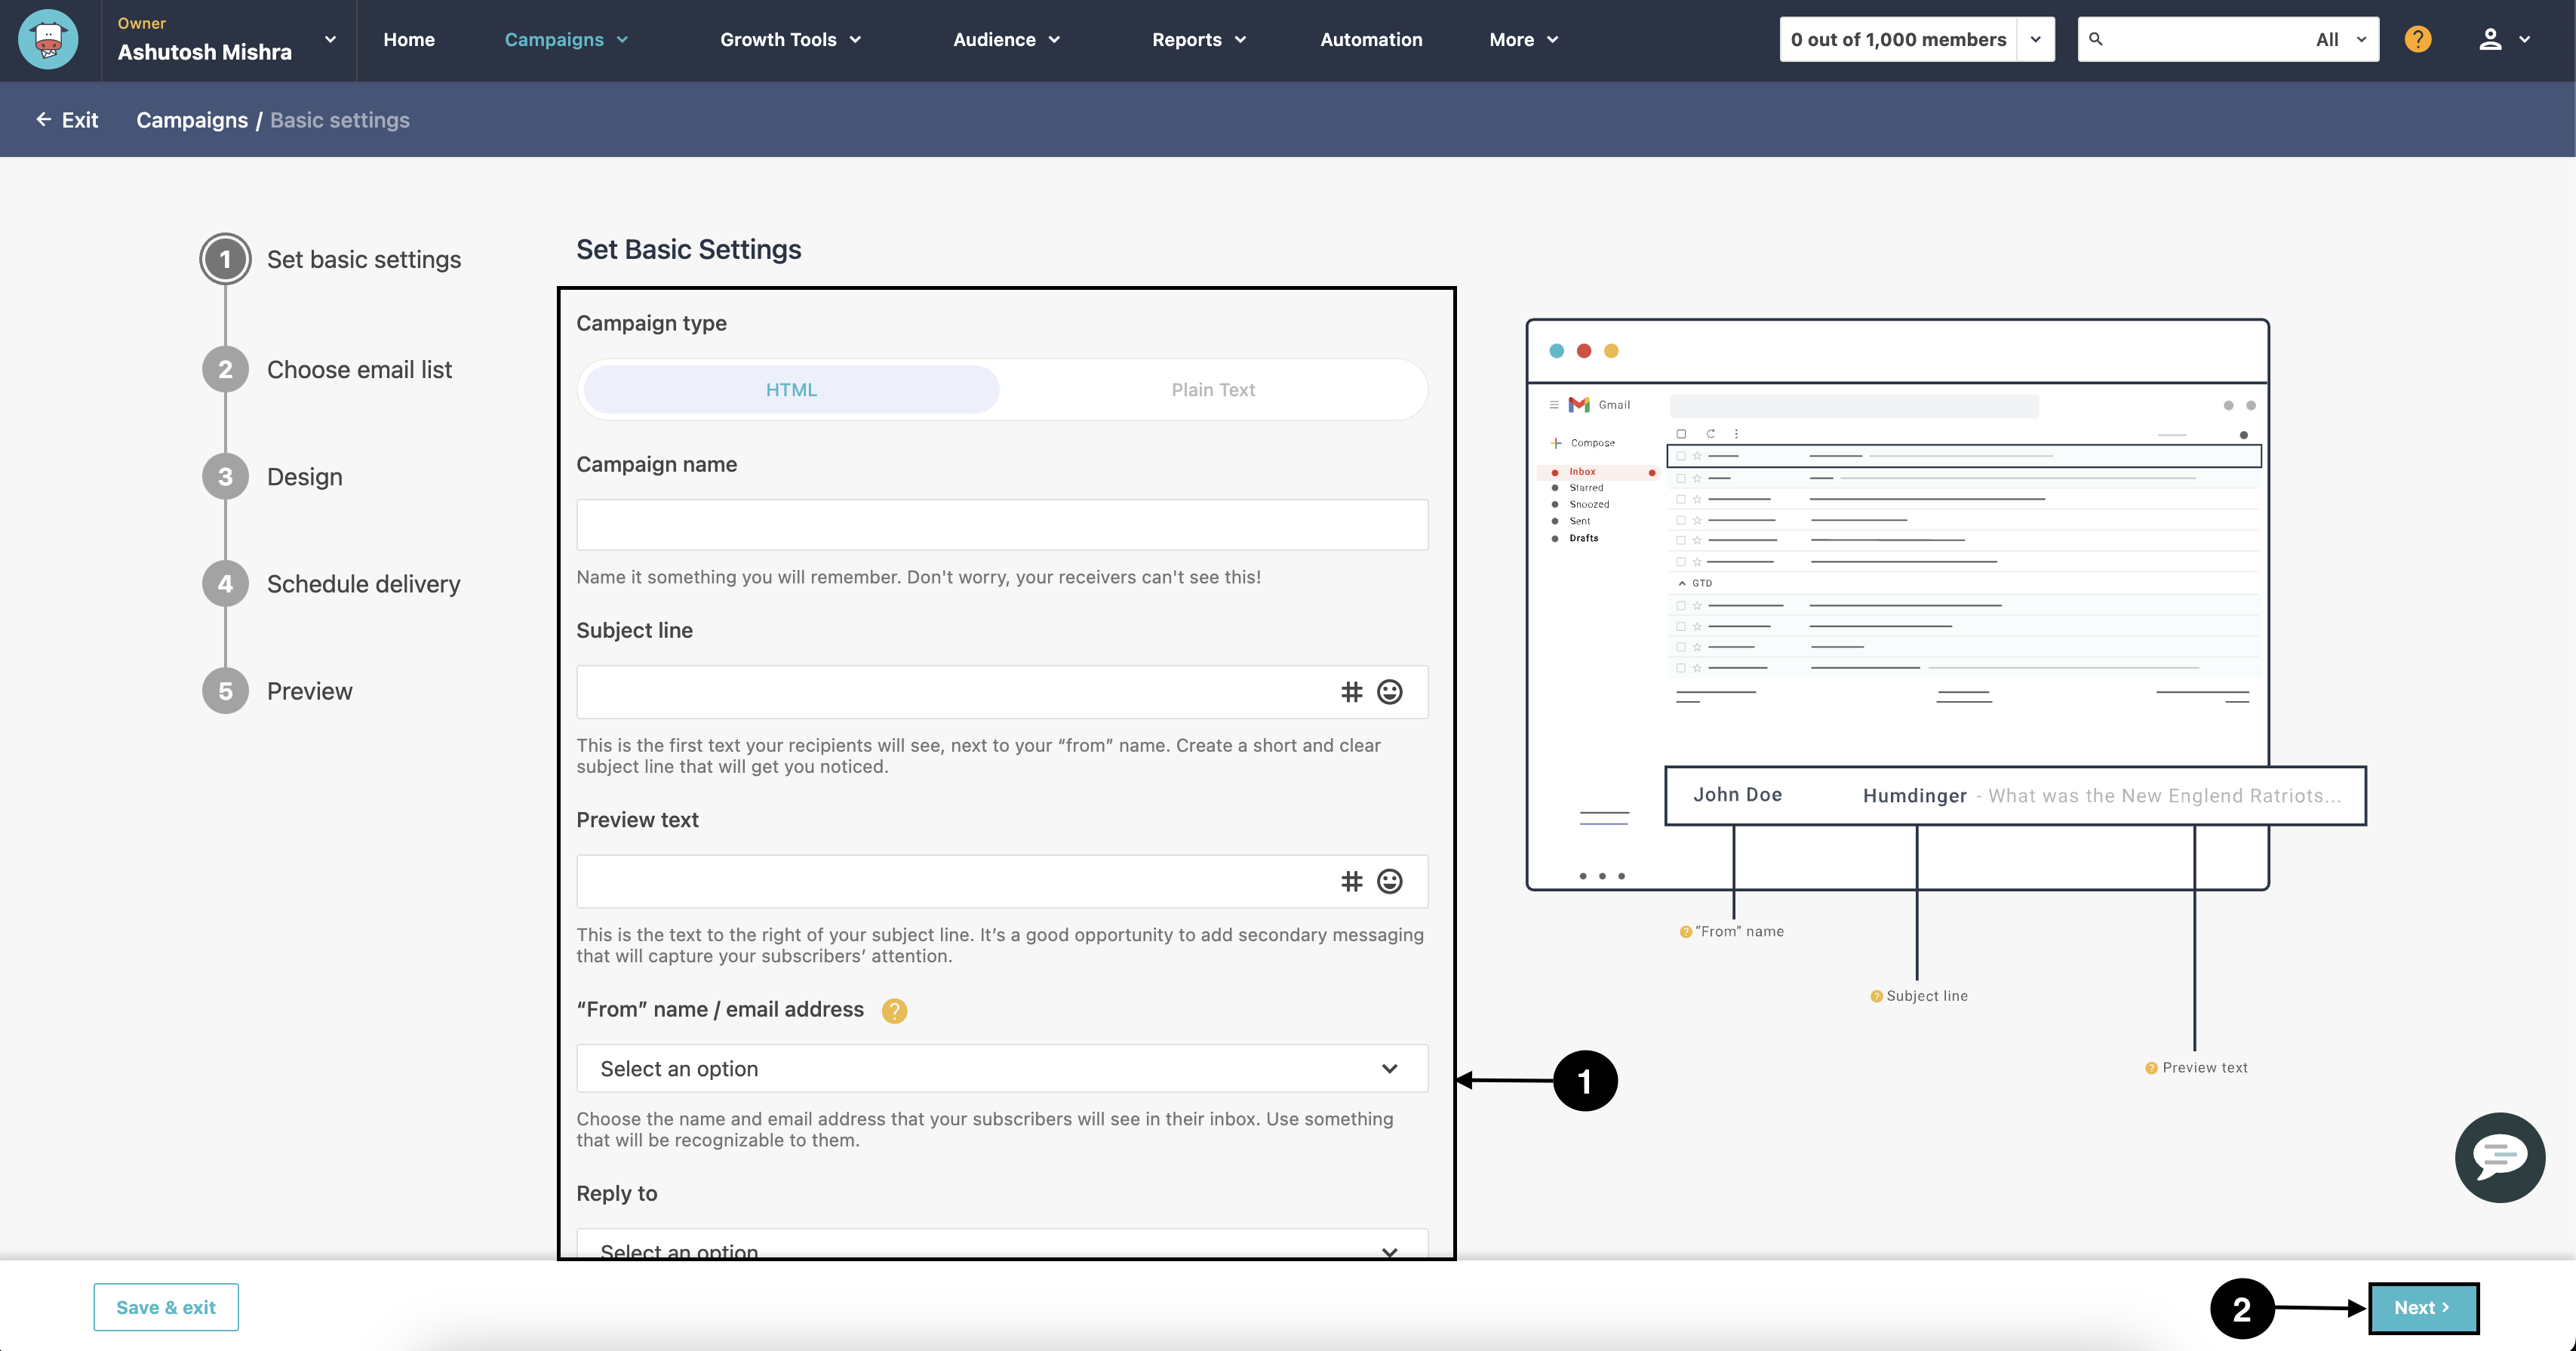
- Select the mailing list and continue.
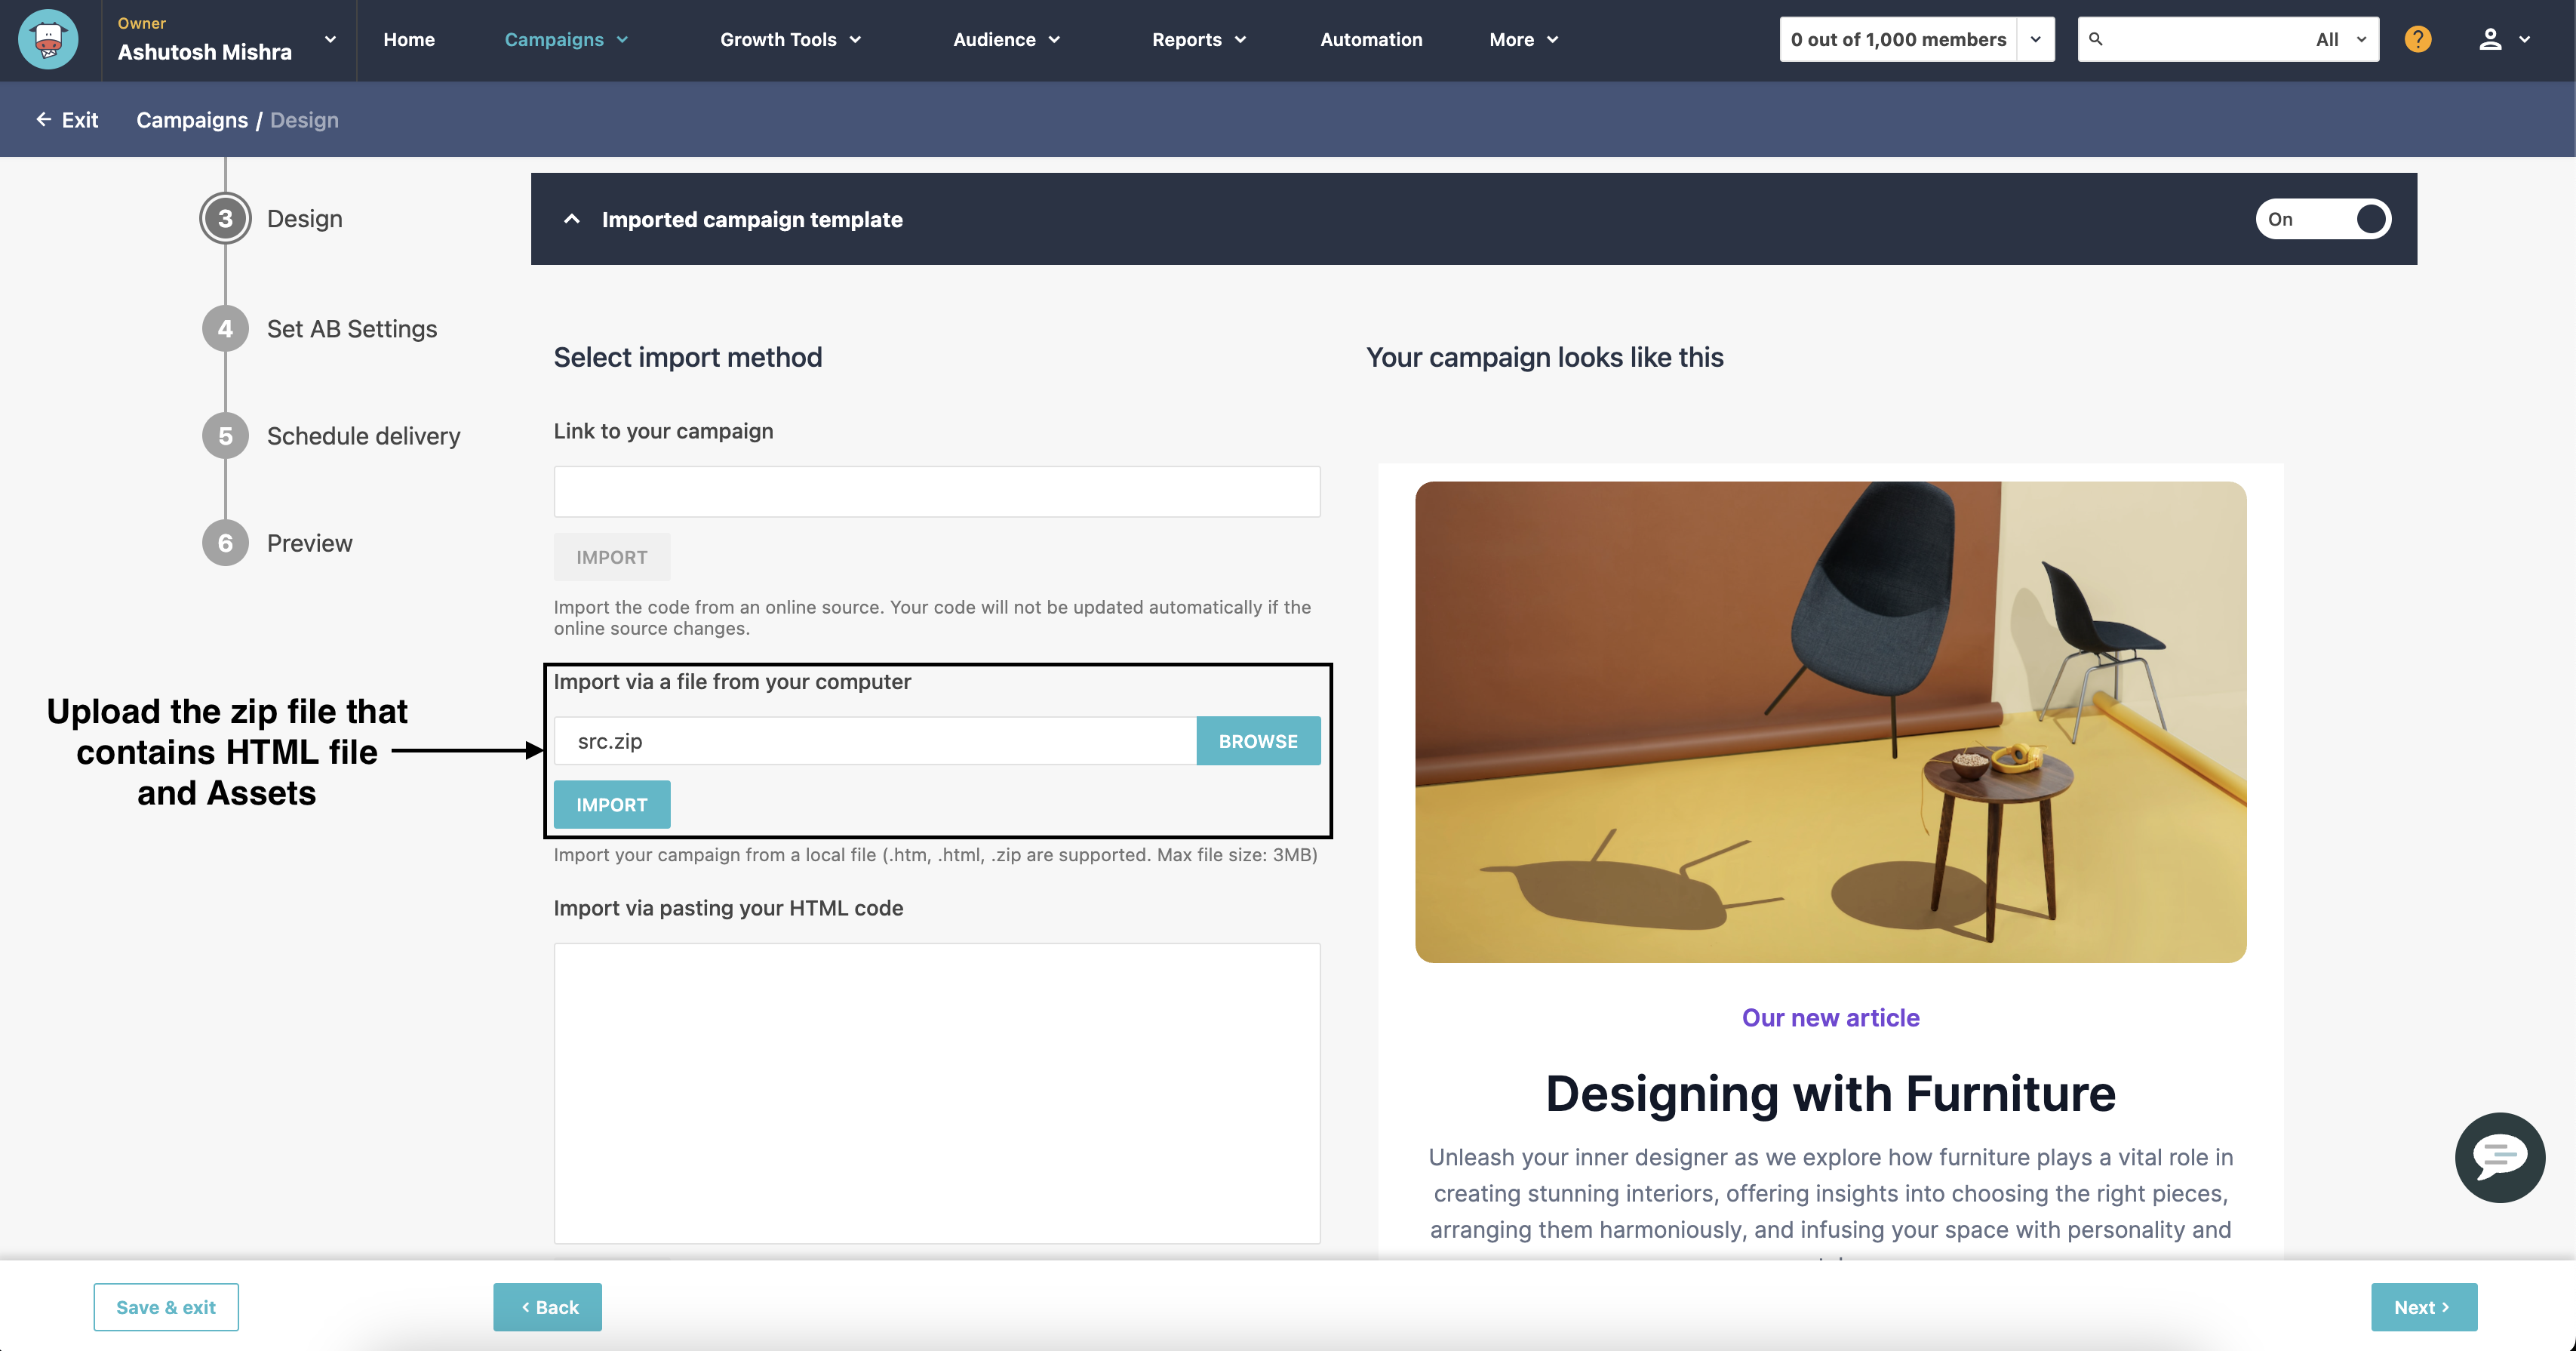
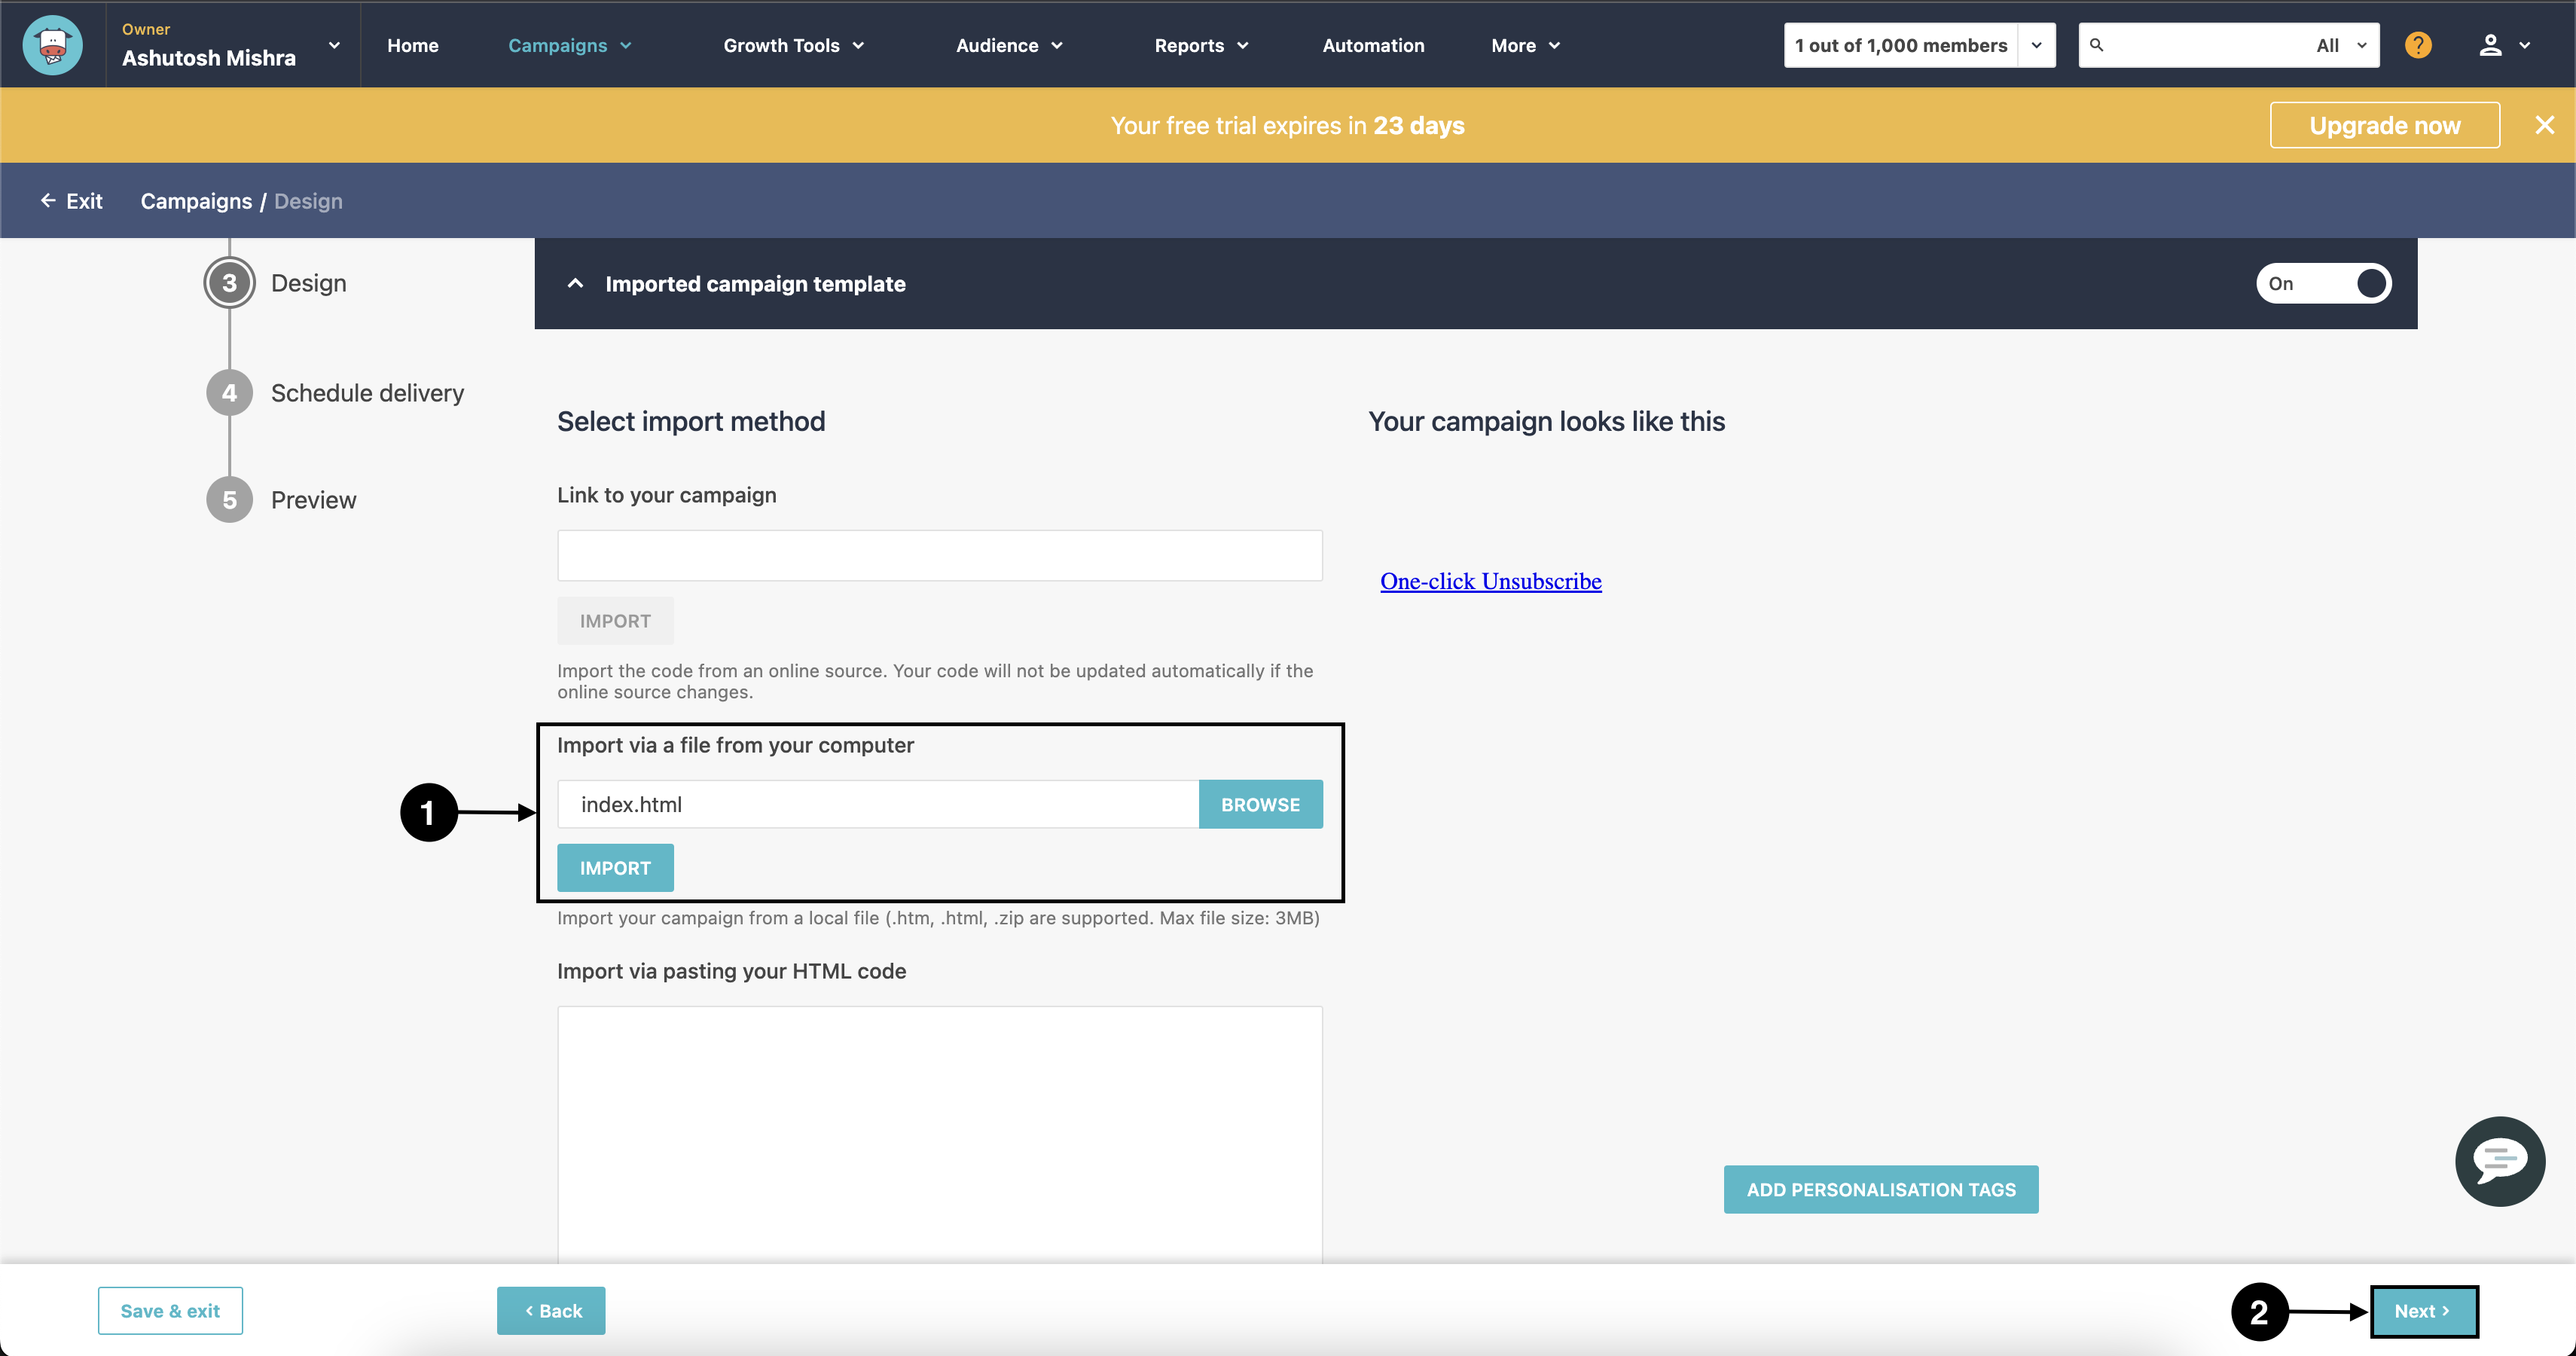
- In the design section, turn on the Imported Campaign Template and upload the zip file that you downloaded from Kombai.
- Add personalization tags(if you want), then click Next.
- Now send or schedule the campaign.
Sending Kombai-generated HTML containing Base64 embedded images
To send the generated HTML code through Moosend, you have to:
- Repeat steps 1-5 of Creating a campaign in Moosend.
- Turn on the Imported Campaign Template, import HTML, and click Next.
- Add personalization tags(if you want), then click Next.
- Now send or schedule the campaign.
Brevo
Sending Kombai-generated HTML containing assets and linked images
To send the generated HTML through Brevo, you have to first create a template and then send it through a campaign:
Creating a template in Brevo
- Download the code from Kombai and sign up for Brevo.
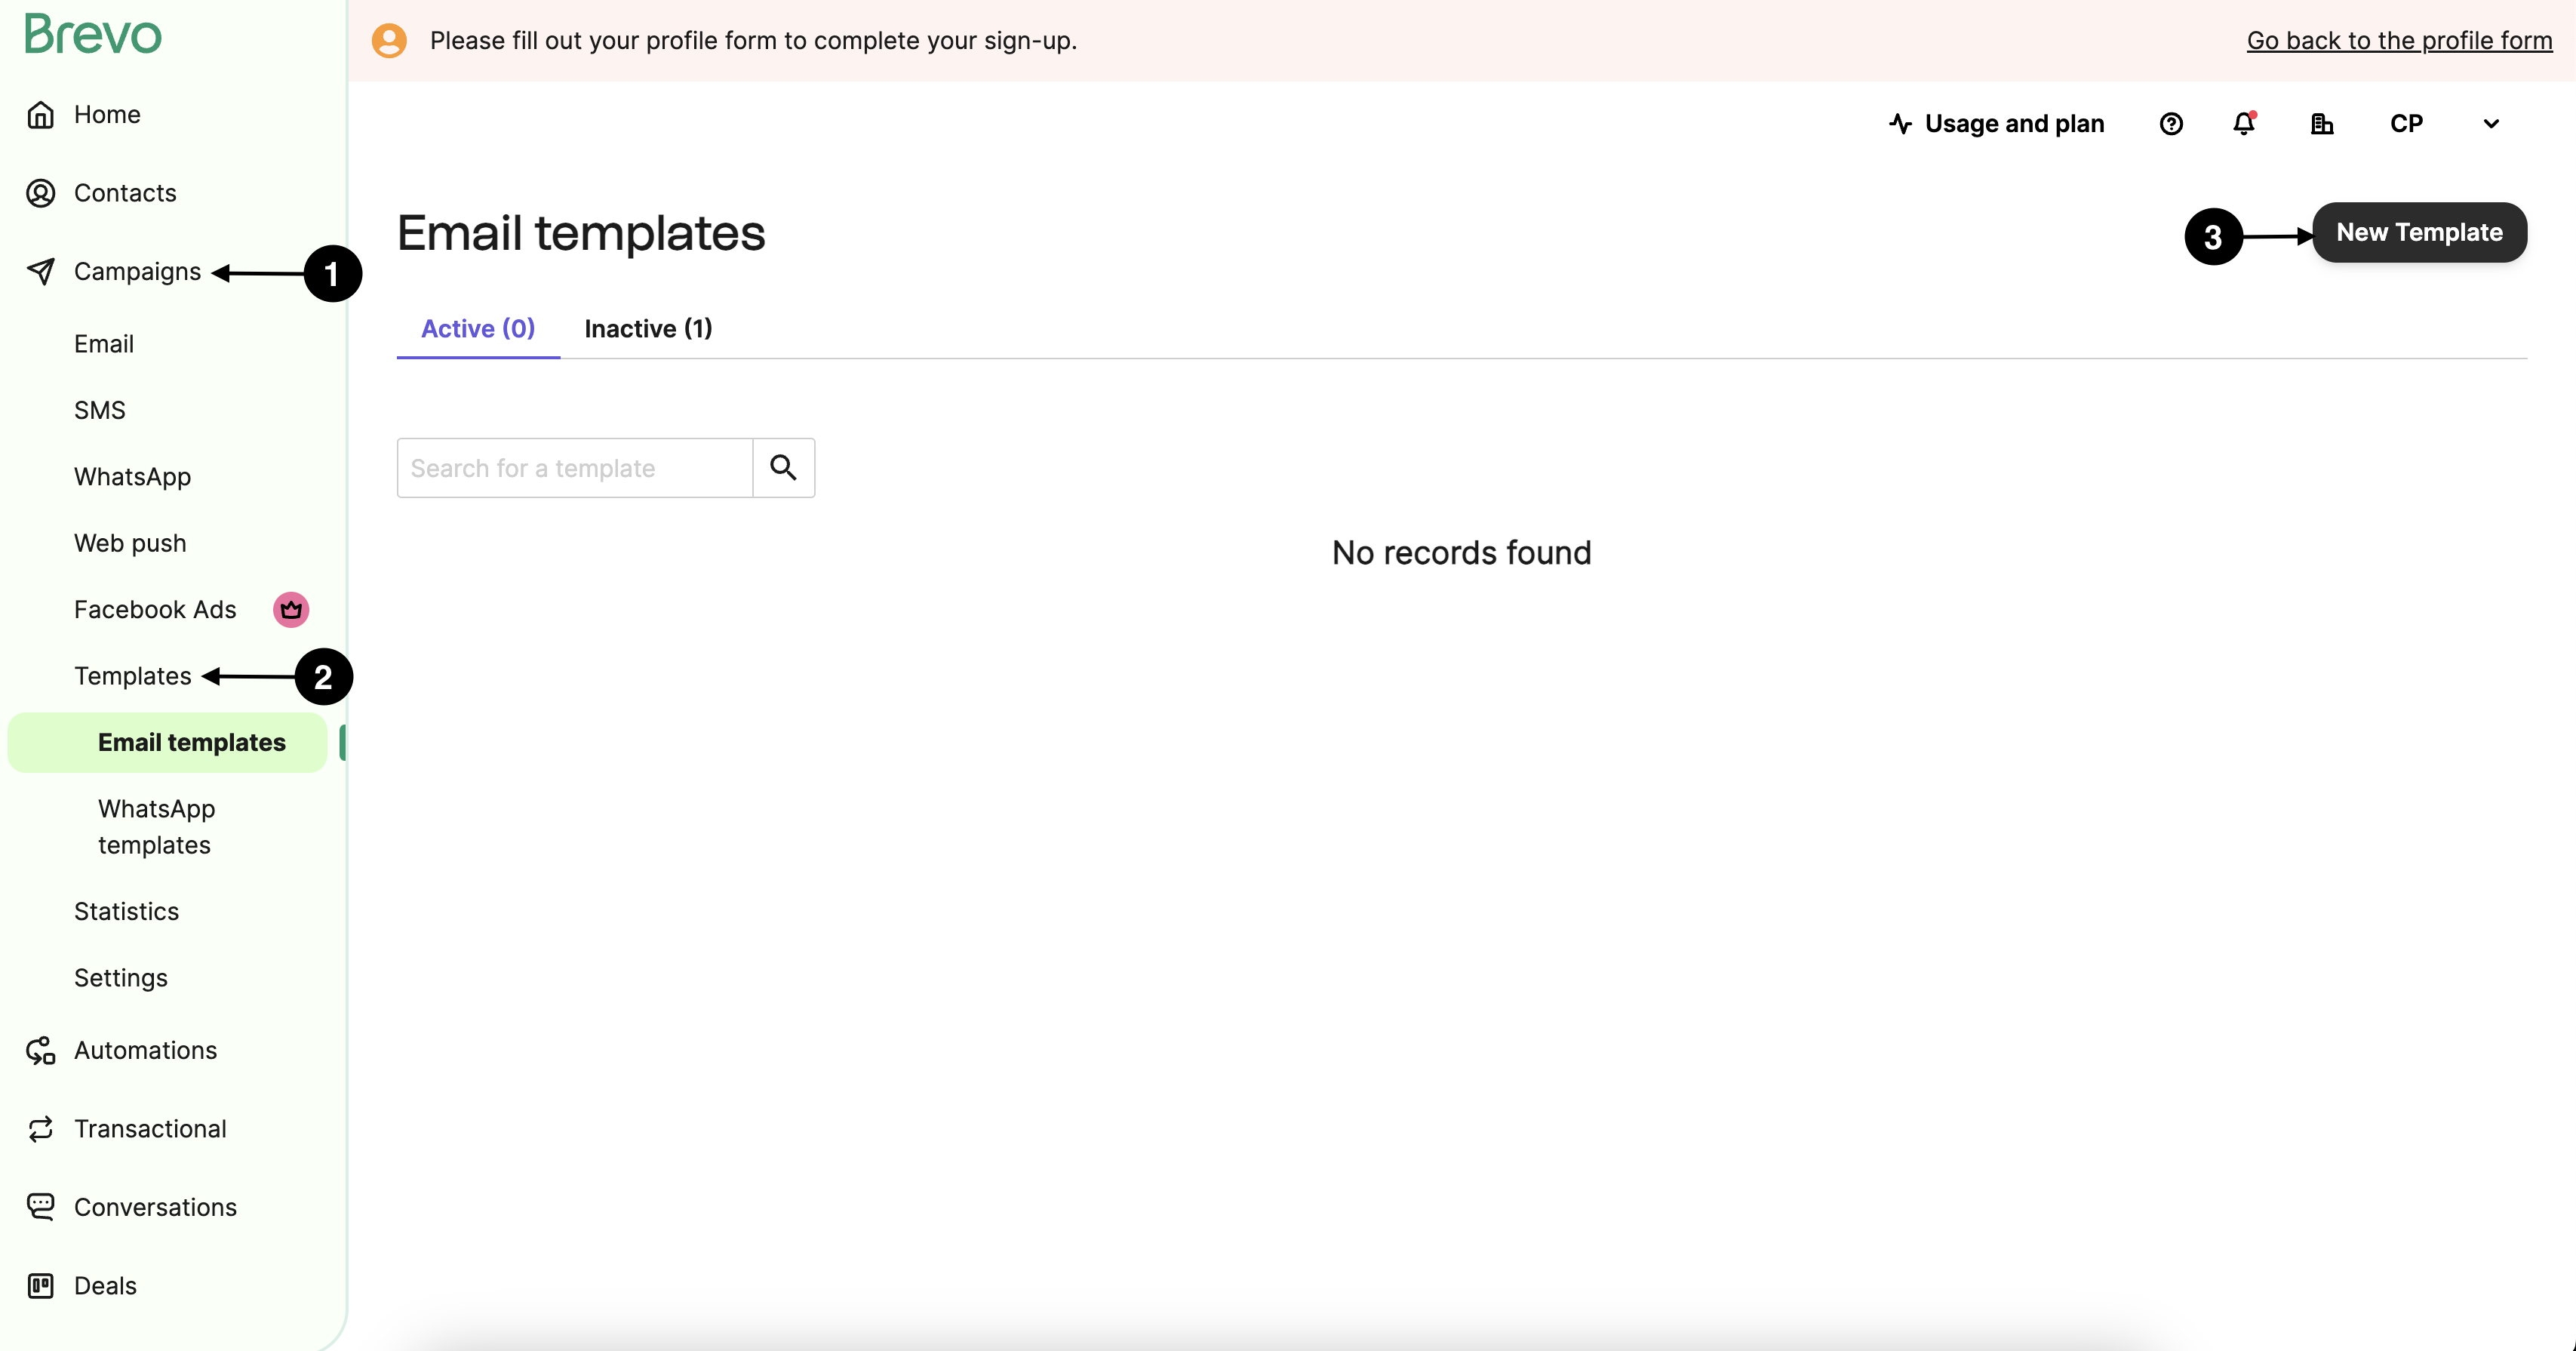
- Go to Campaigns > Templates > New Template.
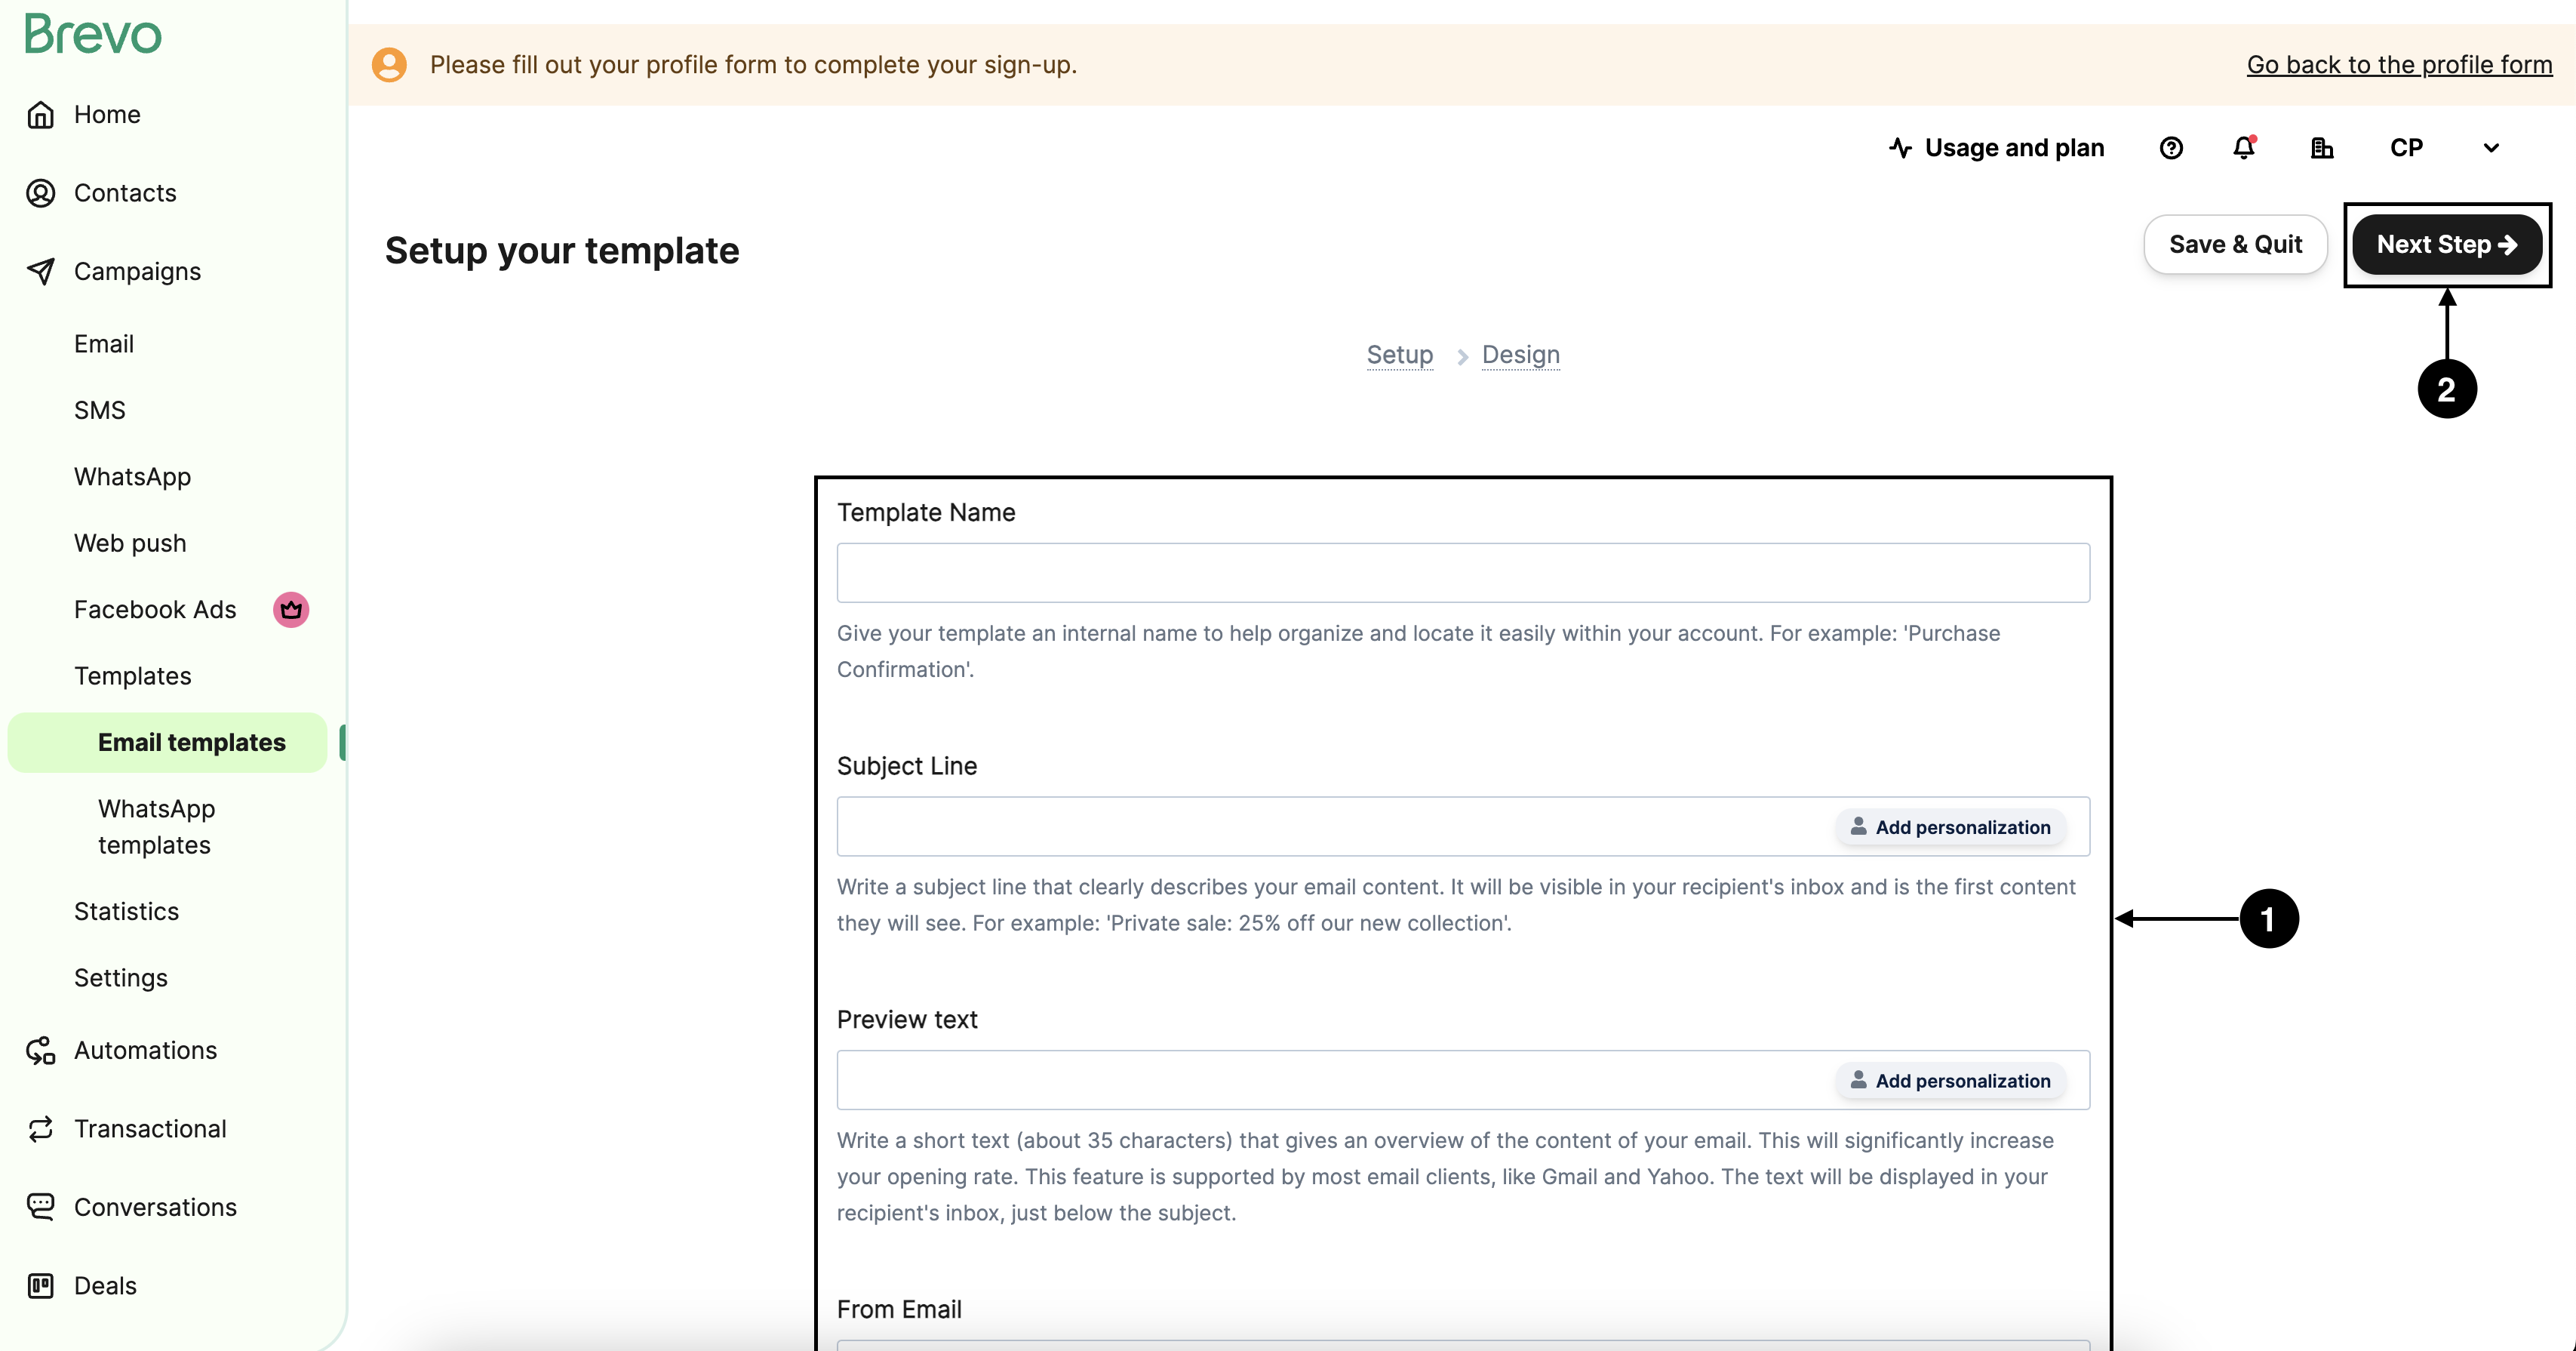
- Fill the required info(template name, sender, subject, etc.) and click Next Step.
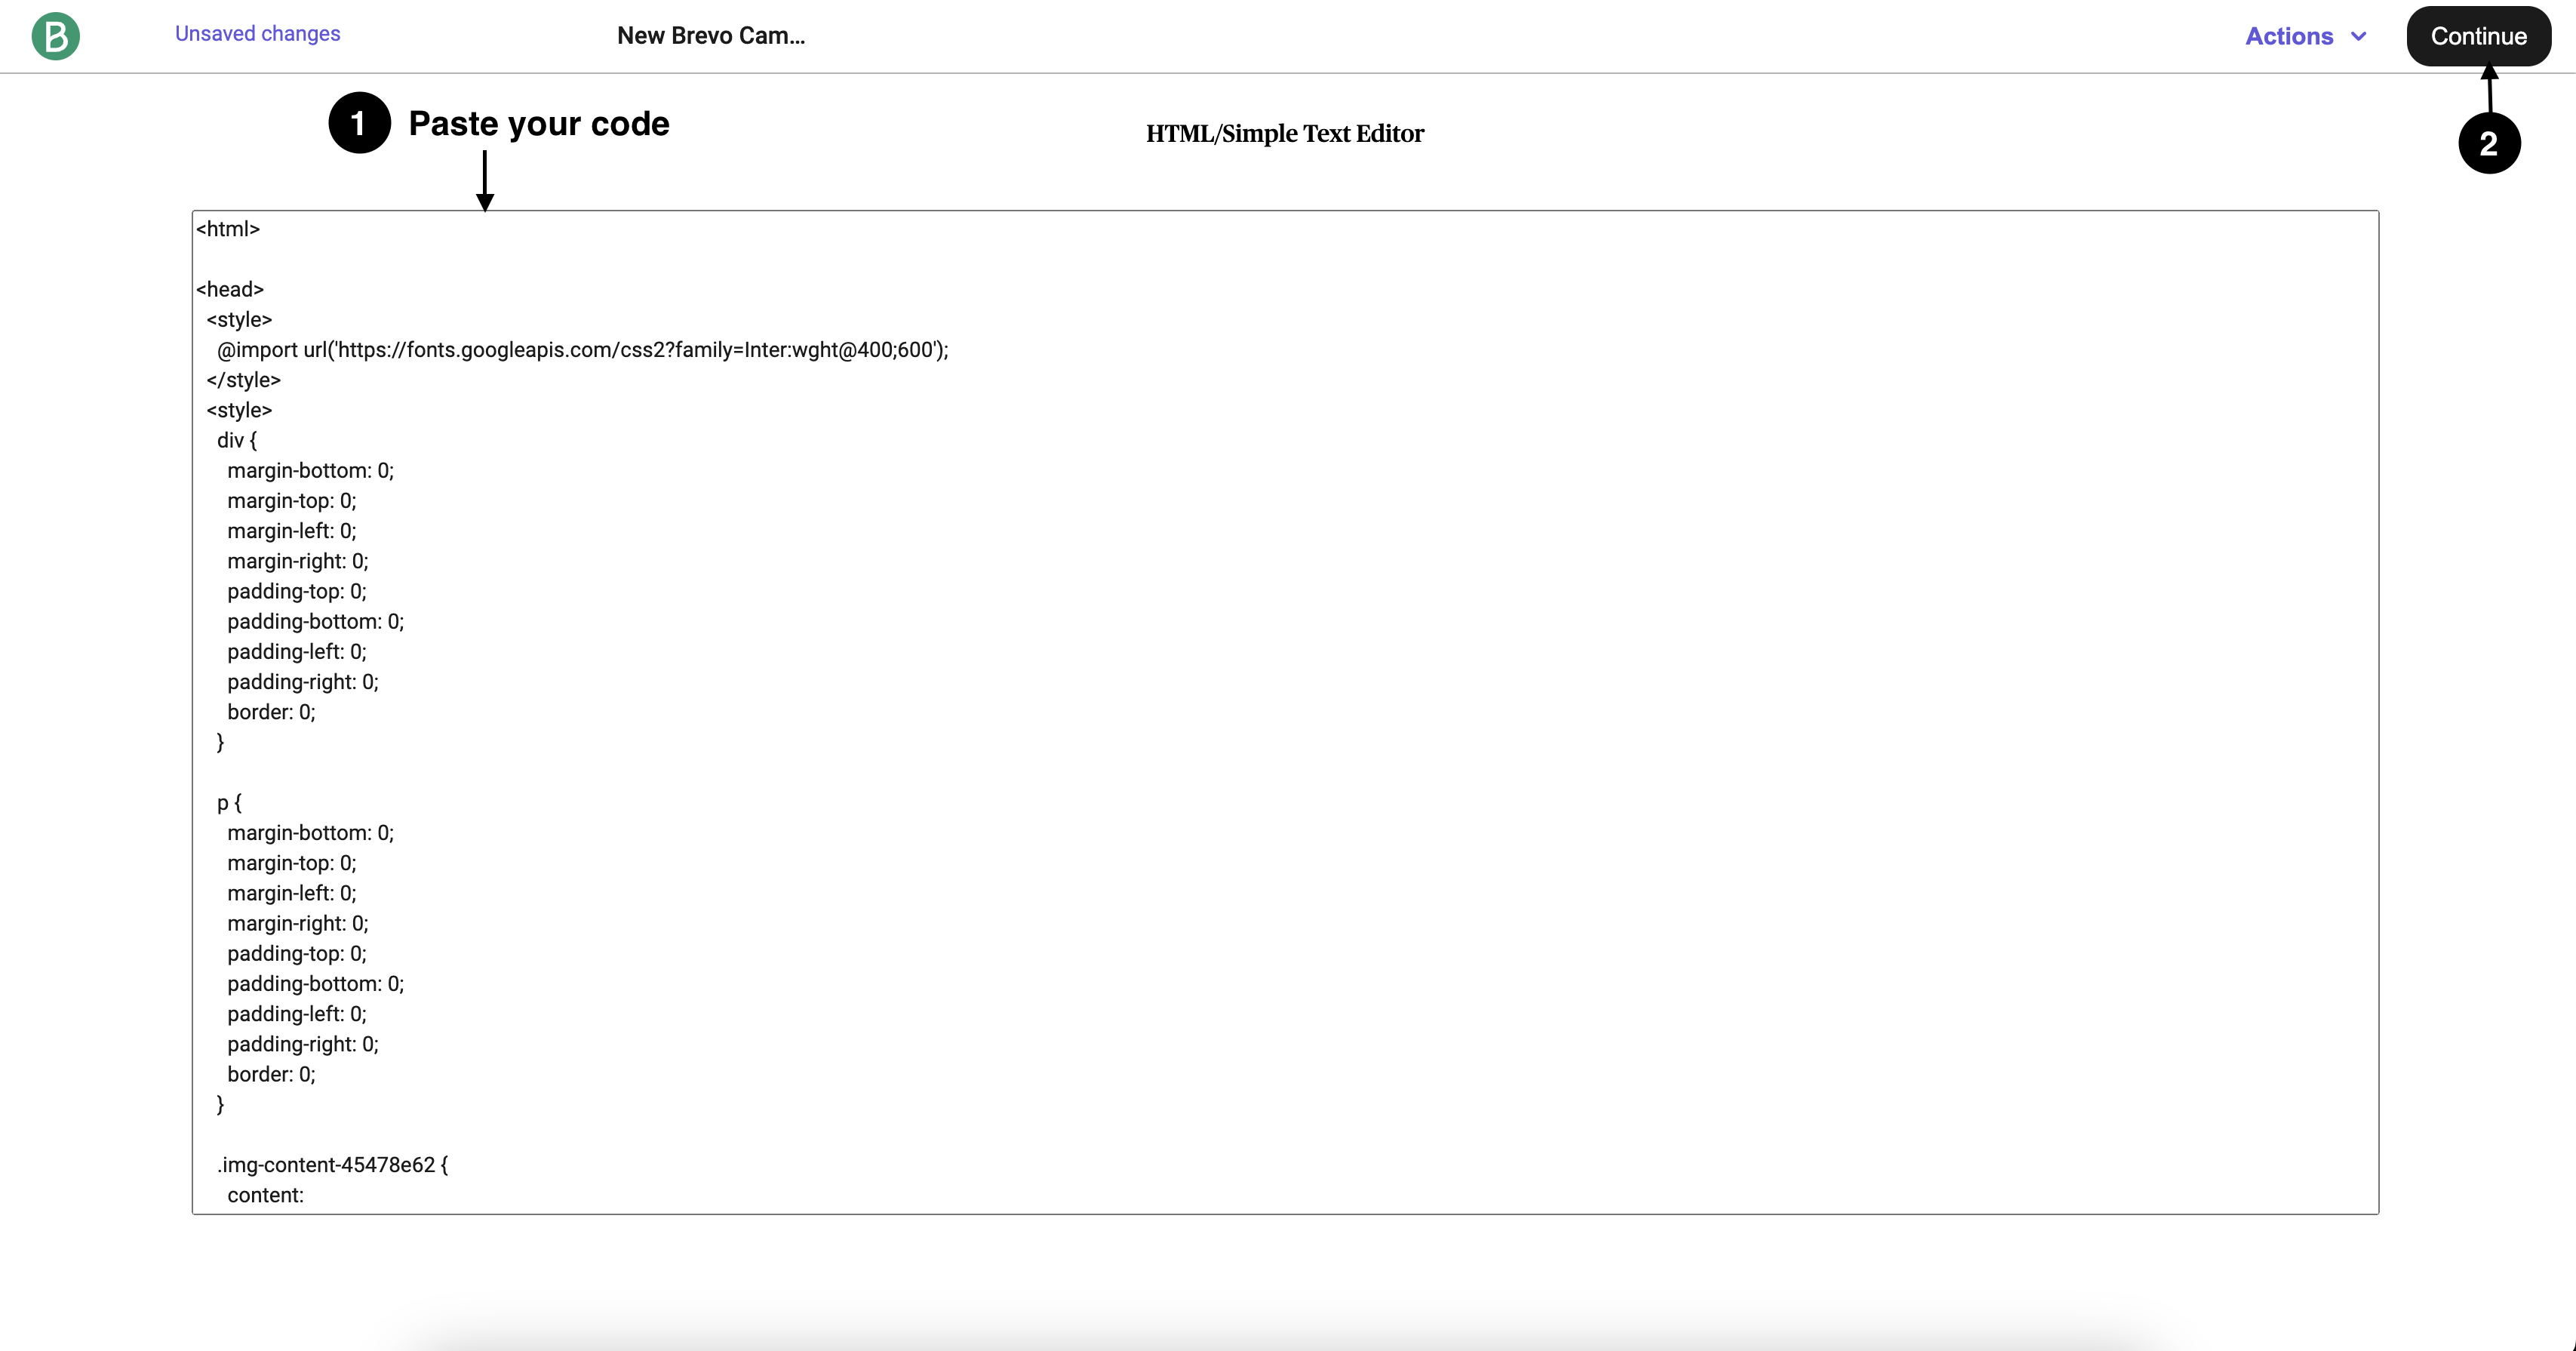
- Now select Code your own > Paste your code.
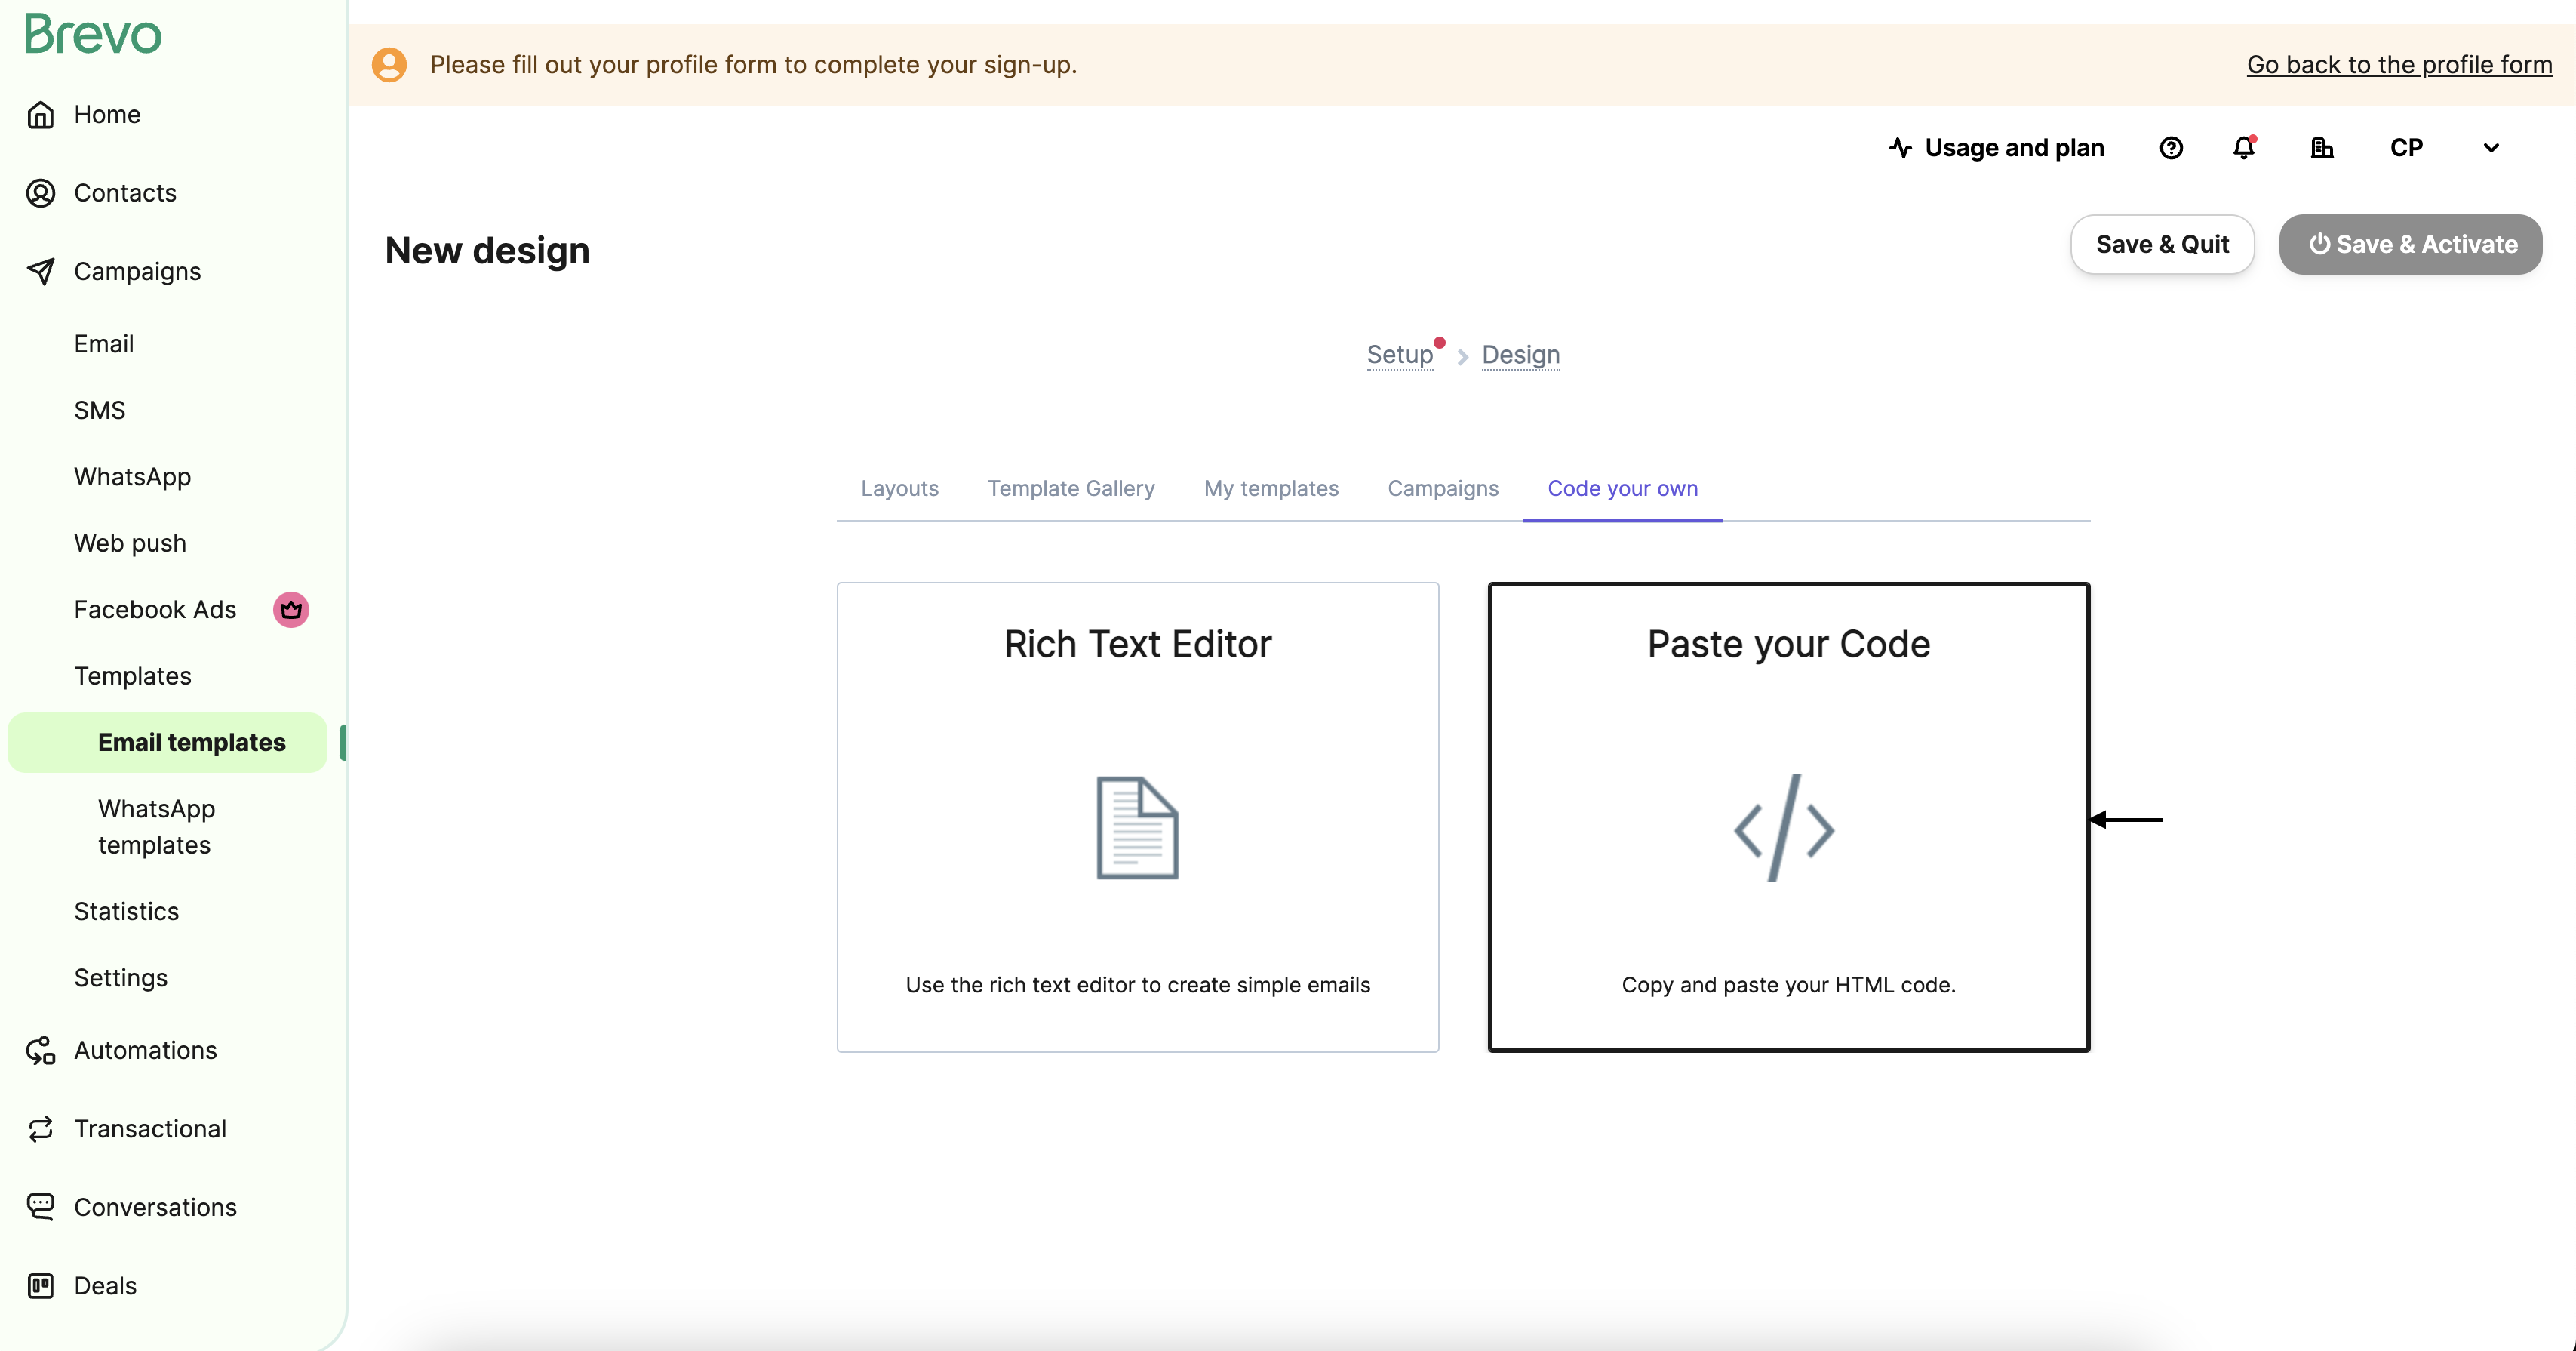
- In the HTML editor, paste your code and replace each image in the Picture Manager with its local counterpart in your system, then save and continue.
- Now, save and activate the template.
Creating a campaign in Brevo
To create a campaign in Brevo, you have to:
- Go to Campaigns > Email > Create an email campaign.
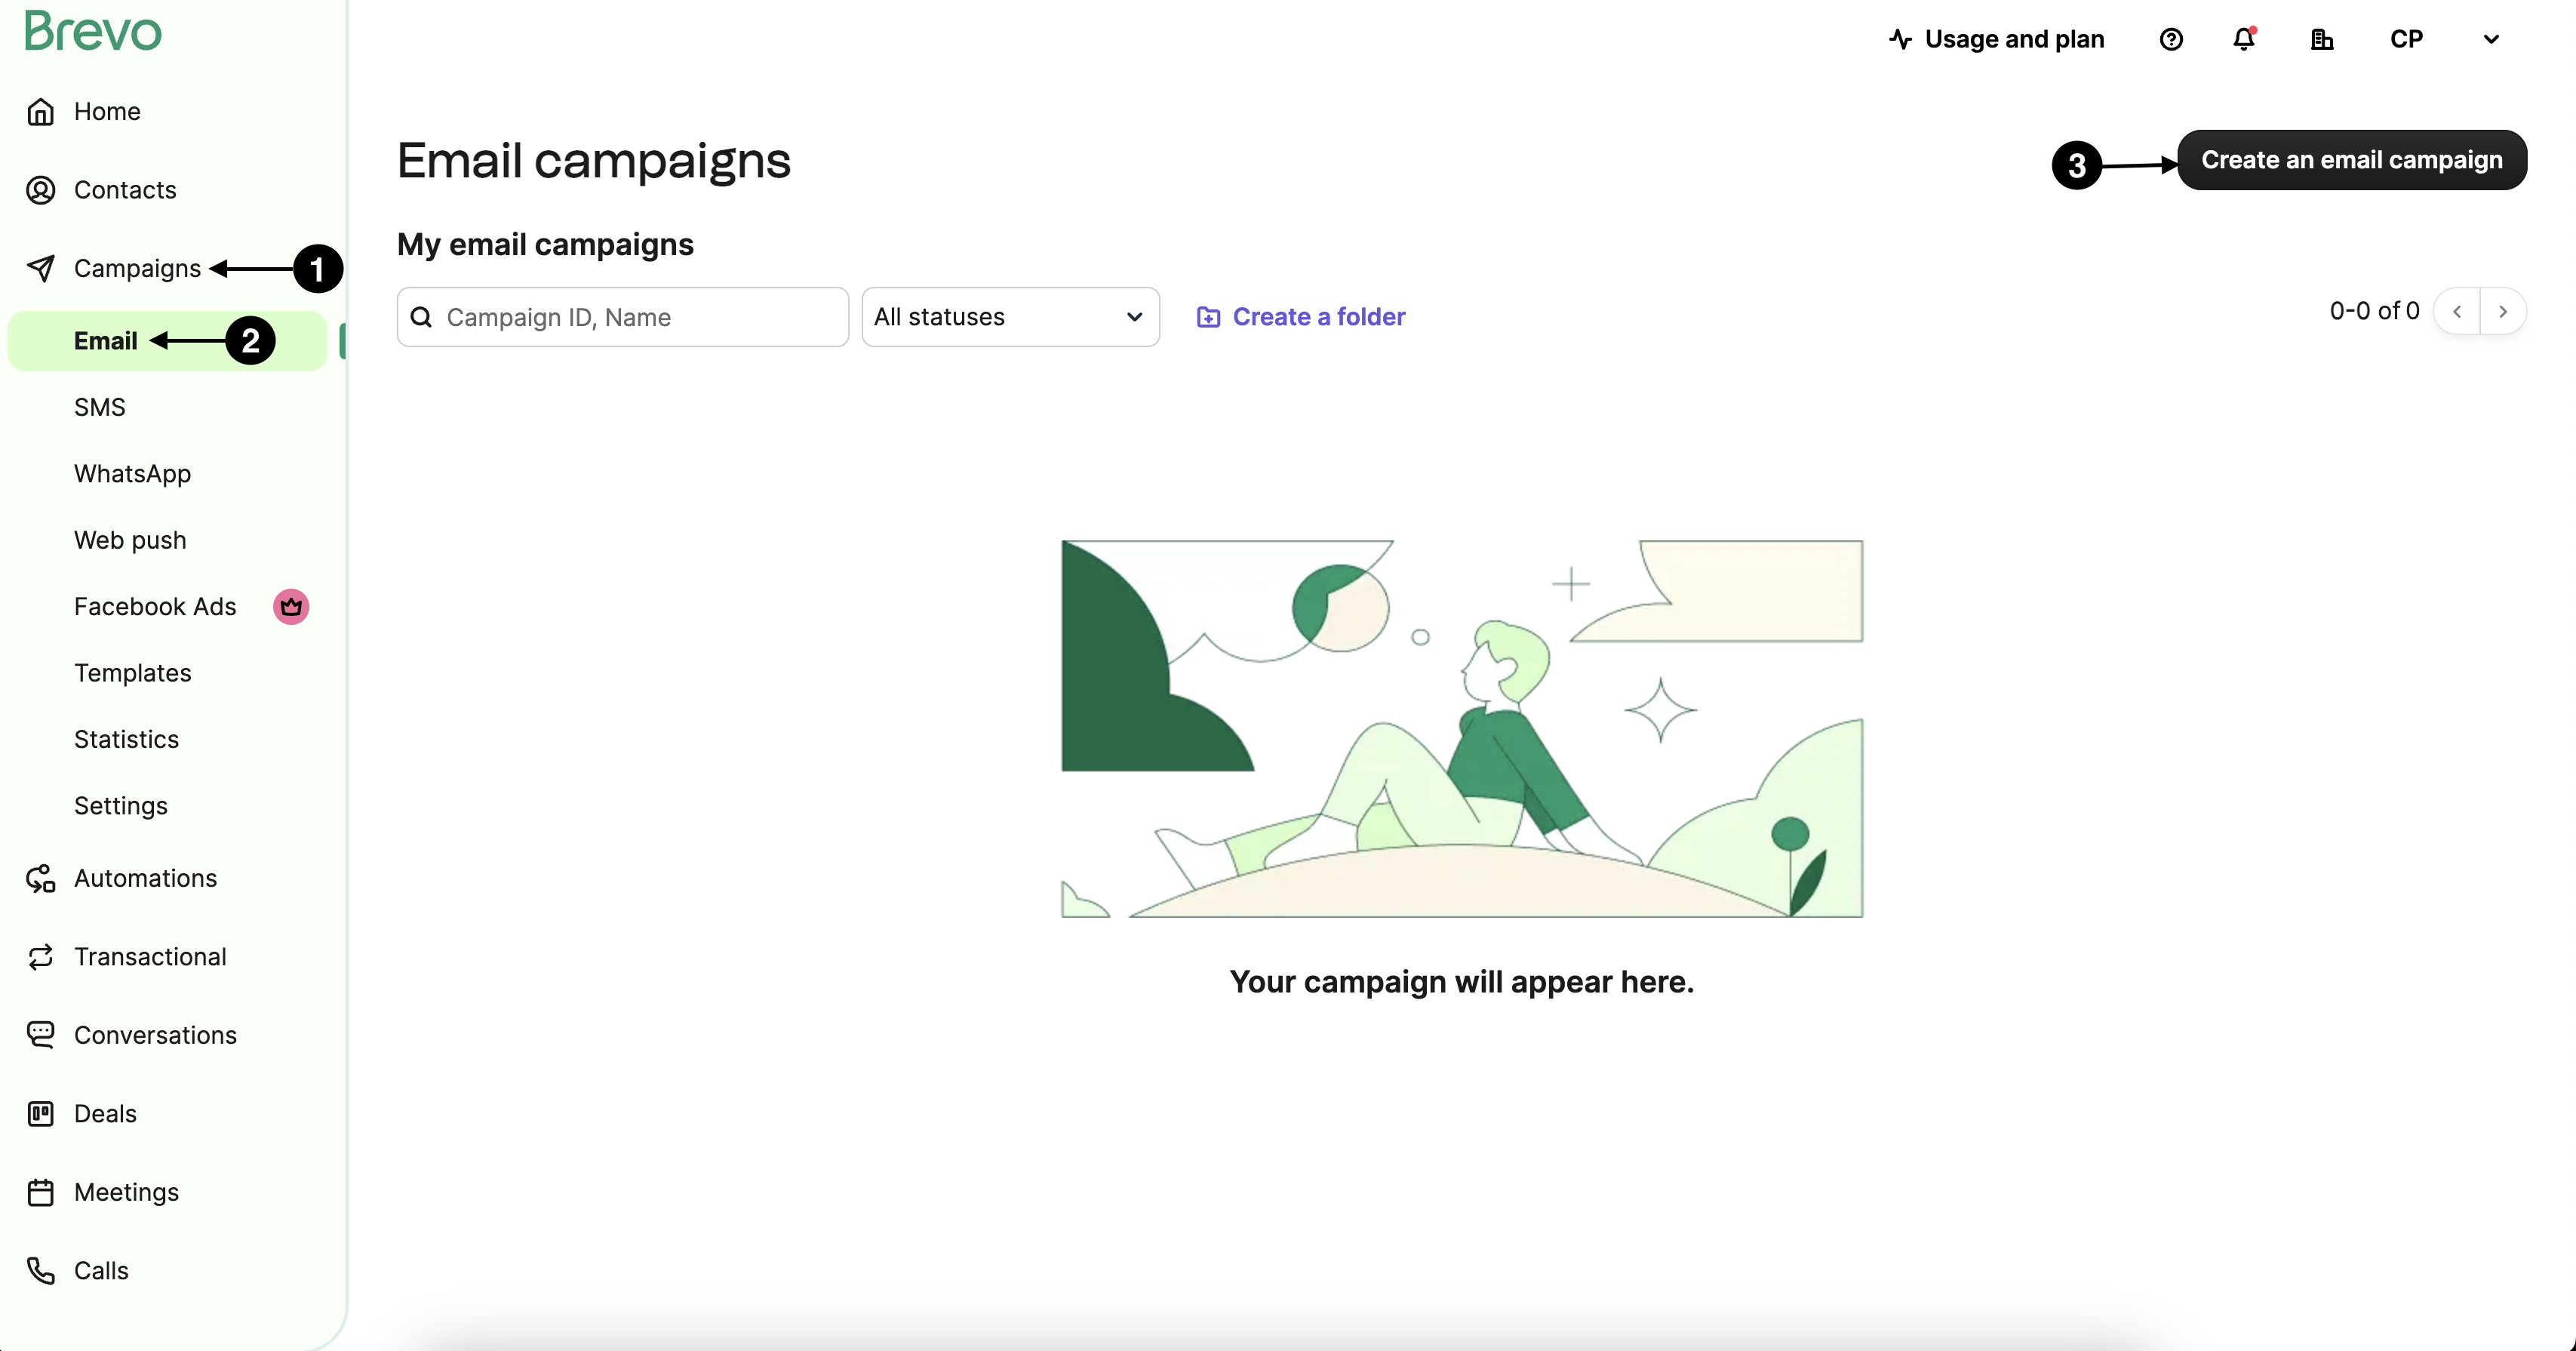
- Name your campaign and click Create campaign.

- Fill in all the email details and click Start Designing.
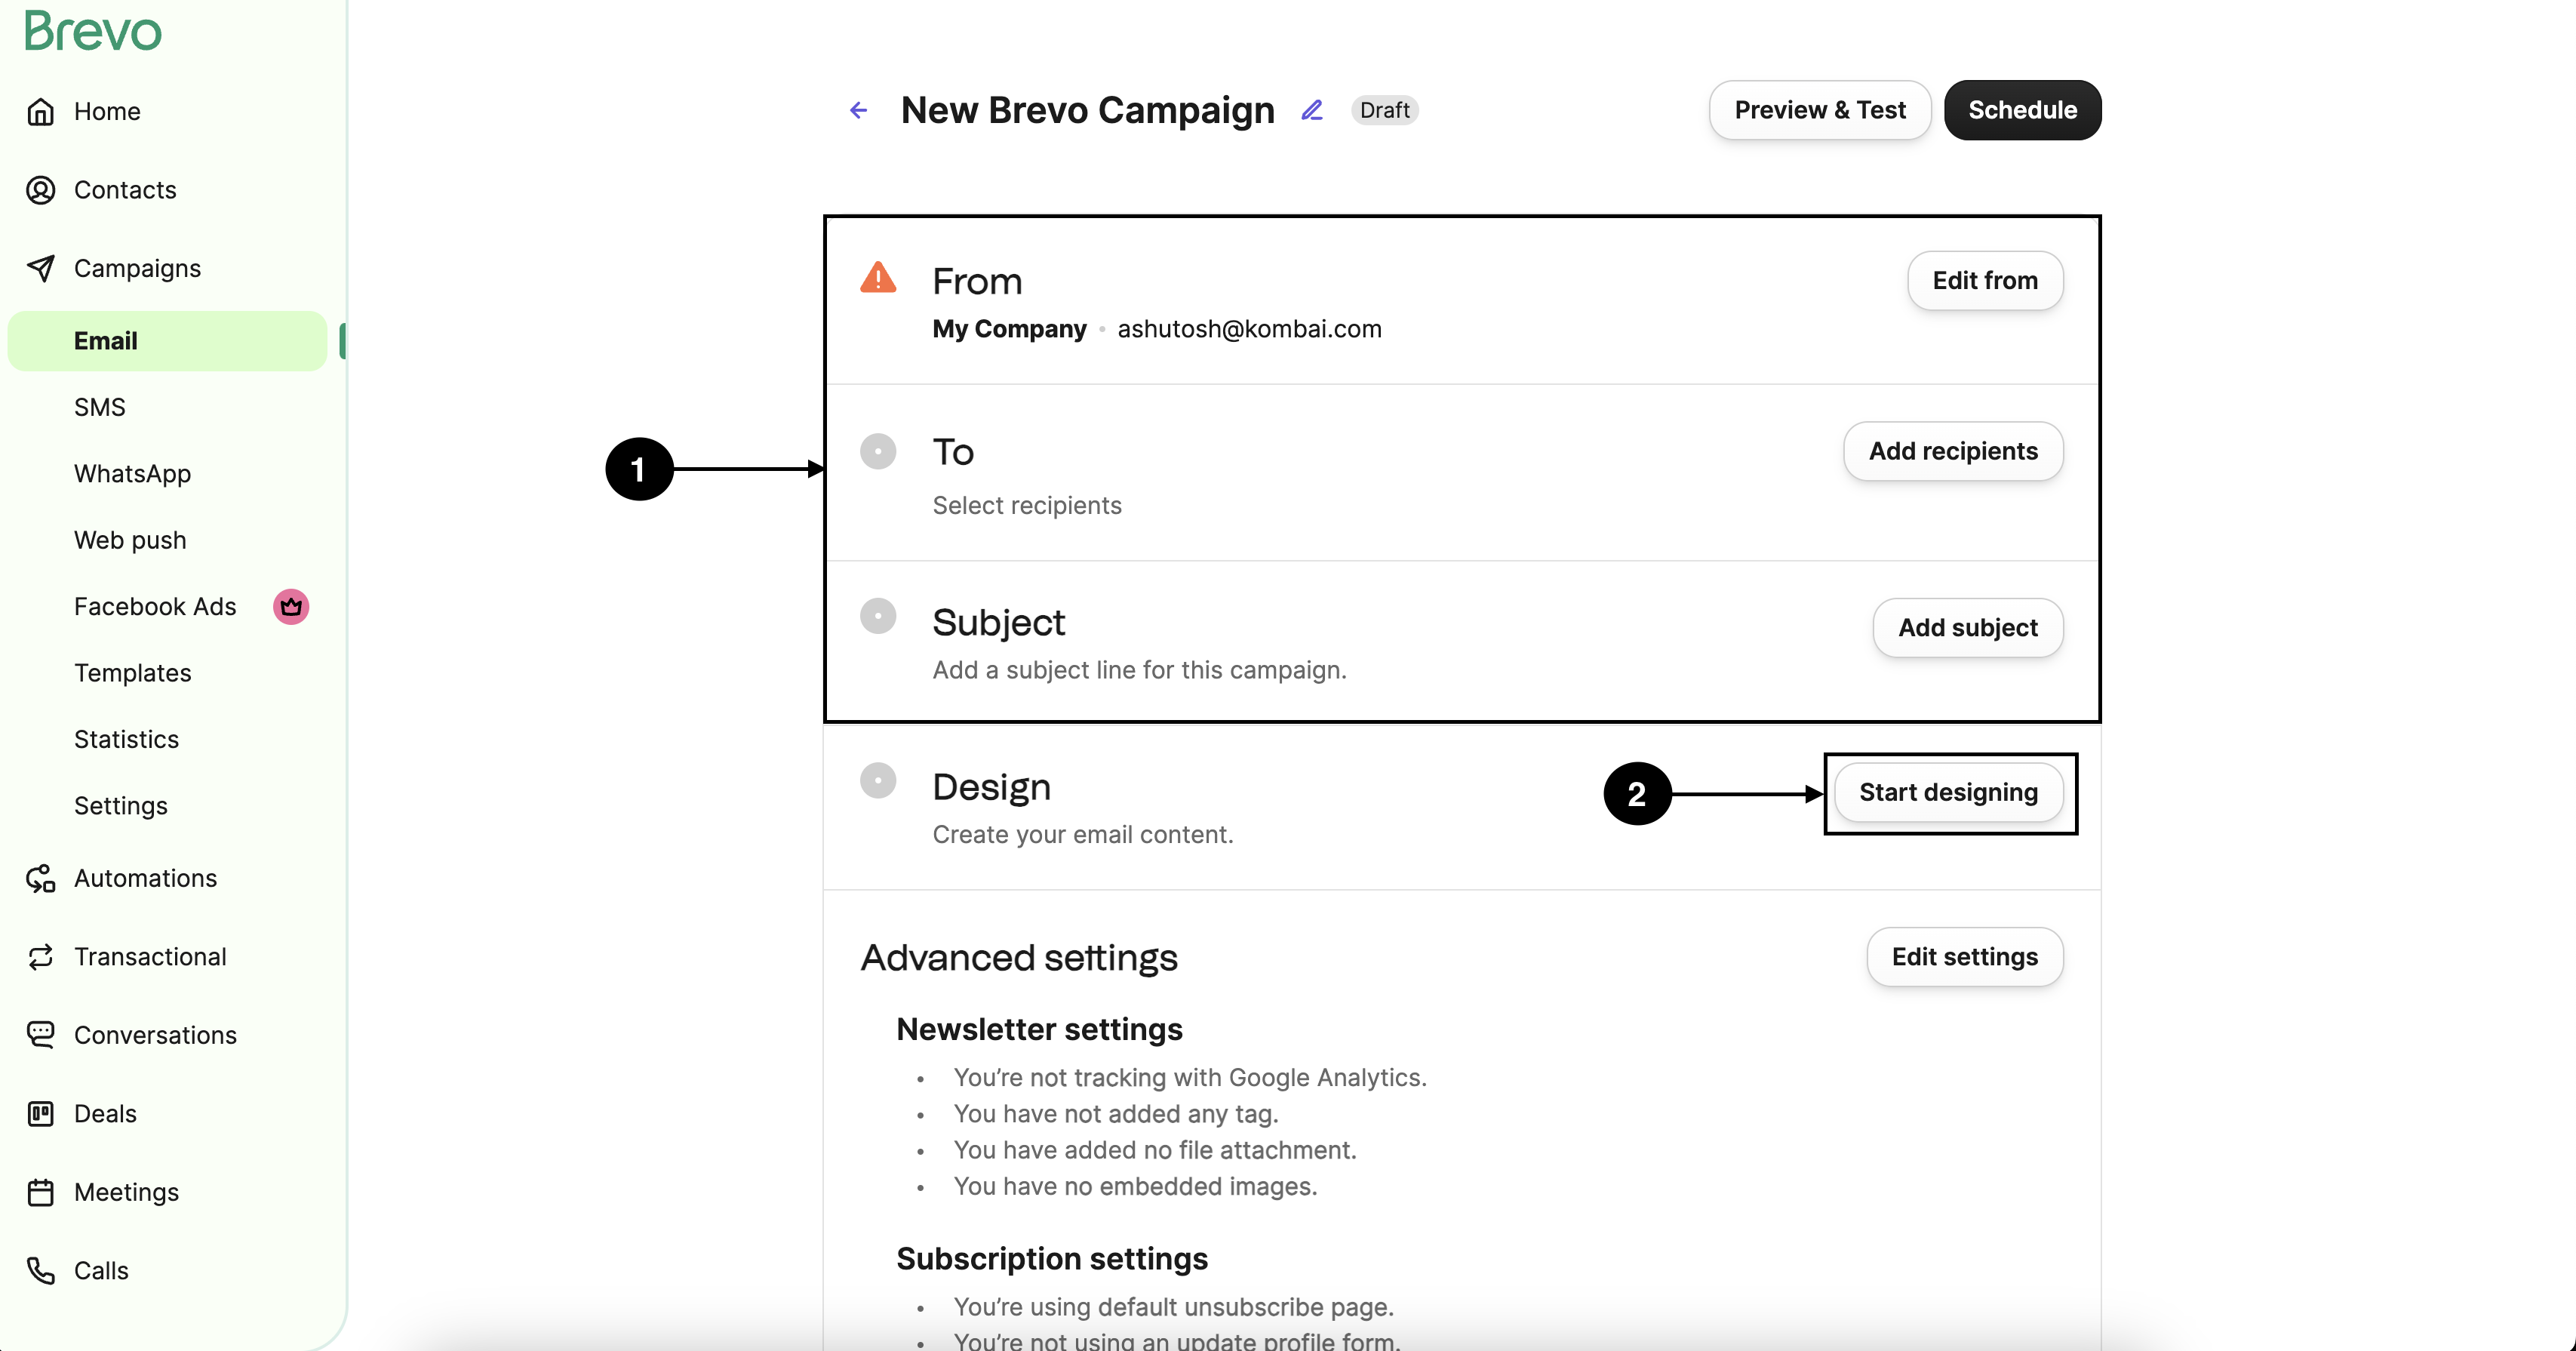
- Click My templates and select the saved template.
Note: When creating a template, putting an unsubscribe link in your code is necessary. To do so, add a unsubscribe placeholder in a HTML <a> tag, e.g., <a href="{{ unsubscribe }}">Click here to unsubscribe</a>
Sending Kombai-generated HTML containing Base64 embedded images
To send the generated HTML code through Brevo, you have to:
- Copy the code from Kombai and sign up for Brevo.
- Repeat steps 1-3 of Creating a campaign in Brevo.
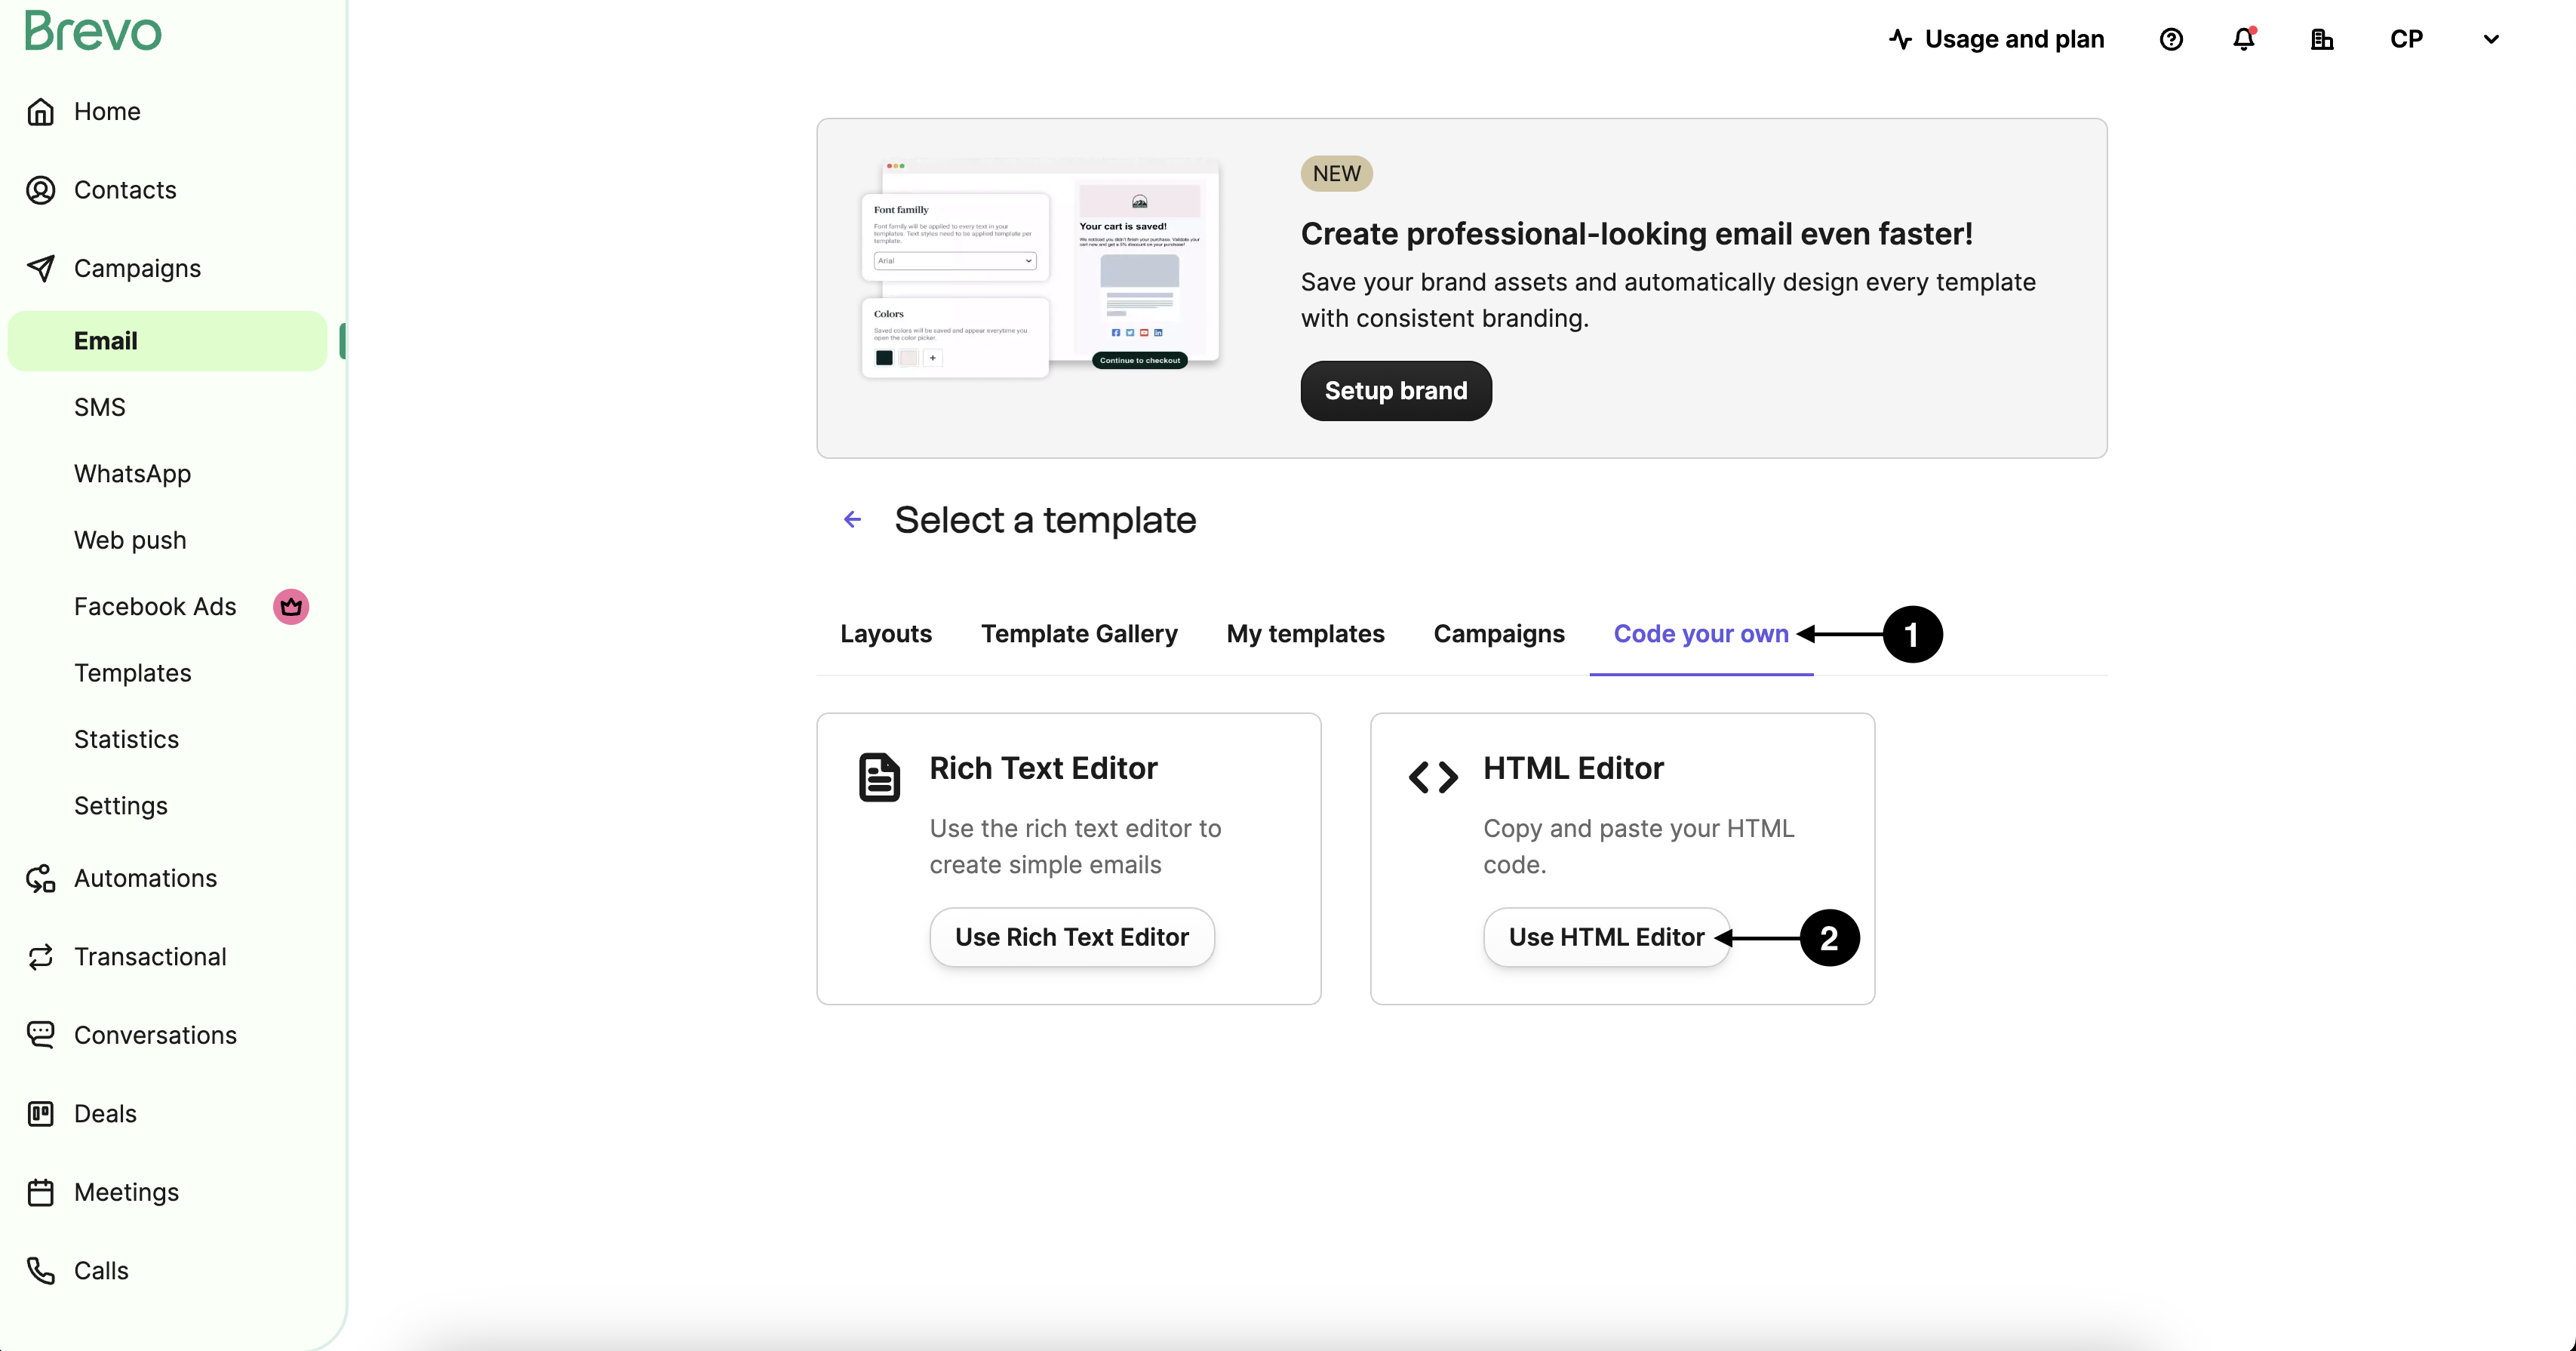
- Click Code your own, then Use HTML Editor.
- Paste your HTML code in the editor and continue.
- Now send or schedule the email.
Zoho Campaigns
Sending Kombai-generated HTML containing assets and linked images
To send the generated HTML through Zoho Campaign, you have to create an Email campaign. First, download the code from Kombai along with external images and follow the below steps:
Creating a campaign in Zoho Campaigns
- In your dashboard, click Create.
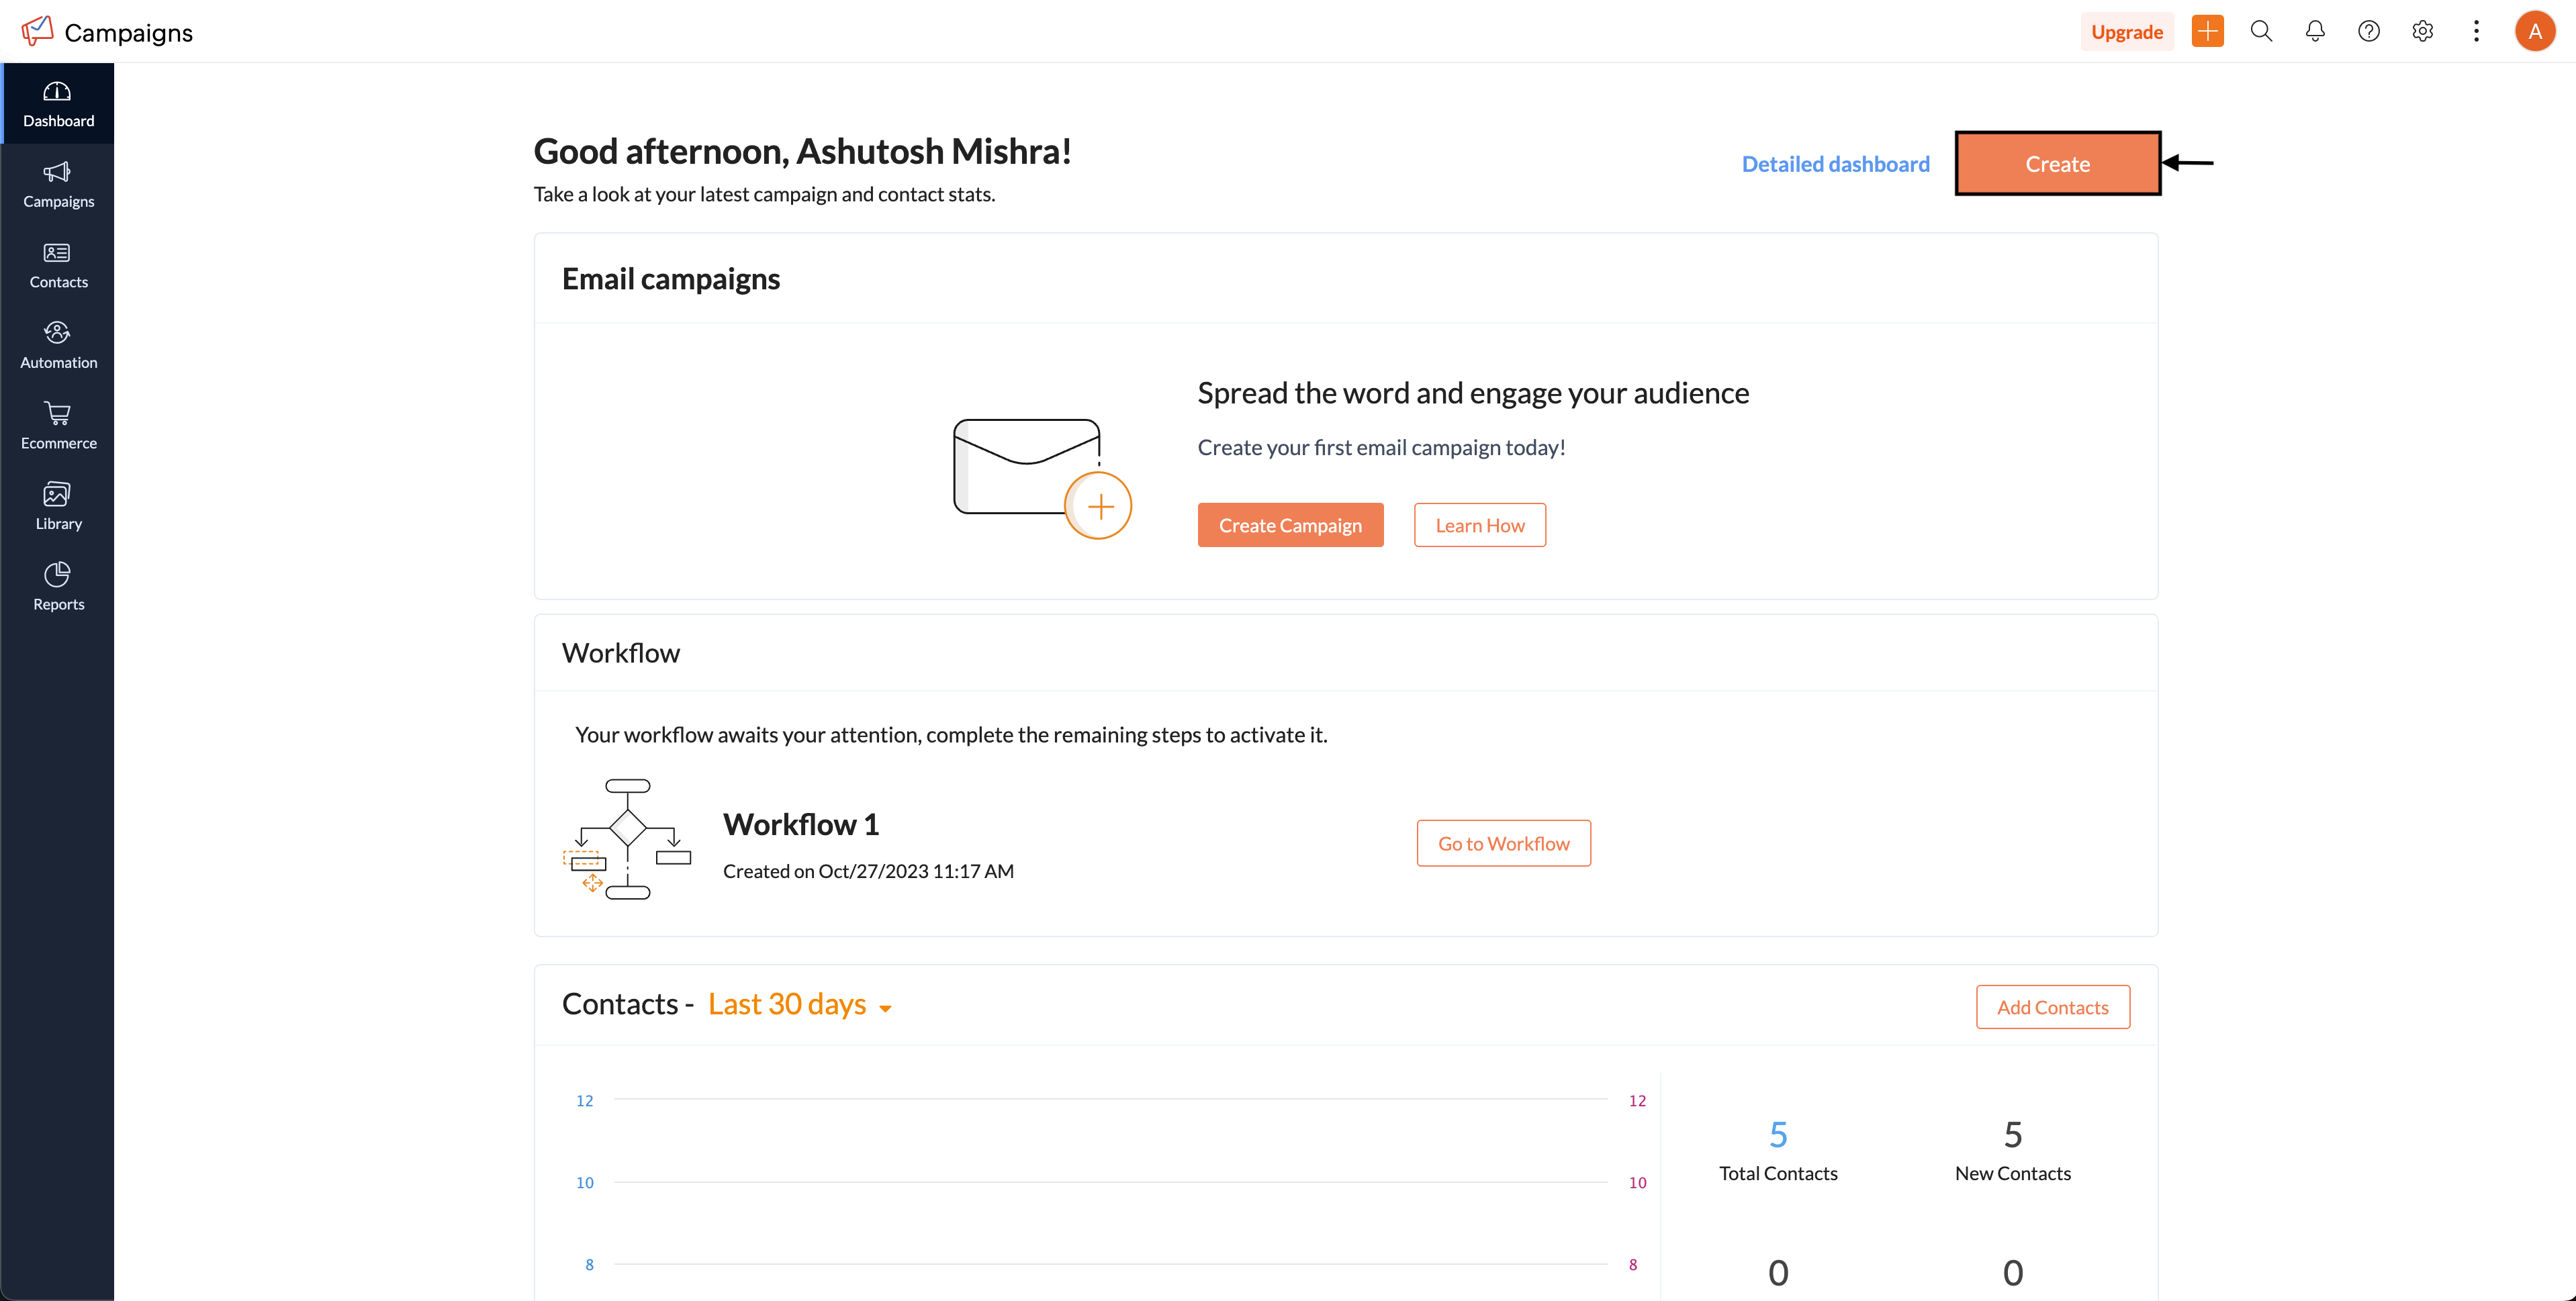
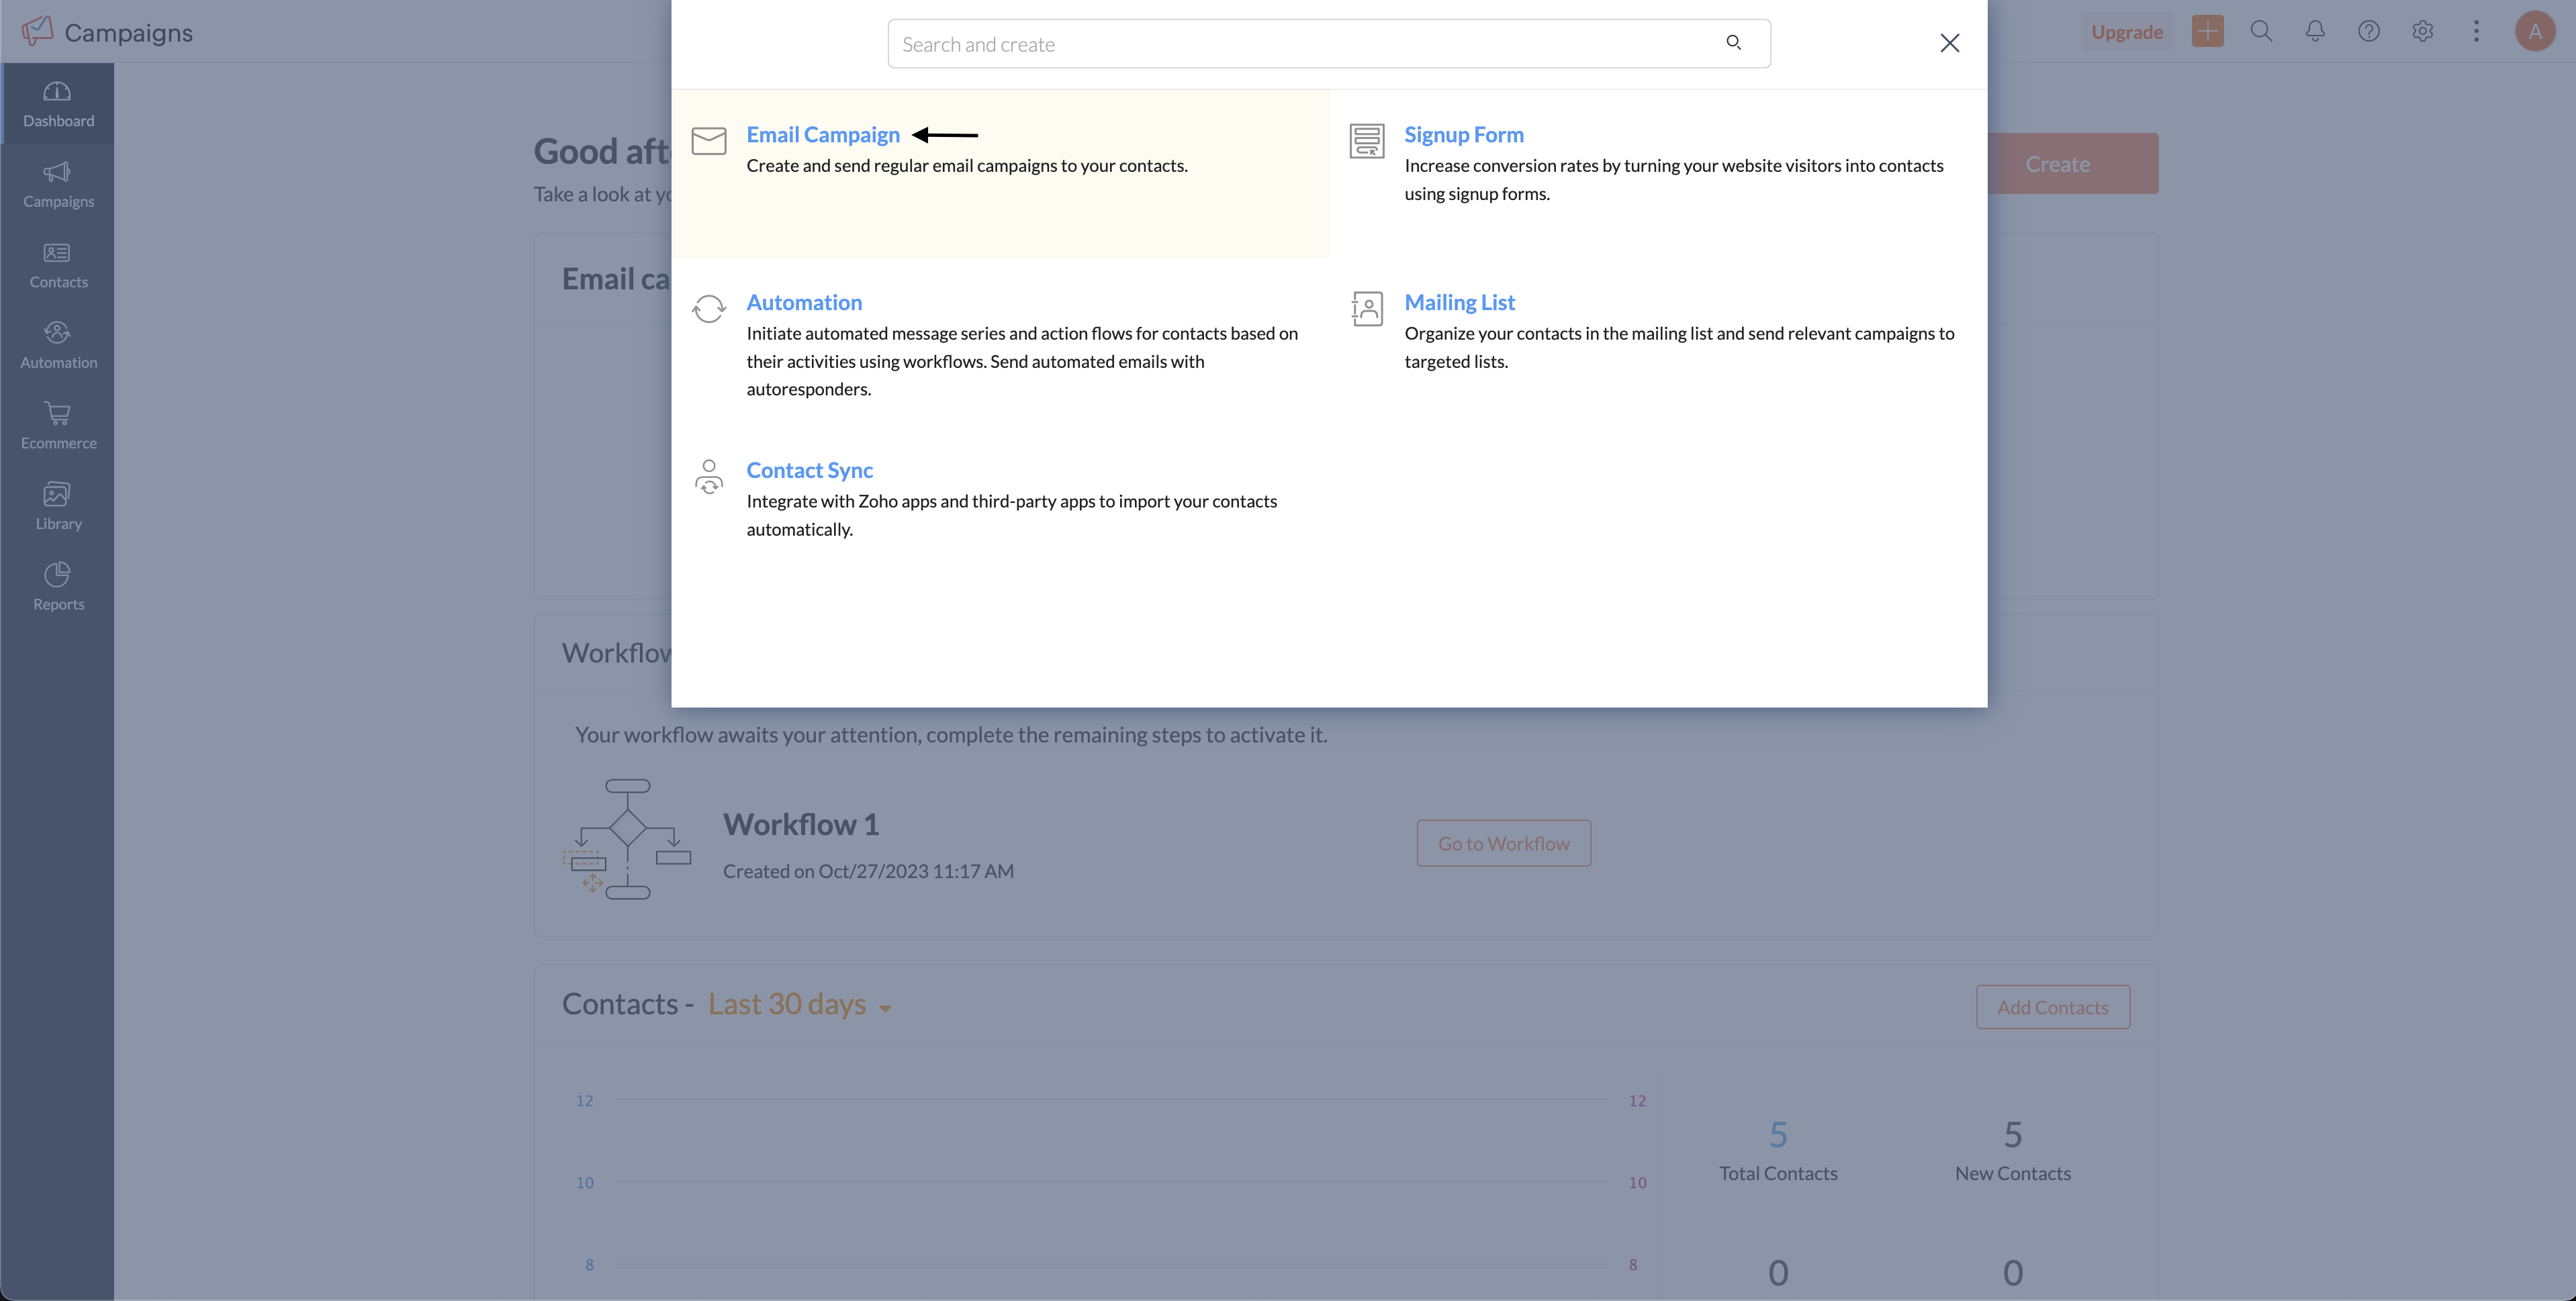
- In the new popup window, choose Email Campaign.
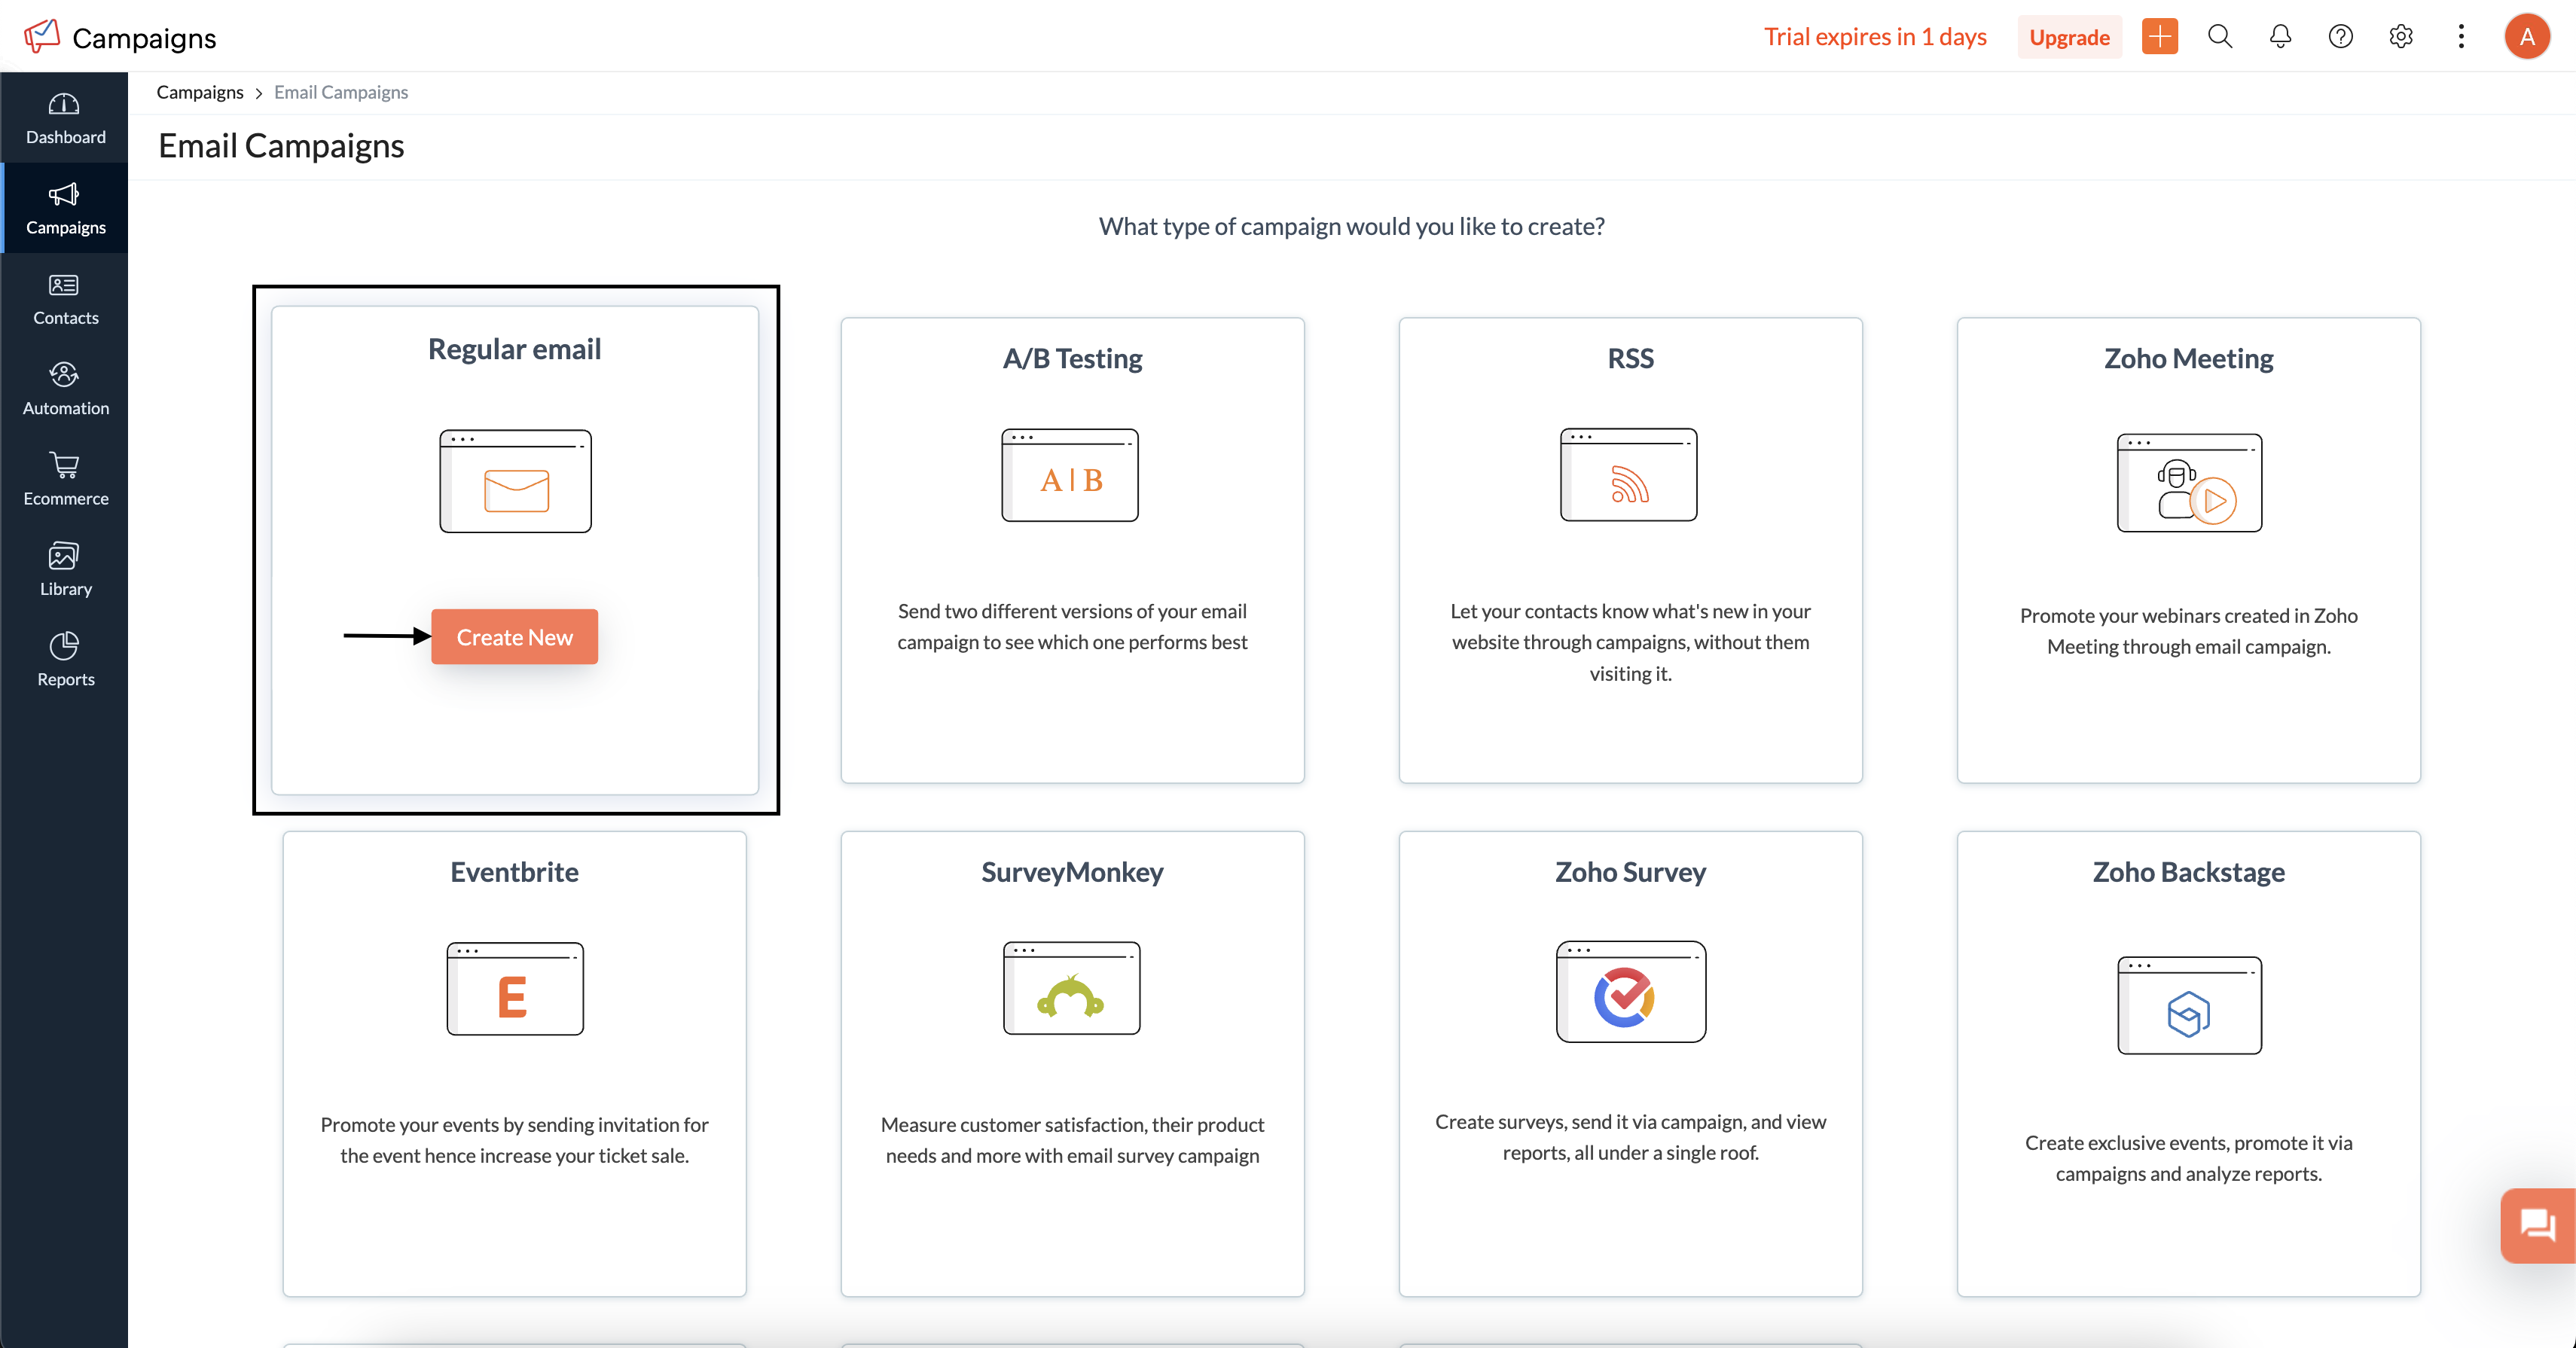
- Create a new Regular Email campaign, name your campaign and proceed.
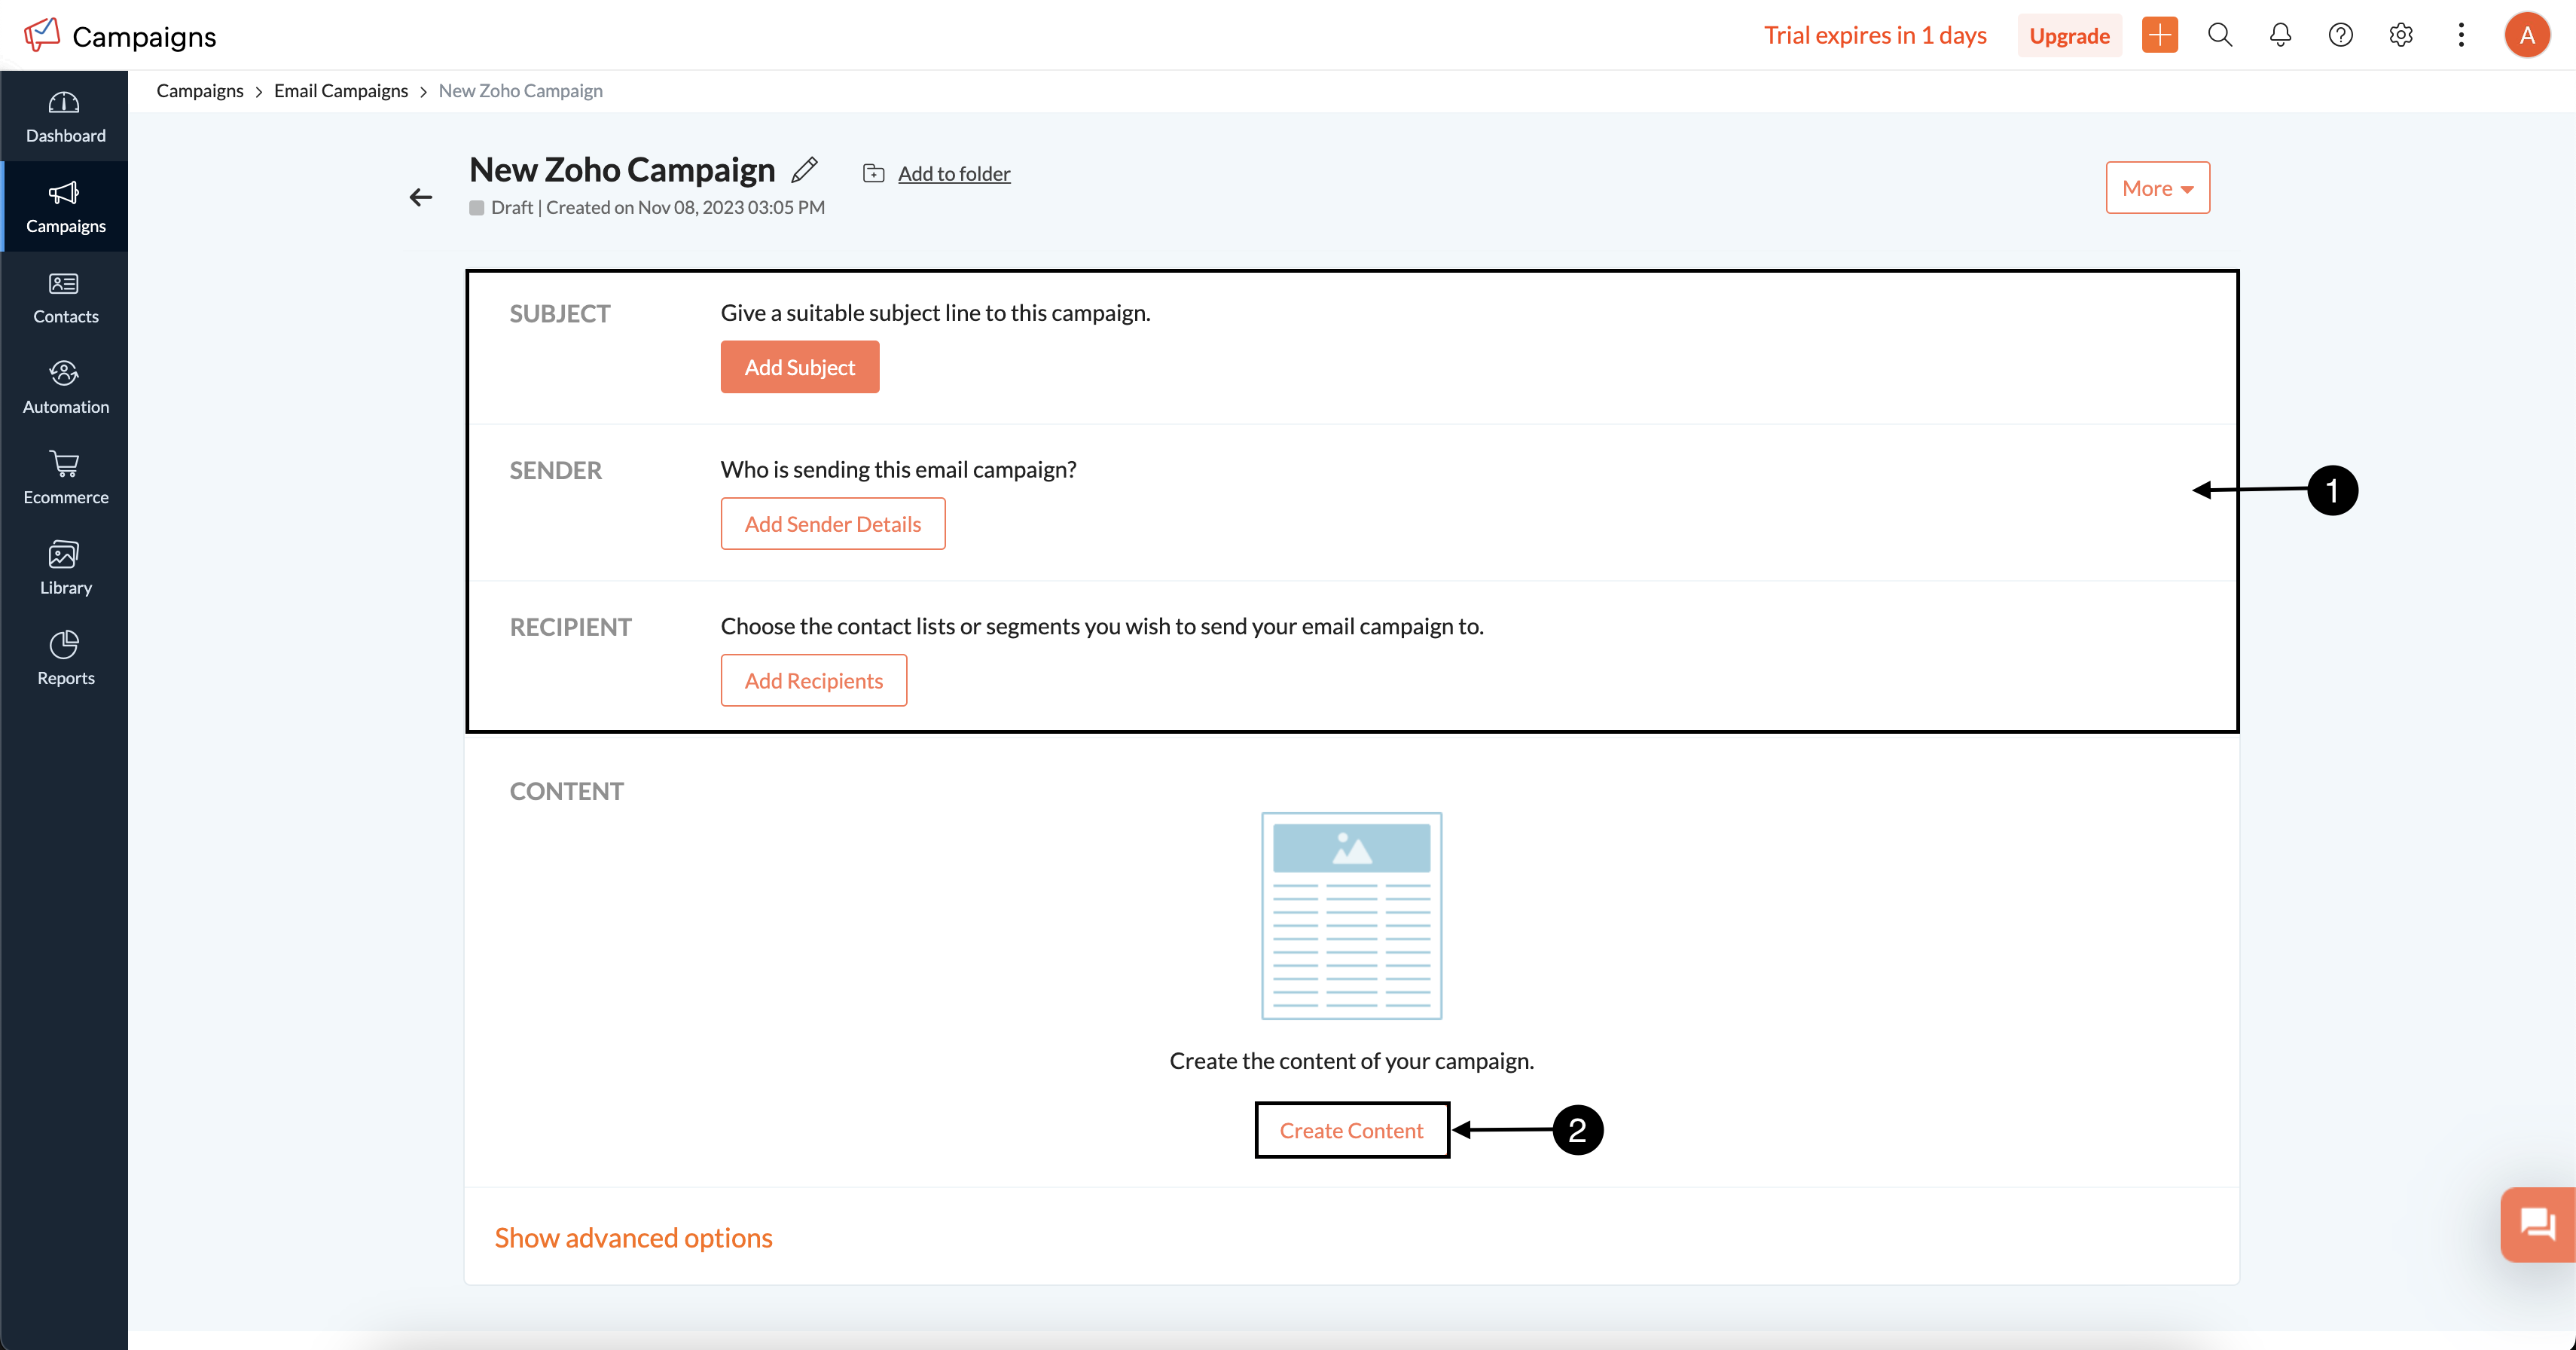
- Fill subject, sender, recipient details and click Create Content.
- Click Import/Upload HTML and select Upload from Computer.
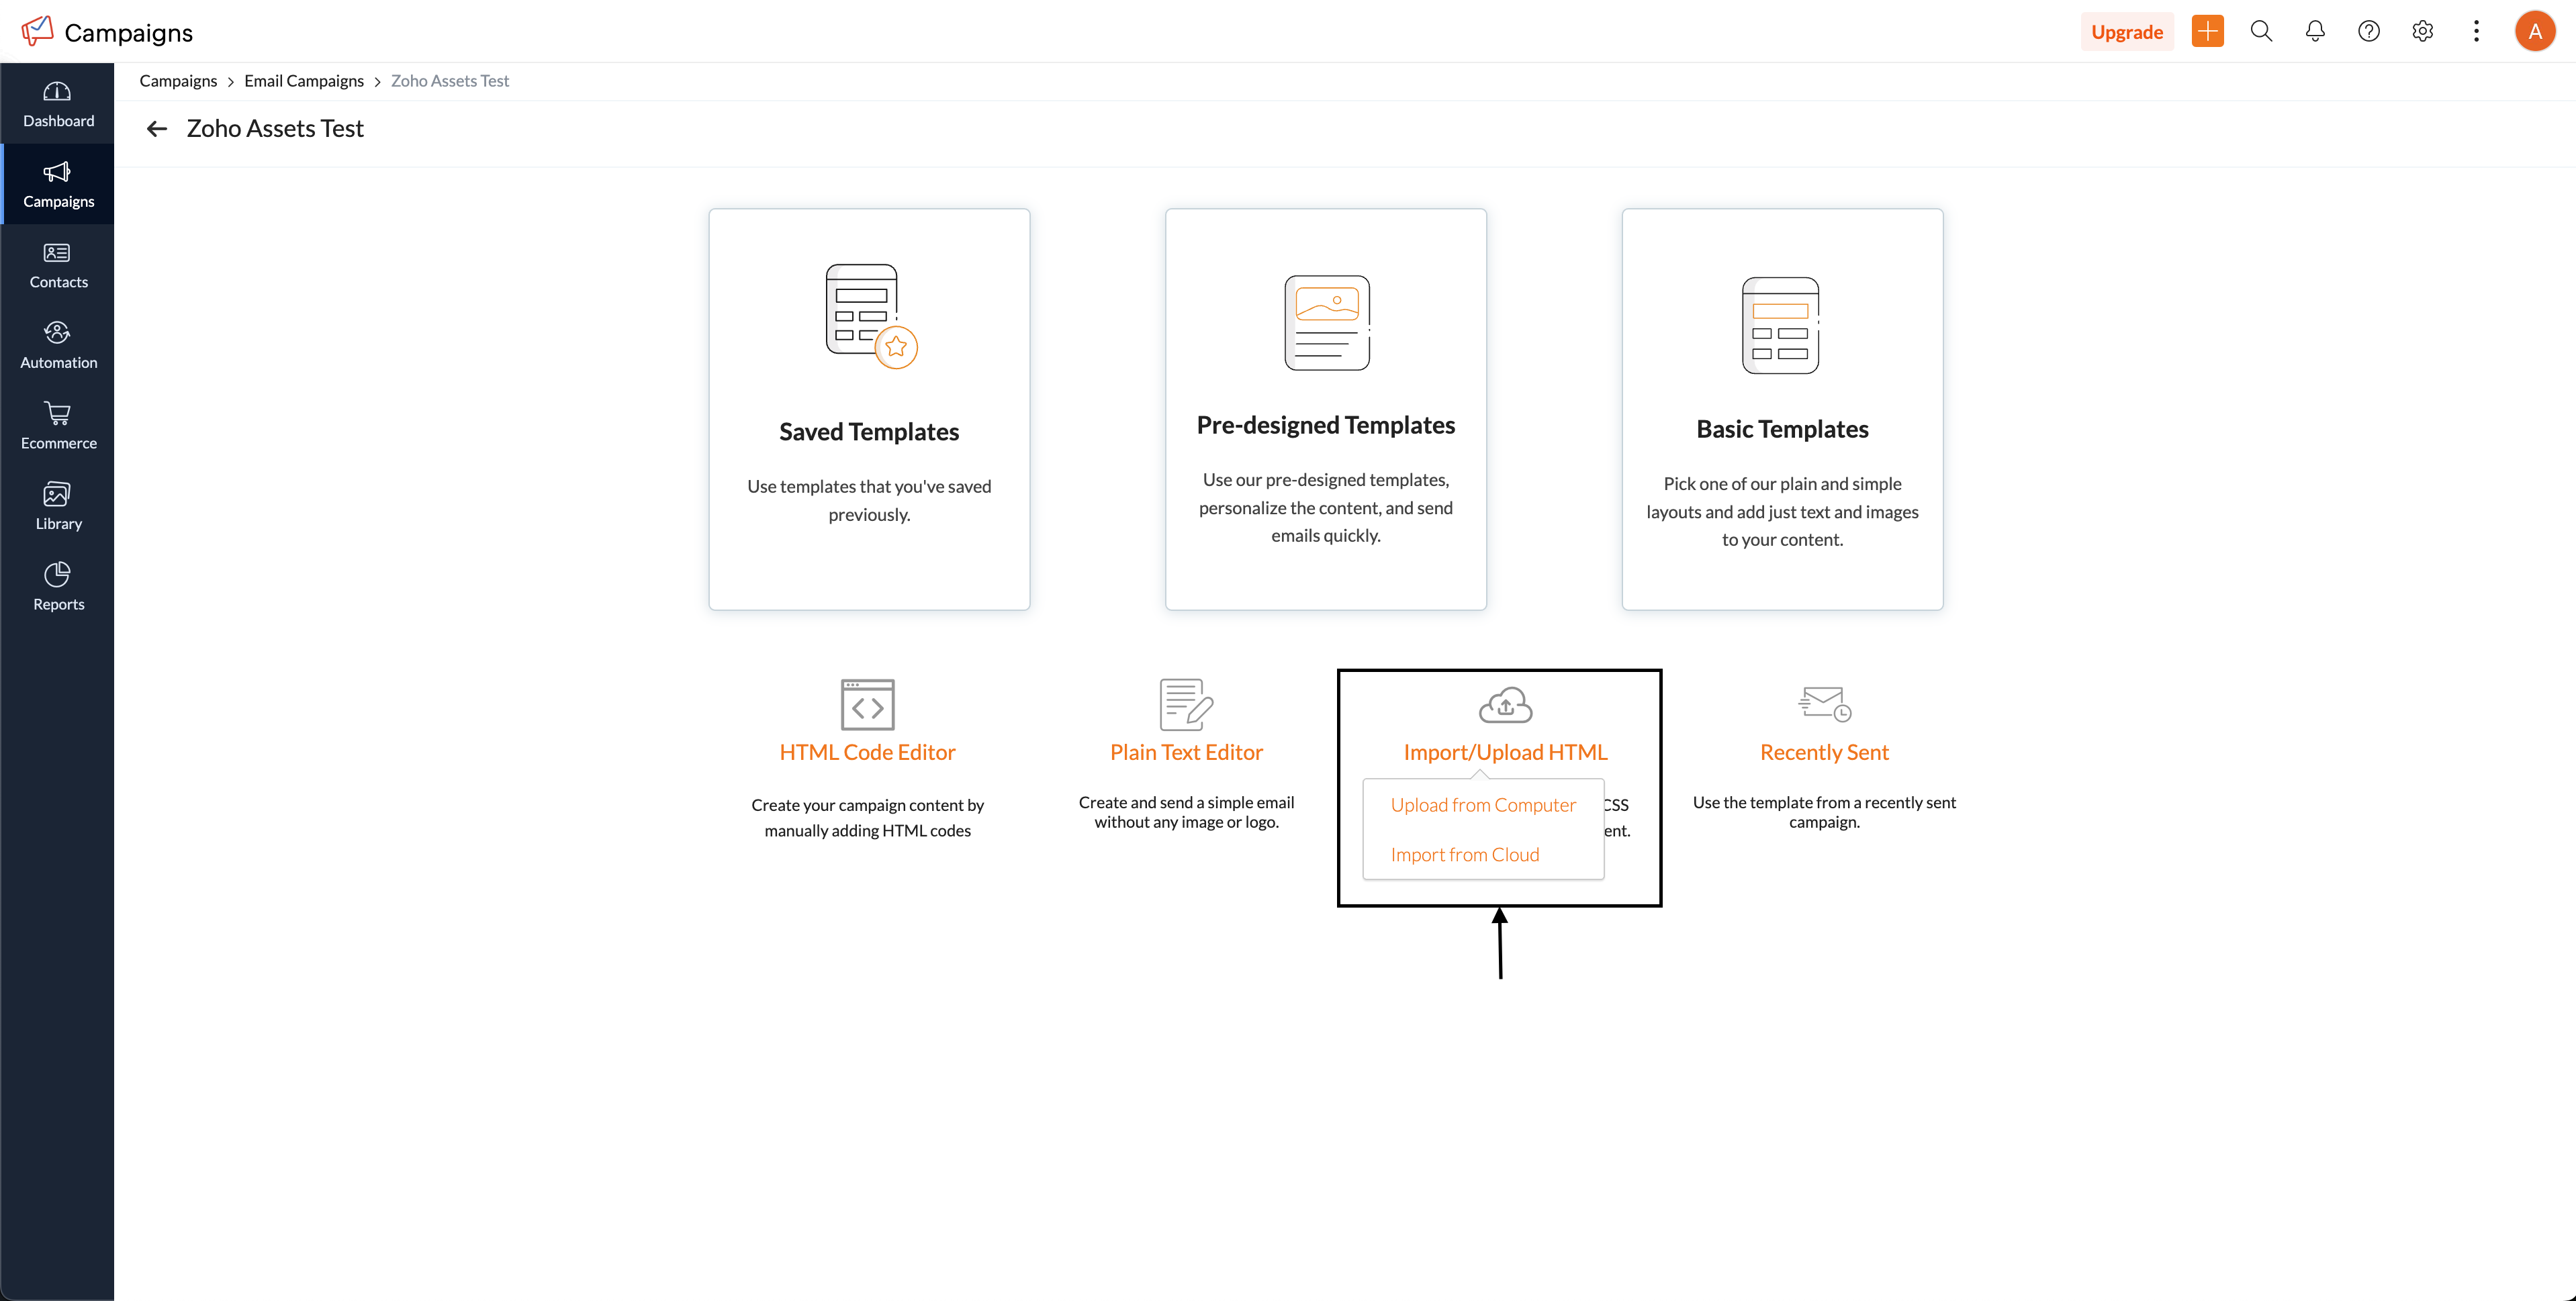
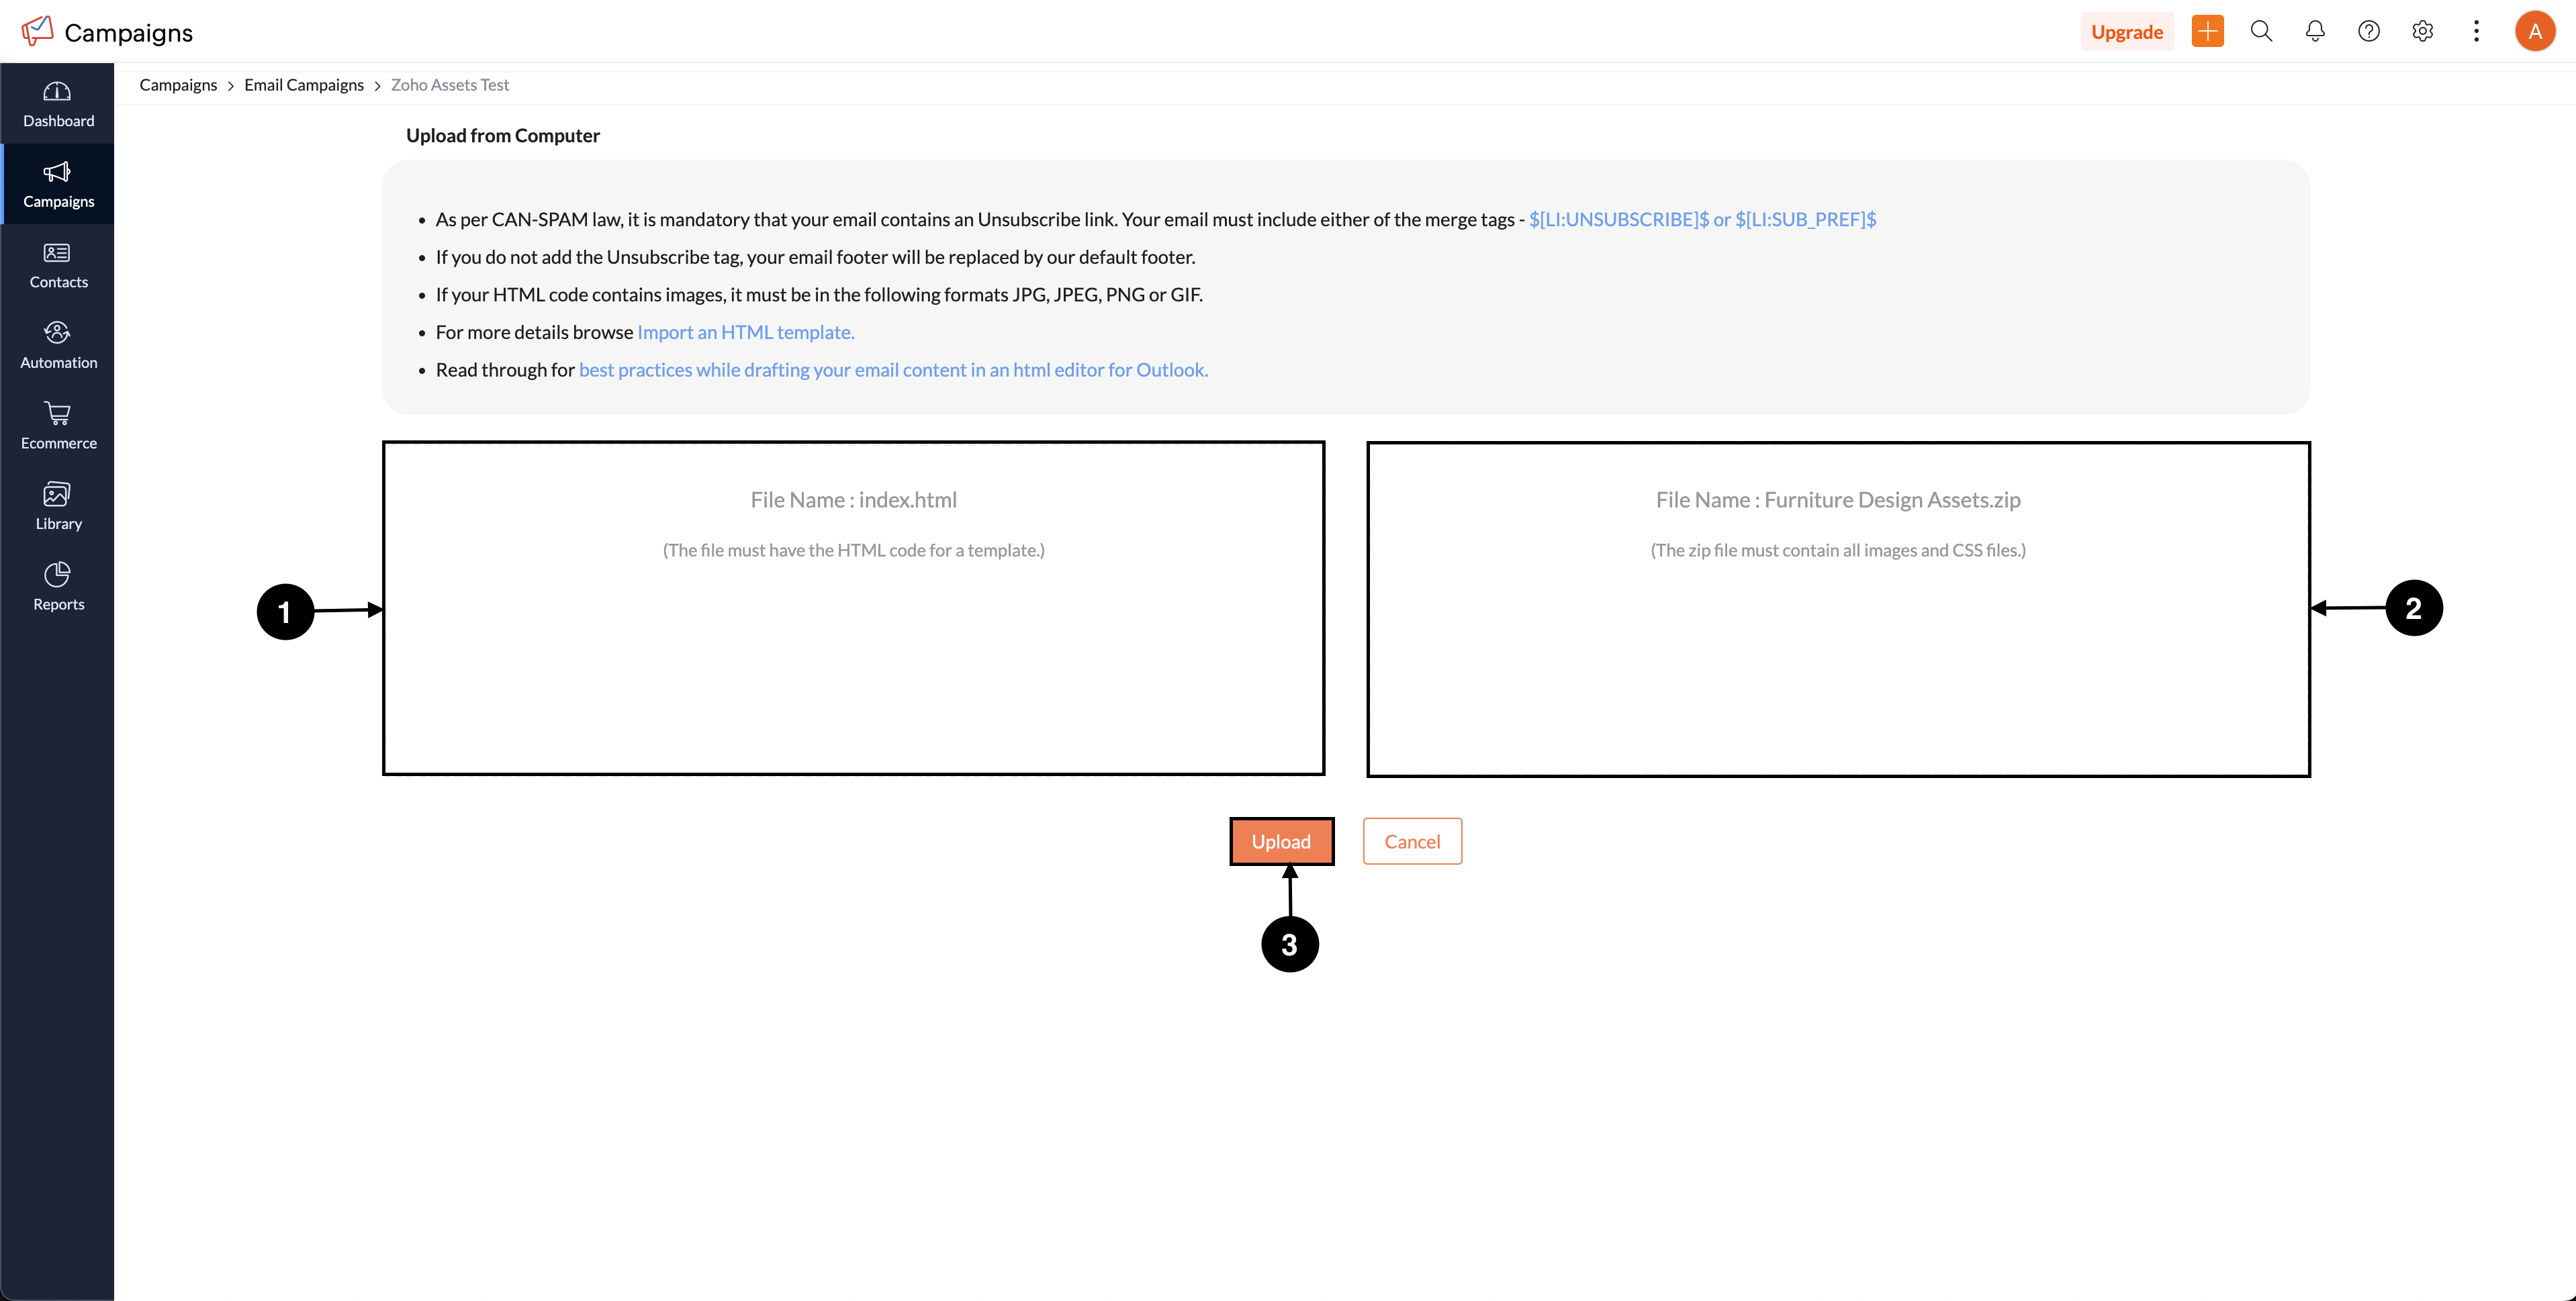
- Upload the html file and zip(that contains both HTML and images) file you downloaded from Kombai.
- Send or schedule your campaign.
Sending Kombai-generated HTML containing Base64 embedded images
To send the generated HTML code through Zoho Campaigns, you have to:
- Copy/Download the code from Kombai with Base64 embedded images.
- Repeat steps 1-4 of Creating a campaign in Zoho Campaigns.
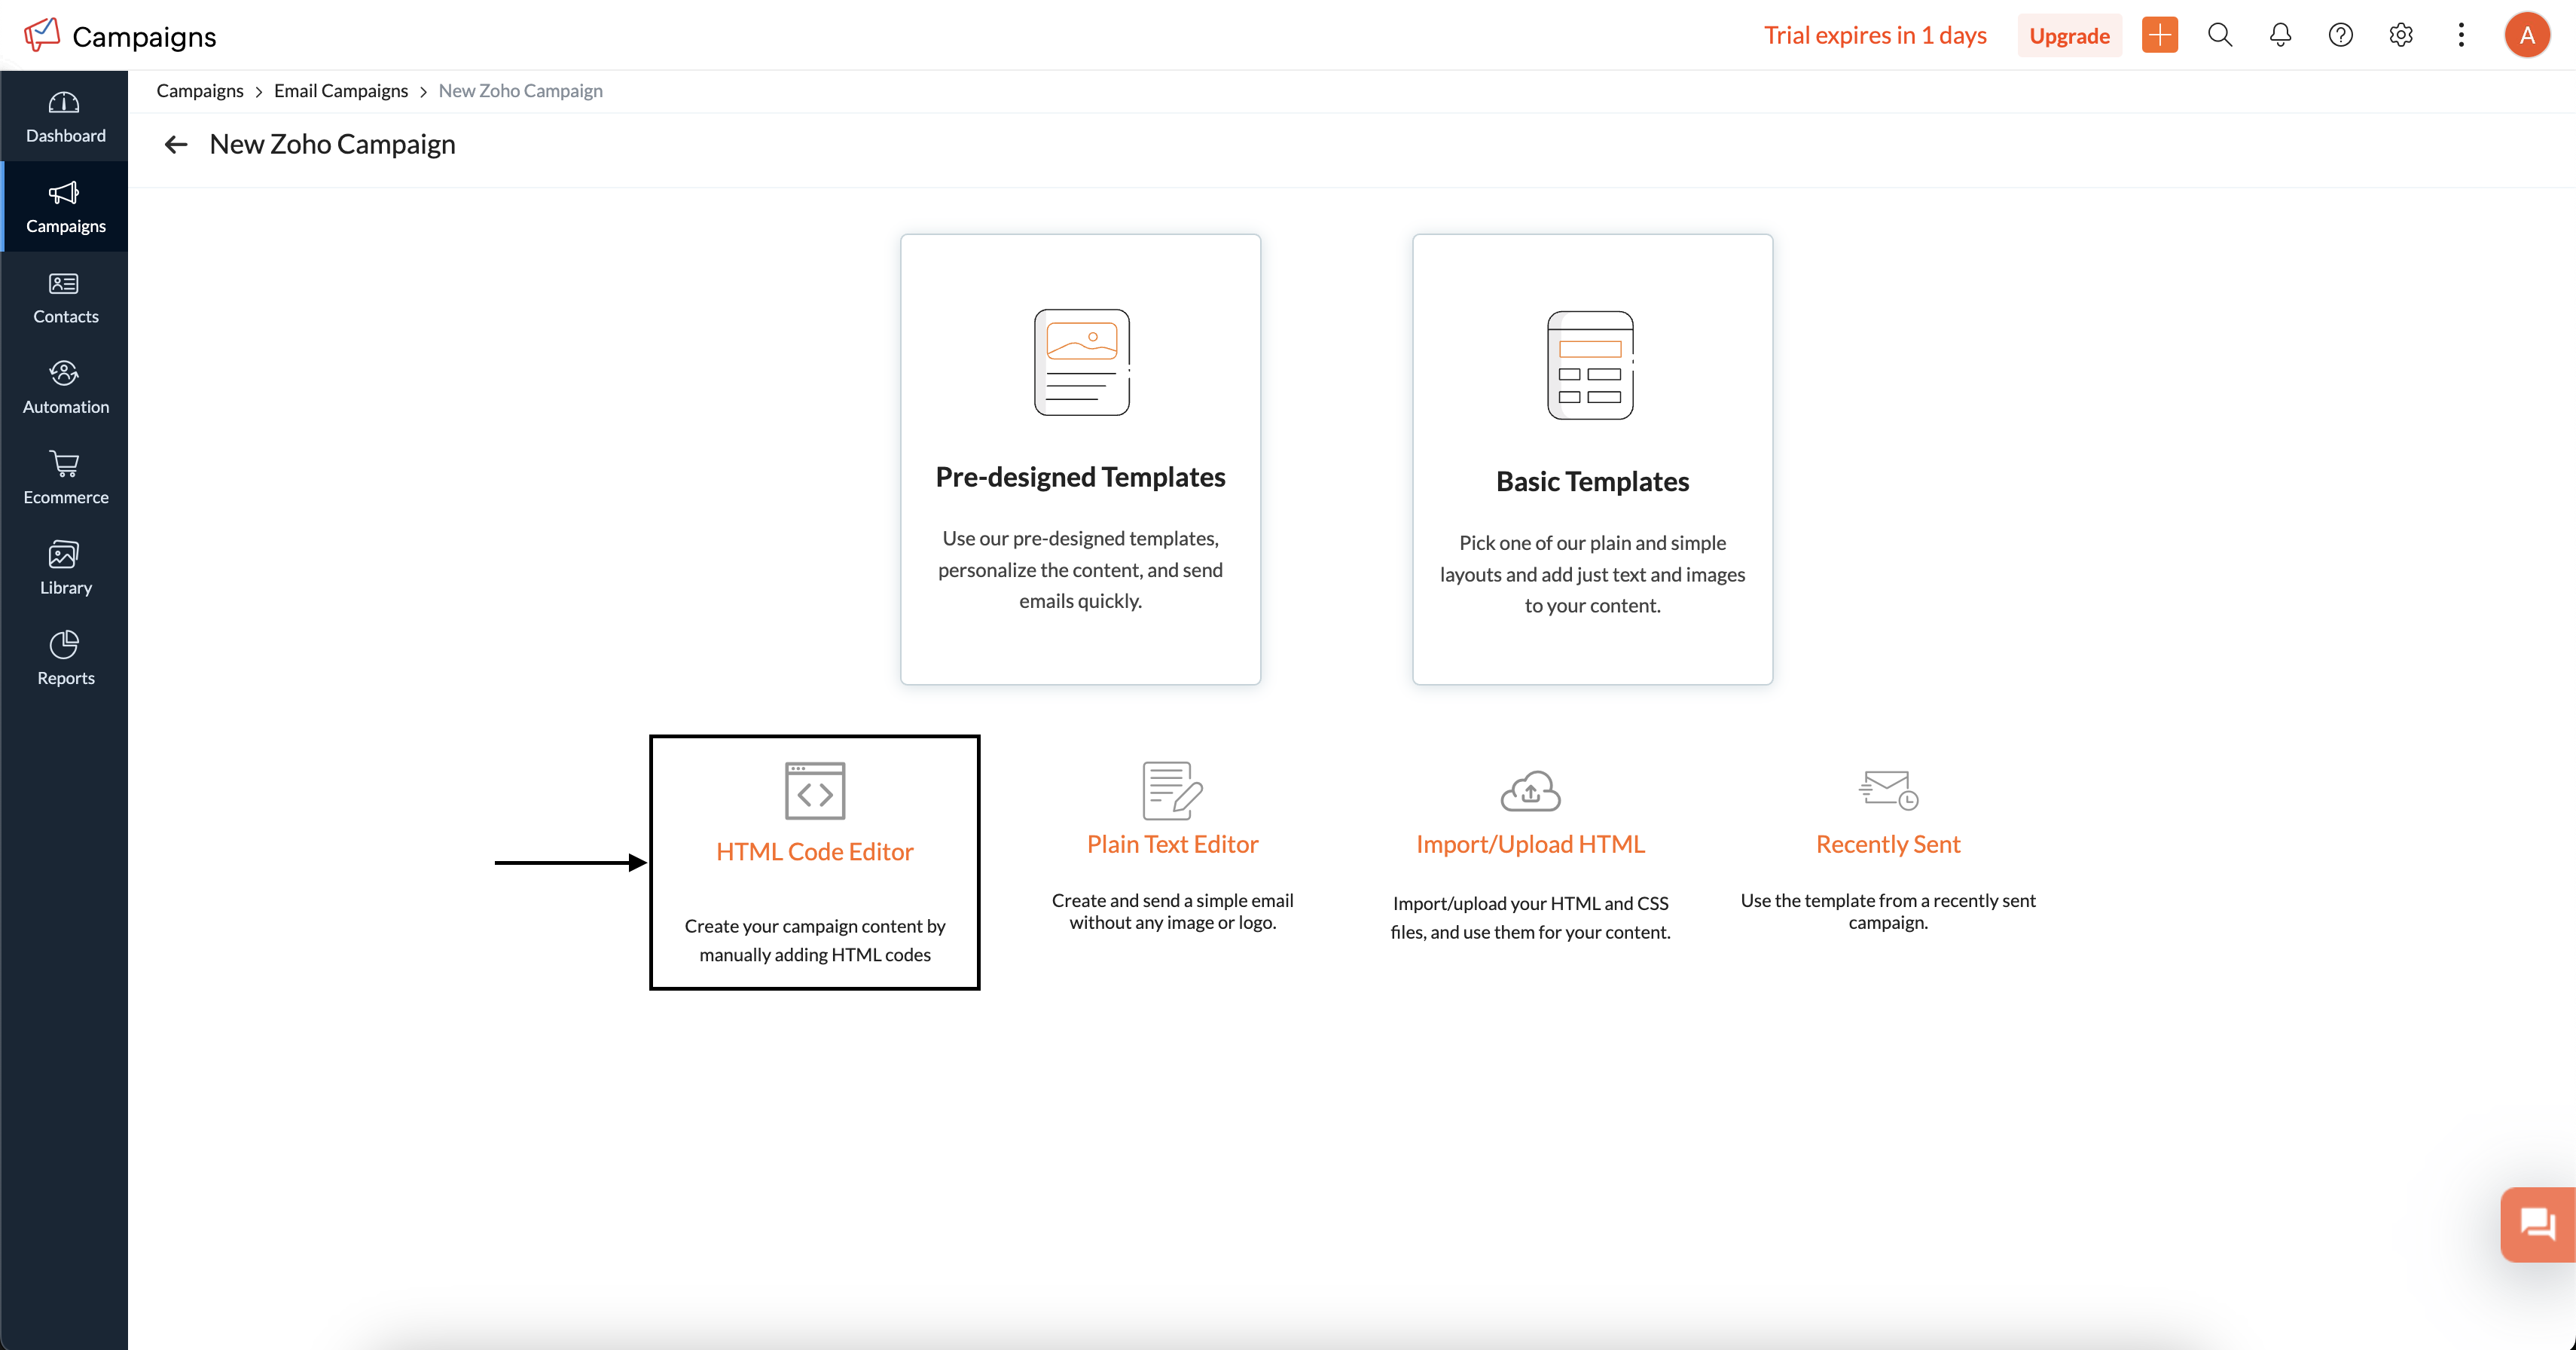
- Select HTML Code Editor.
- Click the code(
</>) icon at the right side of the options bar.
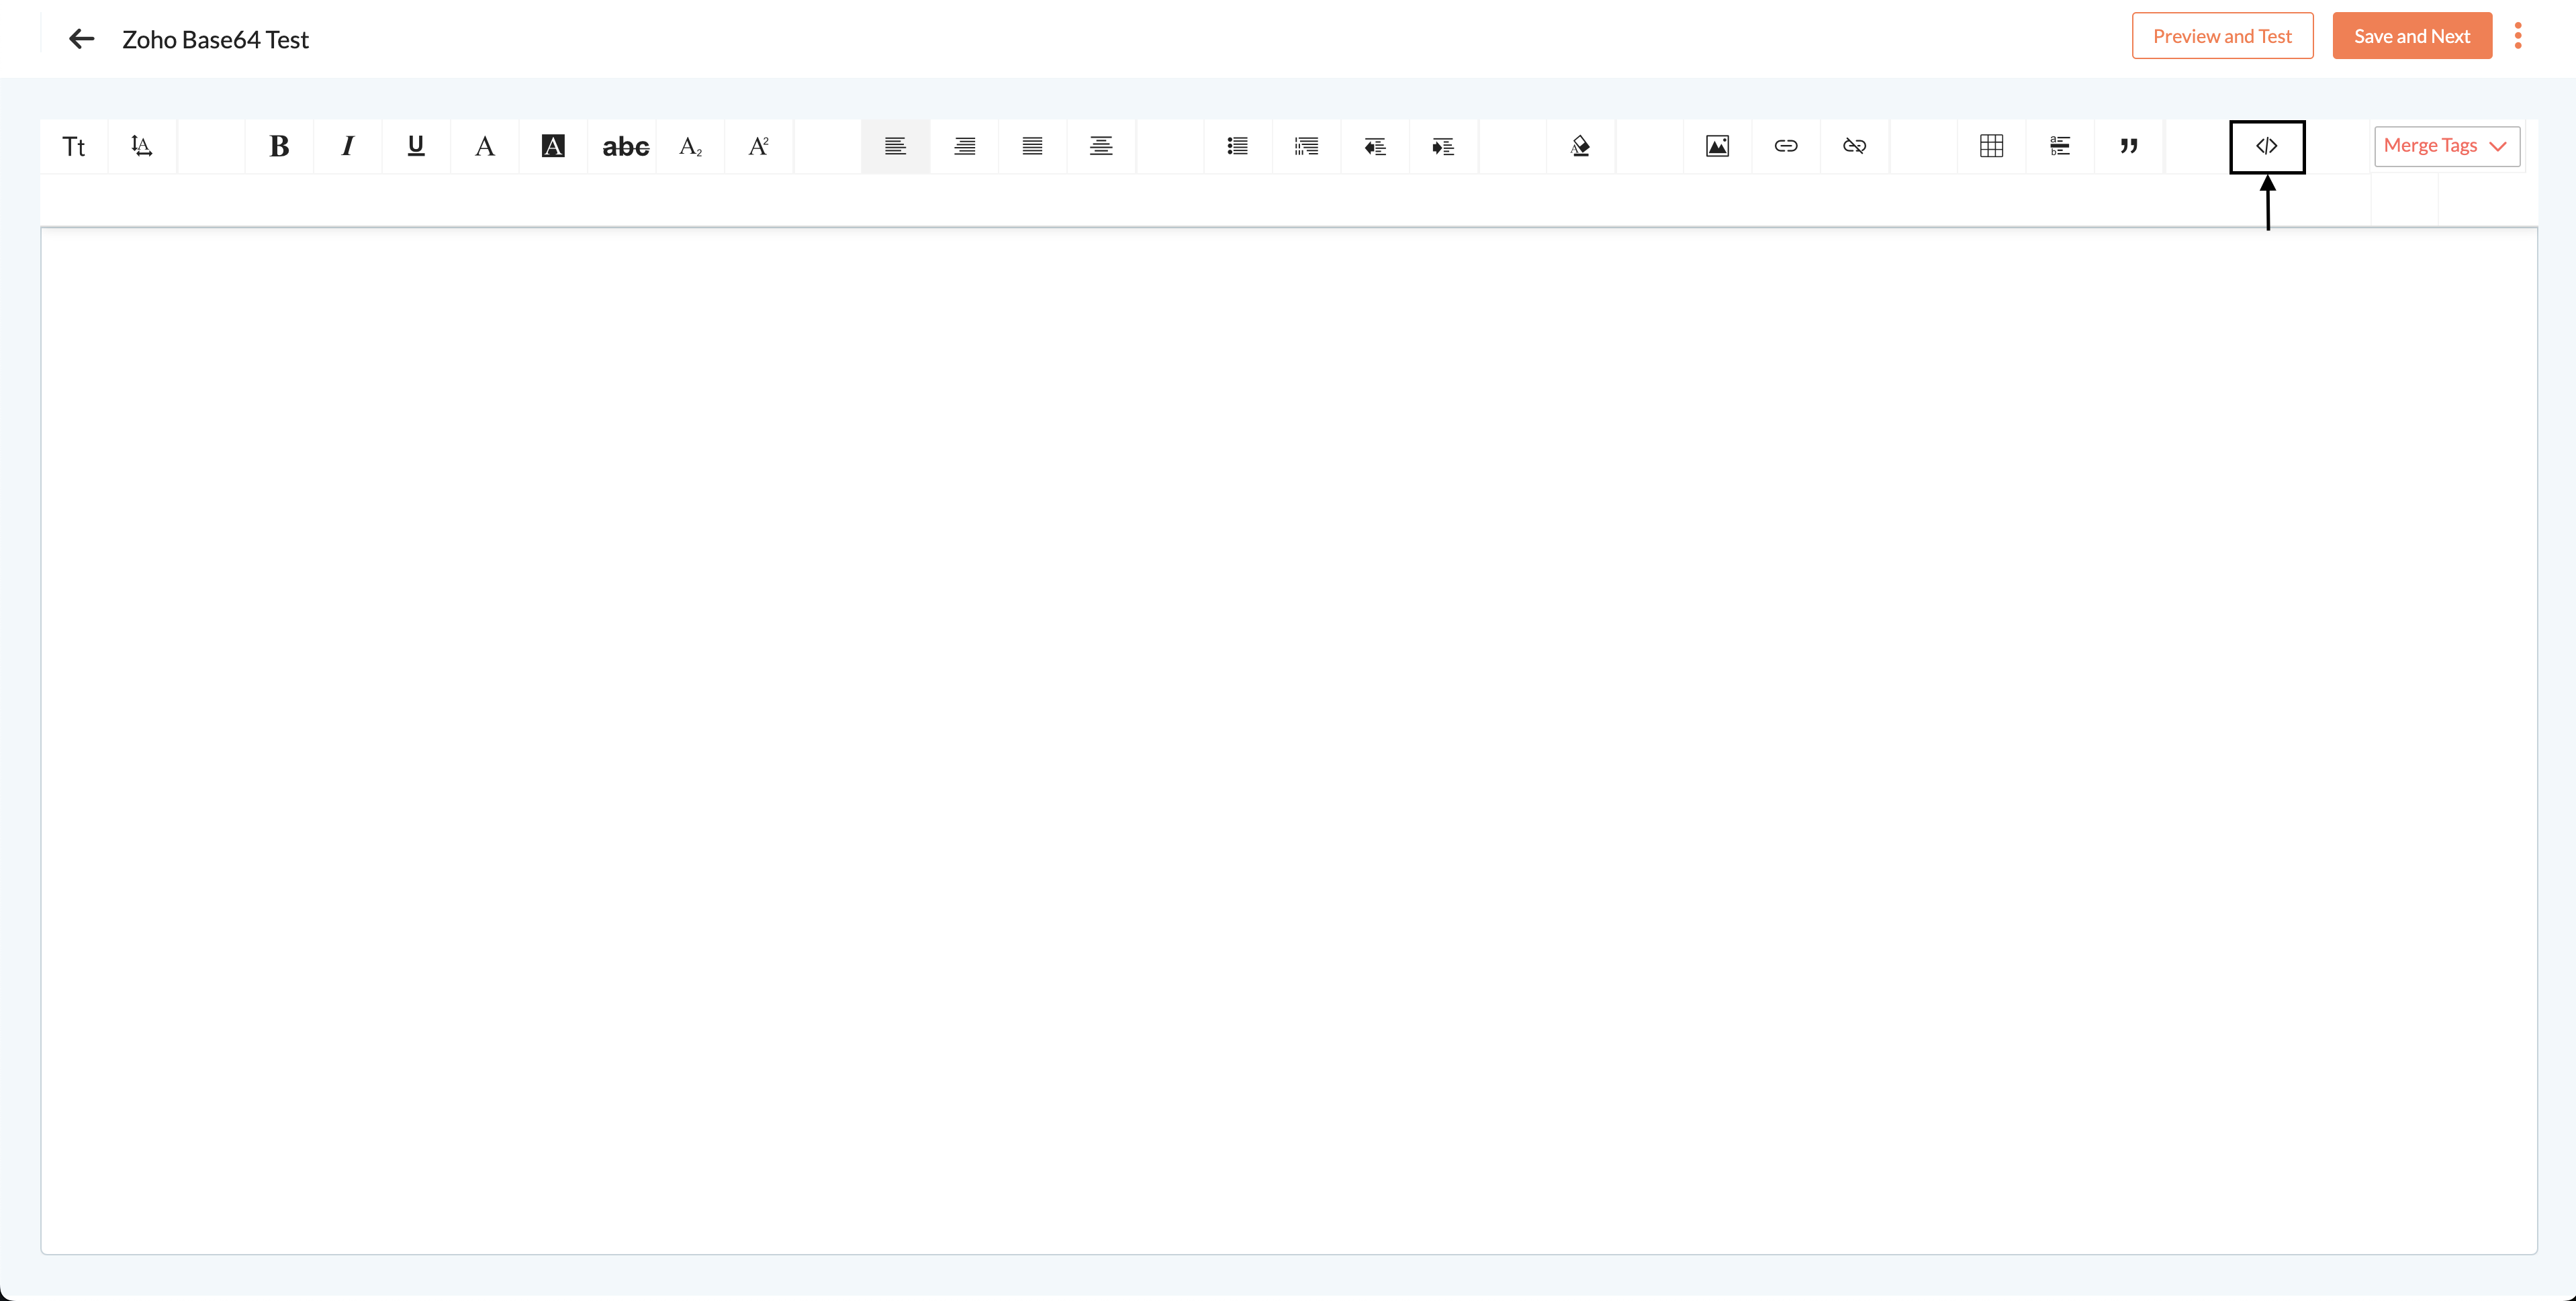
- In the new input box, paste your code and click Insert.
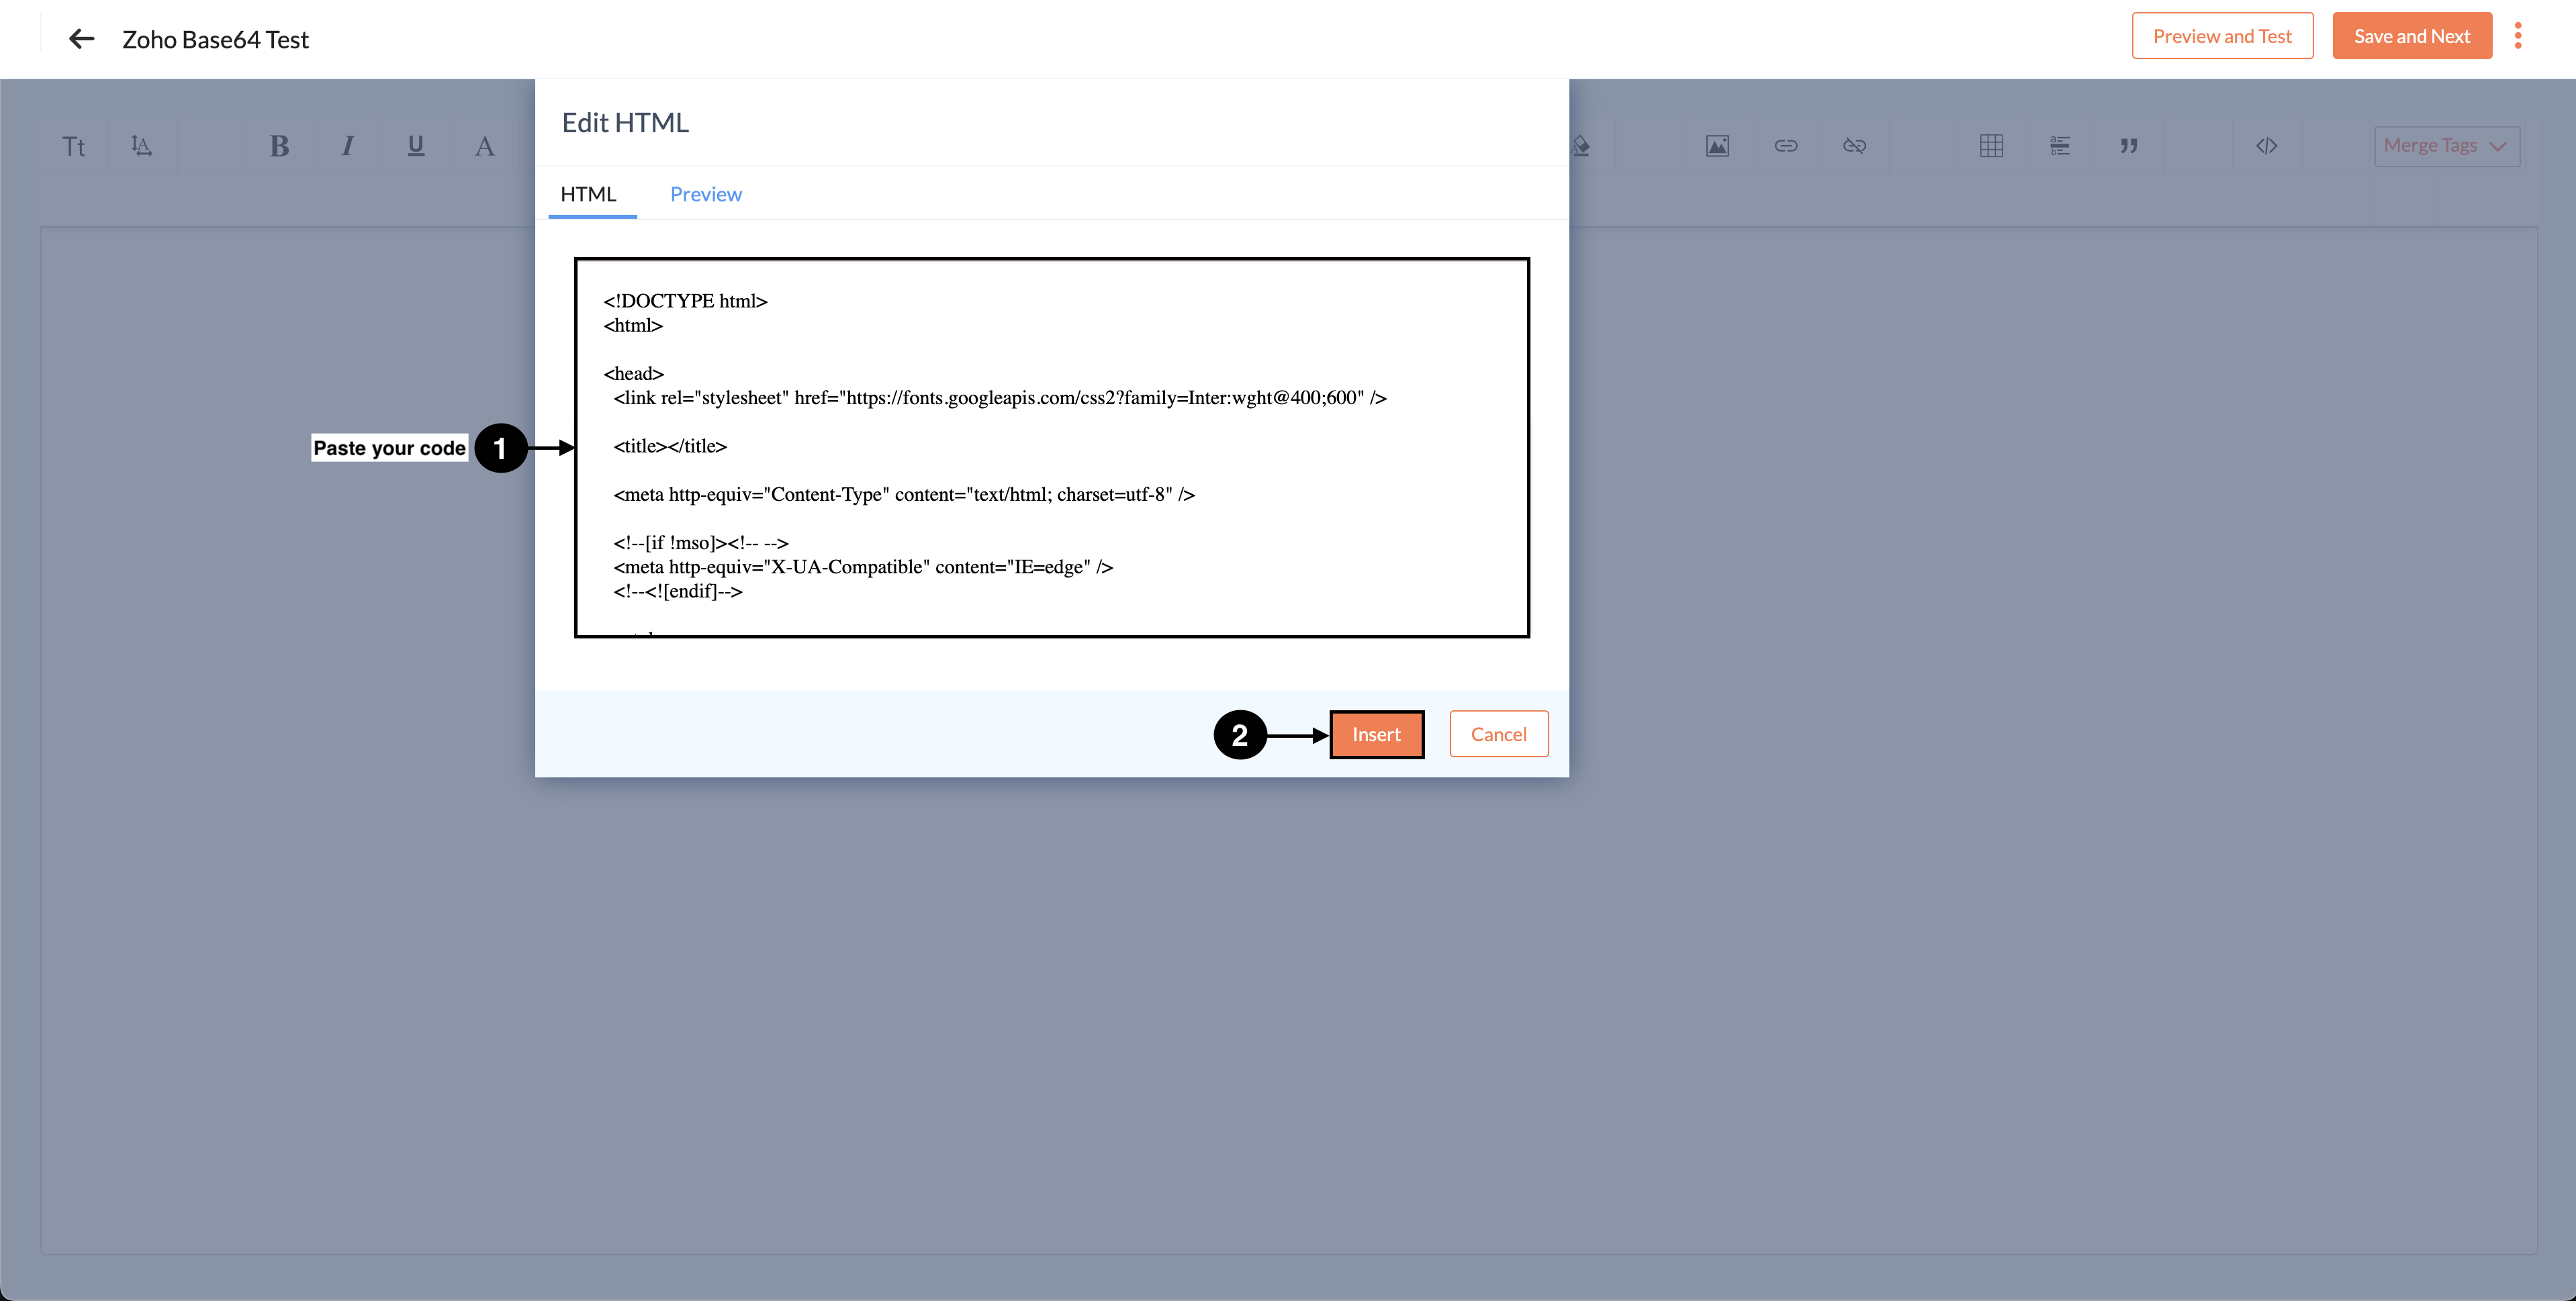
- Continue further and send/schedule your email campaign.
Note: Zoho Campaigns has a character limit of 300,000 characters for HTML email code.
Mailjet
Sending Kombai-generated HTML containing assets and linked images
To send the generated HTML through Mailjet, you have to create an Email campaign. First, download the code from Kombai along with external images and follow the below steps:
Creating a campaign in Mailjet
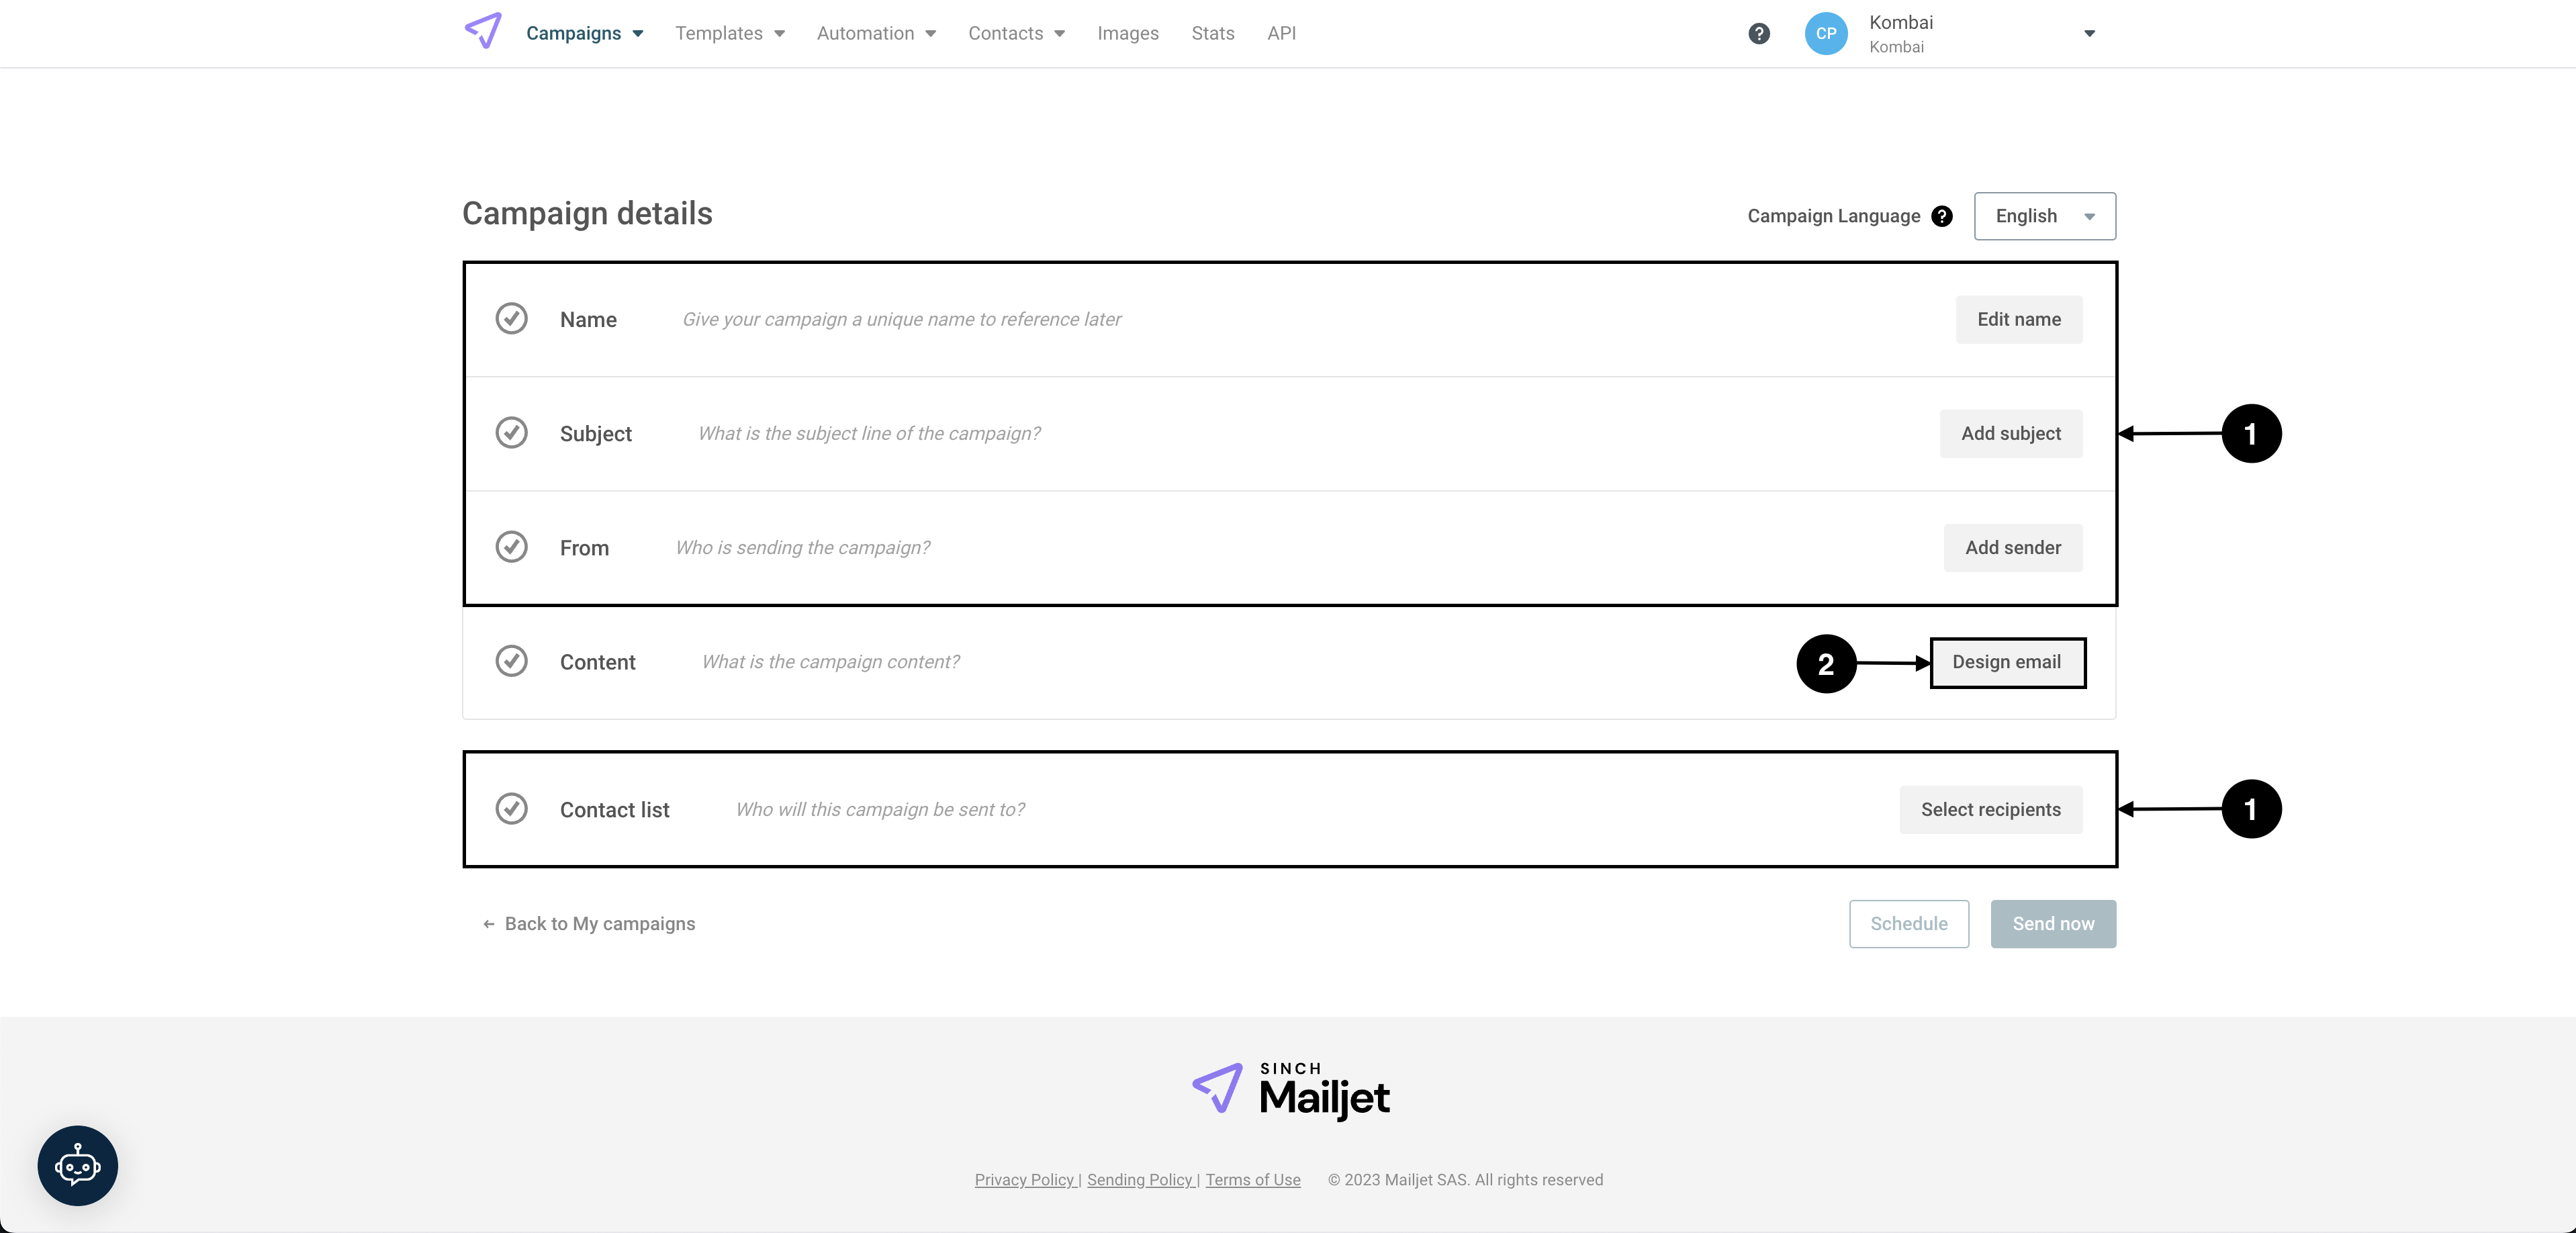
- In your Mailjet dashboard, go to Create a campaign.

- Fill all the required info(subject, sender details, etc.), then click Design email.
- Go to Code in HTML and select Code from scratch.

- Paste your code in the editor. Then go to Images > Insert image from gallery and upload the images from assets folder.

- Replace the existing image source with the images you uploaded to Mailjet(see the below example).
- Continue further and send or schedule your mail.
Sending Kombai-generated HTML containing Base64 embedded images
To send the generated HTML code through Mailjet, you have to:
- Copy/Download the code from Kombai with Base64 embedded images.
- Repeat steps 1-3 from Creating a campaign from Mailjet.
- Paste your code into the editor.
- Continue further and send/schedule your mail.
GetResponse
Sending Kombai-generated HTML containing assets and linked images
To send the generated HTML through GetResponse, you have to create an Email campaign. First, download the code from Kombai along with external images and follow the below steps:
Creating a campaign in GetResponse
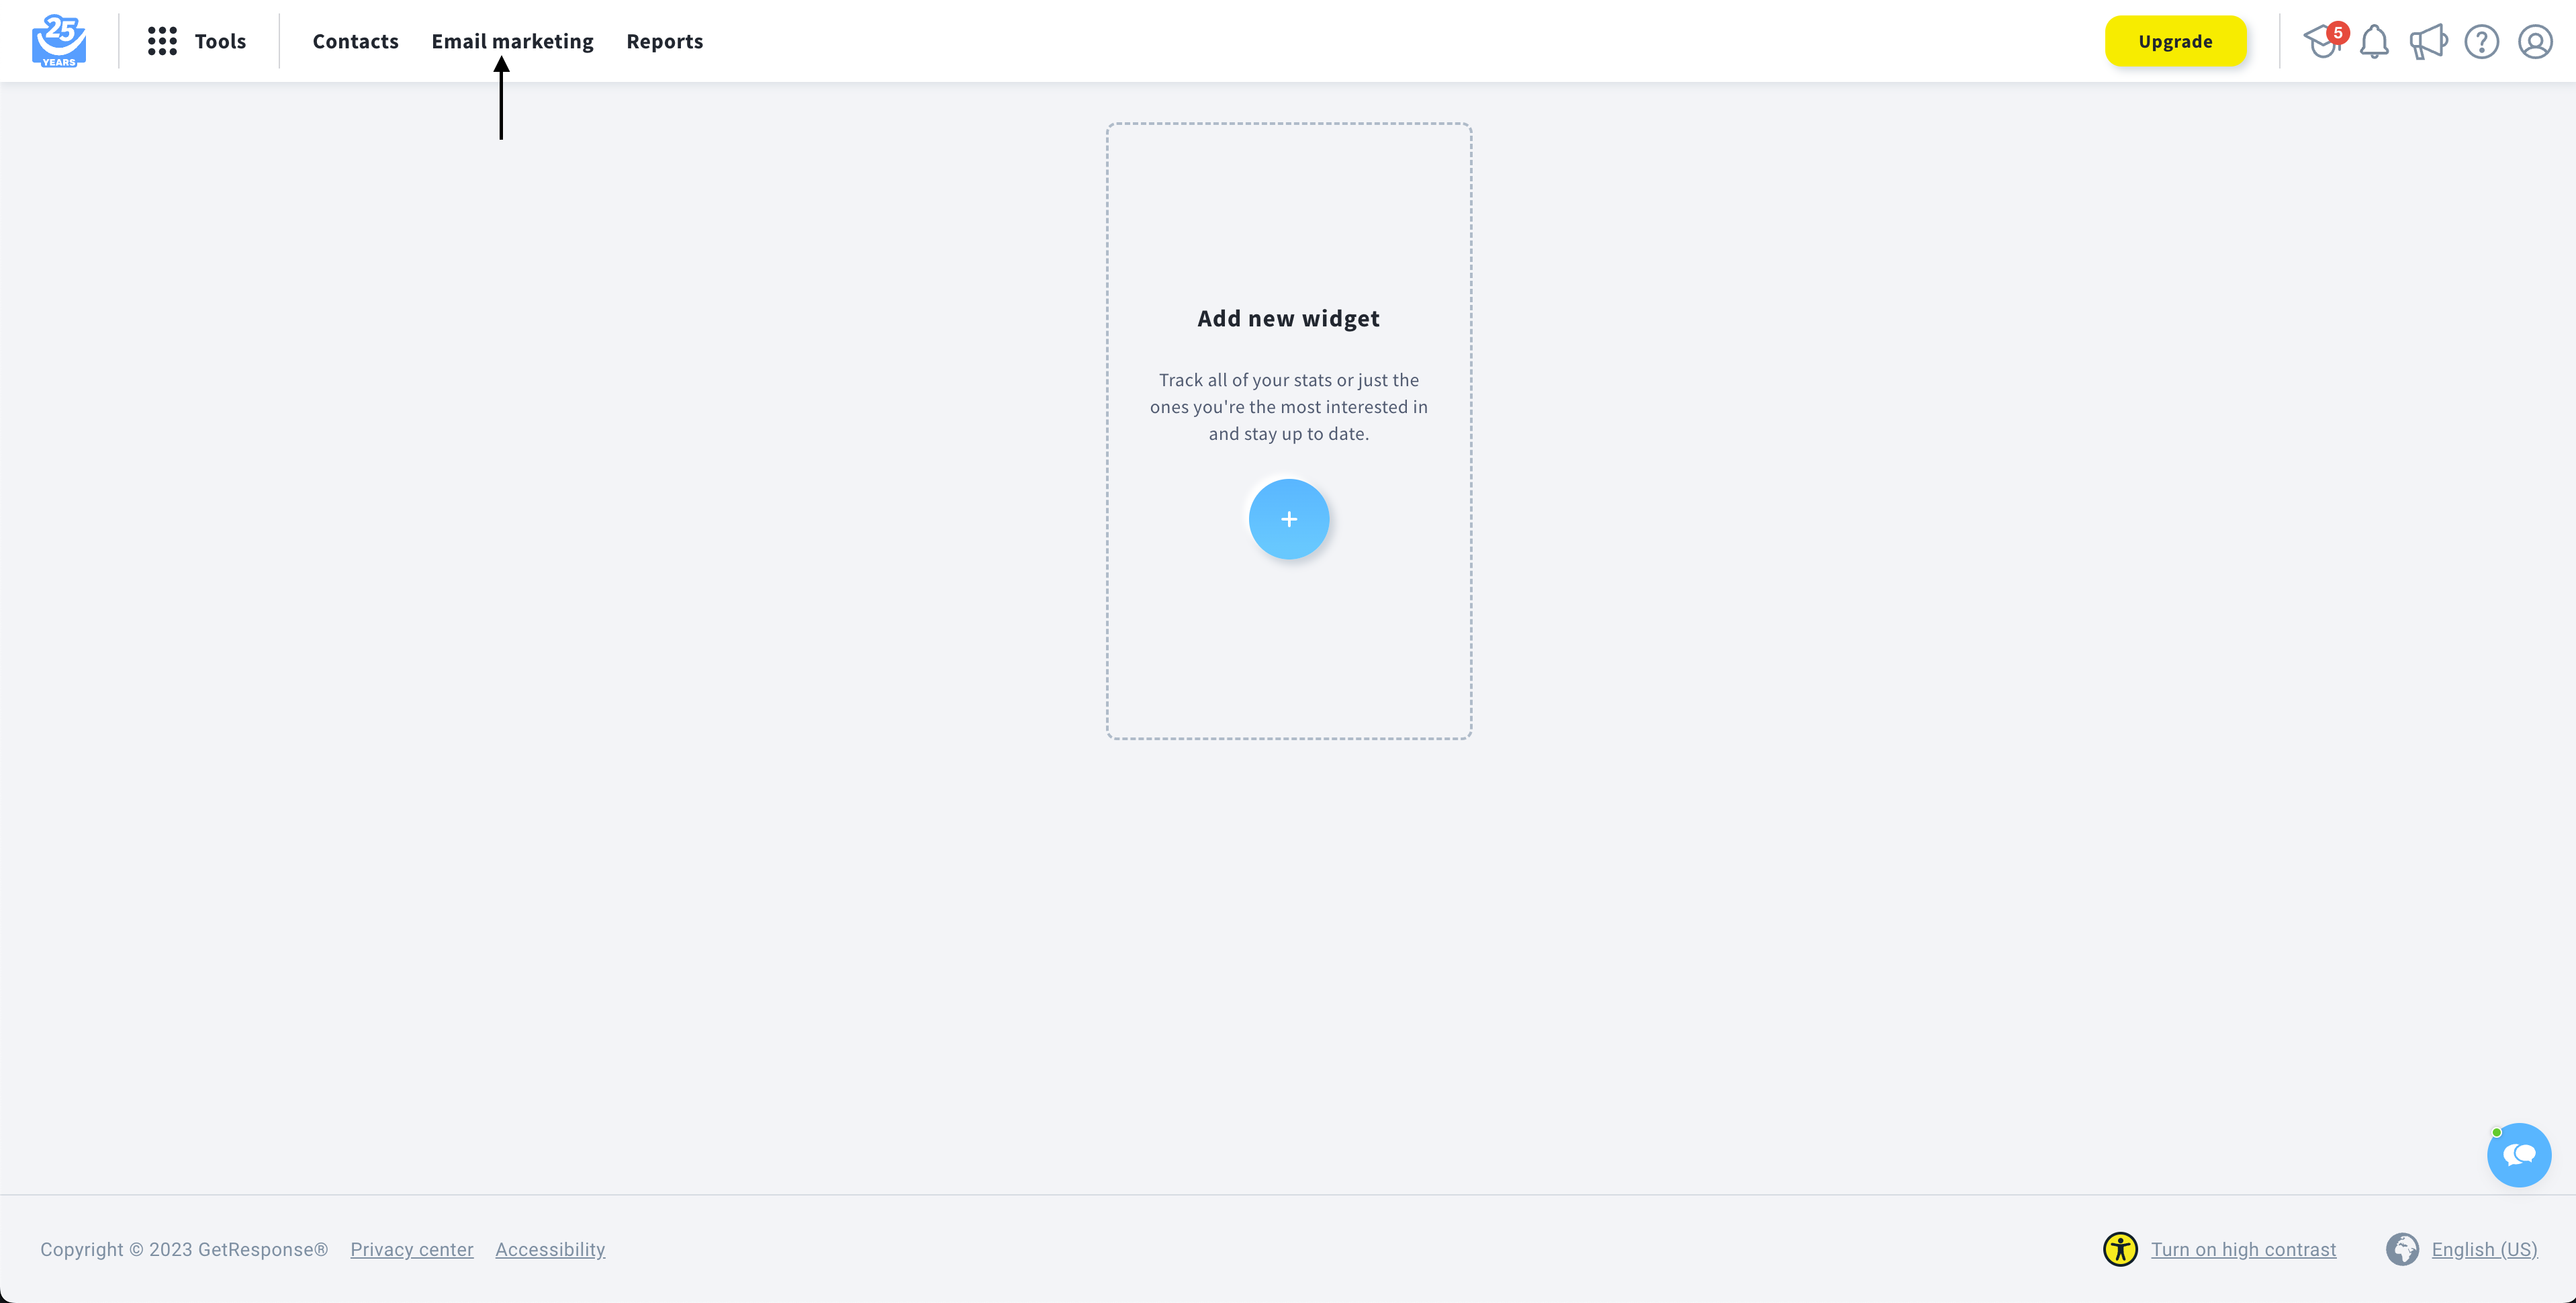
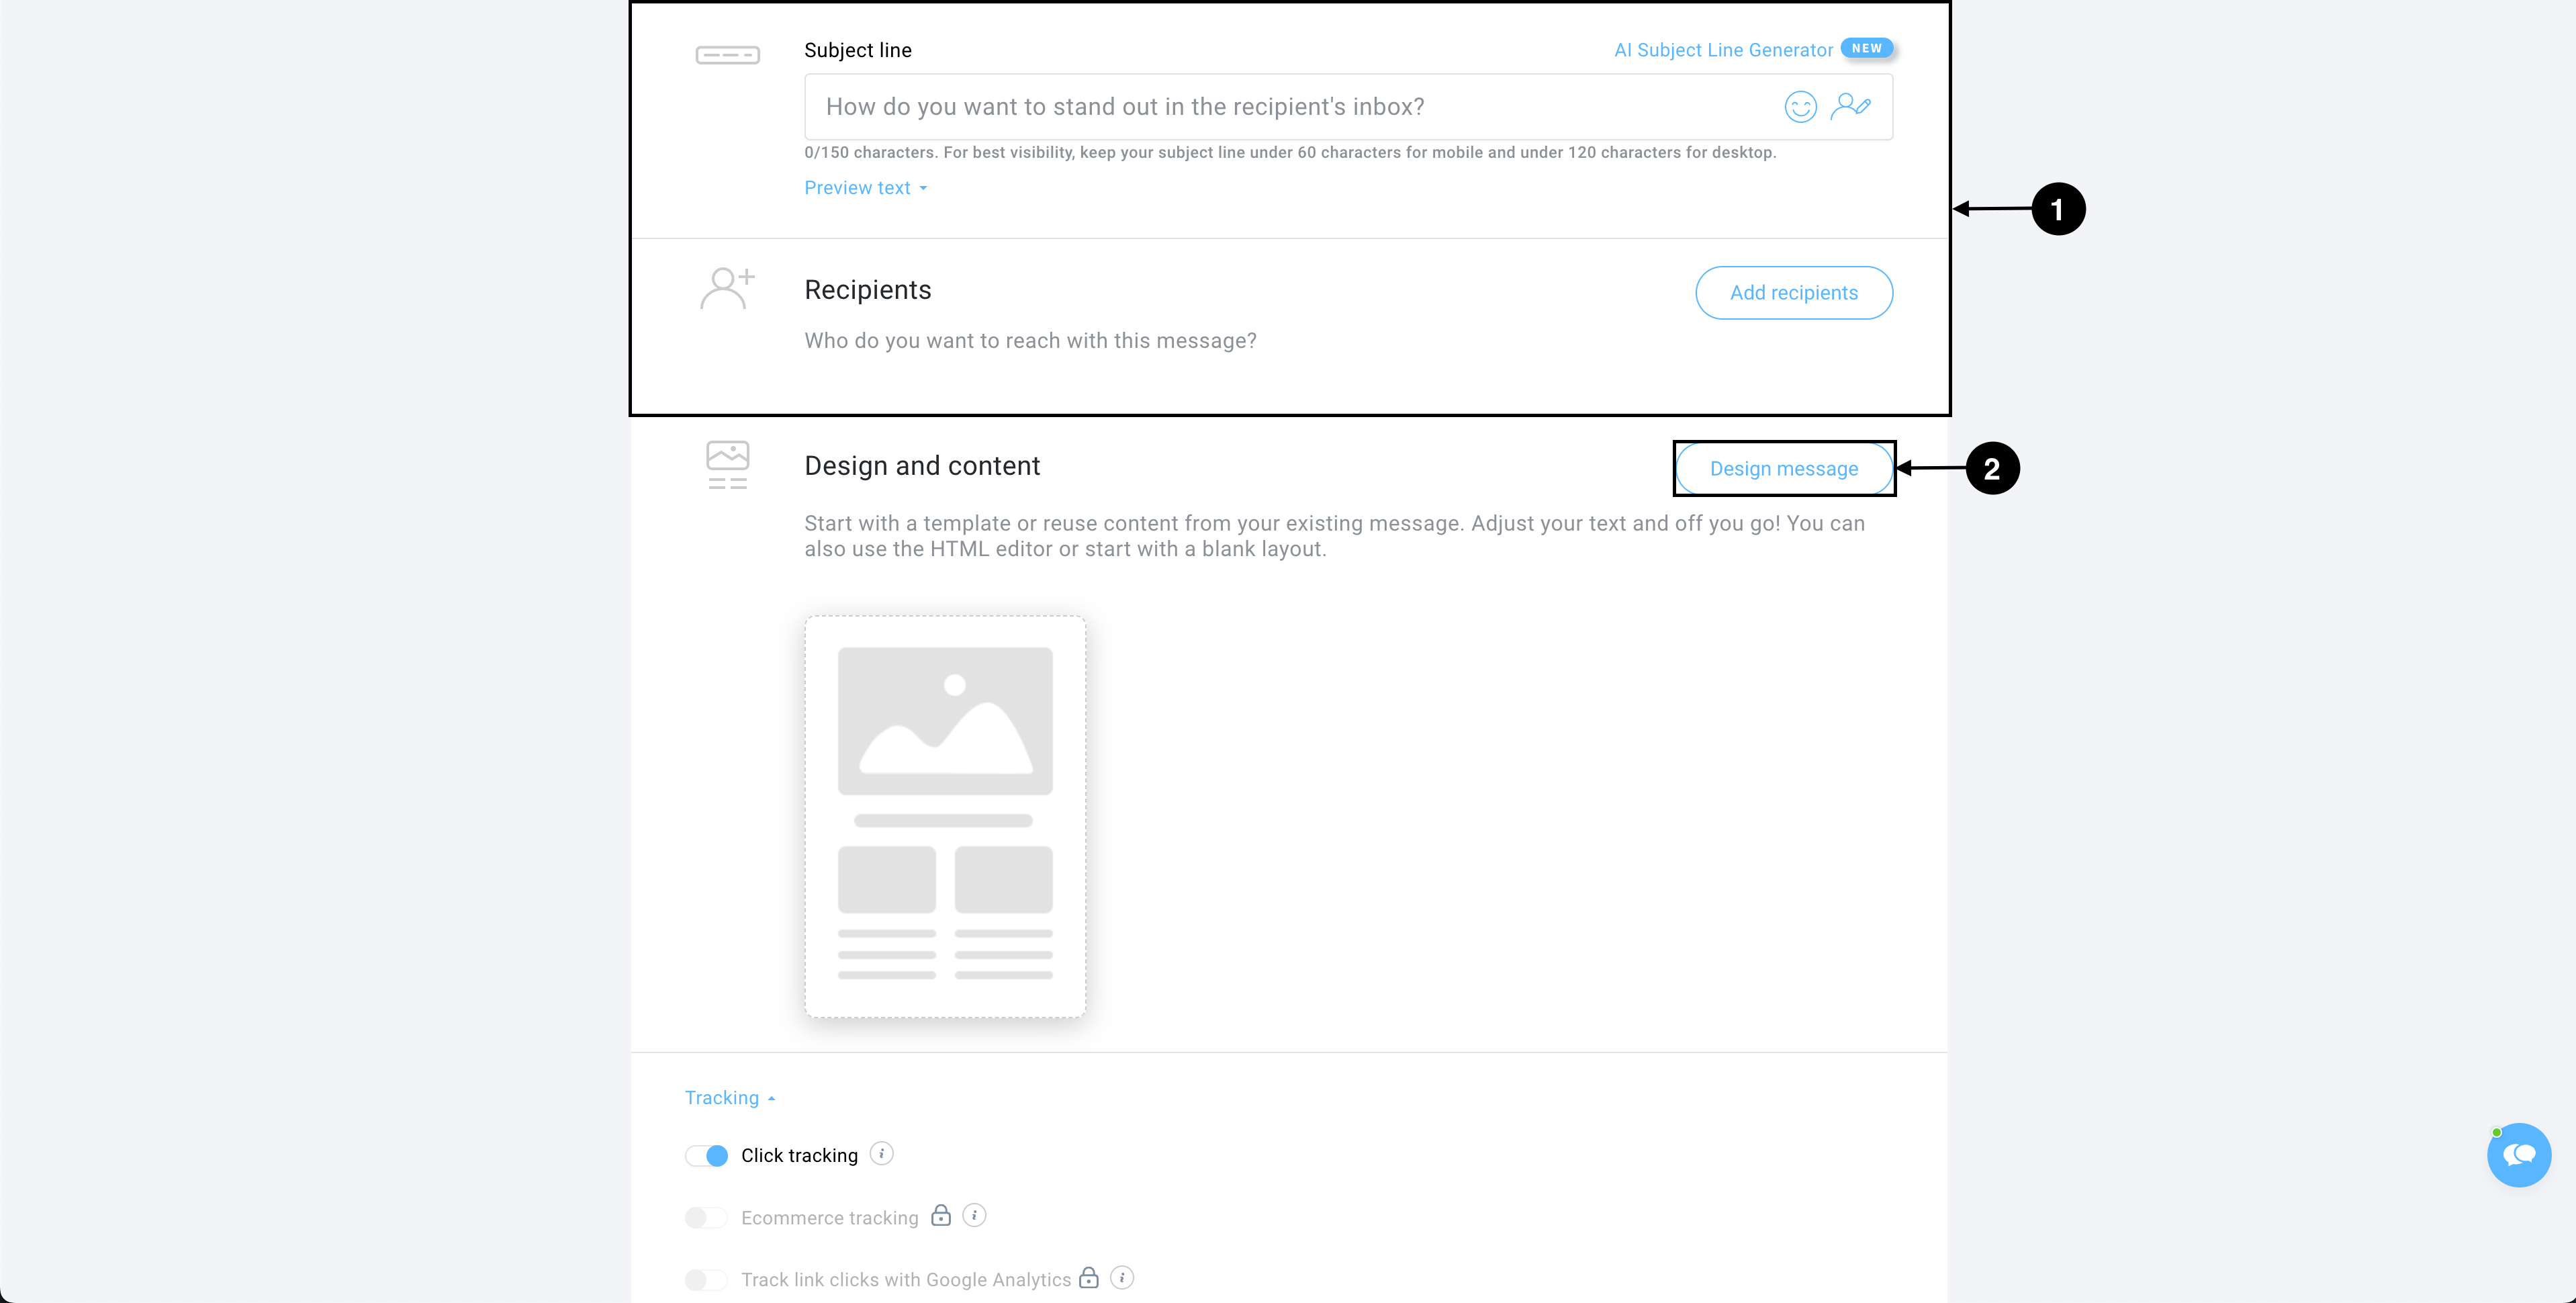
- Click Email marketing in the navbar.
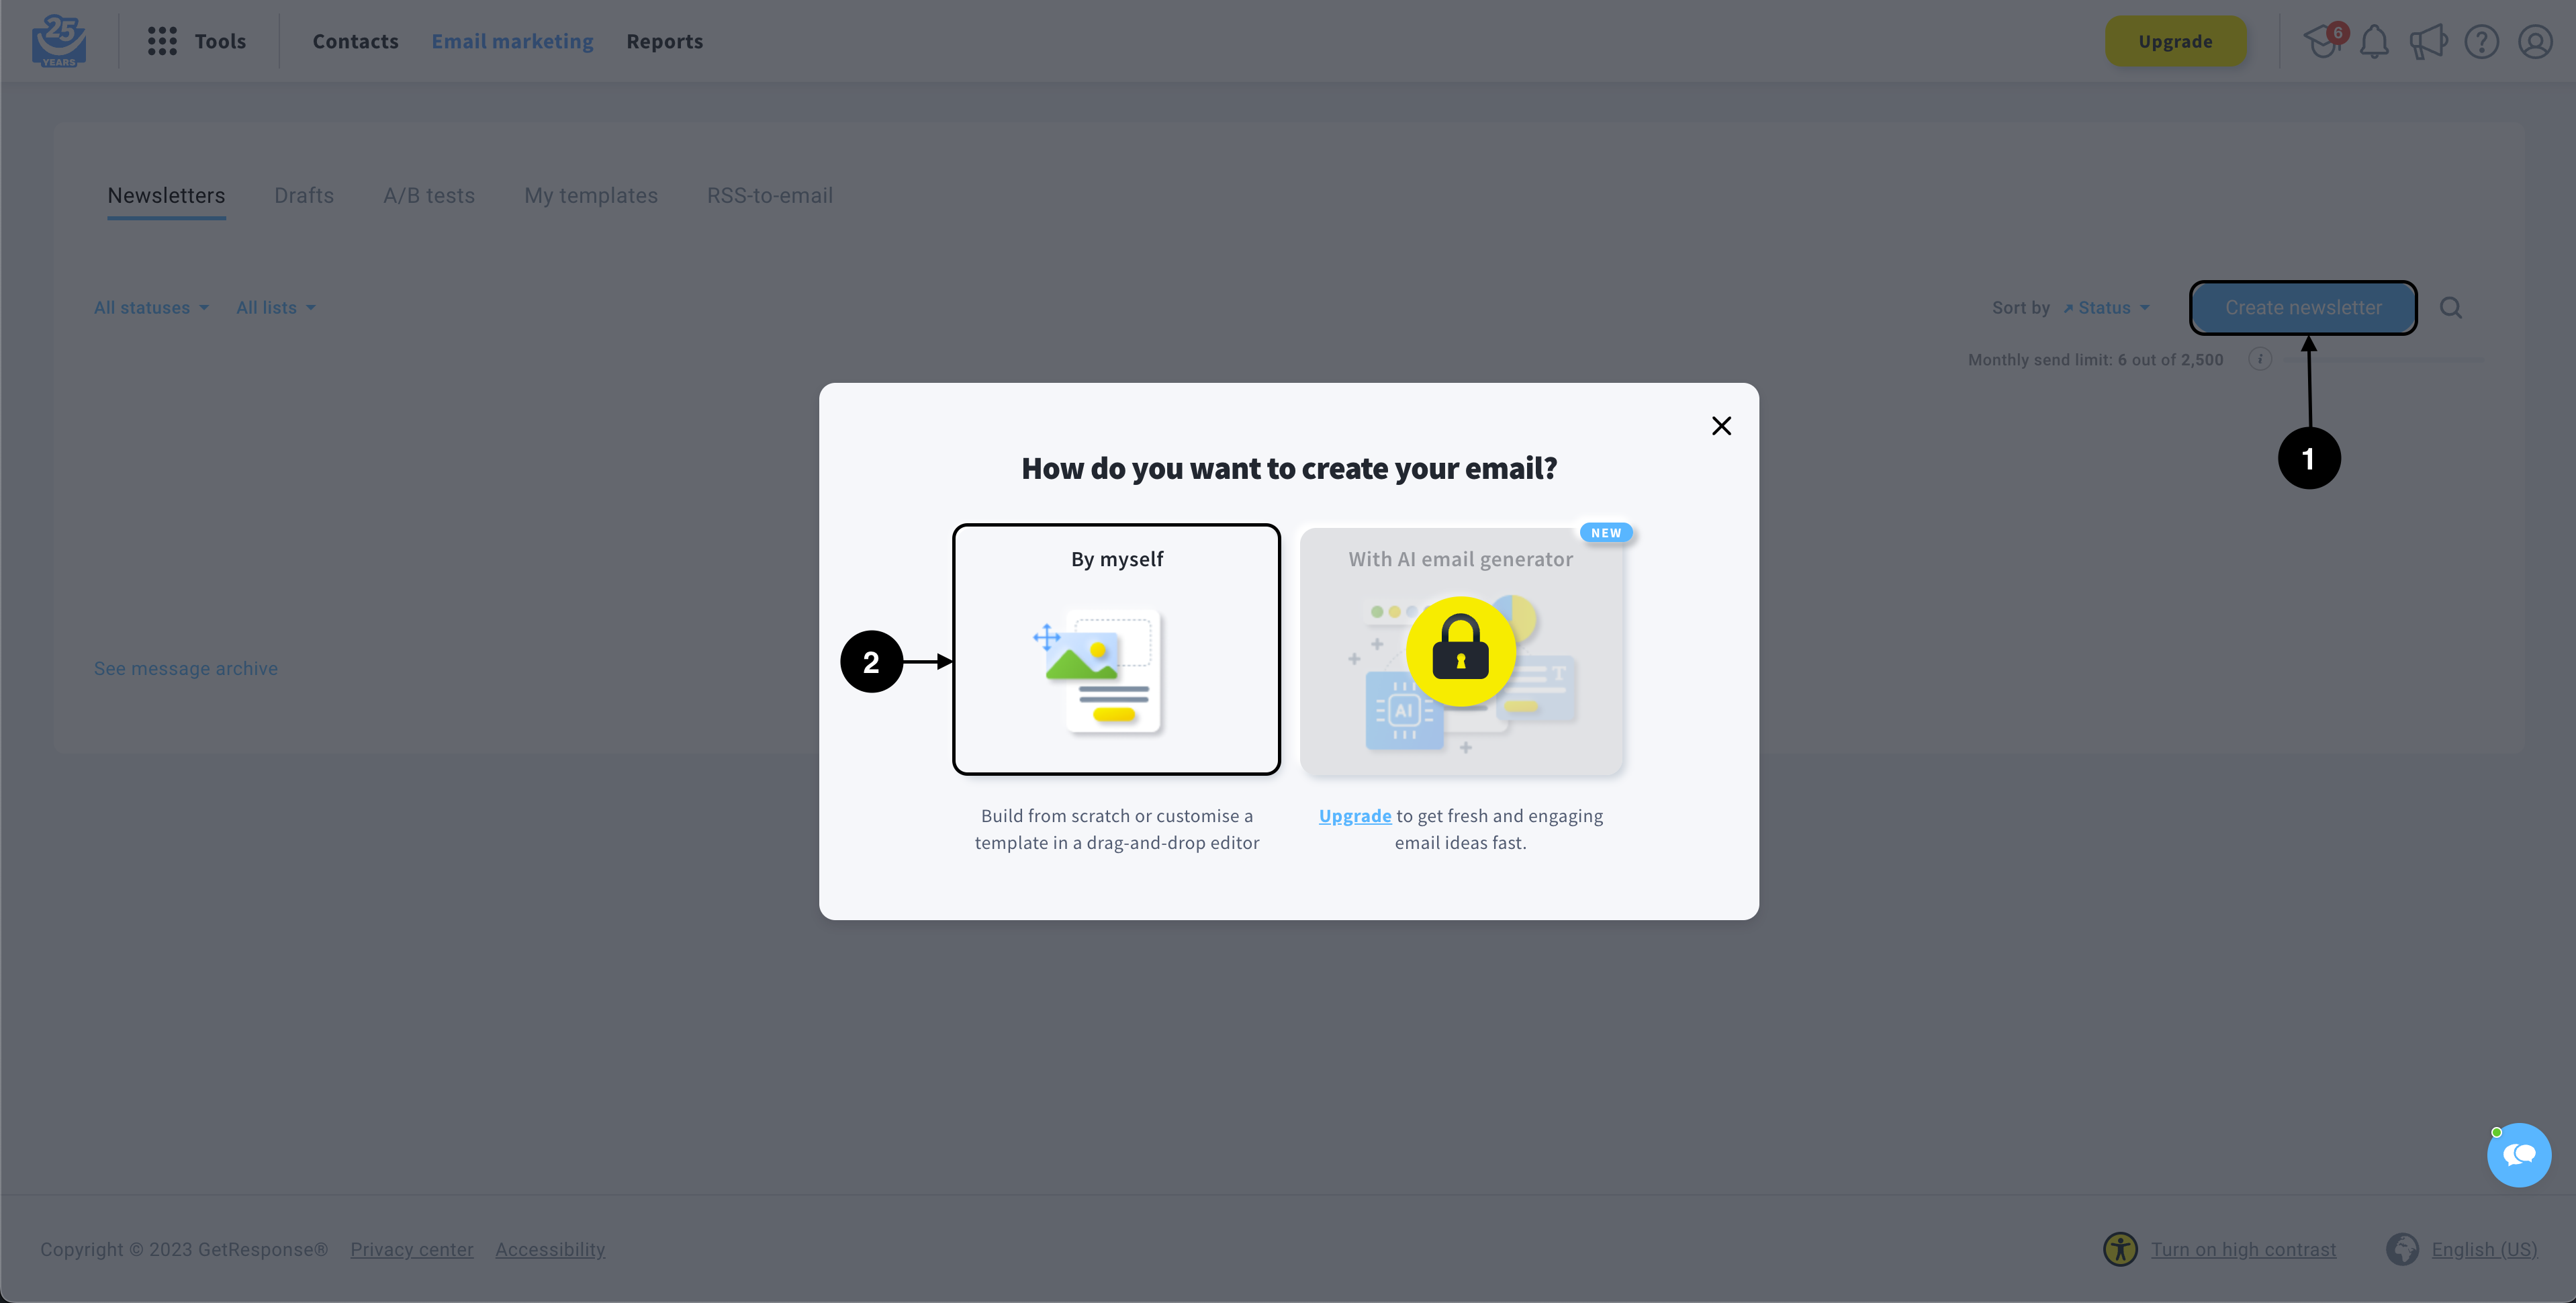
- Go to Create Newsletter > By myself.
- Fill all email-related info(sender, title, etc.) and click Design message.
- Go to the HTML editor, click Upload from ZIP, and upload the zip file you downloaded from Kombai.
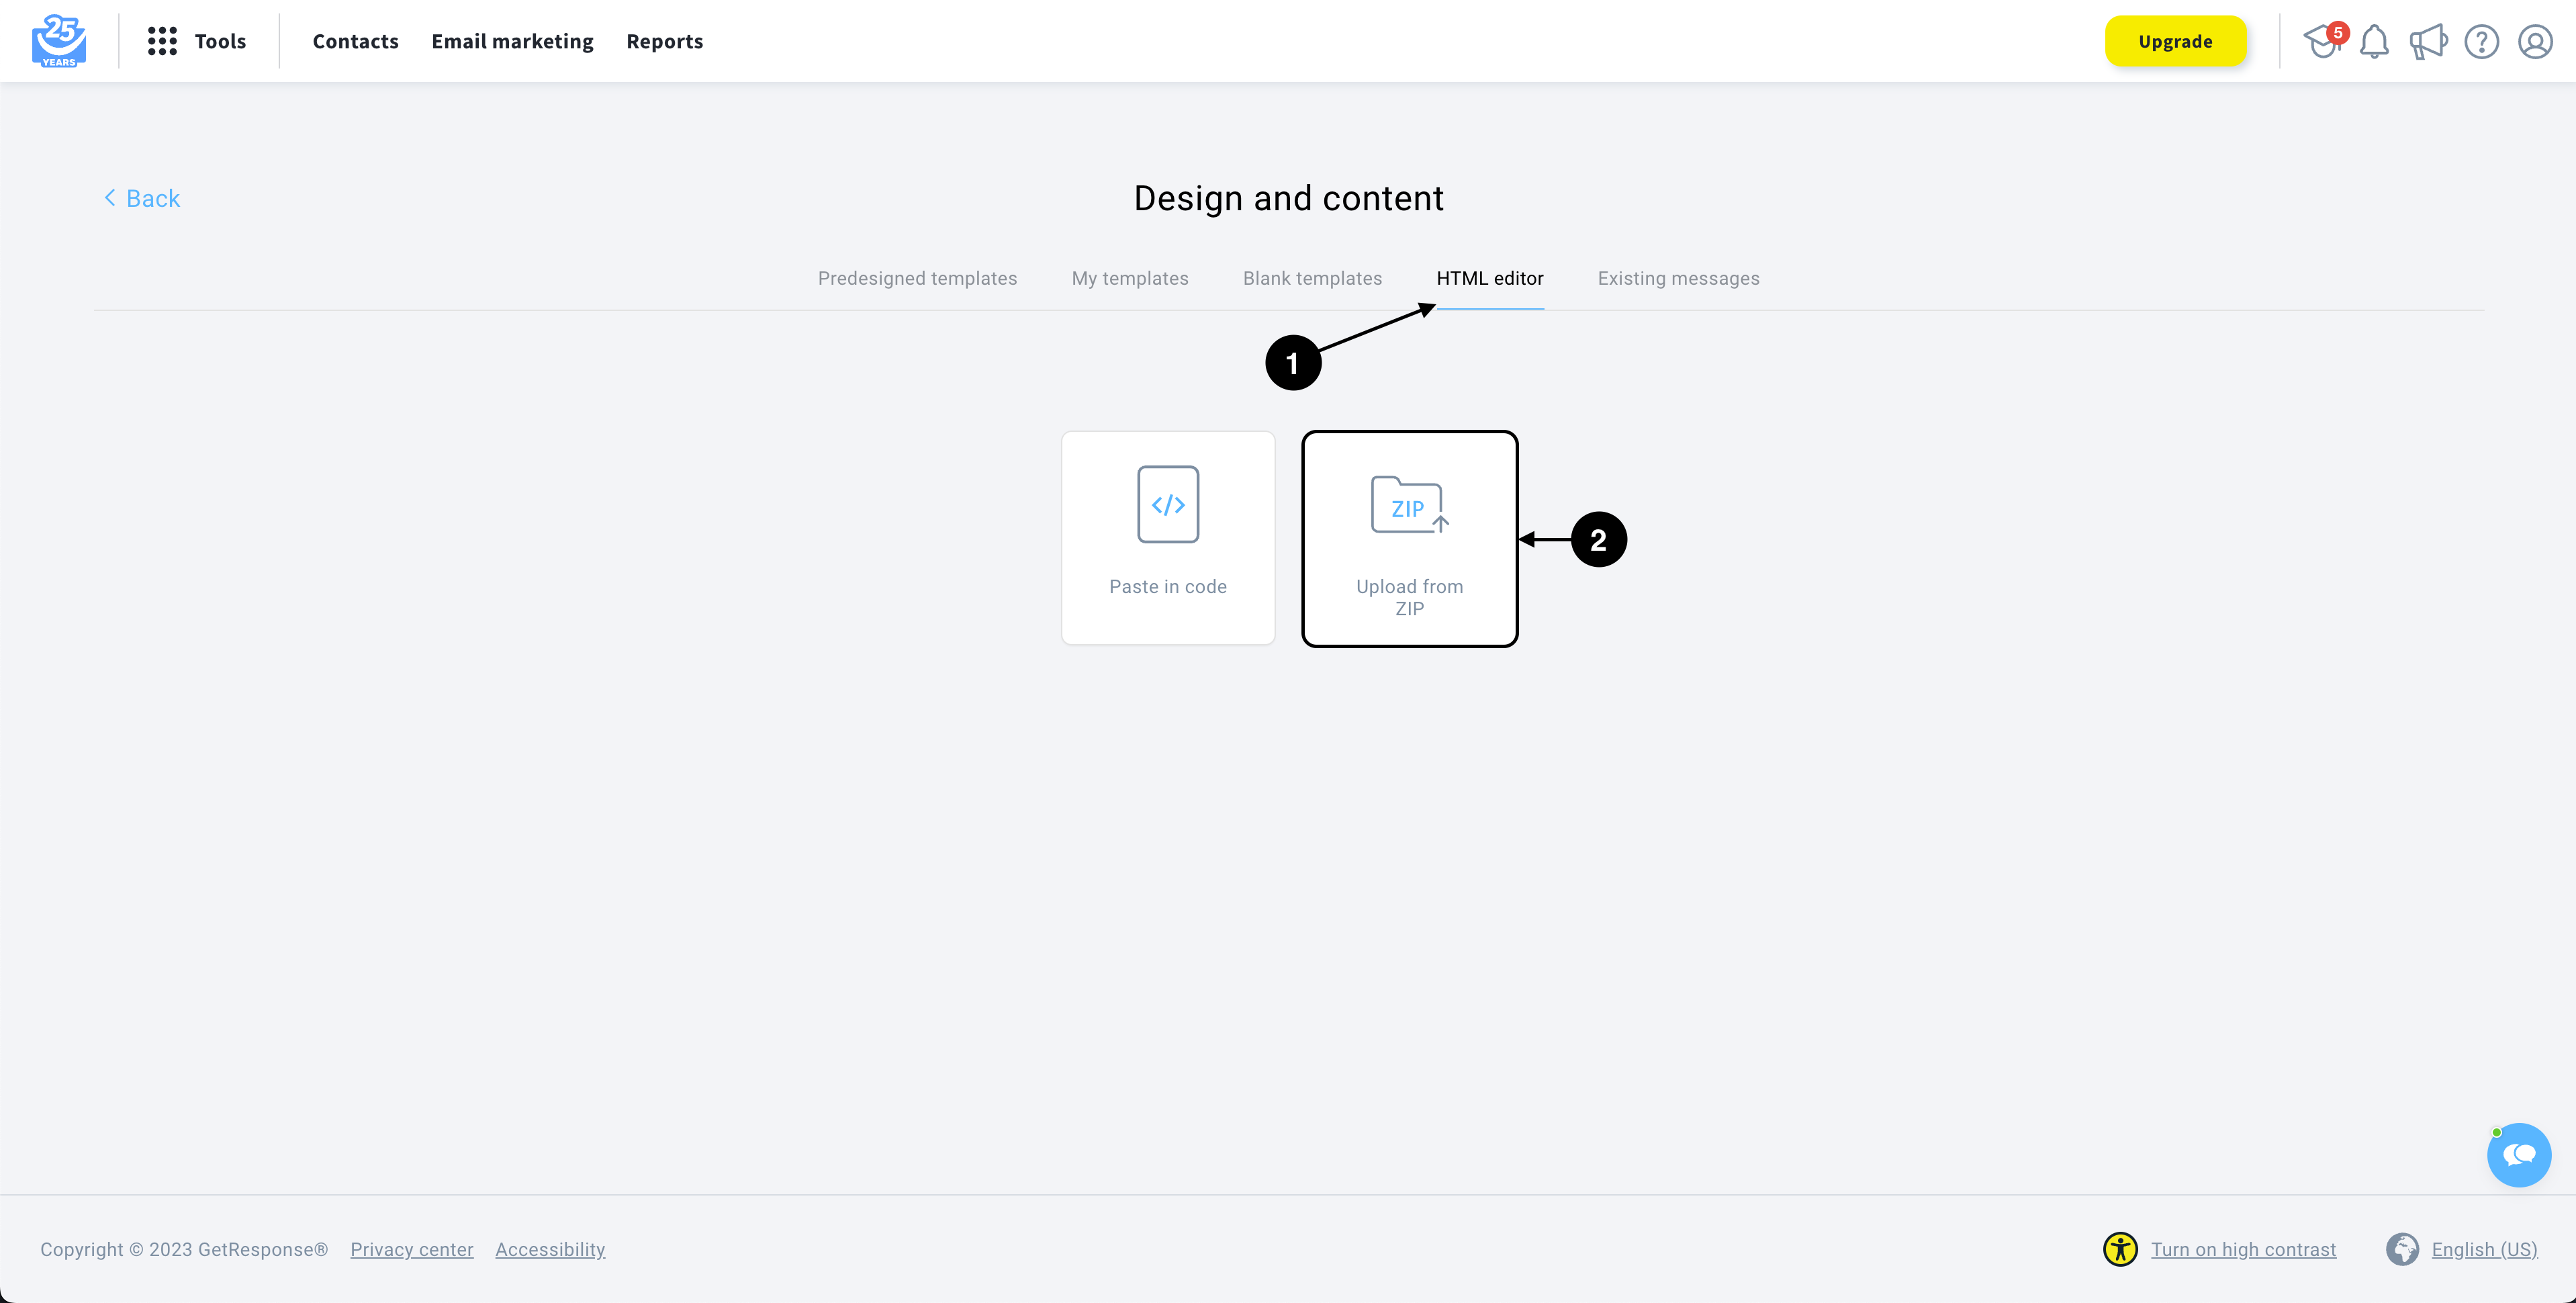
- Once the code is loaded in the editor, continue further and send or schedule your message.
Sending Kombai-generated HTML containing Base64 embedded images
To send the generated HTML code through, you have to:
- Copy/Download the code from Kombai with Base64 embedded images.
- Repeat steps 1-3 of Creating a campaign in GetResponse.
- Go to the HTML editor and click Paste in code.
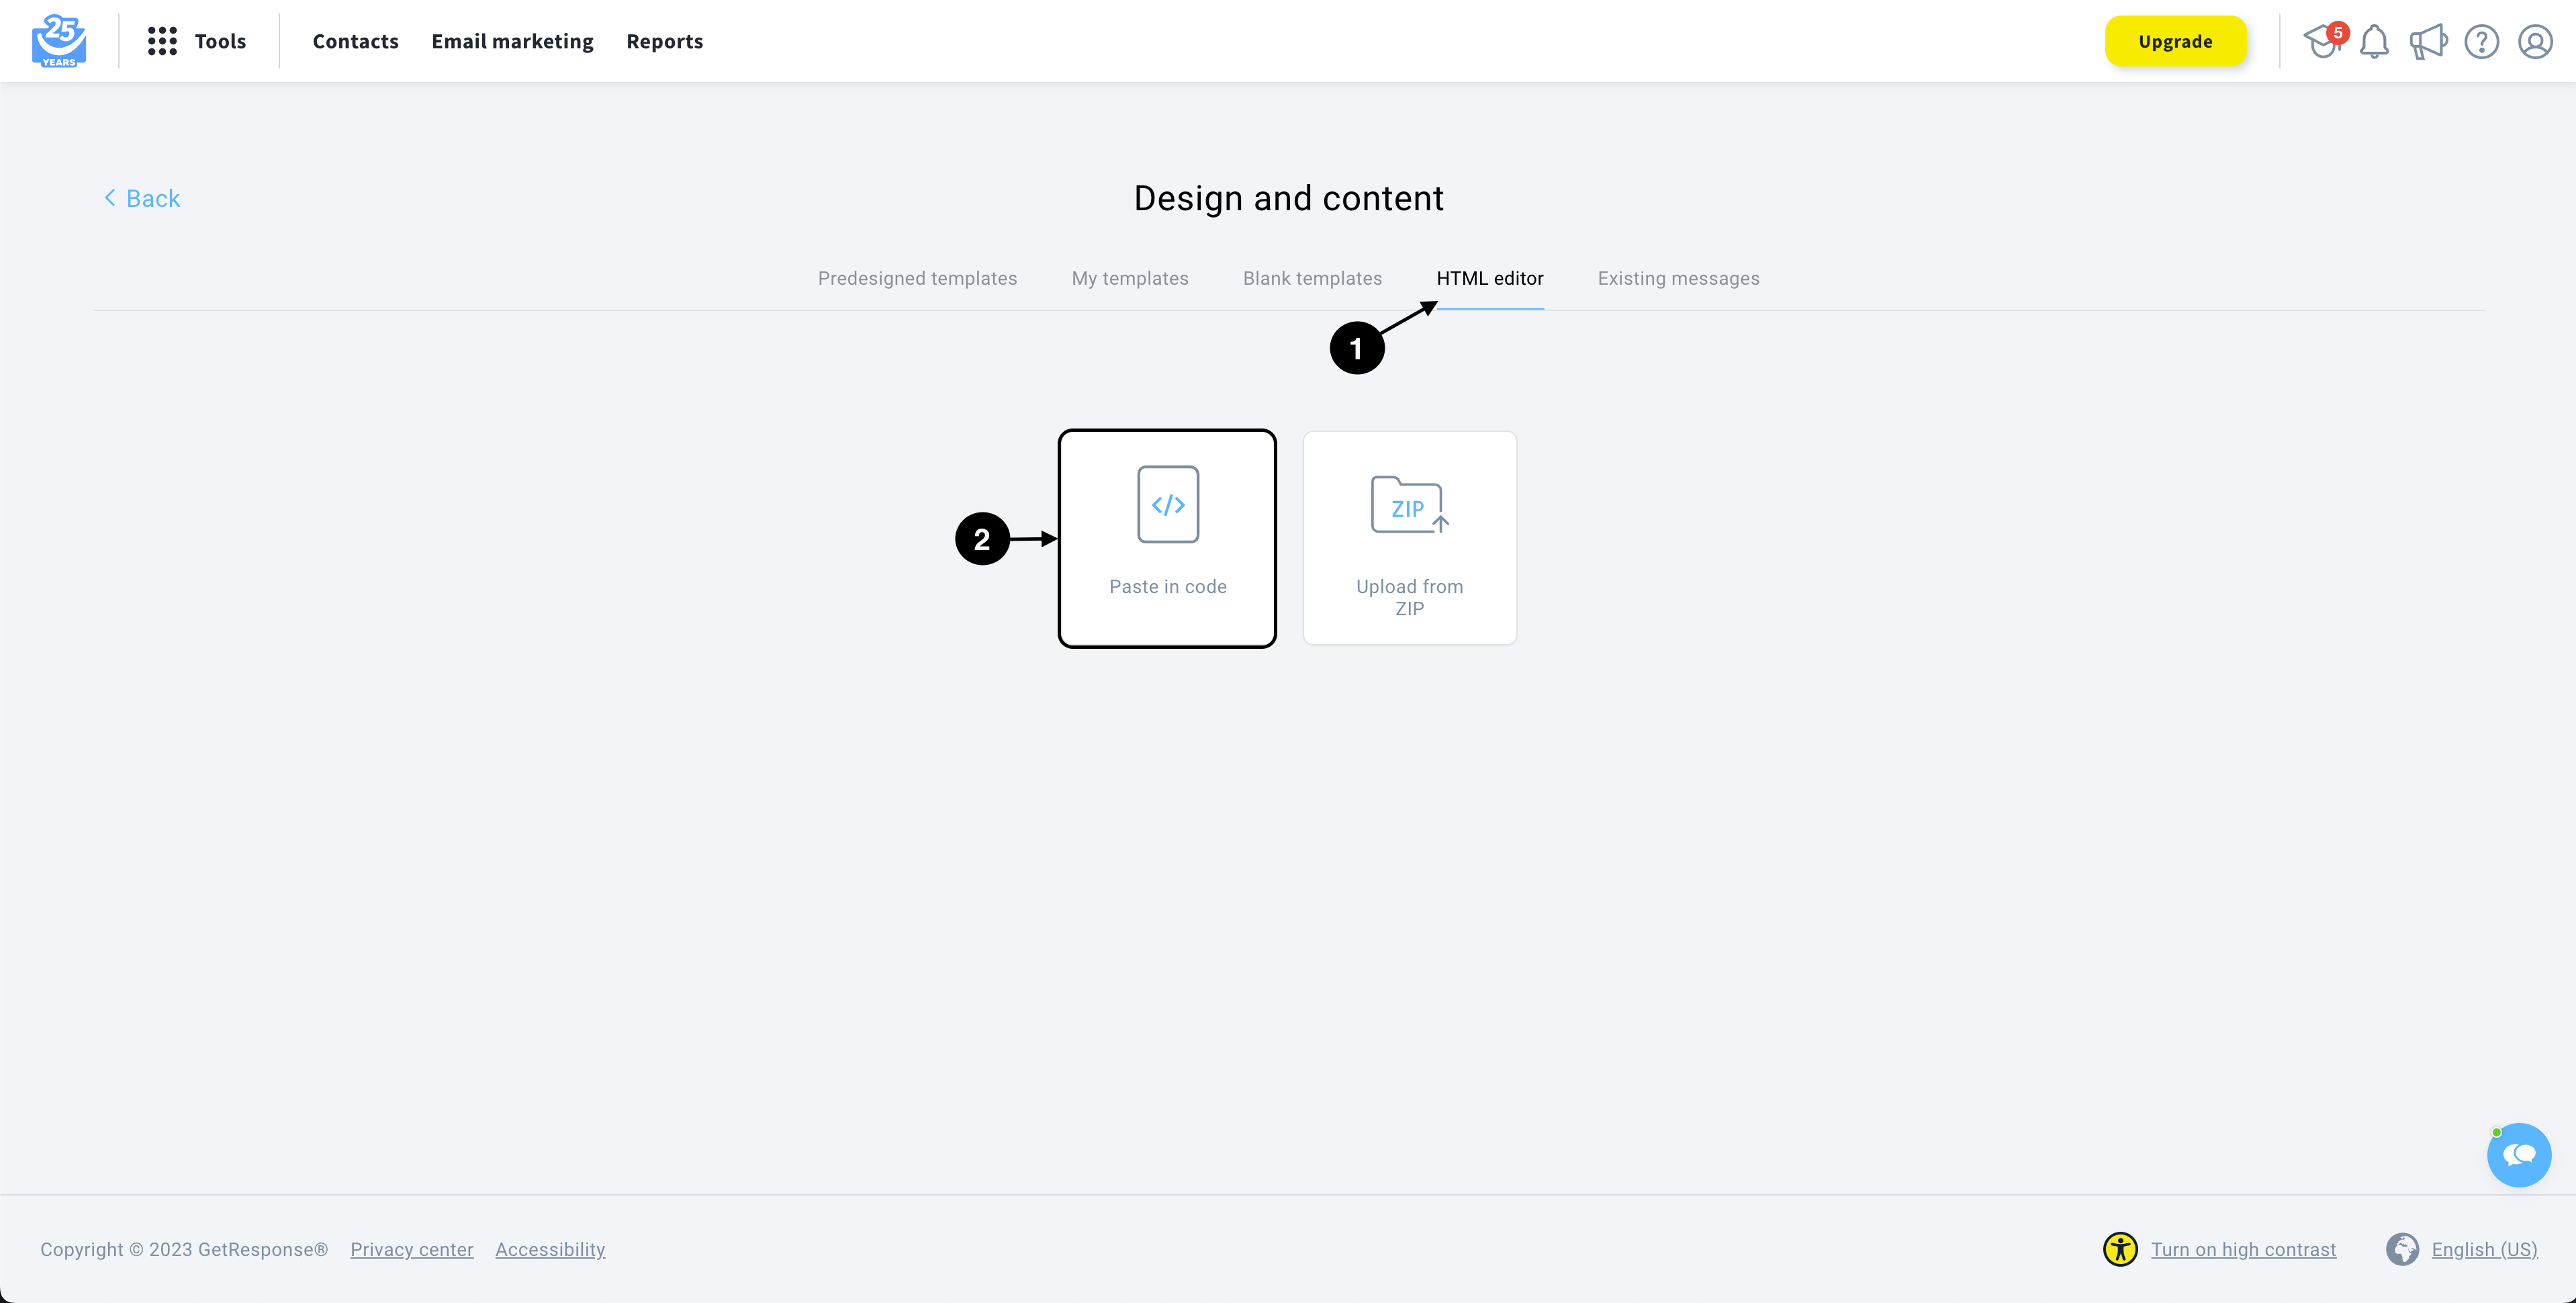
- Paste your code in the editor and continue to send or schedule your message.